Scroll through any gardening feed and you will eventually hit the banana peel promise: soak a few peels in a jar, pour the cloudy water on your plants, and watch them erupt with blooms.
It sounds a little too good to be true, and honestly, it mostly is.
Banana peels really do hold nutrients your plants can use. But how you handle a peel is the difference between feeding your garden and hosting a fruit fly party.
The real answer lives somewhere between miracle fertilizer and internet myth, and that is exactly where this guide sits.
By the end, you will know what a peel can and cannot do, the best ways to turn one into genuine plant food, which plants actually care, and the rookie mistakes that quietly do more harm than good.
Let us clear up the confusion for good.
The short version
- Banana peels are useful organic matter, not a magic fertilizer.
- Their nutrients only reach plant roots after the peel breaks down.
- Composting (or a worm bin) is the best, lowest-risk way to use them.
- “Banana water” and burying raw peels are mostly hype, and they can attract pests.
- Great for potassium-lovers like tomatoes, peppers, and roses, but keep raw peels out of houseplant pots.
What’s Really Inside a Banana Peel
Bananas earned their healthy reputation thanks to potassium, and their peels carry it too, along with smaller amounts of phosphorus, calcium, magnesium, and a scattering of trace minerals like manganese and iron.
What they are short on is nitrogen, the nutrient plants lean on most for leafy green growth.

Here is the part the viral posts skip: a fresh peel is more than 80% water. Take that away and the actual mineral content is modest.
Garden educator Robert Pavlis crunched the numbers and pegged a fresh peel at roughly 0.1-0.1-2.3 on the N-P-K scale, the three figures printed on every fertilizer label.
A bag of composted manure, by comparison, runs closer to 1-1-1. Dried peels concentrate down to something more like 0.6-0.4-11.5, which is exactly why drying matters (more on that shortly).
So yes, peels lean potassium-rich compared with everything else inside them. But “rich in potassium for a banana peel” is not the same as “a potassium powerhouse for your soil.”
Plenty of everyday scraps, including potato skins, avocado, and melon rind, carry just as much or more.
A banana peel is not a superfood. It is simply another helping of organic matter, and that is still worth keeping out of the trash.
 Related post: Are Bananas an Herb? The Surprising Truth About This Everyday Fruit
Why You Can’t Just Toss Peels on the Soil
A peel lying on top of your soil is not feeding anything yet. Plants cannot drink minerals straight out of intact fruit tissue.
Soil microbes, fungi, and worms have to break the peel down first and release those nutrients in a form roots can absorb. Until that happens, a peel is basically decoration.
And that breakdown takes time. In a hot, well-managed compost pile, chopped peels can disappear in 3 to 6 weeks.
Buried whole in ordinary garden soil, a single peel can hang around for the better part of a year, and in cool climates far longer.
Your tomatoes will be picked and gone long before the peel beneath them ever gives anything back.

There is a sneakier catch, too. When microbes get busy digesting a fresh peel, they temporarily borrow nitrogen from the surrounding soil to power the work.
That means a raw peel buried next to a hungry plant can briefly starve it of nitrogen instead of feeding it, the exact opposite of what you were going for.
Then there is the welcome mat you never meant to roll out. Rotting peels smell sweet to fruit flies, fungus gnats, rats, raccoons, possums, and slugs.
Leave peels on the surface or barely covered, and you can trade a tiny nutrient boost for a very real pest headache.
How to Actually Use Banana Peels (Ranked Best to Worst)
The good news: there are genuinely useful ways to put peels to work. Here is how the popular methods stack up, roughly from most reliable to least.
| Method | Best for | Effort | Watch out for |
| Composting | Almost any garden | Low | Very little — this is the safe bet |
| Worm bin | Pots and houseplants (as castings) | Medium | Overfeeding sours the bin |
| Dried peel powder | Outdoor beds | Medium | Still needs to break down in soil |
| Banana “tea” | Outdoor plants, if at all | Low | Minimal nutrients; can smell |
| Burying raw peels | Deep outdoor holes only | Low | Pests, slow release, nitrogen dip |
1. Compost Them — The Gold Standard
If you do nothing else, do this. Composting is the safest bet with the biggest payoff, and it is the one method nearly every expert agrees on.
- Chop the peels into small pieces so they break down faster.

- Add them to your bin as a “green” (moisture- and nitrogen-rich) material.

- Balance them with “browns” such as dry leaves, shredded cardboard, or straw, at roughly 2 parts browns to 1 part greens.
- Turn the pile now and then to keep air moving, and keep it about as damp as a wrung-out sponge.
Success looks like crumbly, dark, earthy-smelling compost in anywhere from a few weeks to a few months. Spread it on beds, mix it into containers, or side-dress your hungriest plants.
And here is the payoff the raw peel only hints at: once banana peels are fully composted, especially alongside manure, research has shown they become genuinely rich in both potassium and nitrogen.
Composting is what unlocks their real value.
Learn How to Compost Sawdust: Pro Tips, Ratios & Risks Explained
2. Feed a Worm Bin
Worms adore banana peels, and their castings are some of the best free plant food around.

Freeze the peels first, then thaw them before feeding. Freezing bursts the cell walls so worms process them faster, and it cuts down on fruit fly stowaways.
Chop them small, tuck them under the bedding, and do not overdo it. Too much wet peel makes a bin soggy and acidic, which worms hate.
The finished castings are gentle enough to top-dress potted plants and even houseplants.
Learn Why Your Garden Needs Earthworms & How to Attract Them
3. Make Dried Peel Powder
Drying concentrates the nutrients and makes peels easy to store and sprinkle.
- Cut the peels into 1-inch pieces.
- Dry them until brittle — in the sun over a couple of warm days, in a dehydrator, or in an oven on its lowest setting with the door cracked — until they snap cleanly.

- Grind them to a powder in a coffee or spice grinder.

Work a tablespoon or two into the soil around outdoor plants. It behaves like a slow-release amendment, but remember it still needs soil life to break it down, so treat it as a supplement, not an instant fix.
Keep the powder for garden beds rather than indoor pots, where it can still invite gnats.
Learn How to Make Pumpkin Powder (DIY Pumpkin Flour at Home)
4. Banana “Tea” — Manage Your Expectations
This is the famous one, and it is where I would pump the brakes. You chop peels into a jar, cover them with water, let it steep for a few days, strain out the peels, and water your plants with the liquid.

The reality check: soaking pulls a little potassium out of the peel, but most of the nutrients stay locked in the tissue you just tossed. Experts who have studied it closely call the payoff negligible next to compost.
If you love the ritual, keep the steep short, dilute it hard — think 5 parts water to 1 part tea — and use it outdoors on the soil, never as a spray on leaves you plan to eat.
Days of steeping can raise the kind of microbes you would not want near your dinner.
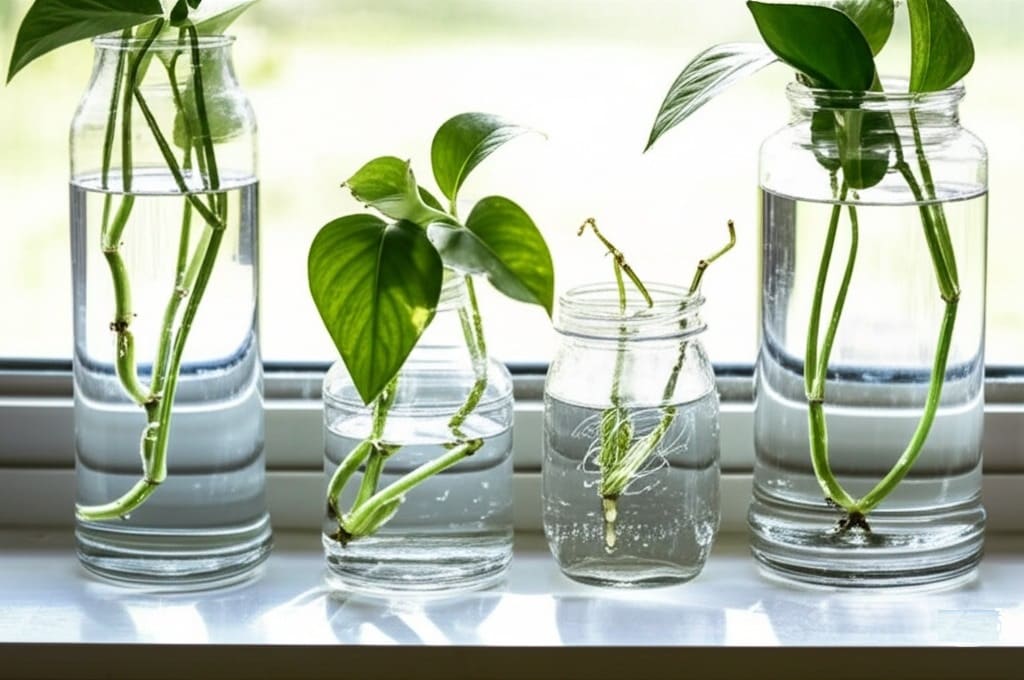
A lot of us have tried this the exciting way at least once: a row of peel-filled jars lined up on the windowsill, big hopes pinned on the houseplants.
More often than not the story ends the same way, with cloudy, sour-smelling water, a drift of fungus gnats a week later, and plants that look exactly as they did before.
It is a harmless experiment, but rarely a rewarding one.
5. Burying Chopped Peels (Only Outdoors, Done Right)
If you are set on burying peels directly, treat it strictly as an outdoor move.
Chop them finely, dig them in at least 8 inches deep, and keep them well away from stems and shallow roots.
Deep burial eases the pest problem and the nitrogen dip, but honestly, running those same peels through your compost first will do more with far less fuss.
Which Plants Actually Benefit — and Which to Skip
Because peels lean potassium-rich, they pair best with plants that flower and fruit.
Potassium supports sturdy stems, better blooms, and healthy fruit set, so think tomatoes, peppers, roses, and other heavy-blooming perennials.
Just keep your expectations grounded. Potassium only helps if a plant is genuinely short on it, and a real shortage usually shows up as older, lower leaves yellowing, weak stems, and disappointing flowers or fruit.
Even then, balanced, living soil is what drives healthy growth, not a single buried peel.
If a plant looks off, a cheap soil test from your local extension office or garden center will confirm what it actually needs far better than guesswork.
The big exception is houseplants. Indoors there is no rain, no sprawling soil ecosystem, and no breeze to carry off odors, so raw peels and banana tea tend to mold, sour the potting mix, and summon fungus gnats.
For potted plants, skip the raw peel hacks altogether. Reach for a thin layer of finished compost or worm castings, or a balanced houseplant fertilizer that tells you exactly what you are giving them.
Avoid These Common Banana Peel Mistakes
- Leaving peels on the surface.
It is an open invitation to pests and does almost nothing for your plants. Bury them deep or compost them instead.
- Relying on peels alone.
They are low in nitrogen and cannot replace a balanced feeding routine. Treat them as a bonus, not the main course.
- Spraying peel tea on edible leaves.
A long soak can grow microbes you would rather not put on your food.
- Overloading one spot.
Piling peels around a single plant can throw off the soil balance. Spread them out.
- Ignoring pesticide residue.
Conventional banana skins can carry surface residues, so give them a rinse, choose organic when you can, and let composting break things down further.
The Payoff Goes Beyond Your Plants
There is a reason composting keeps coming up. When food scraps like peels get buried in a landfill, they break down without oxygen and release methane, a greenhouse gas many times more potent than carbon dioxide.
Food waste is one of the largest categories of material filling up landfills in the first place. Composting your peels at home sidesteps all of that and turns what would have been a problem into free fertilizer.
It is a small loop to close, but multiply it across a year of banana snacks and it genuinely adds up.
Frequently Asked Questions
- Can I just throw banana peels straight into my garden?
You can, but it is the least effective option. Whole peels break down slowly, can temporarily rob nearby plants of nitrogen, and attract pests while they rot.
If you go this route, chop the peels up and bury them several inches deep, or better yet, compost them first.
- Is banana peel water actually worth making?
Not really. Soaking draws out only a trace of potassium while most nutrients stay stuck in the peel, so the benefit is minimal.
If you enjoy the routine, use it outdoors and dilute it, but composting or drying the peels puts far more of their value to work.
- Do banana peels keep pests away?
There is no solid evidence that they repel garden pests, despite the popular aphid claims. If anything, rotting peels are more likely to attract fruit flies, gnats, and rodents than to scare anything off.
Healthy plants in healthy soil are your best line of defense.
- Are banana peels safe for houseplants?
Raw peels and banana tea are a poor fit indoors, where they tend to mold, sour the soil, and draw fungus gnats in a closed space.
If you want to use peels for potted plants, send them through an outdoor compost or worm bin first, then top-dress with the finished compost or castings.
- How long do banana peels take to break down?
It depends entirely on the method. Chopped peels in a hot compost pile can break down in about 3 to 6 weeks, while a whole peel buried in cool soil can linger for a year or more.
Smaller pieces, warmth, moisture, and oxygen all speed things along.
The Bottom Line
Banana peels are not magic, but they are far from useless. The trick is remembering that a peel only becomes plant food after it breaks down, so the methods that help it decompose are the ones that pay off.
Composting wins hands down, with worm bins and dried powder close behind, while banana water and raw burial are mostly for folks who enjoy the ritual more than the results.
Match your peels to potassium-loving plants like tomatoes, peppers, and roses, keep them out of your houseplant pots, and lean on balanced soil for the heavy lifting.
Do that, and you will squeeze real value out of something you were about to throw away.
So start simple. Keep a small container by the kitchen sink and let your peels pile up for the compost instead of the trash. Your garden, and the planet, will quietly thank you for it.
source https://harvestsavvy.com/banana-peels-in-gardening/