Thursday, October 30, 2025

How to Raise Berkshire Pigs: Breeding, Care & Profit Guide

Picture yourself walking through your pasture on a crisp autumn morning. A group of stout black pigs with white markings contentedly root through the grass, greeting you with friendly grunts.

These aren’t just any pigs—you’re looking at one of agriculture’s most treasured heritage breeds, renowned for producing some of the finest pork in the world.

If you’re considering raising pigs for the first time, exploring heritage livestock, or seeking a profitable niche market, Berkshire pigs deserve your attention.

By the end of this guide, you’ll understand why these remarkable animals have captivated farmers for three centuries—and whether they’re right for your operation.

👉 Related post: Why Duroc Pigs Are Every Farmer’s Secret to Profit

Origins: From English Estates to Global Acclaim

The Berkshire story begins in England’s Thames Valley around 1790, near the town of Wantage in Berkshire County.

But those early pigs looked dramatically different from today’s breed. Imagine massive animals weighing up to 1,000 pounds with tawny-red or sandy coats, floppy ears, and variable markings.

The transformation came in the early 1800s when breeders like Lord Barrington introduced Asian bloodlines—specifically Chinese and Siamese pigs.

This strategic cross created the modern Berkshire: medium-sized, black-coated with distinctive white markings, upright ears, and compact muscling perfectly suited for premium pork.

The breed captured aristocratic attention quickly. Queen Victoria maintained a Berkshire herd at Windsor Castle, and when American farmers formed the American Berkshire Association in 1875—the world’s first swine registry—the inaugural registered pig was her boar, “Ace of Spades.”

This dedication to preserving pure bloodlines through careful record-keeping helped Berkshires survive when mid-20th century industrial farming nearly drove them to extinction.

Early Berkshire Pigs
Credit: researchgate

Today, Berkshires thrive globally, particularly in Japan where they’re celebrated as “Kurobuta” (black pig) pork, commanding prices comparable to Wagyu beef.

As consumers increasingly seek flavorful, ethically raised meat, these heritage pigs are experiencing a remarkable renaissance.

Recognition: The Distinctive Berkshire Appearance

Identifying authentic Berkshires is straightforward once you know the hallmarks.

These medium-sized pigs are predominantly black with six white “points”: four white feet (minimum three for registration), a white facial blaze extending partially around the snout, and a white tail tip.

Adult boars typically reach 600 pounds, while sows settle around 500 pounds with proper feeding management.

The Berkshire face features a moderate dish shape, medium-length snout, and large erect ears inclining slightly forward. Their compact, rectangular body sits on strong, straight legs set well apart.

When evaluating breeding stock, look for depth through the body, straight backs without dips, and well-rounded hams—these indicate quality genetics.

Occasionally you’ll see sandy or reddish hair where black meets white—genetic echoes of their tawny ancestors. While less desirable for showing, this doesn’t affect meat quality.

However, beware of pigs marketed as Berkshires with excessive white patches, spotted leopard patterns, or white bands around the body—these signal crossbreeding.

Berkshire Pigs

  • The black coat advantage:

Dark pigmentation provides natural sunburn protection, making Berkshires particularly suited to outdoor systems.

Unlike pink-skinned white breeds suffering severe sun damage, Berkshires thrive in sunny pastures with adequate shade. This hardiness extends to cold weather, as the black coat efficiently absorbs solar heat.

Why Berkshire Pork Commands Premium Prices

If conventional supermarket pork is your only reference point, prepare for revelation.

Berkshire meat displays immediately visible differences: darker rosy-red color rather than pale pink, with abundant intramuscular marbling resembling prime beef. This isn’t excess fat—it’s the foundation of extraordinary flavor and tenderness.

The science is compelling. Berkshire meat has higher pH levels than conventional pork, contributing to darker color, firmer texture, and superior taste.

Research suggests Berkshires possess shorter, more numerous muscle fibers, enhancing moisture retention—resulting in exceptionally juicy pork even after cooking.

Berkshire Pork

The National Pork Producers Association evaluated breeds across 24 sensory characteristics; Berkshires dominated, ranking first overall and leading 19 individual categories.

The flavor defies decades of “other white meat” marketing. Instead of bland leanness, Berkshire delivers sweet, nutty, distinctly porky taste with remarkable depth.

The intramuscular fat has a lower melting point, beginning to break down during cooking and essentially basting the meat from within—creating that melt-in-your-mouth experience people remember.

  • Market reality:

While conventional pork sells for $3-4 per pound, Berkshire commands $4.80-6.50 or more—a 30-40% premium that discerning consumers willingly pay.

In Japan, where Berkshire has been prized for 150+ years, Kurobuta products can sell for double or triple conventional prices.

For farmers, this creates genuine opportunity: you’re not competing on price, you’re offering an entirely different product to an entirely different market.

Temperament: The “Lady’s Pig”

Berkshires earn their affectionate nickname through remarkably docile, friendly personalities. Unlike aggressive breeds, well-bred Berkshires genuinely enjoy human interaction, often approaching for attention rather than fleeing.

This makes them ideal for family farms with children, first-time pig keepers, and operations where customers visit to see where their meat originates.

Their intelligence—roughly equivalent to dogs—means they learn routines quickly and can even be harness-trained for easier movement between pastures.

Watching them methodically work through a pasture, using powerful snouts to excavate roots and insects, demonstrates both their foraging brilliance and entertaining nature. They become genuine farm characters, not just production animals.

Friendly Berkshire Pigs

However, remember that individual personalities vary, and breeding boars always deserve respect regardless of breed reputation. Proper handling practices and awareness around animals weighing 600+ pounds remains essential.

Practical Management: Setting Up for Success

Space, Housing, and Infrastructure

Start with adequate space: minimum 200 square feet (roughly 20’x10′) for a meat-raising pair, but more is always better.

Breeding operations require 400-600 square feet per sow plus expanding space for growing litters. Overcrowding triggers aggression, parasites, and poor growth.

Housing needn’t be elaborate but must provide weather protection, draft-free design, dry bedding areas, and separate farrowing space for pregnant sows.

Many farmers successfully use hoop houses, three-sided sheds, or repurposed structures. The key is protecting pigs from weather extremes while maintaining ventilation.

Housing Berkshire Pigs

  • Summer essentials:

Shade structures and ideally a mud wallow. Berkshires handle heat reasonably well but still need cooling options. Mud isn’t just recreational—it’s thermoregulation and parasite protection combined.

  • Winter considerations:

Despite hardiness, pigs need deep bedding and draft-free shelter when temperatures plummet. The black coat helps absorb solar warmth, but extreme cold still demands protection, especially for newborn piglets.

  • Fencing fundamentals:

Electric fencing works excellently—lightweight, affordable, movable for rotational grazing—but pigs must be trained to respect it.

The proper method involves setting electric wire inside existing physical fencing initially. After encountering the shock while unable to escape, pigs learn permanent fence respect.

👉 Here’s How to Craft Wooden Fence Posts from Farm Trees: A DIY Guide

A farmer I know skipped this training step. His new Berkshire weaners panicked at dusk, ran straight through the untested electric fence, and scattered into surrounding woods. Days of recapture effort taught an expensive lesson: always train pigs to electric fence first.

For permanent installations, woven wire with electric offset prevents digging and climbing. Whatever system you choose, regular fence checks become routine—pigs are determined escape artists when motivated.

Feeding for Quality and Growth

Feed requirements by stage:

  • Weaners (8-12 weeks, 15-30 lbs): 2-3 lbs daily of 16-18% protein starter feed
  • Growers (3-5 months, 30-150 lbs): 4-6 lbs daily of 14-16% protein grower feed
  • Finishers (5-7 months, 150-250 lbs): 5-7 lbs daily of 13-15% protein finisher feed
  • Breeding stock: 4-5 lbs daily maintenance; increase to 6-8 lbs during pregnancy/lactation

Quality feed should include balanced grains (corn, barley, wheat, oats, peas), protein sources (soybean or pea protein), and complete minerals and vitamins.

👉 Discover 15 Ancient Grains You Should Try — Benefits, Uses & Recipes

Many successful farmers supplement commercial feed with farm-produced ingredients: surplus vegetables, culled produce, dairy by-products, and pasture forage. However, verify local regulations—some jurisdictions prohibit food scraps in pig feed.

Feeding Berkshire Pigs

Water is critical:

Pigs consume 2-5 gallons daily depending on size and weather. Dehydration rapidly impacts growth and health. Check waterers multiple times daily, especially in freezing conditions.

Feed conversion ratios for Berkshires hover around 2.6-2.9:1, meaning they require roughly 2.6-2.9 pounds of feed per pound gained—competitive with commercial breeds and excellent for heritage stock.

Reaching market weight (220-250 pounds) from weaning typically takes 5-6 months with proper nutrition.

Understanding boar taint:

Intact males develop a distinctive off-odor and flavor in their meat as they reach sexual maturity, caused by compounds accumulating in fat tissue. This “boar taint” makes pork unpalatable to many consumers.

Most males destined for meat are castrated at 1-3 weeks old, though some farmers market intact males young (before 5-6 months) or target niche markets accepting intact male pork.

Health Management and Warning Signs

Berkshire hardiness means generally robust health, but vigilance prevents problems from escalating.

Watch for these illness indicators:

  • Lethargy or unwillingness to rise
  • Loss of appetite lasting more than a meal
  • Labored breathing or coughing
  • Diarrhea or constipation
  • Limping or reluctance to move
  • Skin lesions, excessive scratching, or hair loss
  • Discharge from eyes, nose, or vulva
  • Body temperature outside normal range (101.5-103.5°F)

Parasite management:

Internal parasites (worms) and external parasites (mange mites, lice) affect outdoor pigs. Establish a deworming schedule with your veterinarian—typically every 2-3 months for growing pigs, twice yearly for adults.

👉 Learn to Mastering Chicken Deworming: A Vital Guide for Poultry Keepers

For external parasites, watch for hair loss around ears, crusty skin, or excessive scratching. Both respond well to treatment when caught early.

Veterinary relationships:

Establish care before emergencies arise. Not all vets work with pigs, and fewer treat pastured operations. Finding a vet experienced with heritage breeds proves invaluable.

You’ll need prescriptions for medications—over-the-counter options available for other livestock aren’t legal for pigs in many jurisdictions.

Biosecurity basics:

When purchasing new stock, quarantine animals 2-3 weeks before introducing them to existing pigs. This isolation period allows observation for developing illness and prevents disease transmission.

Pasture Management and Rotation

Berkshires are enthusiastic foragers, but this comes with consequences: they’ll transform lush pasture into tilled earth remarkably fast.

Their rooting instinct—using powerful snouts as natural plows—turns up roots, insects, and anything else interesting while simultaneously fertilizing.

  • Rotation strategy:

Divide available space into 2-4 paddocks. Move pigs every 3-6 weeks (timing depends on paddock size and pig number), allowing vegetation recovery before returning.

This prevents complete pasture destruction while maintaining forage value and reducing parasite loads.

  • Seasonal forage:

Spring and summer offer maximum pasture nutrition—lush grasses, clovers, and forbs provide protein, vitamins, and minerals. Fall brings acorns, nuts, and root vegetables pigs relish.

Berkshire Pigs foraging

Winter requires supplemental hay and increased grain since dormant pastures provide minimal nutrition.

Properly managed, pigs improve pasture over time by breaking up compacted soil, eliminating undesirable plants, and distributing fertilizer. The key is rotation timing—move them before they create moonscapes.

Raising Pigs for Meat: The Finishing Process

Most Berkshire farmers focus on finishing pigs for premium pork rather than breeding. Understanding this process is essential for success.

Timeline from weaner to butcher:

  • Purchase weaners: 8-12 weeks old, 15-30 pounds
  • Growing period: 5-6 months of feeding and management
  • Target finish weight: 220-250 pounds live weight
  • Processing timing: Usually October-December for spring-born pigs

Ideal slaughter weight considerations:

Berkshires are early-finishing, meaning they reach optimal carcass quality at lighter weights than commercial breeds.

Target 220-250 pounds live weight for standard pork cuts (chops, roasts, fresh bacon). For traditional cured ham and bacon, finish heavier at 250-280 pounds. Beyond 280 pounds, fat becomes excessive and cutting yields drop.

Expected meat yield: From a 250-pound pig, expect approximately:

  • Hanging weight: 175-190 pounds (70-75% of live weight)
  • Packaged meat: 125-145 pounds (50-55% of live weight)
  • Breakdown: 25-30 lbs chops, 15-20 lbs roasts, 20-25 lbs ground pork, 15-20 lbs bacon, 15-20 lbs ham, plus ribs, shoulder, and organs

Processing realities:

USDA-inspected facilities allow retail sales to anyone. Custom processors (non-inspected) only allow sales to customers purchasing the live animal before slaughter—legal structures vary by state.

Book processors months ahead; they’re consistently backlogged, especially during fall processing season. Ask fellow farmers for processor recommendations, as quality varies dramatically.

Breeding Operations: A Deeper Commitment

Breeding transforms seasonal pig-raising into year-round livestock farming. Before committing, honestly evaluate whether this aligns with your goals, resources, and market access.

Selecting Quality Breeding Stock

Quality foundation animals determine everything that follows. Source from reputable breeders registered with the American Berkshire Association or equivalent organizations.

They provide pedigrees, health documentation, and genetic history helping you avoid inbreeding while selecting desirable traits.

  • Evaluating conformation:

Look for rectangular body shape with good depth, straight backs without dips toward the rear, strong legs set wide apart, and well-rounded hams. Avoid narrow hips, close-set feet, or visible structural weakness—these predict problems.

Selecting Quality Berkshire Pigs

  • Boar selection is crucial:

Your boar contributes half the genetics to every piglet. Never compromise on boar quality. Expect premium pricing ($500-1,000+) for superior genetics, but this investment pays across every litter he sires.

Temperament matters immensely—aggressive boars become dangerous as they mature.

  • Age and timing:

Young weaners cost less but require 8-12 months before breeding. Bred gilts or proven sows cost more but produce sooner. Evaluate based on your timeline and budget.

The Breeding Cycle

  • Sexual maturity:

Gilts reach maturity around 6-8 months but shouldn’t breed until 8-12 months when properly developed. Boars mature similarly but many breeders wait until 8-10 months for first breeding.

  • Recognizing estrus:

Sows cycle every 21 days when not pregnant. Heat signs include restlessness, vocalization, swollen reddened vulva, and “standing heat” (freezing when back pressure is applied).

Gilts remain in estrus 24-48 hours; experienced sows may cycle up to 72 hours. Breed during standing heat for best conception rates.

  • Breeding methods:

Natural breeding involves supervised introduction of boar and sow, leaving them together for several days.

Artificial insemination (AI) offers genetic diversity without maintaining multiple boars but requires training, precise timing, and specialized equipment. Fresh semen needs immediate use; frozen semen requires liquid nitrogen storage tanks.

  • Gestation:

Berkshires average 114-116 days (remember: “3 months, 3 weeks, 3 days”). Mark breeding dates clearly to prepare for farrowing.

Farrowing Management

  • Pre-farrowing preparation:

As birth approaches, sows exhibit nest-building behavior, gathering mouthfuls of bedding material. Provide a clean, dry, draft-free space with deep bedding. Berkshire mothering instincts are excellent—most farrow successfully without intervention.

  • The birth process:

Labor typically lasts 2-5 hours with 10-20 minutes between piglets. Healthy piglets emerge quickly, break free from birth sacs, and seek teats within minutes.

Stay nearby to address complications: piglets trapped in membranes, weak piglets needing assistance, or prolonged labor suggesting problems.

  • Newborn care:

Ensure every piglet nurses colostrum within the first hours—this first milk contains crucial antibodies. Count piglets against teat count (minimum 12 teats; each piglet needs one).

Watch for chilling in cold weather, providing heat lamps if necessary. Berkshire litters average 8-10 piglets, though first-time gilts typically produce fewer.

👉 Here’s How to Care for Newborn Piglets: Farrowing, Feeding & Health Tips

  • Winter vs. summer farrowing:

Winter births reduce heat stress on sows but demand vigilant piglet warming. Summer farrowing eases piglet survival but challenges sows with heat—ensure shade, water, and cooling options.

Growing and Marketing Piglets

  • Weaning:

Piglets wean at 6-8 weeks when eating solid feed reliably and weighing 15-20 pounds. This stresses both sows and piglets, so separate gradually if possible. Keep weaned littermates together to maintain social bonds.

  • Feeder pig sales:

Many breeders sell weaners to customers who’ll finish them for meat, avoiding months of additional feeding. Price weaners at $75-125 depending on quality, registration status, and local markets. This generates steady income without extended feed costs.

  • When to replace breeding stock:

Berkshire sows produce well for 4-6 years, with some remaining productive beyond 10 years. Replace when litter sizes decline, mothering quality diminishes, or fertility drops.

Boars typically need replacement every 2-3 years to maintain genetic diversity and manage size/temperament issues.

Grow Berkshire Piglets

Common Mistakes to Avoid

Learning from others’ errors saves time, money, and heartache:

  • Underestimating space needs: Overcrowding triggers aggression, disease, and poor growth. Always provide more space than minimum recommendations.
  • Inadequate fencing: Pigs test boundaries constantly. Invest in proper fencing from the start—repairs and recaptures cost far more than doing it right initially.
  • Neglecting water: Dehydration affects pigs faster than feed shortages. Check waterers multiple times daily, especially in temperature extremes.
  • Buying poor-quality stock: Cheap pigs often carry hidden problems: poor genetics, health issues, or aggressive temperaments. Buy the best you can afford from reputable breeders.
  • Skipping quarantine: Introducing new animals without quarantine risks spreading disease through your entire herd. Always isolate new purchases 2-3 weeks.
  • Insufficient market research: Breeding pigs without confirmed buyers leaves you scrambling as feed costs mount. Establish markets before your first litter arrives.
  • Ignoring health issues: Small problems escalate rapidly in pigs. Address concerns immediately rather than hoping they resolve spontaneously.
  • Winter farrowing without preparation: Newborn piglets die quickly in cold. If farrowing in winter, ensure heated shelters and constant monitoring.

Economic Reality: Making the Numbers Work

Understanding true costs and realistic revenue allows intelligent decisions.

Initial investment:

  • Quality breeding pair: $500-1,000+
  • Fencing and housing: $800-2,500
  • Equipment (feeders, waterers, panels): $200-400
  • Total startup: $1,500-4,000+

Annual costs per breeding sow:

  • Feed (sow + two litters): $1,200-2,000
  • Veterinary care: $100-200
  • Bedding: $100-150
  • Maintenance: $100-200
  • Processing (for meat sales): $150-300 per pig
  • Total: $1,650-2,850+

Revenue scenarios:

Selling feeder pigs: 2 litters × 8-10 piglets × $75-125 = $1,200-2,500 annually

Direct pork sales: 2 litters × 8-10 pigs × $800-1,500 per finished pig = $12,800-30,000 annually (minus processing costs of $1,200-3,000)

The math favors direct meat marketing dramatically, but requires processing connections, legal compliance, marketing effort, and customer base development. Feeder pig sales generate modest income with minimal additional work.

Marketing success strategies:

Build email lists, maintain social media presence, attend farmers markets, partner with restaurants, and leverage farm visits.

Share your story—people pay premium prices for transparency, animal welfare, and connection to their food source. Photos of happy pigs on pasture transform abstract “local meat” into tangible experience.

Frequently Asked Questions

  • How does Berkshire pork compare to other heritage breeds like Tamworth or Gloucestershire Old Spots?

Berkshires excel in marbling and meat flavor, often considered the premium choice among heritage breeds. Tamworths produce leaner bacon-type carcasses with less marbling.

Gloucestershire Old Spots offer good lard production but less meat quality reputation. For direct marketing emphasizing taste, Berkshires typically command highest prices.

  • Can I raise Berkshires without pasture access?

While Berkshires adapt to confinement better than some breeds, they thrive outdoors and pasture access significantly enhances welfare, reduces feed costs, and supports premium marketing.

If space-limited, provide ample pen space, enrichment materials, and high-quality feed. However, outdoor heritage pork commands better prices.

  • What’s the minimum number of pigs to make breeding profitable?

One quality sow producing two litters annually (16-20 piglets) provides reasonable side income but likely won’t replace full-time employment.

Two sows (32-40 piglets annually) can generate substantial revenue with direct marketing, potentially $15,000-25,000 after expenses. Scale depends on your goals, available time, and market demand.

  • How do I find USDA-inspected processors?

Contact your state department of agriculture for lists of inspected facilities. Ask local farmers for recommendations. Book months ahead—processors stay backlogged, especially during peak fall season. Some states maintain online directories of licensed facilities.

  • Are heritage pigs more disease-resistant than commercial breeds?

Berkshires show good general hardiness, but “disease-resistant” overstates reality. They benefit from genetic diversity and outdoor hardiness bred through generations, but still require proper management, biosecurity, and veterinary care.

Their main advantage is adaptability to outdoor systems where some commercial breeds struggle.

Your Berkshire Journey Begins Now

Berkshire pigs offer something increasingly rare: a proven path to sustainable farming while honoring agricultural heritage.

Their combination of exceptional meat quality, manageable temperament, breeding reliability, and premium market demand creates opportunities for farmers willing to step beyond commodity production.

Whether seeking homestead self-sufficiency, launching a niche meat business, or expanding existing operations, Berkshires deserve serious consideration.

Their 300-year track record demonstrates remarkable consistency—few breeds maintain such excellence across centuries of changing agricultural landscapes.

Success with Berkshires requires commitment: proper preparation, quality breeding stock, adequate facilities, consistent management, and most importantly, connecting with customers who value what you’re producing.

But the rewards—financial, personal, and agricultural—make the journey worthwhile.

Ready to begin? Research breeders through the American Berkshire Association, visit farms raising Berkshires to see operations firsthand, and connect with farmers already succeeding with this breed.

Your adventure with one of agriculture’s finest heritage pigs awaits—and every delicious bite of pork you produce will prove you made the right choice.

What questions do you have about starting with Berkshires? Share your thoughts in the comments—let’s build a community supporting better farming and better food.


source https://harvestsavvy.com/raising-berkshire-pigs/

Wednesday, October 29, 2025

How To Plant, Grow, Harvest & Cook Jerusalem Artichokes (Sunchokes)

Picture a vegetable that practically plants itself, survives harsh winters without protection, produces abundant sweet, nutty tubers, and sends up stunning yellow flowers that brighten your garden all summer.

Meet Jerusalem artichokes—the low-maintenance perennial that delivers year after year.

Whether you’re seeking a reliable food crop or your first guaranteed gardening success, this comprehensive guide covers everything from planting to harvest to that first delicious bite.

By the end, you’ll have the complete roadmap for growing thriving Jerusalem artichokes in your own garden.

What Are Jerusalem Artichokes?

Despite their misleading name, Jerusalem artichokes have nothing to do with Jerusalem or artichokes.

These knobby tubers are North American natives belonging to the sunflower family. The name likely evolved from the Italian girasole (sunflower), corrupted to Jerusalem over time.

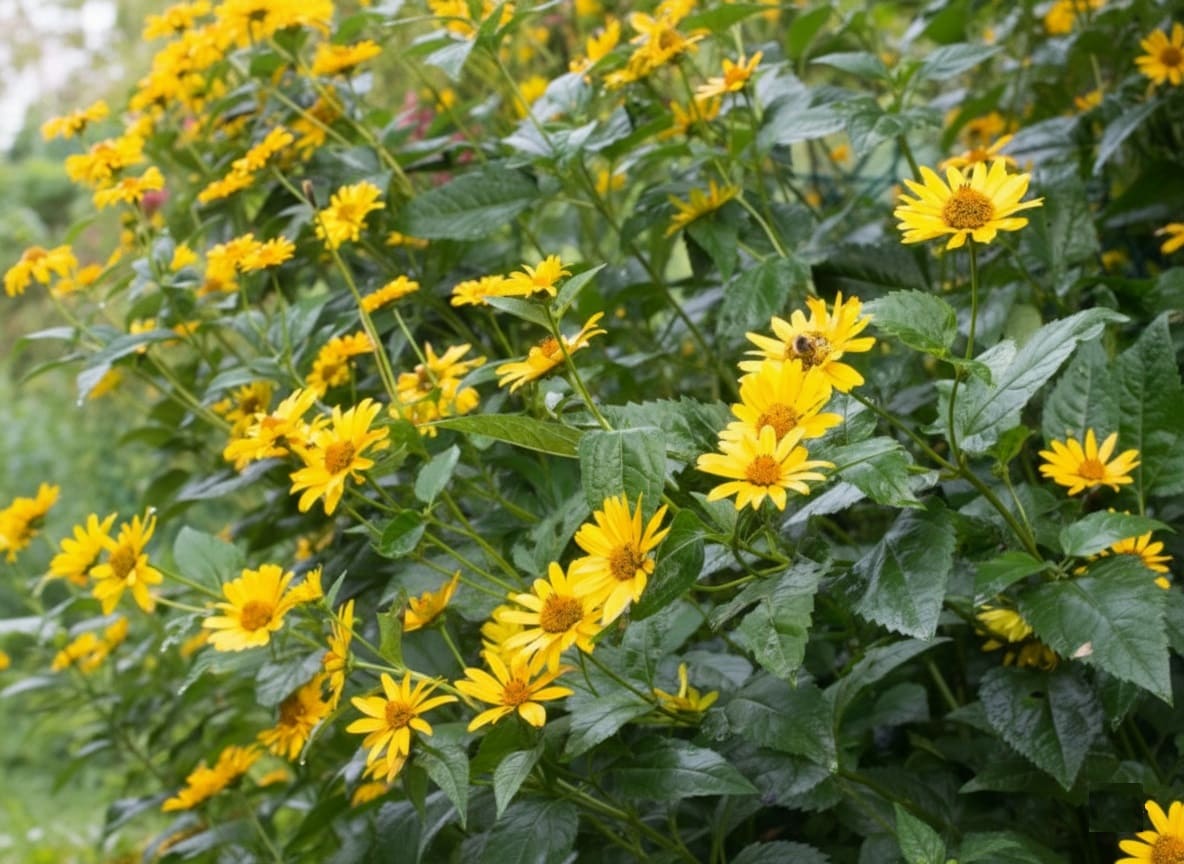
Also called sunchokes or earth apples, these perennials reach impressive heights of six to ten feet by late summer.

Jerusalem Artichokes

👉 Here’s How to Grow Giant Sunflowers: Expert Tips for Towering Blooms

Their cheerful yellow flowers emerge as days shorten—typically August in cooler climates, October in Mediterranean regions. But the real prize lies underground, where irregular, knobby rhizomes develop throughout the season.

The flavor is distinctly earthy and nutty with subtle sweetness. Raw, they’re crisp like water chestnuts with a refreshing bite. Cooked, they develop a creamy, almost buttery consistency that makes stellar soups and roasted dishes.

edible Jerusalem Artichokes

My first taste came at a farmer’s market when a vendor handed me a raw slice. That unexpected sweetness and satisfying crunch convinced me to dedicate a corner of my garden to them the following spring.

Six years later, that patch still produces abundantly with virtually no maintenance.

Understanding the Growing Cycle

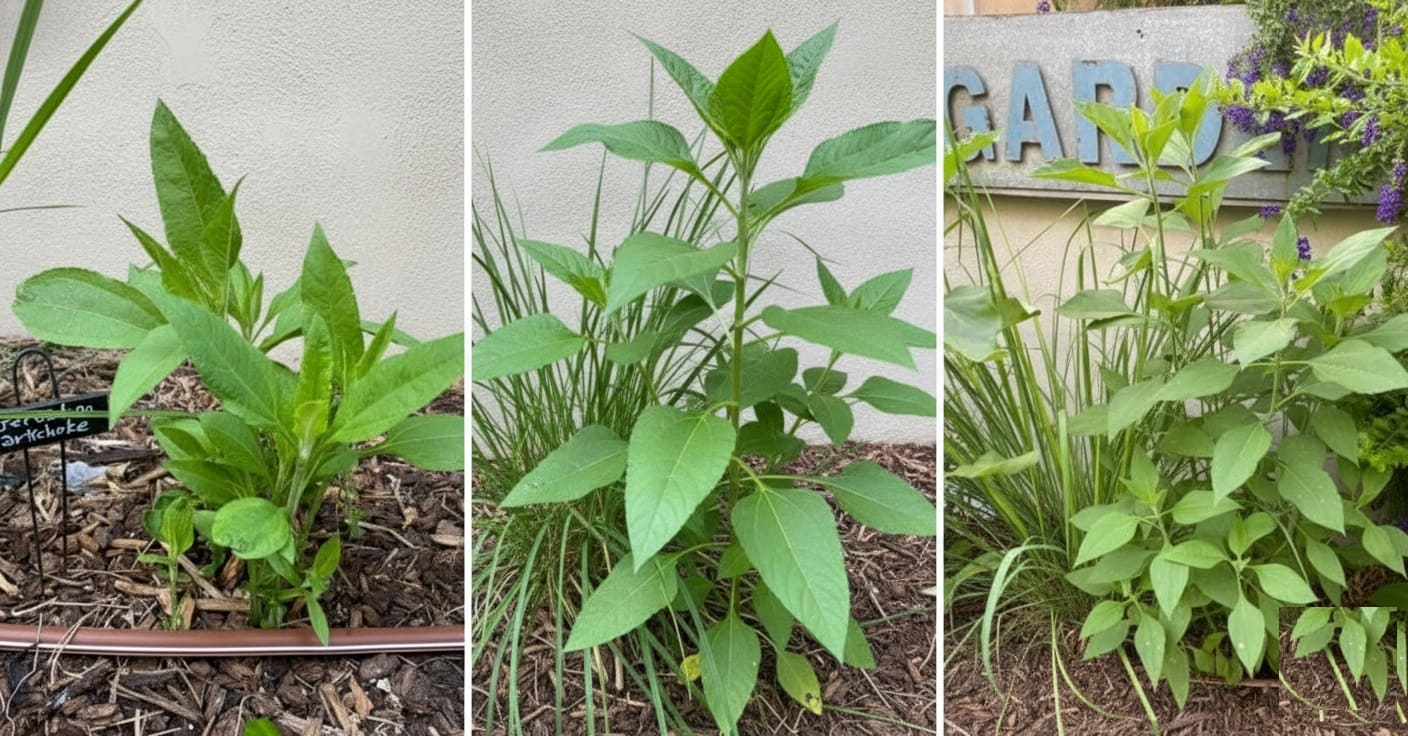
Jerusalem artichokes follow a predictable annual rhythm. Shoots emerge in spring from overwintered tubers, growing rapidly through early summer.

Plants focus energy on height and foliage development until midsummer, when tuber formation begins underground. This continues through autumn as foliage yellows and dies back, signaling that tubers have reached full size and maximum sweetness.

First-year plants from newly planted tubers typically produce modest harvests while establishing root systems.

Second and subsequent years deliver substantially larger yields—often double or triple the first year’s production. This delayed gratification pays off handsomely in long-term productivity.

Why Grow Jerusalem Artichokes?

Jerusalem artichokes offer compelling advantages for home gardeners. They’re remarkably hardy perennials that return year after year without replanting, thriving in conditions that challenge many crops.

Poor soil? No problem. Forgot to water? They’ll forgive you. Their dual purpose as both food crop and ornamental plant means stunning late-summer flowers alongside productive harvests.

The nutritional profile deserves attention too. These tubers pack unique health benefits, particularly for diabetics and those seeking lower-calorie alternatives to potatoes.

👉 Here’s How to Grow Tons of Potatoes in Buckets (Even in Small Spaces!)

Perhaps most remarkably, they store themselves naturally in the ground all winter, eliminating preservation concerns while providing fresh harvests on demand from October through March.

Beyond home gardens, Jerusalem artichokes serve industrial purposes including fructose production, livestock fodder, and biofuel conversion. For bioethanol production, only sugar beets surpass their biomass yield per hectare.

Climate and Growing Conditions

Jerusalem artichokes thrive across USDA hardiness zones 3 through 9, tolerating winter temperatures well below zero. This exceptional cold hardiness makes them reliable even in harsh northern climates where many perennials struggle.

In warmer zones, they appreciate some afternoon shade during peak summer heat, though they’ll still produce in full sun with adequate water.

Soil pH between 5.8 and 7.0 works best, though they tolerate slightly acidic to slightly alkaline conditions without complaint.

The plants adapt to clay, sand, or loam, but loose, well-draining soil enriched with organic matter produces the most abundant, easy-to-harvest tubers. Heavy clay can be amended with compost and sand to improve tuber expansion and simplify digging.

Choosing Your Planting Location

Location decisions have long-term implications with Jerusalem artichokes. These plants grow tall and spread enthusiastically, so thoughtful placement prevents future complications.

Select a spot receiving full sun for optimal growth and tuber production. While they tolerate partial shade, expect noticeably smaller yields in shadier conditions.

Consider placing them along property edges, fence lines, or garden corners where their height won’t shade other crops. Many experienced growers designate a permanent patch rather than rotating Jerusalem artichokes through main vegetable beds.

This approach acknowledges their persistent nature while simplifying management. Their tall, attractive stalks can also serve as living windbreaks or privacy screens.

Before planting, think about accessibility throughout winter. Marking your patch’s location before snow arrives makes midwinter harvesting much easier. A simple stake or permanent marker prevents frustrated searching through frozen ground.

Preparing the Soil

Proper soil preparation makes everything easier down the line. Work soil to twelve inches deep, breaking up compacted layers that could restrict tuber expansion.

Incorporate three to four inches of finished compost or aged manure, which improves both drainage and moisture retention—the sweet spot for Jerusalem artichokes.

If your soil tends toward heavy clay, add coarse sand along with compost to improve structure. Sandy soils benefit from extra organic matter to boost water-holding capacity.

The investment in soil preparation pays dividends at harvest when loose, friable earth releases tubers cleanly instead of requiring excavation.

Test soil pH if you’re uncertain about your conditions. While Jerusalem artichokes tolerate a range, adjusting excessively acidic soil with lime or alkaline soil with sulfur optimizes growth. Most garden centers offer inexpensive pH testing kits that provide quick results.

Planting Jerusalem Artichokes

Sourcing Quality Planting Stock

Obtaining healthy tubers starts your crop on the right foot. Seek out garden centers, nurseries, or seed catalogs specializing in unusual vegetables. Farmers’ markets and fellow gardeners often have tubers available in autumn or early spring.

Even grocery store Jerusalem artichokes work, though named varieties from reputable sources typically perform better.

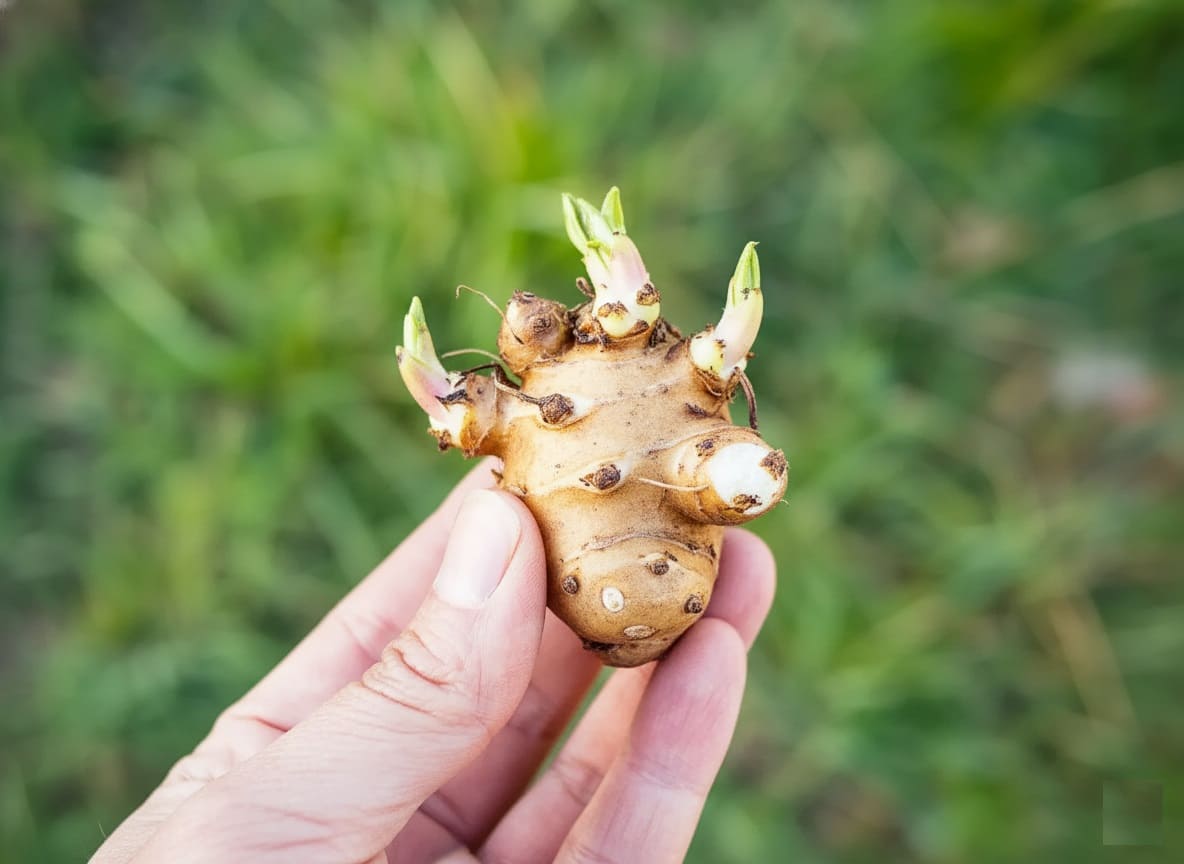
Choose firm tubers without soft spots, mold, or excessive shriveling. Larger tubers (two to three inches) establish faster than smaller ones.

Jerusalem Artichoke tubers

Like seed potatoes, you can cut large Jerusalem artichoke tubers into sections, ensuring each piece has at least two or three visible growing nodes. Let cut surfaces dry for a day before planting to reduce rot risk.

Planting Timing and Method

Plant tubers between late March and mid-May once soil temperatures reach 45-50°F. Cold, wet soil causes rot, so patience pays off in northern regions. In warmer climates, earlier planting extends the growing season and boosts yields.

spacing Jerusalem Artichokes

Follow these steps for successful establishment:

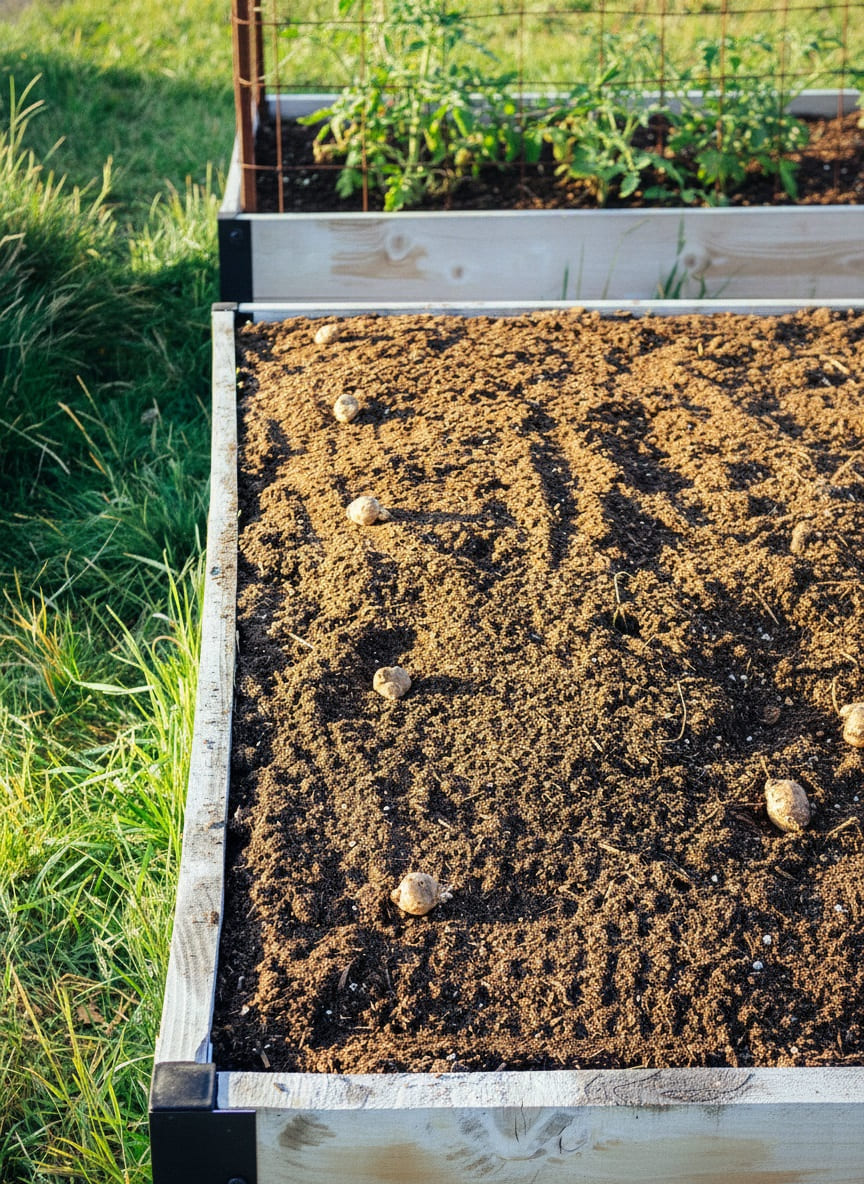
  1. Dig holes or trenches four to six inches deep
  2. Space tubers twelve to eighteen inches apart in rows three feet apart
  3. Place tubers with growing nodes facing upward
  4. Cover with soil and water thoroughly to settle
  5. Apply two to three inches of organic mulch to conserve moisture and suppress weeds

Planting Jerusalem Artichokes

Shoots typically emerge within two to three weeks, making Jerusalem artichokes wonderfully gratifying for impatient gardeners. Mark planted areas clearly to avoid accidental disturbance while waiting for emergence.

Jerusalem Artichoke plants

Care and Maintenance Throughout the Season

Watering Strategy

Consistent moisture during the first six weeks after planting establishes strong root systems. Keep soil evenly moist but never waterlogged, checking moisture levels by feeling the soil a few inches down.

Drip irrigation or soaker hoses work beautifully, delivering water directly to roots while keeping foliage dry.

Established plants develop extensive root systems that access deeper moisture, making them remarkably drought-tolerant. However, Jerusalem artichokes produce substantial biomass, so they still benefit from consistent water.

During hot, dry weather, deep watering once or twice weekly maintains vigorous growth. Irregular watering can reduce tuber size and quality.

Mulching for Success

Mulch serves multiple purposes in Jerusalem artichoke cultivation. Apply three to four inches of organic material—shredded leaves, straw, grass clippings, or wood chips—around plants in late spring.

This layer conserves soil moisture, moderates temperature fluctuations, suppresses weeds, and gradually breaks down to enrich soil.

Refresh mulch in midsummer if it’s decomposed significantly. In autumn, add an extra layer over the planting area to insulate overwintering tubers and make winter harvesting easier in frozen ground. This blanket also protects any tubers you’re leaving for next year’s crop.

Fertilizing for Optimal Yields

Fertilization strategy depends on soil quality and harvest goals. Rich garden soil amended with compost often provides adequate nutrition without supplemental feeding. Poor or sandy soils benefit from strategic fertilizer applications.

Apply balanced fertilizer at planting, then every six to eight weeks during the growing season. Choose formulations with moderate nitrogen and higher potassium, which supports tuber development without excessive foliage production.

Excessive nitrogen creates tall, leafy plants with disappointing underground harvests and reduced storage quality.

Avoid fresh manure, which releases nitrogen too rapidly. Well-composted organic matter or granulated fertilizers applied around plant bases work better.

Tomato or root vegetable fertilizers provide excellent nutrient profiles for Jerusalem artichokes. Side-dress plants in early summer for a midsummer growth boost.

👉 Learn about Banana Peel Fertilizer: Truth vs. Myths About This Popular Garden Hack

Support and Staking

Jerusalem artichokes achieve impressive heights but lack corresponding structural strength. In windy locations or areas prone to summer storms, providing support prevents plants from toppling and breaking.

Install sturdy stakes—bamboo poles, metal garden stakes, or wooden posts—once plants reach three to four feet tall. Drive stakes twelve inches deep for stability.

Loosely tie main stems using soft garden twine, cloth strips, or commercial plant ties. Create a figure-eight pattern around stake and stem to prevent rubbing. Check ties monthly and adjust as plants continue growing.

Managing Height

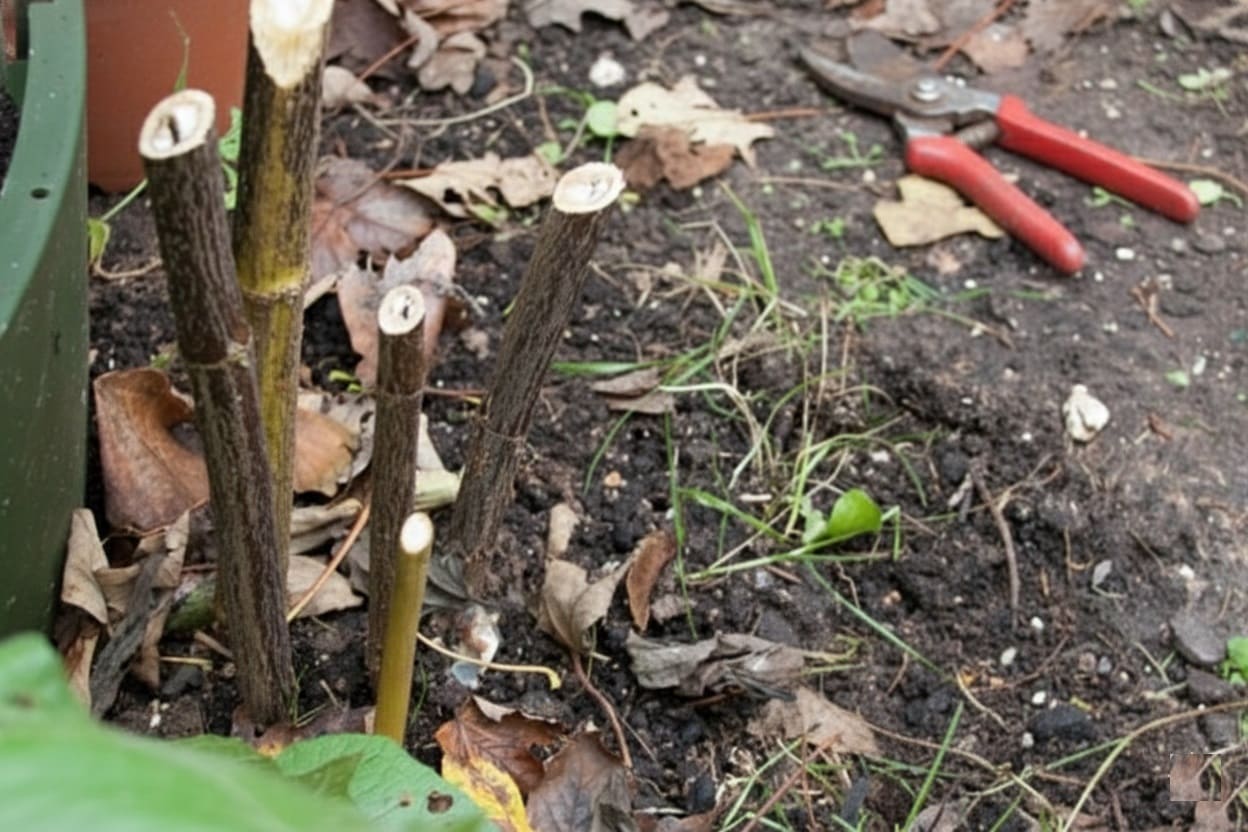
Ten-foot plants aren’t practical for every garden. Trimming stems to five feet in early to mid-July manages height while maintaining decent tuber production. This pruning encourages branching and creates bushier, more manageable plants.

Some gardeners report that topped plants produce slightly smaller but more numerous tubers.

Grow Jerusalem Artichokes
Credit: wikipedia

👉 Learn about Topping Pepper Plants: The Simple Gardening Hack for Bigger Harvests

If growing Jerusalem artichokes for animal fodder, harvest aboveground growth once or twice during summer, followed by fertilization. Plants regrow vigorously from roots, providing multiple harvests of nutritious greens before tuber harvest.

Cutting Jerusalem artichokes

Companion Planting Considerations

Jerusalem artichokes’ tall stature and spreading habit limit ideal companion planting options.

Their height creates substantial shade, making them poor neighbors for most vegetables that require full sun. However, they can work alongside other tall, vigorous plants like corn if spaced adequately.

Plant shade-tolerant crops like lettuce, spinach, or Asian greens on the north side of Jerusalem artichoke rows to take advantage of afternoon shade during hot weather.

Late-season greens planted beneath Jerusalem artichokes in August benefit from cooling shade while tubers finish sizing underground.

Avoid planting Jerusalem artichokes near invasive spreaders like mint or horseradish—that combination creates management nightmares. Similarly, keep them away from perennial herbs and flowers you don’t want overwhelmed by vigorous tuber spread.

Managing Pests and Diseases

Jerusalem artichokes’ remarkable pest and disease resistance makes them ideal for organic growing. They rarely require intervention, though a few issues occasionally arise.

Powdery Mildew

In cool, damp conditions, powdery mildew manifests as white, dusty coating on leaves. While unsightly, minor infections typically don’t significantly impact tuber formation since the problem emerges late in the season.

Prevention works better than treatment. Space plants adequately for air circulation. Water at soil level rather than overhead to keep foliage dry. Remove severely affected leaves and compost them away from the garden.

In persistent cases, organic fungicides containing sulfur or potassium bicarbonate provide control, though treatment is rarely necessary for home gardens.

Underground Pests

Voles pose the primary pest threat, finding Jerusalem artichoke tubers irresistible. These rodents work invisibly underground, potentially devastating entire harvests before detection. If vole activity is known in your area, take preventive measures.

Install hardware cloth barriers around planting beds, burying mesh twelve inches deep with six inches extending aboveground. Growing in raised beds lined with hardware cloth provides complete protection.

Maintain weed-free zones around Jerusalem artichoke patches to eliminate vole cover. Some gardeners report success with castor oil-based repellents applied monthly during the growing season.

Wireworms occasionally tunnel into tubers, creating small holes that don’t significantly affect eating quality but reduce storage life. Crop rotation and avoiding planting where lawn recently grew minimizes wireworm pressure.

Disease Management

Sclerotinia rot emerges when Jerusalem artichokes grow in the same location for many consecutive years. This soil-borne fungus causes stem base rot and gradually reduces vigor and yields. White, fluffy fungal growth appears at the soil line on infected plants.

Since Sclerotinia persists in soil for several years, prevention through crop rotation proves essential. Move your Jerusalem artichoke patch to a new location every three to five years.

Immediately remove and destroy infected plants rather than composting. Improving soil drainage reduces disease pressure, as the fungus thrives in wet conditions.

Aboveground Browsing

Deer occasionally browse young shoots in spring, particularly in areas with high deer populations. However, Jerusalem artichokes typically regrow vigorously from their roots.

Physical barriers like temporary fencing or deer netting protect vulnerable young plants. Deer deterrent sprays applied every few weeks can reduce browsing pressure.

Rabbits may nibble tender spring growth but rarely cause serious damage to established plants. The rapid growth rate of Jerusalem artichokes outpaces most browsing damage.

Harvesting Your Crop

When to Harvest

Patience rewards Jerusalem artichoke growers. Tubers continue sizing underground well into autumn, with sweetness improving after first frost as starches convert to sugars.

Wait until foliage yellows and dies back naturally, usually beginning in late October through November, signaling completed growth and maximum energy storage underground.

The extended harvest window—late autumn through winter into early spring before new growth begins in March—sets Jerusalem artichokes apart from most crops. This flexibility lets you harvest as needed rather than processing entire crops at once.

When to Harvest Jerusalem artichokes

Harvesting Technique

Harvesting resembles digging potatoes but requires extra care due to irregular tuber shapes:

  1. Cut dead stems to ground level
  2. Insert your spading fork twelve inches from the stem base
  3. Lift gently, loosening soil around the entire root zone
  4. Remove tubers as soil falls away, working carefully to avoid breaking knobby extensions
  5. Sift through loosened soil with hands to find smaller tubers

Harvesting Jerusalem artichokes

Expect substantial yields from mature plants—established patches often produce three to five pounds of tubers per square foot.

First-year yields run about half that as plants establish. The irregular shapes mean tubers interconnect surprisingly, so excavate thoroughly to maximize harvest.

My first harvest was comically inefficient. I dug cautiously, trying not to spear any tubers, and spent twice as long as necessary.

I’ve since learned Jerusalem artichokes are tough—work confidently with your fork. Occasionally nicking one won’t significantly impact your harvest.

Storing Jerusalem Artichokes

Thin skins make Jerusalem artichokes more perishable than potatoes, shaping storage approaches. Understanding options helps maintain quality.

Short-Term Refrigeration

For immediate use, store unwashed tubers in perforated plastic bags in your refrigerator’s crisper drawer. They’ll keep one to two weeks before quality declines.

Wait to wash them until just before use to prevent premature deterioration. Excessive moisture promotes mold growth, so ensure good air circulation.

Root Cellar Storage

Traditional root cellar storage mimics natural growing conditions. Layer tubers in slightly damp sand in wooden crates or plastic containers, ensuring individual tubers don’t touch.

Store in cool, dark spaces where temperatures remain between 32-40°F with high humidity. Check monthly and remove any showing decay to prevent spread. This method maintains quality for two to three months.

Freezing

Freezing extends storage up to a year but changes texture from crisp to soft. Peel and cut tubers into chunks, blanch in boiling water for three minutes, plunge immediately into ice water, drain thoroughly, and package in freezer bags with air pressed out.

Frozen Jerusalem artichokes work well in soups and puréed dishes where texture change is less noticeable.

Natural Ground Storage

Here’s where Jerusalem artichokes truly excel. Simply leave them in the ground all winter—they tolerate freezing temperatures remarkably well and can be harvested whenever needed.

This natural cold storage eliminates preservation concerns entirely while maintaining peak quality.

Mark your patch’s location before winter snow obscures it. In regions with deep frost, apply six to twelve inches of mulch over the bed to ease digging during frozen periods.

A thick layer of straw or leaves prevents ground from freezing solid while allowing you to dig through easily. Complete harvesting before new growth emerges in spring.

👉 Here’s How to Overwinter Dahlia Tubers: A Complete Guide for Beginners

Managing Spread and Preventing Garden Takeover

Jerusalem artichokes’ enthusiasm for spreading is both advantage and challenge. Any tuber fragment left in soil can sprout into new plants the following season.

This regenerative ability ensures productive patches year after year but requires management to prevent garden domination.

Containment Strategies

Thorough annual harvesting provides the primary control method, removing most tubers to limit volunteer plants. Installing underground barriers—heavy plastic sheeting or metal edging buried eighteen inches deep—around beds contains root spread effectively.

Many gardeners successfully grow Jerusalem artichokes in large containers (minimum fifteen gallons) for complete control, though container plants require more frequent watering.

The most practical approach for many gardeners involves designating permanent patches in areas where spread isn’t problematic, such as along property edges, fence lines, or corners where they can naturalize without interfering with other plantings.

Monitor for volunteer shoots appearing outside intended areas and remove them promptly before they establish—this proactive approach prevents spread far more easily than attempting to eradicate established plants.

Complete Removal

Deciding to eliminate Jerusalem artichokes from a location requires persistence. Dig thoroughly, removing all visible tubers down to at least twelve inches.

Monitor the area for new shoots throughout the following season, removing them promptly before they establish and produce new tubers. This vigilance must continue for two to three years to achieve complete eradication, as even tiny tuber fragments can regenerate.

For stubborn patches, repeated cultivation that brings tubers to the surface for exposure and desiccation works gradually.

Some gardeners resort to covering the area with thick black plastic for an entire growing season to smother regrowth, though this renders the space unusable temporarily.

Health Benefits and Nutritional Value

Jerusalem artichokes pack impressive nutritional benefits into modest calorie counts. Their unique composition offers advantages worth understanding.

Inulin: The Star Component

The tubers contain approximately sixteen percent carbohydrates, with half consisting of inulin—a prebiotic fiber our bodies don’t fully digest.

This characteristic provides multiple benefits: supporting digestive health by feeding beneficial gut bacteria, avoiding blood sugar spikes (making Jerusalem artichokes suitable for diabetics), and contributing to feelings of fullness without excess calories.

Research suggests inulin may improve calcium absorption, support immune function, and promote healthy cholesterol levels. These effects stem from inulin’s role in fostering beneficial gut bacteria populations.

Additional Nutritional Highlights

Beyond inulin, Jerusalem artichokes provide about three percent protein, vitamins A, B1, and B2, and essential minerals including potassium and iron. At only thirty calories per 100 grams—less than half that of potatoes—they’re naturally diet-friendly.

Managing Digestive Effects

The inulin that makes Jerusalem artichokes nutritious can cause digestive discomfort for some people, particularly when consumed in large quantities initially. The fermentation of undigested inulin in the intestines produces gas.

Start with small portions—two to three ounces—and increase gradually as your digestive system adapts.

Cooking methods matter: longer cooking times break down more inulin, improving digestibility. Adding acidic ingredients like lemon juice or vinegar during cooking may also help. Most people develop tolerance within a few weeks of regular consumption.

Cooking and Enjoying Jerusalem Artichokes

Jerusalem artichokes’ nutty, slightly sweet flavor enhances numerous dishes. Their versatility matches their adaptability in the garden.

Preparation Basics

Skip peeling—the thin skin is completely edible and contributes fiber and nutrients. Simply scrub tubers under running water with a vegetable brush to remove soil.

For recipes requiring peeled vegetables, parboil tubers for a few minutes to loosen skins, which then slip off easily. The knobby shape makes peeling fresh tubers tedious and wasteful.

Cooking Methods That Shine

Raw preparations showcase Jerusalem artichokes’ crisp texture and refreshing quality. Slice thinly for salads where their juicy sweetness complements mixed greens beautifully, or cut into matchsticks for crunchy slaw.

Jerusalem artichokes for salads

Roasting brings out natural sweetness through caramelization. Cut into chunks, toss with olive oil and seasonings, and roast at 400°F for thirty to forty minutes until golden and tender. The edges develop irresistible crispy bits while interiors turn creamy.

Roasted Jerusalem artichokes

Soups capitalize on Jerusalem artichokes’ creamy potential. Sauté with onions and garlic, add stock, simmer until soft, then purée for velvety soup without cream. Thyme, tarragon, or nutmeg complement the earthy flavor perfectly.

Jerusalem artichoke soup

Mashed Jerusalem artichokes surprise people who expect potato substitutes. Boil until tender, then mash with butter and cream. The result is naturally smoother and sweeter than mashed potatoes, with a more complex flavor profile.

Mashed Jerusalem artichokes

Chips make addictive snacks. Slice very thinly using a mandoline, toss with minimal oil and salt, then bake at 375°F until crisp, turning once. Dehydrating works too, producing shelf-stable chips with concentrated flavor.

Jerusalem artichoke chips

Complementary Flavors

Jerusalem artichokes pair beautifully with herbs like thyme, rosemary, parsley, and tarragon. Warm spices including cumin, coriander, curry powder, and nutmeg enhance their earthy notes.

Aromatics—garlic, shallots, leeks, ginger—build complexity. Acidic elements like lemon juice, vinegar, or wine brighten dishes, while butter, cream, and aged cheeses add richness.

My favorite preparation remains embarrassingly simple: roasted Jerusalem artichokes tossed with olive oil, coarse salt, black pepper, and fresh rosemary.

This combination lets their natural sweetness shine while rosemary adds aromatic depth. I could happily eat an entire pan as a meal.

Choosing Varieties

While all Jerusalem artichokes share similar growing requirements, different varieties offer distinct characteristics.

Named varieties vary in flowering vigor, maximum height, stem strength, overall yield, and tuber color. Some produce predominantly brown-skinned tubers, while others lean toward red or purple hues. All have white flesh inside.

Smoother-skinned varieties like ‘Fuseau’ simplify preparation and reduce waste. Compact varieties reaching only six feet rather than ten work better in smaller gardens or windy locations. High-yielding varieties maximize production from limited space.

Unfortunately, variety selection often proves limited. Many garden centers stock tubers simply labeled as Jerusalem artichokes without variety specification.

This generic approach works fine for most growers—the basic unnamed varieties produce reliably. Once established, save your own tubers year after year regardless of variety.

Some gardeners maintain several varieties in different patches, comparing performance and preferences over time.

Troubleshooting Common Issues

Poor Tuber Development

Small or sparse tubers typically result from excessive nitrogen, which pushes energy toward foliage at underground storage’s expense.

Reduce nitrogen-rich fertilizers and avoid fresh manure. Overcrowding also limits tuber size—thin plants to proper spacing or divide congested patches.

Inadequate water during tuber formation (August through October) reduces size. Ensure consistent moisture through autumn. Harvesting too early, before frost sweetens tubers, also yields disappointing results. Wait for foliage to die back naturally.

Weak or Stunted Growth

Stunted plants often indicate poor drainage or compacted soil restricting root development. Improve soil structure with compost and ensure adequate drainage.

Extremely poor, depleted soil benefits from fertilization—apply balanced fertilizer at planting and midsummer.

Excessive shade limits growth and yields. Jerusalem artichokes need at least six hours of direct sun daily for optimal performance. Move plantings to sunnier locations if current sites prove too shady.

Plants Falling Over

Weak stems that flop over signal insufficient staking in windy areas or top-heavy growth from excessive nitrogen. Install sturdy support stakes and reduce nitrogen fertilization. Pruning plants to manageable heights in midsummer also prevents toppling.

No Flowers

Lack of flowering rarely impacts tuber production, as flowers form late in the season after most tuber development completes. However, if flowers are desired for ornamental purposes, ensure plants receive full sun and adequate water.

Some varieties flower more prolifically than others. Northern gardens with short growing seasons may not see flowers some years.

Long-Term Management and Perennial Care

Jerusalem artichokes can remain productive in the same location for twenty years or more with proper management. The key to long-term success is partial harvesting—dig only what you’ll use, leaving a portion in the ground to overwinter and regenerate automatically in spring.

This low-maintenance perennial system eliminates annual replanting. Simply harvest as needed and allow remaining tubers to perpetuate the patch. T

o maintain vigor over many years, apply compost or balanced fertilizer annually in spring, divide and thin overcrowded patches every three to five years, maintain mulch layers, and rotate plantings if disease appears.

For gardeners wanting fresh starts, dig thoroughly in autumn, replant select tubers in spring at a new location, and monitor the original site for volunteers to remove. This approach provides both crop rotation benefits and fresh soil for vigorous growth.

Frequently Asked Questions

  1. Are Jerusalem artichokes invasive?

They’re aggressive spreaders if unmanaged but not truly invasive. Proper containment, thorough annual harvesting, and prompt removal of unwanted shoots keep them under control.

Consider them enthusiastic rather than invasive—they’ll stay where you want them with reasonable attention.

  1. Can I grow Jerusalem artichokes in containers?

Absolutely. Use large containers (minimum fifteen gallons) with excellent drainage. Container growing completely controls spread while still producing substantial harvests.

Ensure adequate water during the growing season, as containers dry faster than ground soil. Stake tall growth to prevent toppling.

  1. Why do Jerusalem artichokes cause digestive issues?

Inulin ferments in the lower digestive tract, producing gas for some people. Start with small portions allowing gut bacteria to adjust. Longer cooking breaks down more inulin, improving digestibility.

Adding acidic ingredients like lemon juice during cooking may help. Most people develop tolerance within a few weeks of regular consumption.

  1. How do Jerusalem artichokes compare nutritionally to potatoes?

Jerusalem artichokes contain less than half the calories of potatoes while providing more fiber, particularly prebiotic inulin.

They’re lower in total carbohydrates but higher in certain minerals. The main trade-off is digestibility—potatoes are easier on sensitive stomachs initially.

  1. What’s the difference between Jerusalem artichokes and regular artichokes?

They’re completely unrelated plants. Globe artichokes are Mediterranean thistles grown for edible flower buds. Jerusalem artichokes are North American sunflowers grown for edible tubers. The similar name comes from comparable flavor profiles, not botanical relationship.

  1. When is the best time to harvest for maximum sweetness?

Wait until after the first hard frost. Cold temperatures trigger starch-to-sugar conversion, dramatically improving flavor.

Tubers harvested in November or December taste noticeably sweeter than those dug in early October. This is why many gardeners consider Jerusalem artichokes a winter crop despite summer growing.

👉 Find out When and How to Harvest Vegetables for Peak Flavor: Timing & Tips for Every Crop

Final Thoughts

Jerusalem artichokes offer a rare combination of productivity, resilience, and versatility that few crops match.

These remarkable tubers deserve serious consideration whether you’re seeking reliable food production, low-maintenance perennials, or simply something different for your garden.

Success boils down to these essentials: plant in full sun with decent drainage, provide consistent water and moderate fertilizer during the growing season, stake tall plants in windy locations, harvest from late autumn through winter into early spring, leave some tubers for next year’s crop, and control spread through thorough harvesting and boundary management.

Start small if you’re uncertain. A few tubers planted in a corner of your garden will quickly demonstrate whether Jerusalem artichokes suit your growing conditions and culinary preferences.

Given their tendency to return year after year with minimal input, there’s little risk in giving them a try.

Ready to get started? Source quality tubers from a nursery, farmer’s market, or fellow gardener. Plant them this spring, and by next autumn, you’ll be harvesting your first crop of these unique, delicious tubers.

Share your experience below, and subscribe for more practical growing guides to help you succeed in the garden all year round.


source https://harvestsavvy.com/growing-jerusalem-artichokes/

How to Grow Hollyhocks: Complete Guide From Seed to Bloom

Have you ever walked through a cottage garden in midsummer and stopped in your tracks at the sight of towering flower spikes painted in jewel tones? Those magnificent pillars of blooms are hollyhocks, and they’re easier to grow than you might think.

Whether you’re dreaming of transforming your garden fence into a floral masterpiece or adding vertical drama to your borders, hollyhocks deliver that classic cottage garden magic with surprisingly little fuss.

Last summer, I drove through a small coastal village where hollyhocks had taken over—not just in gardens, but erupting from cracks in the pavement, against stone walls, basically anywhere their seeds had landed.

If a flower can thrive in asphalt, I figured, surely I could manage to grow them in actual soil. That realization changed everything about how I approach these beauties.

This guide will walk you through everything you need to know about growing hollyhocks successfully, from choosing the right varieties to dealing with that infamous rust disease.

By the end, you’ll understand why these tall, show-stopping perennials have been garden favorites for centuries and how to make them thrive in your own space.

Understanding Hollyhocks: What Makes Them Special?

Hollyhocks (Alcea rosea) are those unmistakable tall spires covered in ruffled, cup-shaped blooms that light up gardens from June through August.

They typically reach 6 to 8 feet tall, though some varieties can stretch even taller, making them perfect backdrop plants for borders or stunning features against walls and fences.

Here’s what makes hollyhocks interesting: most are technically biennials, which means they follow a two-year life cycle.

  1. In their first year, they focus on building foliage and developing a strong root system.
  2. The second year is showtime—those impressive flower stalks shoot up and bloom their hearts out.

But here’s the trick: because hollyhocks self-seed so enthusiastically, once you’ve got them established, they’ll keep coming back year after year, creating the illusion of being perennials.

Some newer varieties are bred to behave more like short-lived perennials, flowering in their first year if you start them early enough indoors or plant them early in spring. These are perfect if you’re impatient (and let’s be honest, most gardeners are).

Why You’ll Love Growing Them

Hollyhocks aren’t just pretty faces. They’re ecological powerhouses in your garden. They serve as host plants for painted lady butterfly caterpillars and attract an impressive parade of pollinators—bumblebees, honeybees, hummingbirds, and various butterflies all make regular visits.

Bumblebees seem particularly fond of white and pink varieties, while hummingbirds gravitate toward the deep reds and purples.

Plus, they’re surprisingly tough. Hollyhocks can handle a range of conditions, tolerate drought once established, and are even one of the few plants that can grow near black walnut trees, which normally poison the soil for most other plants.

They’re hardy in zones 3 through 9, making them accessible to gardeners across much of North America.

Choosing Your Hollyhock Varieties

The world of hollyhocks offers a stunning color palette: deep burgundies that are almost black, vibrant reds, soft pinks and peaches, sunny yellows, pure whites, and even rich purples. You’ll find both single-flowered and double-flowered varieties.

1. Single-flowered varieties are your best choice if you want to support pollinators. The open flowers make it easy for bees and butterflies to access the nectar and pollen.

They’re also more weather-resistant because water sheds off easily, and they tend to look more natural in cottage garden settings.

Single-flowered Hollyhocks

2. Double-flowered varieties create spectacular, ruffled blooms that look almost like peonies on a stick. They’re showstoppers in ornamental displays, but keep in mind that pollinators can’t access their pollen and nectar.

These varieties can also get damaged more easily in wind and rain because the heavy blooms catch more weather.

Double-flowered Hollyhocks

Standout Varieties to Consider

  • ‘Blacknight’ offers sumptuous, very dark purple flowers with a silky appearance—perfect as a dramatic focal point.
  • ‘Halo’ series varieties are known for beautiful bicolored flowers and good rust resistance. ‘Halo Red’ features raspberry-colored blooms with warm yellow centers, while ‘Halo Apricot’ shows dusky pink petals with dark purple centers.
  • ‘Sunshine’ produces fresh, pale-yellow single flowers on sturdy stems and reliably regrows each year as a perennial.
  • ‘Peaches ‘n’ Dreams’ is a double-flowered variety with balled blooms in soft peach-pink shades.
  • ‘Mars Magic’ and other modern hybrids often bloom earlier and more reliably in their first year.
  • Alcea rugosa (also called Russian hollyhock) is your best bet if rust disease has been a problem in your area—this species shows excellent resistance.

When choosing colors, think about what will complement your existing garden. Dark purples look stunning against light-colored walls or when planted with contrasting pastels.

Soft pinks and peaches create romantic cottage garden vibes, while deep reds and whites make bold statements.

Soft pink and red Hollyhocks

Starting Hollyhocks from Seed

Growing hollyhocks from seed is straightforward and economical, giving you access to far more varieties than you’ll find as plants. Here’s how to give your seeds the best start.

Direct Sowing Outdoors

The easiest method is sowing seeds directly where you want them to grow. Hollyhocks develop long taproots that don’t love being disturbed, so starting them in place means healthier plants.

  • Timing:

You have two windows. Sow in early spring about a week before your last expected frost, or sow in late summer to early fall.

The late summer/fall timing actually mimics how hollyhocks naturally reseed themselves, and many gardeners find it produces stronger plants.

Starting Hollyhocks from Seed

  • Method:

Choose a sunny spot with well-draining soil. Sow seeds about ¼ inch deep and space them roughly 2 feet apart (you can always thin later).

Water gently and keep the soil moist but not soggy. Seeds typically germinate within 7 to 21 days, though some stubborn ones might take longer—patience is key.

If you’re sowing in fall, you can scatter seeds on gravel or clear ground against a sunny wall. The exposure to winter frost actually benefits hollyhock seeds.

It might look messy through winter, but come spring, you’ll see tiny seedlings emerging. This natural cold stratification improves germination rates.

Starting Seeds Indoors

If you want a head start or live in a region with a short growing season, start seeds indoors about 9 weeks before your last frost date.

Important tip:

Use tall, individual pots or deep cell trays. Hollyhocks develop those long taproots quickly, and cramped roots lead to stressed plants. Fill containers with well-draining seed compost, sow seeds with just a light covering of soil, water gently, and place in a warm spot.

Starting Hollyhock Seeds Indoors

Once seedlings develop their second set of true leaves, they’re ready to be hardened off.

Gradually introduce them to outdoor conditions over about a week, then transplant them outside two to three weeks after the last frost. Handle transplants carefully to avoid damaging that taproot.

Hollyhock seedlings

Growing in Greenhouses for Extended Seasons

Starting seeds in a greenhouse in early autumn gives you a significant advantage. The protected environment allows seedlings to develop strong basal rosettes through fall and winter.

By spring, you’ll have robust young plants ready to hit the ground running—literally. They’ll often bloom earlier and more vigorously than spring-sown plants.

Keep greenhouse-grown seedlings in good light but avoid too much warmth, which can produce weak, leggy plants. The goal is sturdy, compact growth. By late winter or early spring, these plants will be ready to harden off and move outdoors.

The Seed-Saving Secret

Want free hollyhocks forever? Let some flower stalks stay on the plants until they form seeds. Once seed pods turn brown and start to split (usually around September), collect them.

Each pod contains multiple flat, disc-shaped seeds. You can sow these immediately for next year’s crop or store them in a cool, dry place.

Hollyhock Seed-Saving

Don’t expect exact color replicas from saved seeds, though. Hollyhocks cross-pollinate enthusiastically, so you’ll get delightful surprises. That’s part of their charm—every generation brings new color combinations.

Planting Location and Soil Preparation

Success with hollyhocks starts with choosing the right spot. Get this right, and you’re halfway to those spectacular blooms.

Sun and Shelter

Hollyhocks perform best in full sun—aim for at least six to eight hours of direct sunlight daily. They’ll tolerate partial shade, but you’ll get fewer flowers and the plants might lean dramatically toward the light, requiring staking.

Because they grow so tall, wind protection is crucial. Plant them against walls, fences, buildings, or in locations sheltered by larger shrubs.

Strong winds can snap those impressive flower spikes or knock entire plants over. Think of hollyhocks as the tall friend who needs a strong arm to lean on during storms.

Soil Requirements

Hollyhocks are surprisingly unfussy about soil type, but they do have preferences. They thrive in fertile, well-draining soil enriched with organic matter. Heavy clay that stays waterlogged will doom them—the roots rot quickly in soggy conditions.

Ideally, prepare your planting area by working in a good layer (about 4 inches) of well-rotted compost or aged manure.

This improves soil structure, adds nutrients, and enhances drainage. If you’re dealing with heavy clay, consider adding some grit or coarse sand to improve drainage.

Sandy or gravelly soil? Hollyhocks actually love it, especially if it drains quickly. Some of the most spectacular wild hollyhock displays occur in coastal areas with sandy, free-draining soil.

The pH isn’t critical—hollyhocks adapt to a range from slightly acidic to slightly alkaline. Don’t stress about testing unless you’re having problems.

Spacing Matters

Plant or thin hollyhocks to about 18 to 24 inches apart. This spacing allows good air circulation, which is your first line of defense against fungal diseases like rust. Crowded plants in humid conditions are disease magnets.

If you’re planning a dramatic display along a fence or wall, consider staggering planting times. Sowing some seeds in spring and others in late summer gives you staggered flowering seasons—extended bloom time with minimal extra effort.

Essential Care Throughout the Season

Hollyhocks are low-maintenance, but a little attention goes a long way toward keeping them healthy and blooming their best.

Watering Wisdom

  • Young plants:

Keep seedlings and newly planted hollyhocks consistently moist, ensuring the top 6 inches of soil stays damp but not soggy. This encourages strong root development during their critical establishment period.

  • Established plants:

Here’s the good news—once hollyhocks are established, they’re impressively drought-tolerant. They only need supplemental water during prolonged hot, dry spells.

  • The golden rule:

Always water at the base of the plant. Wet foliage invites fungal diseases, especially rust. Use soaker hoses or drip irrigation rather than overhead sprinklers. If you must hand-water, water early in the day so any splashed foliage can dry before evening.

Feeding for Better Blooms

Hollyhocks aren’t heavy feeders, but they do appreciate some nutritional support.

In early spring, as new growth emerges, spread a 2 to 4-inch layer of rich compost around the base of established plants. This mulch serves double duty—it feeds the soil as it breaks down and suppresses weeds.

For an extra boost, apply a balanced liquid fertilizer when plants begin their upward growth surge and again about three weeks later. This extended feeding period supports that impressive bloom production.

Avoid overfeeding though—too much nitrogen produces lush foliage at the expense of flowers.

In containers, plants need more regular feeding since nutrients wash out with watering.

Use a balanced, all-purpose fertilizer according to package directions during the growing season, but err on the side of less rather than more. Overfed hollyhocks can develop weak stems that flop over.

👉 Learn about Banana Peel Fertilizer: Truth vs. Myths About This Popular Garden Hack

Staking and Support

Unless you’ve chosen a particularly sheltered spot, plan to stake your hollyhocks. Once they reach 4 to 5 feet tall, even a moderate breeze can cause problems.

Place a sturdy bamboo cane or wooden stake next to each stem early in the season. Use soft garden twine or plant ties to attach the stem loosely to the support at several points as it grows.

The goal is guidance, not restriction—the stem should be able to move slightly in the breeze (this actually strengthens it), but shouldn’t be able to bend far enough to snap.

For plants against walls or fences, you can tie them directly to the structure. This looks more natural and provides excellent support.

Hollyhocks against walls for support

Deadheading and Pruning

During the blooming season, remove individual flowers as they fade. This keeps plants looking tidy and can encourage a modest flush of secondary blooms. Start at the bottom of the spike, where flowers open first, and work your way up as the season progresses.

Once a flower spike finishes blooming completely, you have a choice. If you want to prevent self-seeding (maybe you have limited space or want to control spread), cut the stalk back to the base immediately.

If you want those free seeds for next year, leave a few stalks standing until the seed pods turn brown and papery.

Deadheading Hollyhocks

Fall cleanup is critical: 

Once plants go dormant in fall or after the first hard frost, cut all stems and foliage back to about 6 inches above ground level.

This is crucial for disease management—the rust fungus overwinters in dead plant material. Dispose of all cut material in municipal trash or by deep burying, never in your compost pile.

Related posts:

Winter Protection

In zones 5 and warmer, hollyhocks usually overwinter without special help. In colder zones (3-4), provide some protection.

After cutting plants back in fall, cover the crown and root zone with 4 to 6 inches of straw, shredded leaves, or bark mulch. This insulation protects roots during temperature swings and prevents frost heaving.

In early spring, gradually remove the mulch in layers as temperatures warm, allowing the plant to acclimate slowly. Once new growth appears, remove all remaining mulch.

Container-grown hollyhocks are more vulnerable in winter since their roots are above ground. In cold climates, either move containers into an unheated garage or greenhouse, or group them in a sheltered spot against your house foundation.

Ensure pots don’t sit in water-filled saucers—waterlogged, frozen soil spells disaster.

Tackling Common Problems

Hollyhocks are generally tough, but a few issues can crop up. Here’s how to prevent and address them.

Hollyhock Rust: The Main Villain

This is the number one problem for hollyhock growers worldwide. Hollyhock rust is caused by the fungus Puccinia malvacearum (or Leptopuccinia malvacearum in some classifications), and it’s incredibly common. If you grow hollyhocks, you’ll almost certainly encounter it eventually.

  • What it looks like:

First, you’ll notice small orange or yellow spots appearing on lower leaves, usually on the upper surface. Flip the leaf over, and you’ll see the telltale raised, rust-colored or orange-brown pustules (these are fungal spores).

As the infection progresses, leaves develop holes, giving them a lacy appearance, and severely affected leaves yellow and drop prematurely.

Hollyhock Rust

  • Why it happens:

The fungus thrives in warm, humid conditions and spreads via spores carried by wind, rain splash, or irrigation water. It overwinters in infected plant debris, ready to attack next year’s plants.

Prevention strategies:

  • Provide excellent air circulation by proper spacing
  • Water only at soil level, never wetting foliage
  • Remove and destroy all plant debris in fall—this is crucial
  • Remove any weedy mallow plants nearby (they harbor the fungus)
  • Choose resistant varieties like Alcea rugosa or the ‘Halo’ series
  • Avoid planting hollyhocks in the same location year after year if possible

Treatment approach: Honestly, once rust appears, it’s tough to eliminate. Your best strategy is damage control:

  1. Early detection wins: Check plants regularly, especially lower leaves. At the first sign of rust, immediately remove affected leaves and dispose of them in household trash (never compost them).
  2. Continued vigilance: Keep removing infected leaves throughout the season. Yes, your plant might look ratty, but removing diseased tissue slows spread to healthy leaves.
  3. Fungicides as last resort: If rust becomes overwhelming, you can apply fungicides containing chlorothalonil, mancozeb, myclobutanil, tebuconazole, or triticonazole. Apply them early in the season, before symptoms appear, for best results. If applying multiple times, rotate between different active ingredients to prevent fungicide resistance. Always follow label instructions carefully.
  4. Accept some imperfection: Many experienced hollyhock growers simply accept that rust will appear and manage it by removing the worst leaves. The plants usually bloom beautifully despite having some rust damage on lower foliage—and those upper leaves often hide the affected bottom ones anyway.

Other Fungal Issues

Powdery mildew appears as white, powdery patches on leaves, usually later in the season. It’s less destructive than rust but still weakens plants.

Prevention is similar: good air circulation, adequate sunlight, and avoiding overhead watering. Severely affected leaves can be removed.

Pest Problems

  • Slugs and snails love tender young hollyhock leaves and can demolish seedlings overnight. Protect young plants with organic slug baits, copper tape around containers, or beer traps. Establish a defense perimeter early.
  • Japanese beetles can skeletonize leaves quickly. Hand-picking early morning when beetles are sluggish is effective for small infestations. For larger problems, consider row covers or organic insecticidal soap.
  • Spider mites sometimes appear in hot, dry weather, causing stippled, yellowed leaves. They hate water, so a strong spray from the hose can help. In severe cases, use insecticidal soap.
  • Aphids may cluster on new growth or flower buds. A strong water spray dislodges many, or use insecticidal soap for persistent problems.

When Hollyhocks Won’t Bloom

If your plants are producing plenty of leaves but no flowers, consider these factors:

  • Not enough sun: Hollyhocks need at least six hours of direct sun daily for good blooming. Less sun means fewer (or no) flowers.
  • First-year biennial: Biennial varieties simply won’t bloom their first year—they need that second season. Be patient.
  • Too much nitrogen: Over-fertilizing, especially with high-nitrogen products, pushes leaf growth at the expense of flowers. Let up on the feeding.

Yellow Leaves and Other Signs of Stress

  • Overwatering is a common cause of yellowing leaves. Hollyhocks prefer soil that dries out somewhat between waterings. Ensure your soil drains well and reduce watering frequency.
  • Insufficient drainage causes similar symptoms. If water pools around your plants, you need to improve drainage by amending the soil with compost and grit or relocating plants.
  • Natural aging: Lower leaves naturally yellow and drop as plants mature, especially late in the season. This is normal.

👉 Find out Why Are My Cucumber Leaves Turning Yellow? Top Causes & Solutions

Special Situations: Containers and Small Spaces

Don’t have a big garden? No problem. Hollyhocks can thrive in containers, bringing their cottage garden charm to balconies, patios, and small yards.

Container Growing Success

  • Choose large containers: Use pots at least 16 to 18 inches deep and 12 to 14 inches wide. Remember those long taproots need room. Ensure containers have excellent drainage holes.
  • Soil mix: Use a quality, well-draining potting mix. Adding some perlite or coarse sand improves drainage further.
  • Watering needs change: Container plants dry out faster than those in the ground. Check soil moisture daily during hot weather and water whenever the top inch feels dry. But never let containers sit in water-filled saucers.
  • Feeding is more critical: Nutrients wash out quickly with regular watering. Feed every two to three weeks during the growing season with a balanced liquid fertilizer diluted to half strength.
  • Support is essential: Even container hollyhocks grow tall and need staking. Place a sturdy support in the container at planting time to avoid damaging roots later.
  • Choose compact varieties: French hollyhocks (Alcea ficifolia) stay more compact and are ideal for containers. Some modern hybrids are also bred for smaller size while maintaining impressive blooms.
  • Winter care: In cold climates, move containers to protected locations—an unheated garage, greenhouse, or against a heated building wall. The above-ground exposure makes container roots more vulnerable to freezing.

Hollyhocks Container Growing

Balcony and Patio Considerations

Balconies often have unique microclimates—they can be windier or more sheltered, sunnier or shadier than ground-level gardens. Observe your space before committing to hollyhocks.

  • Wind protection is paramount: High balconies can be extremely windy. If yours is exposed, choose a corner or position containers against railings where buildings provide some wind break. Extra-sturdy staking becomes crucial.
  • Weight matters: Large containers with soil and tall plants get heavy. Ensure your balcony can handle the weight, especially when soil is saturated after watering.
  • Sunlight patterns: Track how sun moves across your balcony throughout the day. You need at least six hours of direct sun for good blooming.

👉 Here are 34 Best Air-Purifying Indoor Plants That Thrive Without Direct Sunlight

Beyond Beauty: Other Uses for Hollyhocks

Hollyhocks offer more than ornamental value. They’re completely edible, including flowers, leaves, and roots.

The blooms make stunning, showy garnishes on salads and desserts, or can even be used as small, edible containers for dips. The flowers have a mild, slightly sweet flavor.

Hollyhock salad

👉 Read The Complete Guide to Edible Flowers: 25+ Varieties to Grow & Cook

In traditional medicine, various parts of hollyhocks have been used for treating minor wounds, stomach issues, and inflammation, though there’s limited scientific evidence supporting these uses.

If you’re interested in medicinal applications, consult with a qualified healthcare professional before using hollyhocks therapeutically.

The ecological benefits deserve emphasis. As host plants for painted lady butterflies, hollyhocks support complete life cycles of important pollinators.

Watching caterpillars munch your leaves is actually a sign of a healthy ecosystem, and those caterpillars will transform into beautiful butterflies. Think of slightly chewed leaves as your contribution to biodiversity.

Design Ideas and Companion Planting

Hollyhocks are architectural plants that demand thoughtful placement. Their height and vertical growth pattern make them natural backdrop plants or specimen features.

Against structures: Plant hollyhocks along fences, walls, or the sides of buildings where their height enhances rather than overwhelms. They look particularly charming against weathered barn siding, stone walls, or white picket fences.

Creating depth: Use hollyhocks as the back row of tiered borders, with medium-height plants (3 to 4 feet) in the middle and low growers (under 2 feet) in front. This creates visual depth and ensures all plants get their moment in the spotlight.

Hiding unattractive features: Tall hollyhocks effectively screen utility boxes, compost bins, or other garden eyesores while adding beauty.

Cottage garden combinations: Plant hollyhocks with classic cottage garden companions like:

  • Roses (especially climbing varieties that can weave through hollyhock stalks)
  • Delphiniums (for contrasting flower shapes)
  • Dahlias (for mid-height interest)
  • Shasta daisies (for cheerful white flowers)
  • Phlox (for fragrant summer color)
  • Baby’s breath (for airy texture)
  • Black-eyed Susans (for bold color contrast)

Hiding their legs: Hollyhocks sometimes develop bare, unattractive stems at ground level as lower leaves yellow and drop. Plant bushier, lower-growing companions in front to hide these less-than-pretty stems while letting the blooms shine above.

Color harmonies: Deep purple hollyhocks look stunning with silver-leaved plants like lamb’s ears or artemisia. White hollyhocks brighten shady corners or create elegant monochromatic schemes with other white bloomers. Pink and peach varieties are naturals with soft cottage garden pastels.

Frequently Asked Questions

  • Do hollyhocks come back every year?

Technically, most hollyhocks are biennials, living for two years. However, because they self-seed so prolifically, once established, hollyhocks create a self-perpetuating population that seems perennial.

Some newer varieties are bred as short-lived perennials that return for several years.

  • Why aren’t my hollyhocks blooming in the first year?

If you’re growing traditional biennial varieties, this is completely normal—they focus on root and foliage growth the first year and bloom the second.

To get first-year blooms, choose varieties marketed as annuals or short-lived perennials, and start them early indoors (January to February) or plant them very early in spring.

  • Can I grow hollyhocks from seed I collected myself?

Absolutely! Collecting and sowing your own seed is one of the joys of growing hollyhocks. However, because they cross-pollinate freely, you likely won’t get exact replicas of the parent plant colors.

This unpredictability is part of their charm—you’ll discover delightful new color combinations.

  • Are hollyhocks deer resistant?

Deer typically leave hollyhocks alone, making them good choices for gardens with deer pressure. However, extremely hungry deer in areas with limited food sources might nibble them, especially tender new growth.

  • How do I get rid of rust once it’s established?

Honestly, complete elimination is nearly impossible once rust takes hold. Focus on management: remove infected leaves promptly, improve air circulation, ensure proper watering practices, clean up all debris in fall, and consider preventative fungicide applications the following spring before symptoms appear.

  • Can hollyhocks be transplanted?

It’s challenging because of their long taproots, which don’t appreciate disturbance. If you must transplant, do it when plants are very young (just a few true leaves) and extremely carefully, taking as much surrounding soil as possible.

Water transplants thoroughly and expect some setback. Honestly, it’s usually easier to start new plants from seed in the desired location.

  • How long do hollyhocks live?

Biennial varieties complete their life cycle in two years. Some behave as short-lived perennials, returning for three to five years.

In practice, thanks to self-seeding, a planting of hollyhocks can persist indefinitely as new seedlings replace old plants. Many gardeners have had hollyhock colonies that have lasted decades through this natural succession.

Your Hollyhock Journey Begins

Growing hollyhocks successfully comes down to a few key practices: choosing a sunny location with good drainage, spacing plants properly for air circulation, watering at the base rather than overhead, dealing with rust proactively through good hygiene, and being patient through that first non-blooming year for biennial varieties.

Once established, these magnificent plants reward you with minimal effort, year after year (thanks to enthusiastic self-seeding).

They transform ordinary garden spaces into cottage garden dreams, support pollinators, and create those unforgettable vertical accents that draw the eye upward and make people stop and stare.

Key Takeaways:

  • Start seeds directly in the ground for easiest success, or use deep pots if starting indoors
  • Choose sunny, well-drained locations with wind protection
  • Water at soil level only to prevent fungal diseases
  • Space plants 18 to 24 inches apart for good air circulation
  • Stake tall varieties before they need it
  • Clean up all plant debris in fall to break the rust disease cycle
  • Let some seed heads remain if you want free plants next year
  • Be patient with biennials—they’re worth the wait

Ready to transform your garden with these towering beauties? Start by choosing a few varieties that call to you—maybe a classic deep red, a soft peach, or that almost-black purple.

Prepare your planting area with good soil and plenty of sun. Sow your seeds or plant your starts. Then step back and watch them work their magic.

Those spectacular flower spikes shooting up next summer will be worth every bit of patience and care you invest.

Before you know it, you’ll be the one with the hollyhocks that make people slow down and take a second look. And when they ask your secret? Just smile and share a few seeds.

Your turn: What hollyhock colors are you dreaming of? Drop a comment below sharing your vision, and feel free to ask questions—this community loves helping fellow hollyhock enthusiasts succeed!


source https://harvestsavvy.com/growing-hollyhocks/

Black Apples Guide: Arkansas Black vs Black Diamond Apples

Picture this: You’re wandering through a farmers market on a crisp autumn morning when your eyes land on something extraordinary—an apple so...