Wednesday, December 31, 2025

How to Grow Vegetables in Winter: Complete Guide + Expert Tips

I’ll never forget the first time I harvested crisp lettuce from my garden in January. There I was, bundled in my winter coat, brushing snow off the cold frame lid to reveal perfectly green, tender leaves underneath.

My neighbor stopped mid-shovel to stare. “Wait—you’re still gardening?”

That moment changed everything. I realized winter doesn’t have to mean the end of fresh, homegrown food.

With the right approach, your garden can keep producing through the coldest months, delivering vegetables that actually taste better than their summer counterparts.

Why Winter Gardening Is Worth Your Time

Here’s what surprised me most: winter gardening requires less daily work than summer gardening.

Your plants grow slowly and steadily, watering is infrequent, and you’re not constantly battling weeds.

Once your crops are established and protected, they practically care for themselves. The secret isn’t fighting winter—it’s working with it.

Beyond the practical benefits, there’s something deeply satisfying about harvesting fresh food when your neighbors’ gardens are dormant.

You’ll save money on groceries, reduce food miles, and experience flavors that store-bought winter vegetables simply can’t match.

That first bite of frost-sweetened kale or candy-crisp carrot makes every bit of planning worthwhile.

How Plants Survive Winter: Understanding the Science

Cold-tolerant plants are remarkable survivors. When temperatures drop, they perform botanical magic: moving water out of their cells to prevent ice crystals from bursting them (this is what kills warm-season crops like tomatoes).

They also produce natural antifreeze—sugars and special proteins that lower the freezing point of their remaining cellular water. These sugars don’t just protect the plant; they’re what make winter vegetables taste sweeter after a frost.

But here’s what most gardeners don’t realize: in most regions, extreme cold isn’t what kills hardy vegetables—it’s desiccation. Winter winds dry out plant tissues faster than frozen roots can replace the moisture, similar to freezer burn on food.

This is why protection from wind and maintaining soil moisture matters more than just keeping plants warm.

The Critical Timing Secret

This is where most winter gardeners stumble. Success depends on understanding one concept: the Persephone Period.

the Persephone Period

When daylight drops below 10 hours per day (roughly November through February in temperate zones), plant growth essentially stops.

Your vegetables enter dormancy, sitting in the garden like living storage. They won’t grow, but they won’t die either—if they’re mature enough and properly protected.

The key? Your crops must be mature or nearly mature before this period begins.

To calculate your planting dates, work backwards from your area’s first frost or when daylight drops below 10 hours. Check your seed packet for days to maturity, then add 7-10 extra days to account for slowing autumn growth.

For example, if winter lettuce takes 50 days to mature and your Persephone Period starts November 1st, plant in early September.

For longer-season crops like Brussels sprouts (90+ days) or storage cabbage (100+ days), you’ll be planting in midsummer.

I know—planning for winter while harvesting tomatoes feels strange, but this is what separates success from disappointment.

Choosing the Right Crops and Varieties

Not all vegetables tolerate cold equally, and variety selection matters tremendously. A summer lettuce variety planted for winter will bolt or freeze, while ‘Winter Density’ lettuce thrives in the same conditions.

The Ultra-Hardy Champions survive repeated freezing and thawing, handling temperatures into the teens Fahrenheit with minimal protection:

  • Kale (‘Winterbor’, ‘Lacinato’, ‘Red Russian’)
  • Spinach (‘Giant Winter’, ‘Space’)
  • Mache (corn salad)
  • Leeks
  • Garlic (planted in fall for summer harvest)
  • Parsnips (actually improve after freezing)
  • Brussels sprouts

Cold-Tolerant Performers handle light to moderate frosts (mid-20s°F) with row cover or mulch protection:

  • Carrots (‘Napoli’, ‘Bolero’ for best winter performance)
  • Beets (‘Bull’s Blood’ for both roots and greens)
  • Turnips and rutabagas
  • Swiss chard
  • Asian greens (mizuna, tatsoi, bok choy)
  • Arugula
  • Winter lettuce varieties (‘Winter Density’, ‘North Pole’, ‘Salanova’)

winter vegetables

👉 Here’s How to Grow Winter Radishes: Varieties, Planting Tips & Storage Guide

What NOT to Grow:

Resist the temptation to try warm-season crops—tomatoes, peppers, cucumbers, squash, and beans need consistent warmth and won’t survive even with protection unless you have a heated greenhouse.

Even cold-hardy crops have their limits; standard cabbage varieties may bolt prematurely if planted at the wrong time.

When shopping for seeds, read descriptions carefully. Words like “winter,” “hardy,” “cold-tolerant,” and “bolt-resistant” are your clues. Seed companies often group winter varieties together, making selection easier.

Protection Strategies: Building Your Winter Garden Fortress

You don’t need an expensive heated greenhouse. Most effective protection methods cost less than a nice dinner out, and you can start simple and expand as you gain confidence.

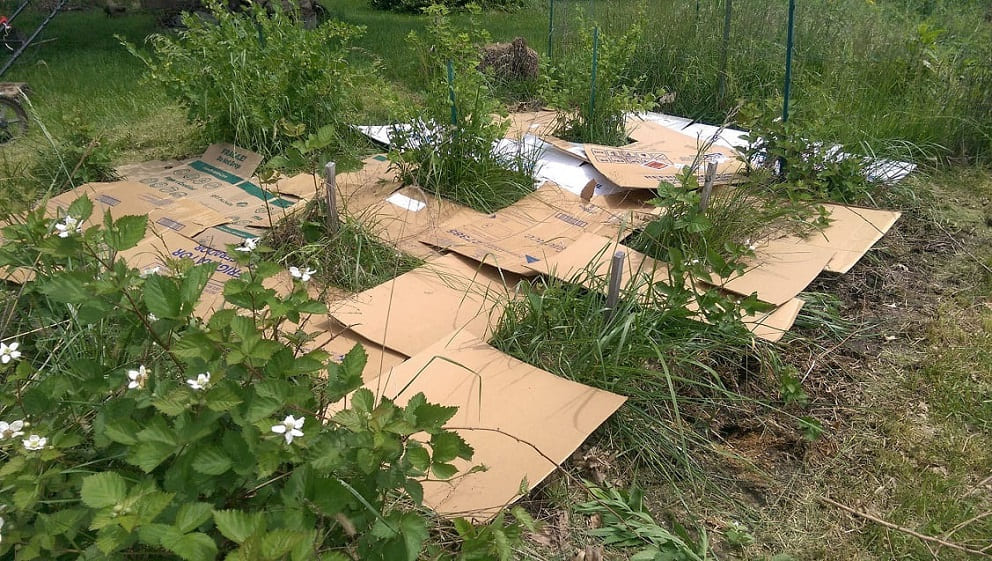
Mulching: Your First Line of Defense

Think of mulch as a blanket for your soil. It insulates roots, moderates temperature swings, retains moisture, and keeps the ground workable longer.

Last winter, I mulched half my carrot bed with 6 inches of straw and left the other half bare. When temperatures hit 15°F, the unmulched carrots developed freeze damage. The mulched ones? Perfect.

using hay for garden mulch

Apply mulch after planting but before the ground freezes hard—typically late October through November in most zones.

For root crops like carrots, beets, and turnips, a 4-6 inch layer of straw, shredded leaves, or even pine needles keeps soil accessible for harvesting. For leafy greens, 2-3 inches is sufficient.

Row Covers: Lightweight Protection with Big Impact

These frost blankets float over crops on simple wire or PVC hoops, trapping heat while allowing light, air, and water through.

A medium-weight row cover (Agribon AG-30) provides about 4-6°F of protection. Double-layer it on especially cold nights for up to 10°F of protection.

I make hoops from 9-gauge wire bent into arches every 4 feet down the bed. The covers drape over these hoops and get anchored with rocks, boards, or garden stakes. Total cost for a 4×8 bed? About $30, and the materials last for years.

row covers

Credit: University of Maryland ExtensionCritical note: You must vent or remove covers when daytime temperatures rise above 40°F. Even in winter, a covered bed on a sunny day can hit 70°F inside, causing plants to lose their cold hardiness and triggering premature bolting.

row cover

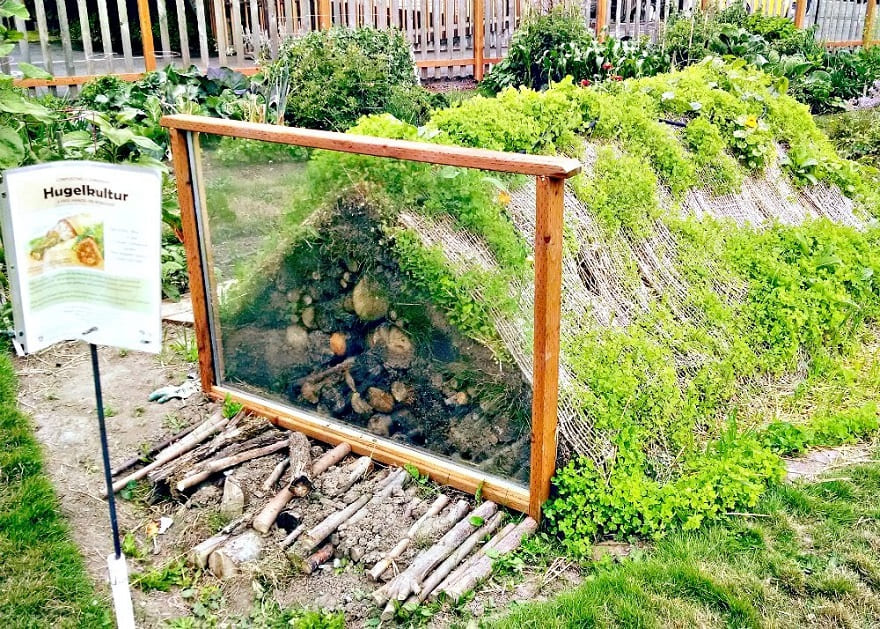
Cold Frames: The Weekend Project

A cold frame is essentially a bottomless box with a transparent lid. The simplest version uses straw bales stacked in a rectangle with an old window laid on top.

I built my first permanent frame from scrap lumber and a recycled glass door for under $40, and it’s still producing five years later.

Wooden Cold Frames
Credit: eartheasy

The magic happens on sunny days when the cold frame captures solar heat. On a January afternoon when it’s 25°F outside, my cold frame can reach 60°F inside—warm enough for active growth.

But this is also the challenge: you’ll need to prop the lid open on sunny days to prevent overheating, and close it again before sunset.

For maximum effectiveness, position cold frames on the south side of a building or fence to maximize sun exposure and provide wind protection.

Low Tunnels: Maximum Protection for Serious Growers

For dedicated winter production, low tunnels are hard to beat. These mini-greenhouses use metal hoops or bent PVC pipe covered with 6-mil UV-resistant greenhouse plastic installed over garden beds.

Plastic provides more insulation than fabric (up to 10-15°F protection) and creates a stable microclimate, but requires more management. You’ll need to:

  • Vent on sunny days above 40°F to prevent excessive heat buildup
  • Monitor for condensation (excessive moisture promotes disease)
  • Remove snow accumulation before weight damages the structure
  • Water when needed, as the plastic blocks rain

Think of low tunnels as “freeze-wrapping” your garden—you’re creating a protective microclimate that locks in humidity and blocks drying winds.

Low Tunnels
Credit: hobbyfarms

Soil Preparation: The Foundation of Winter Success

Winter vegetables need excellent soil, but preparation differs from summer gardening. The focus shifts to drainage and steady (not excessive) fertility.

Before planting, work in 2-3 inches of finished compost or well-aged manure. Winter crops are moderate feeders—they need nutrients for strong roots and healthy leaves, but excess nitrogen causes soft growth vulnerable to freeze damage.

I add compost plus a light application of balanced organic fertilizer (like 4-4-4) at planting time.

Drainage is critical. Waterlogged soil in winter leads to root rot and frost heaving. If water puddles after rain, work in additional compost or plant in raised beds. Many winter garden failures trace back to drainage problems, not cold.

For brassicas (cabbage family plants), test your soil pH. They prefer slightly alkaline conditions (pH 6.5-7.0) and may struggle in acidic soil. A simple $10 soil test can save you from months of disappointing results.

Water beds deeply a few days before planting, then let them settle. Pre-moistened soil gives seeds and transplants the best start. In fall, when temperatures are mild and rain is sporadic, maintaining consistent moisture is crucial for establishment.

Planting Your Winter Garden: Seeds vs. Transplants

  • Direct sowing works best for:

Root vegetables (carrots, beets, radishes, turnips) that resent transplanting, plus quick-growing greens like arugula and spinach that can be sown multiple times for succession harvests.

  • Start indoors as transplants:

Slower-growing crops like kale, cabbage, lettuce, and Asian greens benefit enormously from a head start. I sow these under lights in late summer, giving them 4-6 weeks to develop strong root systems before transplanting.

👉 Here’s How to Cold Stratify Seeds: 4 Proven Methods That Actually Work

The Hardening Off Process You Cannot Skip

Seedlings started indoors or even in a protected area must be gradually acclimated to outdoor conditions—even cold-hardy crops. This process, called hardening off, typically takes 7-10 days.

Start by placing transplants outside in a protected spot for one hour on Day 1, bringing them back inside.

Increase outdoor time by 1-2 hours daily, gradually exposing them to direct sun and wind. By Day 7-10, they can stay out overnight and are ready for transplanting.

Skip this step and even “hardy” seedlings will suffer transplant shock, setting them back weeks or killing them outright. I learned this lesson the hard way with a flat of beautiful lettuce that turned to mush overnight.

Succession Planting for Continuous Harvests

Don’t sow all your lettuce at once. Plant a new batch every two weeks through late summer and early fall, stopping about 6 weeks before your Persephone Period begins.

This staggers your harvest so you’re eating fresh greens continuously rather than facing feast-or-famine.

Succession Planting

I grow 24 lettuce heads at a time in three different varieties—enough for twice-weekly salads with some to share. When one planting matures, the next is already growing to fill the gap.

Container Growing for Winter: Small Space Solutions

Limited space or poor soil? Containers offer surprising winter potential, especially if you can move them to protected areas or bring them indoors during extreme cold.

Container requirements differ from summer:

  • Insulation matters. Roots in containers freeze faster than in-ground plants. Wrap pots in bubble wrap or burlap, group containers together for mutual insulation, or move them against a south-facing wall.
  • Drainage is crucial. Use containers with drainage holes and quality potting mix that won’t compact. Soggy soil + freezing temperatures = dead plants.
  • Size appropriately. Leafy greens need 6-9 inches of depth, but kale and chard prefer 12-18 inches. Root vegetables like carrots need at least 12 inches.

Best container candidates include lettuce, arugula, spinach, Asian greens, radishes, and green onions. I keep a rotation of salad greens in 12-inch pots on my covered porch, moving them to the garage on the coldest nights.

Growing Fennel in Container

Winter Garden Maintenance: The Surprising Truth

Once established, winter gardens need minimal intervention. This is gardening at its most meditative—checking on plants occasionally, harvesting as needed, with long stretches of simply letting nature do its work.

Watering Wisely in Winter

This is where many gardeners struggle. Your winter garden still needs water, but much less frequently and only when soil is dry several inches down.

Check moisture weekly, especially under covers that block rain and snow. Water in the morning on days when temperatures will rise above freezing, and always water the soil, not the leaves. Wet foliage in freezing temperatures invites disease.

  • My approach:

I keep 5-gallon buckets in my garage, fill them the day before I need to water, and hand-water my beds. The water warms slightly overnight, reducing shock to plant roots.

  • Critical point:

Water well before an expected hard freeze. Moist soil holds heat better than dry soil and protects roots. Counter-intuitive, but effective.

👉 Here’s How to Build a Wicking Bed: DIY Self‑Watering Raised Garden Guide

Feeding: Less is More

Winter vegetables don’t need constant fertilizing. The slow-release fertilizer applied at planting typically carries them through.

For greenhouse-grown crops or long-term container plants, a monthly dose of diluted liquid fertilizer (like fish emulsion at half-strength) maintains steady growth without promoting tender new leaves vulnerable to cold.

Monitoring for Pests and Problems

While pest pressure drops dramatically in winter, certain problems persist:

  • Slugs and snails remain active in mild winter areas, especially under covers where condensation keeps things moist. Check regularly and handpick, or use organic iron phosphate baits.
  • Aphids can explode under row covers and in cold frames where air circulation is limited. The solution is better ventilation on mild days and insecticidal soap if infestations develop.
  • Rodents (voles, mice, rabbits) may discover your winter greens are the only fresh food around. Hardware cloth barriers or chicken wire cages protect valuable crops.
  • Disease primarily means fungal issues from excessive moisture. Good ventilation and avoiding wet foliage solve most problems before they start.

Venting: The Management Task You Can’t Ignore

This deserves special emphasis because it’s the most common mistake I see winter gardeners make. Any covered structure—cold frame, low tunnel, or greenhouse—needs venting when temperatures rise.

  • Here’s why:

On a 45°F day, a closed cold frame can hit 80°F inside within hours. This causes plants to lose their cold-hardening and triggers growth when you want dormancy.

Worse, warm humid air condensing on cold plastic or glass overnight creates perfect conditions for fungal disease.

  • The solution is simple:

crack or remove covers when daytime highs will exceed 40°F, then close them again before sunset. I prop cold frame lids open with a stick and roll up the sides of my low tunnels a few inches.

In snowy regions, you’ll also need to brush snow off structures before the weight causes damage. A soft broom from the outside works well for plastic-covered tunnels.

Harvesting: Timing and Techniques

Harvest in the warmest part of the day when leaves are most pliable and sugars are highest.

For greens, I use the “cut-and-come-again” method—taking outer leaves while leaving the growing center intact. A single kale plant harvested this way can produce for 4-6 months.

Root vegetables can stay in the ground until needed, assuming your soil doesn’t freeze solid or you’ve mulched heavily.

In fact, many taste better with extended storage. I’ve harvested carrots in February that were sweeter than any I’ve ever bought.

Special harvesting notes:

  • Harvest carrots, parsnips, and kale after a hard frost for maximum sweetness
  • Pick lettuce and spinach before leaves get too large and tough
  • Brussels sprouts actually improve after freezing—no need to rush them
  • Cut greens in the morning if you’re storing them; they’ll keep longer

👉 Learn When & How to Harvest Vegetables for Peak Flavor: Timing & Tips for Every Crop

Beyond Fresh Eating: Winter Harvest Storage

Even with season extension, you may harvest more than you can eat fresh. Root vegetables store excellently with minimal processing.

  • Refrigerator storage: Remove greens from roots (they draw moisture), store roots in perforated plastic bags in the crisper. Most keep 2-3 months this way.
  • Cold storage: If you have an unheated garage, basement, or shed that stays 32-40°F, pack roots in boxes of barely damp sand. They’ll keep until spring.
  • Freezing greens: Blanch kale, chard, and spinach for 2 minutes, shock in ice water, squeeze dry, and freeze in portions. Perfect for winter soups and smoothies.
  • Leaving in the ground: This is my preferred method for carrots and parsnips. Heavy mulch keeps soil workable, and I harvest as needed. The garden becomes my outdoor refrigerator.

Regional Adaptations: Making Winter Gardening Work Where You Live

Mild Winter Zones (8-10)

You can grow almost anything through winter, including crops that flower like broccoli and cauliflower.

Your challenges are managing occasional heat spells and preventing bolt during warm periods.

Focus on succession planting and choosing bolt-resistant varieties. Simple row covers may be all you need for frost protection.

Moderate Winter Zones (6-7)

This is the sweet spot for winter gardening. With basic protection—mulch, row covers, or simple cold frames—you can harvest leafy greens, root crops, and hardy brassicas all winter.

Your strategy should focus on having crops mature by November, then managing ventilation and harvest through winter.

Cold Winter Zones (4-5)

Winter harvesting is challenging but achievable if you focus on the ultra-hardy crops and use substantial protection. Insulated cold frames, thick mulch, and multiple cover layers become necessary.

Your harvest window is shorter, but the satisfaction of eating homegrown spinach in February makes it worthwhile. Consider investing in a small unheated greenhouse for best results.

Very Cold Zones (3 and below)

You’ll need heated greenhouses for winter production, but you can still use fall extension techniques to push harvests well into November and start crops in February. Focus on storage crops and heavy mulching for spring revival.

Troubleshooting Common Problems

  • Yellowing leaves: Usually nitrogen deficiency or waterlogged soil. Check drainage and consider a light feeding.
  • Slow or no growth: Normal once you enter the Persephone Period. Your vegetables are dormant, not dying.
  • Bolting (premature flowering): Caused by temperature fluctuations. Vent more aggressively on warm days to keep plants consistently cool.
  • Frost damage despite protection: Layer up. Add second row cover, increase mulch depth, or add temporary covers on the coldest nights. Remember that desiccation from wind often looks like frost damage—better wind protection may be the answer.
  • Mushy, rotting plants: Too much moisture. Improve ventilation and reduce watering frequency.
  • Stunted plants that won’t grow: Planted too late, they’ll remain tiny until spring when they’ll likely bolt. Lesson learned for next year’s timing.

The Real Cost and Return

Let’s talk honestly about investment and payoff. A basic winter garden setup—row cover, hoops, and seeds—runs $50-100 for a 4×8 bed. A permanent cold frame costs $100-300 depending on materials.

Compare this to buying organic mixed greens at $6/container twice weekly December through March: $240+.

My winter garden produces roughly $500 worth of vegetables from a $200 investment (including seeds).

But the real value isn’t just monetary—it’s eating food at peak nutrition, reducing food miles, and having a winter hobby that gets me outside and active. You can’t put a price on satisfaction.

Start small if budget is tight. One mulched bed of spinach and one cold frame with lettuce costs about $60 and delivers enough greens for one person all winter.

Your Winter Garden Journey Starts Now

Winter vegetable growing isn’t about replicating summer abundance. It’s about working with the season’s rhythm, protecting hardy plants, and experiencing the satisfaction of harvesting fresh food when most gardens lie dormant.

That first winter harvest—whether it’s a handful of carrots or a bowl of crisp lettuce—changes how you see your garden. Y

ou’ll realize the growing season isn’t something that ends in October and resumes in May. It’s a year-round opportunity to connect with the earth and feed yourself.

Start simple: choose 2-3 crops from the ultra-hardy list, set up one protection method, and plant this coming late summer. Keep detailed notes about what works in your specific microclimate. Build on success gradually rather than attempting everything at once.

The vegetables are waiting. Your neighbor’s shocked face when you harvest lettuce in January? That’s waiting too. And once you taste that first frost-sweetened kale, you’ll understand why winter gardening isn’t just possible—it’s essential.

Ready to plan your winter garden? Drop a comment with your zone and which crop you’ll try first—I’d love to hear about your journey.


source https://harvestsavvy.com/growing-vegetables-in-winter/

Sunday, December 28, 2025

What Is Permaculture? Principles, Design, and How to Get Started Anywhere

Close your eyes for a moment and imagine walking through a garden where nature does most of the work.

  • The air hums with bees moving between flowers.
  • Tomatoes climb trellises next to nitrogen-fixing beans.
  • Fruit trees shade medicinal herbs below, while chickens scratch contentedly through the mulch, turning last season’s leaves into next year’s fertility.
  • Water flows from your roof into planted swales that guide it slowly through the landscape.

Nothing goes to waste. Everything connects. This isn’t fantasy. This is permaculture.

What Exactly Is Permaculture?

Permaculture is a design system for creating food-producing ecosystems that work with nature instead of against it.

Coined by Australians Bill Mollison and David Holmgren in the 1970s, the word blends “permanent agriculture” and “permanent culture”—signaling this goes beyond gardening techniques.

It emerged as a response to industrial agriculture’s devastating impacts: poisoned waterways, eroded topsoil, collapsed biodiversity, and communities dependent on inputs they couldn’t control.

What separates permaculture from organic gardening or sustainable agriculture is its systematic design approach guided by ethics and principles.

permaculture vs organic gardening

Whether you’re working with a balcony or a hundred-acre farm, permaculture provides a framework for creating self-maintaining landscapes that regenerate while feeding people.

The Ethical Foundation

The Ethical Foundation of permaculture

Three ethics guide every permaculture decision:

1. Earth Care asks: Does this build soil, support biodiversity, and strengthen ecosystems?

Harvesting rainwater, planting trees that sequester carbon, building soil rather than depleting it—all express this ethic.

2. People Care recognizes that hungry, struggling people can’t care for the earth.

It means designing systems that meet human needs: food security, meaningful work, beauty, health. This includes fair treatment, knowledge sharing, and community resilience.

3. Fair Share tackles consumption directly. Take what you need. Share surplus. Reinvest excess.

When your fruit trees overproduce, that abundance becomes preserved food, gifts to neighbors, compost for fertility, or feed for wildlife.

The 12 Design Principles: Your Permaculture Toolkit

David Holmgren articulated twelve principles that translate those ethics into action. Think of these as thinking tools rather than rigid rules:

  1. Observe and Interact

Before you dig, watch. Where does water flow during rainstorms? Which areas stay cool in summer? Where do pollinators congregate?

Spend a full year observing your site through all seasons before making major changes.

  1. Catch and Store Energy

Nature provides pulses of abundance—summer sun, winter rains, autumn harvests. Design systems that capture these gifts when they’re plentiful and store them for lean times.

Rainwater tanks, solar panels, root cellars, and preserved foods all embody this principle.

  1. Obtain a Yield

You can’t work on an empty stomach. Every system should provide returns on your investment of time and energy.

This might be food, income, beauty, or community connection—but it must sustain you enough to continue the work.

  1. Apply Self-Regulation and Accept Feedback

Nature self-regulates through feedback loops. If your compost smells awful, it’s too wet or nitrogen-heavy.

If pests overwhelm your crops, diversity is lacking. Listen to what the system tells you and adjust.

  1. Use and Value Renewable Resources

Choose perennial plants over annuals where possible. Use solar energy instead of fossil fuels.

Build with local, renewable materials. Let chickens provide pest control instead of chemicals.

  1. Produce No Waste

In nature, waste doesn’t exist—one organism’s output becomes another’s input.

Your kitchen scraps feed worms, which create castings that feed plants, which feed you. Design closed loops.

  1. Design from Patterns to Details

Nature repeats patterns: spirals, branches, waves. Observe these patterns first, then fill in the details.

A swale follows the contour of land (pattern) before you decide which trees to plant along it (detail).

  1. Integrate Rather Than Segregate

Instead of isolated components, create beneficial relationships. Plant pest-repelling herbs near vegetables.

Position the chicken coop where birds can access and fertilize garden beds. Let each element support multiple others.

  1. Use Small and Slow Solutions

Start with one raised bed instead of plowing an acre. Small systems are easier to manage, require fewer resources, and teach you more.

As permaculturist Bill Mollison quipped: the goal is “maximum hammock time.”

  1. Use and Value Diversity

Monocultures fail spectacularly. Diverse systems resist pests, adapt to change, and produce year-round harvests.

Mix annuals and perennials, vegetables and herbs, domestic and native species.

  1. Use Edges and Value the Marginal

The most productive zones occur where two systems meet—forest edge, pond shore, garden border.

Increase edge by creating curves, spirals, and keyhole beds rather than straight lines.

  1. Creatively Use and Respond to Change

Change is inevitable. Rather than resist it, observe carefully and intervene at the right moment to turn challenges into opportunities.

How Permaculture Design Actually Works

Understanding principles is one thing. Applying them is another. Here’s the systematic process permaculturists use:

Step 1: Site Analysis—Reading Your Land

Before planting anything, you need to understand what you have. This involves two key analyses:

Zone Planning organizes your space by how frequently you’ll visit each area:

  • Zone 0: Your house and immediate surroundings
  • Zone 1: Daily visits—kitchen garden with herbs, salad greens, compost
  • Zone 2: Weekly visits—larger vegetables, small fruits, chicken coop
  • Zone 3: Monthly visits—main crops, orchards, larger livestock
  • Zone 4: Occasional visits—foraging areas, timber production
  • Zone 5: Wild areas left for observation and wildlife

A balcony gardener might have all five zones in containers and vertical space. A farm spreads them across acres. The principle remains: intensive management close, extensive management distant.

Permaculture Zone Planning

Sector Analysis maps energy flows through your property:

  • Sun paths: Where does morning sun hit versus afternoon? Where are year-round sunny spots versus seasonal shade?
  • Wind: What direction do prevailing winds come from? Where are wind tunnels versus protected pockets?
  • Water: How does water flow across your land during rain? Where does it pool or rush?
  • Fire risk: Which direction would wildfire approach from? (Critical in fire-prone regions)
  • Views and noise: What do you want to block or highlight?
  • Wildlife paths: Where do animals naturally move through?

You map these sectors as wedges radiating from your house. This reveals where to place windbreaks, solar panels, water harvesting features, and fire-resistant plants.

Step 2: Functional Design—Making Elements Work Together

Now you start placing elements based on your analysis. The magic happens in the relationships you create.

Stacking Functions means each element serves multiple purposes. A deciduous tree on your home’s south side provides:

  • Summer shade (cooling)
  • Winter sun (warming when leaves drop)
  • Fruit harvest (food)
  • Mulch from fallen leaves (soil building)
  • Wildlife habitat (ecosystem support)
  • Beauty (quality of life)

Functional Design of Permaculture

Creating Guilds groups species that benefit one another. Here’s a detailed example around a peach tree:

The Peach Guild:

  • Peach tree (center) – provides fruit and shade
  • Comfrey (circle around tree) – deep roots mine minerals, leaves provide mulch, flowers feed bees
  • White clover (ground cover) – fixes nitrogen, feeds soil, crowds out weeds, stays green when mowed
  • Garlic & chives (pest barrier) – strong scent confuses pests like borers and aphids
  • Calendula & borage (pollinator magnets) – attract beneficial insects, self-seed annually
  • Yarrow (dynamic accumulator) – accumulates potassium, attracts predatory wasps that eat pests
  • Strawberries (edge planting) – provide ground cover, extra harvest, spread naturally

Each plant performs multiple jobs. The system becomes resilient because if one element fails, others compensate.

Step 3: Layering in Space and Time

Rather than flat rows, permaculture creates three-dimensional productivity by mimicking forest structure:

permaculture layering

The Seven Layers:

  1. Canopy – Tall nut and fruit trees (walnut, oak, pecan)
  2. UnderstorySmaller fruit trees (apple, pear, persimmon)
  3. Shrub – Berry bushes (blueberry, currant, elderberry)
  4. Herbaceous – Perennial vegetables and herbs (asparagus, rhubarb, lovage)
  5. Ground Cover – Low-growing edibles (strawberry, sweet potato, nasturtium)
  6. Root – Underground crops (garlic, potato, ginger, sunchoke)
  7. Vertical – Climbing vines (grapes, kiwi, beans, passion fruit)

But you also layer in time through succession planning. Your first-year garden might have:

  • Spring: Early greens and peas (cool season)
  • Summer: Tomatoes and squash taking over as spring crops fade (warm season)
  • Fall: Brassicas planted in late summer now thriving (cool season returns)
  • Winter: Garlic and cover crops building soil (regeneration)

Meanwhile, your perennial systems mature over years:

  • Years 1-2: Fast-growing nitrogen fixers (beans, clover) establish and improve soil
  • Years 3-5: Fruit shrubs begin producing while trees mature
  • Years 5-10: Tree crops hit stride as nitrogen fixers get removed or coppiced
  • Years 10+: Mature food forest requires minimal intervention

Essential Permaculture Practices

Theory becomes real when you put hands in soil. Here are the foundational techniques:

Water: The Keystone Resource

Water management often determines success or failure. Permaculture’s approach: slow it, spread it, sink it.

1. Rainwater Harvesting captures water before it leaves your property. A 1,000-square-foot roof collecting 30 inches of annual rainfall yields over 18,000 gallons. That’s significant in any climate.

Connect gutters to tanks, use first-flush diverters to skip dirty initial runoff, and gravity-feed water to gardens below.

Rainwater harvesting

👉 Here’s How to Use Goldfish for Mosquito Control in Rain Barrels

2. Swales are shallow trenches dug on contour (following the land’s elevation) that catch runoff and allow it to infiltrate slowly rather than eroding downhill.

Plant the swale’s downhill berm with trees whose roots access that stored water. In dry climates, swales can be the difference between thriving orchards and dead sticks.

How a Swale works

3. Greywater Systems reuse water from sinks, showers, and laundry for irrigation. Simple systems divert shower water directly to mulch basins around fruit trees.

More complex systems include filters and distribution networks. Check local codes—legality varies.

Greywater system
Greywater system

4. Ponds serve multiple functions: water storage, wildlife habitat, aquaculture, microclimate moderation (cooling in summer), fire protection, and beauty.

Position them high in your landscape if possible, allowing gravity-fed distribution to areas below.

permaculture pond

Soil Building Without Destruction

Healthy soil is everything. Permaculture builds it through addition and protection, not tillage.

Sheet Mulching transforms lawn or weedy ground into planted beds without digging:

  1. Mow existing vegetation short
  2. Add nitrogen source (manure, compost, or blood meal)
  3. Layer cardboard or newspaper (overlap edges)
  4. Add 4-6 inches of mixed compost
  5. Top with 2-4 inches of wood chips or straw
  6. Plant immediately through the layers or wait 2-3 months

Cardboard-for-Weed-Control

The cardboard smothers grass while decomposing into soil. Worms and microbes do the work you’d otherwise do with a spade.

Hügelkultur buries logs and branches under soil to create raised beds that hold water and slowly release nutrients as wood decomposes:

  1. Dig a shallow trench or build on flat ground
  2. Place logs and woody debris (avoid allelopathic species like black walnut)
  3. Add smaller sticks, leaves, and compost
  4. Mound soil over the wood (12-24 inches deep)
  5. Plant into the mound immediately
Hügelkultur
Hügelkultur

These beds can last 5-7 years without watering in many climates because decomposing wood acts like a sponge. They’re ideal for water-challenged sites.

Chop-and-Drop Mulching uses certain plants (comfrey, borage, nitrogen-fixing trees) as living fertilizer factories.

Cut them back periodically and drop the nutrient-rich leaves directly around other plants. They break down quickly, feeding soil life and suppressing weeds.

Integrating Animals Strategically

Animals aren’t decoration in permaculture—they’re workers. But integration requires thoughtful management.

1. Chicken Tractors are mobile coops moved daily or weekly across garden beds. The birds:

  • Clear crop residues after harvest
  • Eat pests, larvae, and weed seeds
  • Scratch and aerate the surface
  • Deposit high-nitrogen manure
  • Turn the bed into planting-ready condition in 1-2 weeks
The Mobile Chicken Tractor
Credit: WholeMade Homestead

You control their impact through timing. Too long in one spot and they’ll compact soil and denude everything. Moved correctly, they prepare beds better than you could with tools.

2. Rotational Grazing applies similar logic to larger animals. Rather than continuous grazing that degrades pasture, move cattle, sheep, or goats frequently (daily to weekly).

This mimics wild herbivore patterns: intense grazing followed by long rest periods. Results include:

  • Deeper-rooted, more diverse pasture
  • Better water infiltration
  • Increased soil carbon
  • Reduced parasite loads
  • Higher animal health and weight gain

The key is observation. Move animals when they’ve eaten the top third of grass, not more. Give pastures 30-90 days rest before returning.

3. Aquaponics creates closed-loop fish and plant production. Fish waste becomes plant fertilizer. Plants clean water for fish.

Small backyard systems can produce year-round greens and modest fish harvests with minimal water use (just replacing what evaporates).

Your First Year: A Realistic Implementation Plan

Most permaculture advice skips the messy reality of getting started. Here’s a practical timeline:

Season 1 (Months 1-3): Observe and Document

This feels passive but it’s crucial:

  • Photograph your site weekly from the same spots
  • Track sun and shade patterns through the day
  • Note where water flows during rain
  • Record what’s already growing (some “weeds” are useful)
  • Test soil with a basic kit or lab analysis
  • Identify existing microclimates (cold pockets, hot spots, wind tunnels)
  • Talk to neighbors about local challenges (pests, weather patterns)

Create rough maps showing these observations. Graph paper and colored pencils work fine. Fancy software isn’t necessary.

Season 2 (Months 4-6): Design on Paper

With observation data, start designing:

  • Draw your property to scale
  • Mark zones based on access from your house
  • Add sector analysis (sun, wind, water, views)
  • Sketch potential swales, ponds, or water features
  • Plan initial guilds around 1-3 starter trees or beds
  • List plants suited to your climate and goals
  • Estimate realistic time and budget

Make mistakes on paper. They’re free here, expensive in the ground.

Season 3 (Months 7-9): Start Small in Zone 1

Begin with what you’ll tend daily:

  • Install one 4’×8′ raised bed near your door
  • Plant a simple salad guild: lettuce, radishes, herbs
  • Start a three-bin compost system (or single tumbler)
  • Put one rain barrel on your largest downspout
  • Plant one fruit tree with a basic guild around it

Resist doing more. This phase teaches you what works with your schedule and energy levels.

Season 4 (Months 10-12): Expand and Refine

Based on what you learned:

  • Add 1-2 more Zone 1 beds or expand existing ones
  • Try sheet mulching to convert a lawn section
  • Plant perennials: berries, asparagus, rhubarb, herbs
  • Install additional water harvesting if the first barrel fills
  • Adjust your guilds based on what thrived or struggled
  • Start saving seeds from successful plants

By year’s end, you’ll have functioning systems and real experience to guide Year 2 expansion.

Common Challenges and Realistic Solutions

Permaculture books often skip the failures. Let’s address them:

“My Guilds Aren’t Working”

  • The problem: You planted the recommended guild but some plants died, others took over, and it looks nothing like the photos.
  • Why this happens: Guilds are location-specific. A Mediterranean climate guild won’t work in Minnesota. Plus, textbook guilds often skip mentioning aggressive plants that dominate.

The fix:

Start with 2-3 compatible plants maximum. Once you see how they interact in your soil and climate, add more. Research can’t replace observation. Your site will teach you what works.

“I’m Drowning in Zucchini But Have No Tomatoes”

  • The problem: Unbalanced yields or massive gluts you can’t use.
  • Why this happens: Poor planning for succession and realistic consumption needs.

The fix:

Calculate backwards. If your family eats one salad daily, you need X lettuce plants replanted every 3 weeks, not 20 plants all at once.

For preservation crops like tomatoes, plant based on how many jars of sauce you’ll actually make. Share or trade surplus intentionally rather than letting it rot.

“The Chickens Destroyed My Garden”

  • The problem: Free-ranging birds decimated your plants, scratched out seeds, ate everything green.
  • Why this happens: Timing and access weren’t managed. Chickens are indiscriminate.

The fix:

Use them as tools, not free-roaming workers. Mobile tractors, temporary fencing, and scheduled access to specific areas prevent destruction while capturing benefits.

Never give chickens access to actively growing vegetables. Use them before planting or after harvest.

“Everything Died Over Winter/Summer”

  • The problem: Seasonal stress killed poorly adapted plants.
  • Why this happens: Choosing plants based on what you want rather than what suits your climate.

The fix:

Start with native and proven perennials. Gradually experiment with borderline species. Use microclimates strategically—plant tender species on warm south-facing walls, hardy species in exposed areas. Accept that some plants simply won’t work in your zone.

“I Don’t Have Time for This”

  • The problem: Permaculture requires more observation and maintenance than promised.
  • Why this happens: Young systems need establishment care. Also, initial enthusiasm leads to over-ambitious designs.

The fix:

Be ruthlessly honest about available time. If you have 3 hours weekly, design for that reality.

Mature permaculture systems do need less intervention, but reaching maturity takes 3-5 years. Scale back if overwhelmed. Ten well-tended plants beat 100 neglected ones.

Real Costs: What to Actually Expect

Permaculture can be cheap or expensive depending on your approach:

Minimal-Cost Start ($100-500):

  • Seeds, compost, basic tools
  • Free materials: cardboard, leaves, wood chips from arborists
  • Salvaged rain barrels
  • Repurposed materials for beds
  • Time investment: significant

Mid-Range Investment ($500-5,000):

  • Quality tools
  • Purchased compost and mulch
  • Fruit trees and perennials
  • Simple irrigation setup
  • Rain tank(s)
  • Chicken coop materials
  • Time investment: moderate

Established System ($5,000+):

  • Extensive water infrastructure
  • Professional design consultation
  • Earthmoving for ponds or swales
  • Greenhouse or larger structures
  • Diverse mature plantings
  • Fencing and animal infrastructure
  • Time investment: lower once established

The permaculture approach actually saves money over time through reduced inputs, but establishment costs are real. Budget accordingly.

When Permaculture Excels

Permaculture isn’t always the answer. It works best when:

  • You’re in it for the long term: If you’re renting short-term or plan to move soon, focus on portable containers and annual crops rather than permanent landscapes.
  • You value resilience over maximum yield: A permaculture system might produce 70% of a conventional farm’s yield while using 30% of the inputs—better net efficiency, lower gross output.
  • You enjoy observation and experimentation: This isn’t paint-by-numbers. You need to think, adjust, and learn continuously.
  • You have some control over your land: Even renters can practice permaculture with landlord permission or in community gardens, but ownership gives you freedom to make permanent changes.
  • You want diverse outputs: If you only want tomatoes, conventional intensive growing might serve better. Permaculture shines when you want food, medicine, habitat, beauty, and materials from the same space.

Success Stories Worth Learning From

1. Geoff Lawton’s Greening the Desert Project transformed 10 acres of barren Jordanian desert into productive oasis through aggressive water harvesting and strategic planting.

Geoff Lawton's Greening the Desert Project
Credit: Greening The Desert Project

In a decade, the land grew abundant fruit trees, vegetables, and mushrooms. The key: massive initial water infrastructure capturing every drop.

2. Sepp Holzer’s Krameterhof in the Austrian Alps produces diverse crops at 5,000 feet elevation through terraced ponds, microclimates, and integrated animals—all without external inputs.

Sepp Holzer's Krameterhof
Credit: Krameterhof

Started in the 1960s, it’s now a 50+ year case study in resilience.

3. Urban Community Gardens across Los Angeles use permaculture to grow 6,000+ pounds of produce annually on former vacant lots.

Sheet mulching, intensive planting, and water harvesting transform degraded urban soil into productivity within 2-3 years.

Urban Community Gardens across Los Angeles
Credit: neighbor

These examples share common threads: water management came first, diversity was prioritized, and patient establishment yielded exponential returns.

Taking Your Next Step

If you’re ready to begin:

  1. Spend one season observing before changing anything. This patience prevents expensive mistakes.
  2. Start with water – even a single rain barrel or simple swale teaches you about flows and storage.
  3. Join or create community – online forums, local permaculture guilds, or garden clubs provide support and knowledge sharing.
  4. Take a Permaculture Design Course if you want depth. The standard 72-hour PDC covers design methodology comprehensively. Many are now available online.
  5. Read activelyGaia’s Garden by Toby Hemenway remains the most practical intro. Holmgren’s Permaculture: Principles and Pathways Beyond Sustainability provides philosophical depth.
  6. Accept imperfection – your first designs will have flaws. That’s how you learn. Start small enough that mistakes don’t devastate you.

The Deeper Gift

After all this information, you might still struggle to explain permaculture in one sentence. That’s because it’s simultaneously a design methodology, an ethical framework, and a way of seeing the world.

What matters most is this: Permaculture teaches you to notice relationships instead of just things. To value the wild edge alongside the tidy row. To work less and observe more. To feed yourself while feeding the soil.

Your small patch of earth—whether balcony or farm—connects to the planet’s breathing, living skin. What you do there ripples outward in ways you’ll never fully see.

Start where you are. Use what you have. Observe deeply, design carefully, plant thoughtfully, and tend patiently.

Let the garden teach you. Share what you learn. Build soil. Feed pollinators. Harvest hope alongside your tomatoes.

The world needs more people growing food with dirt under their fingernails and wonder in their hearts.

It needs your small corner of abundance, however imperfect.

It needs you to begin.

Frequently Asked Questions

  • How is permaculture different from organic gardening?

Organic gardening avoids synthetic chemicals but doesn’t necessarily involve systems thinking. You can have an organic monoculture.

Permaculture always emphasizes diversity, beneficial relationships between elements, and designing for self-maintenance. It includes organic methods but goes further into design methodology.

  • Will permaculture work in my climate?

Yes, because permaculture is about observing YOUR specific site and working with what thrives there.

Desert permaculture looks completely different from tropical or temperate approaches, but the principles remain constant. The techniques adapt to place.

  • How much time does it really take?

Establishment (Years 1-3) demands consistent time—perhaps 5-10 hours weekly. Once systems mature, maintenance drops dramatically.

A mature food forest might need 1-2 hours weekly for harvest and light pruning. Annual gardens always require more time than perennial systems.

  • Can I practice permaculture if I’m renting?

Focus on containers, annual plantings, and portable systems. Sheet mulch in movable frames. Grow vertical gardens.

Some landlords welcome improvements like fruit trees (they increase property value), but always get permission for permanent changes. Community gardens offer another outlet.

  • What’s the single most important thing to start with?

Water management. Whether capturing rain from your roof or reshaping land to slow runoff, controlling water flow creates the foundation for everything else. You can grow food without perfect soil or ideal plants, but without water, nothing thrives.


source https://harvestsavvy.com/what-is-permaculture/

Saturday, December 27, 2025

When to Plant Your Garden: The Complete Timing Guide for Every Season

Have you ever stood in the garden center in early spring, seedlings in hand, wondering if it’s too early to plant? Or watched your lettuce bolt in the heat while your neighbor’s thrived, making you question your timing?

The truth is, successful gardening isn’t just about what you plant—it’s about when.
Timing transforms gardening from guesswork into predictable abundance.

This guide will teach you to read nature’s signals and schedule plantings that deliver fresh harvests from early spring through late fall.

The Foundation: Understanding Your Frost Dates

Before you plant a single seed, you need to know two critical dates for your area: the average last spring frost and the average first fall frost. These dates form the backbone of every planting decision you’ll make.

A frost date represents when temperatures typically dip to 32°F (0°C) or below. The word “average” is key—some years frost arrives earlier or later than expected, which is why experienced gardeners keep an eye on forecasts and have protection ready.

Finding your frost dates:

  1. In the United States, enter your zip code into the National Gardening Association’s frost date calculator or check with your local Cooperative Extension office.
  2. In the UK, last frost typically falls between mid-April and late May depending on region.
  3. In Australia, timing varies dramatically from tropical Queensland (minimal frost) to alpine Victoria (frost possible into November).

One common point of confusion: growing zones and frost dates are not the same thing.

The USDA Plant Hardiness Zone Map divides regions based on average minimum winter temperatures—useful for selecting perennials and trees, but not for timing annual vegetable plantings.

Two gardens in the same zone can have frost dates weeks apart depending on elevation and proximity to water. Use your hardiness zone to select plant varieties; use your frost dates to schedule when to actually plant.

The USDA Plant Hardiness Zone Map
Credit: Wisconsin Horticulture

Cool-Season vs. Warm-Season Crops: The Essential Divide

All vegetables fall into one of two categories based on their temperature preferences, and understanding this division immediately simplifies your planning.

Cool-Season Crops

Cool-Season Crops

Cool-season crops thrive when temperatures hover between 55°F and 75°F. Many tolerate light frost and actually taste sweeter after a cold snap—Brussels sprouts and parsnips are famous examples.

This group includes leafy greens (lettuce, spinach, kale, arugula), brassicas (broccoli, cabbage, cauliflower), root vegetables (carrots, beets, radishes, turnips), alliums (onions, garlic, leeks), and peas.

Plant these in early spring as soon as soil can be worked, and again in late summer for fall harvests.

👉 Here are 37 Winter Vegetables to Grow: Complete Cold-Weather Guide

Warm-season crops

Warm-season crops

Warm-season crops cannot tolerate frost and grow best when temperatures consistently reach 65°F to 95°F.

This group includes nightshades (tomatoes, peppers, eggplants), cucurbits (cucumbers, squash, melons, pumpkins), beans, corn, and okra. Plant these only after all danger of frost has passed and soil has warmed sufficiently.

In spring, start with cool-season crops. Once frost danger passes and soil warms, transition to warm-season vegetables. It’s that straightforward.

Why Soil Temperature Matters More Than Air Temperature

Here’s a principle that separates successful gardeners from frustrated ones: seeds respond to soil temperature, not air temperature.

A sunny 70°F day in early spring might tempt you to plant everything. But if your soil is still 45°F, warm-season seeds will sit dormant—or worse, rot before germinating.

Cool-season crops are more forgiving, germinating in soil as cold as 40°F, but even they have optimal ranges.

Minimum soil temperatures for germination:

  • Lettuce, spinach, peas: 35-40°F
  • Carrots, beets, cabbage: 40-45°F
  • Beans, corn: 60°F
  • Tomatoes, peppers, squash, melons: 60-70°F

To measure soil temperature, insert a thermometer 2-4 inches deep in the morning for several consecutive days. Inexpensive soil thermometers provide far more accurate guidance than frost dates alone.

Without a thermometer, watch for natural indicators: weeds actively growing, earthworms near the surface, and soil that feels consistently warm to your touch several inches down.

Reading Seed Packets: Days to Maturity Explained

Every seed packet lists “days to maturity”—the approximate time from planting to harvest. This number is essential for planning, but it requires interpretation.

  • For direct-sown crops (seeds planted directly in the garden), days to maturity counts from germination to harvest.
  • For transplanted crops, it typically counts from transplant date, not seed starting date. A tomato packet saying “75 days” means 75 days from when you put that transplant in the ground, not from when you started the seed indoors.

This distinction matters enormously for scheduling. If you’re starting tomatoes indoors 6-8 weeks before transplanting, your actual seed-to-harvest timeline is closer to 115-130 days.

Days to maturity also helps you calculate fall planting deadlines. Count backwards from your first fall frost: add the days to maturity, plus 10-14 days for harvest window, plus 7-10 extra days because shorter fall days slow growth.

A 50-day lettuce with an October 15 frost date needs planting by early August at the latest.

Starting Seeds Indoors: Timing Your Head Start

Starting seeds indoors extends your growing season, especially valuable in northern climates with short summers.

However, timing is crucial—seedlings started too early become leggy and rootbound before transplanting conditions arrive.

Traditional Soil Germination
Credit: The Seasonal Homestead

Indoor starting timeline (weeks before last frost):

Crop Start Indoors Transplant Outdoors
Onions, leeks, celery 10-12 weeks 2-4 weeks before last frost
Peppers, eggplants 8-10 weeks 2 weeks after last frost
Tomatoes 6-8 weeks 1-2 weeks after last frost
Broccoli, cabbage, cauliflower 6-8 weeks 2-4 weeks before last frost
Lettuce 4-5 weeks 3-4 weeks before last frost
Cucumbers, squash, melons 3-4 weeks 1-2 weeks after last frost

Notice that cold-hardy transplants (brassicas, lettuce, onions) can go out before the last frost date, while tender crops must wait until after—often two weeks after to ensure soil warmth.

Hardening off bridges the gap between cozy indoor conditions and the real world.

A week or two before transplanting, place seedlings outside in a sheltered spot for a few hours daily, gradually increasing exposure until they can handle full sun and temperature fluctuations.

Skip this step and you’ll shock your plants, setting them back weeks.

Succession Planting: The Secret to Continuous Harvests

One of the most valuable techniques experienced gardeners use is rarely explained to beginners: succession planting.

The concept is simple. Instead of planting all your lettuce seeds at once and harvesting everything in a two-week window, plant a small amount every 2-3 weeks throughout the planting season.

You’ll harvest continuously for months rather than dealing with overwhelming gluts followed by empty beds.

Succession Planting

Succession planting works brilliantly for quick-maturing crops: radishes (25 days), lettuce (45-60 days), spinach (40-45 days), bush beans (50-60 days), and salad greens.

It’s less practical for long-season crops like tomatoes, peppers, and winter squash that produce continuously once they start.

To implement succession planting, mark your calendar with planting dates every 2-3 weeks from your first safe planting date until about 8 weeks before your fall frost (for cool-season crops) or midsummer (for warm-season crops).

Even three or four successions dramatically extend your harvest window.

Protecting Plants: Extending Your Windows

Simple protection methods can extend your planting windows by 2-4 weeks on either end of the season—a significant gain in short-season climates.

1. Row covers (also called floating row covers or garden fabric) are lightweight spun fabrics that rest directly on plants or over wire hoops.

They trap heat, raise temperatures 2-8°F depending on weight, and protect against light frost while allowing water and light through.

Use lightweight covers (0.5 oz) for pest protection with minimal warming; heavier covers (1.5-2 oz) for frost protection.

2. Cloches are individual plant covers—traditional glass bell jars, plastic jugs with bottoms removed, or commercial plastic domes. They’re ideal for protecting individual transplants during unpredictable spring weather.

garden cloche

3. Cold frames are bottomless boxes with transparent lids that create miniature greenhouses.

They’re perfect for hardening off seedlings, starting cool-season crops extra early, or extending fall harvests of greens well into winter.

Cold Frames

The key with all protection is ventilation. On sunny days, temperatures inside covered areas can spike dangerously high. Vent row covers by lifting edges, prop cold frame lids open, and remove cloches during warm afternoons.

Month-by-Month Planting Guide

While specific dates vary by location, this framework applies to most temperate Northern Hemisphere climates. Adjust based on your local frost dates.

  • Late Winter (January-February)

The focus is preparation and indoor seed starting. Begin slow-growing crops like onions, leeks, celery, and peppers under grow lights 10-12 weeks before your last frost date.

Outdoors, plant garlic if you haven’t already (fall planting is preferable in most regions). Prepare beds by adding compost and checking drainage.

  • Early Spring (March-April)

As soon as soil is workable—not frozen or waterlogged—direct sow peas, spinach, lettuce, radishes, and carrots. Transplant onion sets and early potatoes.

Start tomato, pepper, and brassica seeds indoors if you haven’t yet. Row covers and cloches provide insurance against late cold snaps.

  • Late Spring (May-June)

After your last frost date passes, transplant tender seedlings including tomatoes, peppers, and eggplants.

Direct sow beans, corn, cucumbers, squash, and melons once soil reaches 60-65°F. Continue succession planting quick crops like lettuce and radishes.

  • Summer (July-August)

Early summer: plant final successions of beans, corn, and summer squash. Mid-to-late summer: shift focus to fall gardening.

Start brassicas and lettuce indoors for transplanting in late summer. Direct sow carrots, beets, and turnips for fall harvest. Time these plantings using the days-to-maturity calculation described earlier.

  • Fall (September-October)

Transplant cool-season crops for fall and winter harvests. Plant garlic cloves for next year. Before first frost, harvest remaining warm-season crops. Use row covers to extend harvests of hardy greens.

  • Winter (November-December)

In mild climates, continue harvesting cold-hardy crops like kale, Brussels sprouts, parsnips, and leeks. In cold climates, harvest what remains, protect perennial crops with mulch, and plan next year’s garden.

Putting It All Together: A Sample Timeline

Here’s how this works in practice for a USDA Zone 6 garden (last spring frost around May 15, first fall frost around October 15):

  1. Late February/Early March: Start tomatoes, peppers, and eggplants indoors under lights. Start broccoli and cabbage indoors.
  2. Late March: Direct sow peas, spinach, and lettuce outdoors. Plant onion sets and seed potatoes.
  3. Mid-April: Transplant hardened-off broccoli and cabbage outdoors. Direct sow carrots and beets. Start a second round of lettuce.
  4. Early May: Plant a third succession of lettuce. Start hardening off tomatoes and peppers.
  5. Late May/Early June: Transplant tomatoes, peppers, and eggplants after last frost. Direct sow beans, cucumbers, and squash once soil reaches 65°F.
  6. Mid-June: Plant fall broccoli and cabbage seeds indoors. Start a first succession of fall lettuce.
  7. July: Direct sow beans for fall harvest. Transplant fall brassicas. Plant second succession of fall lettuce and greens.
  8. August: Direct sow final succession of lettuce, spinach, and radishes for fall. Plant garlic cloves for next year’s harvest.
  9. September-October: Harvest, harvest, harvest. Protect tender crops from early frost. Mulch fall crops for extended harvest.

Adjust these dates based on your specific zone—earlier in warmer zones, later in colder ones.

Regional Considerations

  • Northern Climates (USDA Zones 3-5)

With growing seasons as short as 90-120 frost-free days, maximizing every week matters. Start seeds indoors, invest in season extenders, and choose short-season varieties bred for quick maturity.

Look for terms like “early,” “short-season,” or specific day counts under 70 for warm-season crops.

  • Southern Climates (USDA Zones 8-10)

Heat becomes the limiting factor rather than cold. Cool-season crops bolt quickly in spring, making fall and winter prime planting seasons.

Summer’s intense heat can stress even warm-season crops—provide afternoon shade and consistent water.

  • Mediterranean Climates

Mild, wet winters and dry summers flip the typical calendar. Many crops grow best from fall through spring, while summer demands drought-tolerant varieties or diligent irrigation.

  • UK and Northern Europe

Unpredictable springs require patience. The “Ice Saints” period in mid-May traditionally marks the end of frost risk.

Cool summers favor brassicas and root crops; heat-loving crops like melons may need greenhouse protection.

Common Timing Mistakes to Avoid

  • Trusting warm spells too early.

A few sunny March days don’t mean winter is over. Always verify against your frost dates and watch extended forecasts before planting tender crops.

  • Planting everything at once.

Stagger plantings of quick-maturing crops for continuous harvests rather than overwhelming gluts.

  • Ignoring soil conditions.

Cold, waterlogged soil rots seeds and stunts transplants regardless of air temperature. Wait until soil is workable and adequately warm.

  • Forgetting fall planting windows.

The fall garden must be planted in mid-to-late summer. By the time fall weather arrives, it’s too late to start most crops.

  • Skipping hardening off.

Transplants moved directly from indoor conditions to the garden suffer severe shock. The extra week of gradual acclimation pays dividends.

Frequently Asked Questions

  • Can I plant vegetables year-round?

In mild climates (zones 9-11), yes—different crops suit different seasons. In colder regions, winter growing requires cold frames or row covers.

Hardy crops like kale, spinach, and some roots can overwinter with minimal protection even in zone 6.

  • What if I miss the ideal planting window?

For many crops, shift to succession planting or wait for the fall window. Quick crops like beans and lettuce offer multiple opportunities throughout the season.

For long-season crops like tomatoes, purchasing larger transplants can help make up lost time.

  • Is it ever too late to plant a garden?

Rarely. Even after missing spring planting, fall gardening offers excellent opportunities.

Quick crops like radishes and lettuce can go in until late summer. If autumn has arrived, plant garlic for next year and prepare beds for spring.

  • What’s the easiest vegetable for beginners to time correctly?

Radishes are wonderfully forgiving—they germinate quickly, mature in 25-30 days, and can be planted almost any time soil isn’t frozen.

Lettuce and bush beans are also beginner-friendly with obvious planting windows and quick results.

  • Should I follow planting dates on seed packets exactly?

Use packet recommendations as starting points, then adjust based on your local frost dates and observed conditions.

Regional planting guides from your local Extension service offer more tailored advice than generic packet instructions.

Key Takeaways

The rhythm of planting becomes second nature with practice. Master your local frost dates, respect the cool-season/warm-season divide, pay attention to soil temperature rather than just air temperature, and use succession planting to extend your harvests.

When uncertain, patience pays—plants started later in favorable conditions almost always outperform those planted early under marginal conditions.

Each season teaches something new about your soil, your microclimate, and your personal gardening style.

Start simple: look up your frost dates, pick three vegetables you love to eat, and create a basic schedule.

That small step transforms theory into harvests—and there’s nothing quite like eating something you grew at exactly the right moment.

What vegetables will you plant first? Share your plans in the comments below!


source https://harvestsavvy.com/garden-calendar/

42 Perennial Vegetables to Plant Once and Harvest for Years

The previous owners had moved away years ago, yet there it stood—a massive rhubarb plant hidden behind the tool shed, sending up vibrant red...