Have you ever pulled a stubborn weed from your garden, only to watch it return with a vengeance weeks later? What if I told you that persistent plant might actually be one of the most valuable herbs you could grow?
Mugwort has earned quite the reputation—dismissed by some as an invasive nuisance, celebrated by others as a medicinal powerhouse with centuries of traditional use.
This guide will walk you through everything you need to know about growing mugwort intentionally and successfully.
Whether you’re interested in its traditional medicinal applications, curious about its culinary possibilities, or simply want to harness this vigorous grower for your healing garden, you’ll discover practical strategies for cultivation, management, and use.
By the end, you’ll understand why this aromatic perennial deserves a carefully considered place in your landscape—and how to keep it exactly where you want it.
Understanding Mugwort: More Than Just a Weed
Mugwort (Artemisia vulgaris) is a hardy perennial herb that belongs to the same family as sagebrush and wormwood.
With its distinctive silvery-green leaves and aromatic scent, this plant has played fascinating roles throughout history.
Ancient cultures revered it for its supposed mystical properties, believing it could stimulate vivid dreams and offer spiritual protection. Medieval brewers used it to flavor beer before hops became the standard.
Traditional Chinese medicine has employed mugwort for thousands of years in a practice called moxibustion, where the dried herb is burned near the skin to promote healing.
Beyond folklore and tradition, mugwort contains compounds that have made it valuable in herbal medicine.
Historical uses include supporting digestive health, acting as a mild laxative, regulating menstrual cycles, and treating external skin conditions like rashes and minor burns.
While modern science continues to explore these traditional applications, the plant’s resilience and easy cultivation make it an attractive addition to any medicinal herb garden.
The challenge with mugwort isn’t getting it to grow—it’s keeping it under control. This vigorous spreader propagates through both seeds and underground rhizomes, which explains why it can quickly dominate a garden bed if left unchecked.
Understanding this dual-pronged growth strategy is essential before you plant your first seed or cutting.
Starting Mugwort From Seed: A Step-by-Step Approach
While many gardeners encounter mugwort as a volunteer plant or forage it from the wild, starting from seed offers distinct advantages.
You’ll have certainty about what variety you’re growing, avoid potential misidentification issues with similar-looking plants, and control exactly where it establishes itself in your garden.
Preparing for Germination
Mugwort seeds are tiny and benefit from a cold stratification period to break dormancy and improve germination rates. Here’s how to set yourself up for success:
- The Cold Treatment Method:
Mix your mugwort seeds with slightly moistened vermiculite or sand in a sealed plastic bag. Place this in your refrigerator for four to six weeks. This cold period mimics winter conditions and primes the seeds for spring sprouting.
Check occasionally to ensure the medium stays barely damp but not wet—you want moisture, not mold.
- Timing Your Planting:
Once stratification is complete, you can start seeds indoors about six to eight weeks before your last expected frost date. This gives seedlings time to develop strong root systems before facing outdoor conditions.
Sowing and Early Care
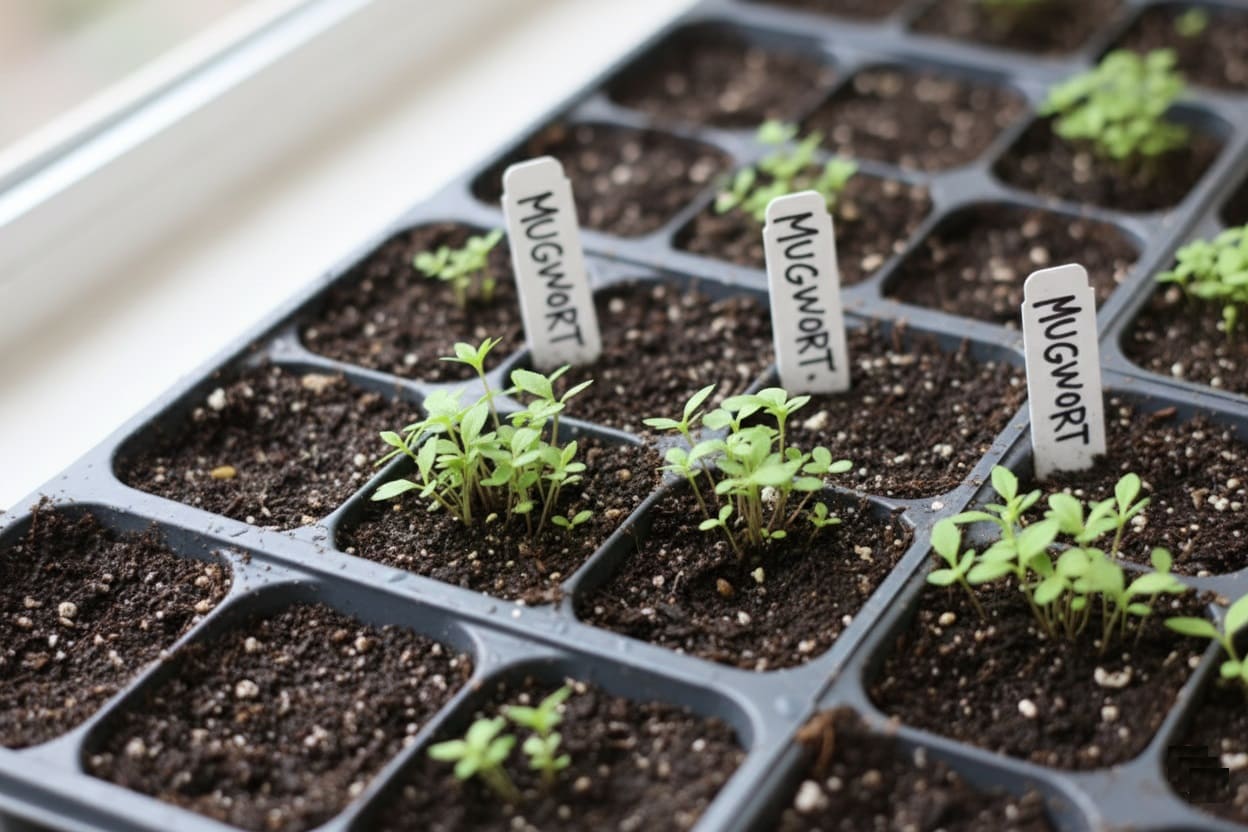
Choose shallow seed trays or small pots filled with a light, well-draining seed-starting mix. Mugwort seeds need light to germinate, so the key is to barely cover them—think of it as tucking them in with the thinnest blanket possible, not burying them.
Sprinkle seeds on the surface of moistened soil and gently press them in with your fingertip.
A very light dusting of vermiculite or fine soil can help keep them in place while still allowing light penetration. Mist the surface gently rather than pouring water, which could wash away or drown your seeds.
Place your containers in a warm location with temperatures between 65-75°F. A bright windowsill works well, or you can use grow lights positioned about four to six inches above the soil surface.
Keep the soil consistently moist but never waterlogged—think of a well-wrung sponge as your moisture target.
 Learn about Optimal Soil Temperatures for Seed Germination: A Gardener’s Guide
- Germination Timeline:
With proper conditions, expect to see tiny seedlings emerge within ten to twenty-one days. The process can be slow at first, so patience is your friend here. Once sprouted, those delicate seedlings will develop their characteristic feathery leaves.
Transplanting Seedlings
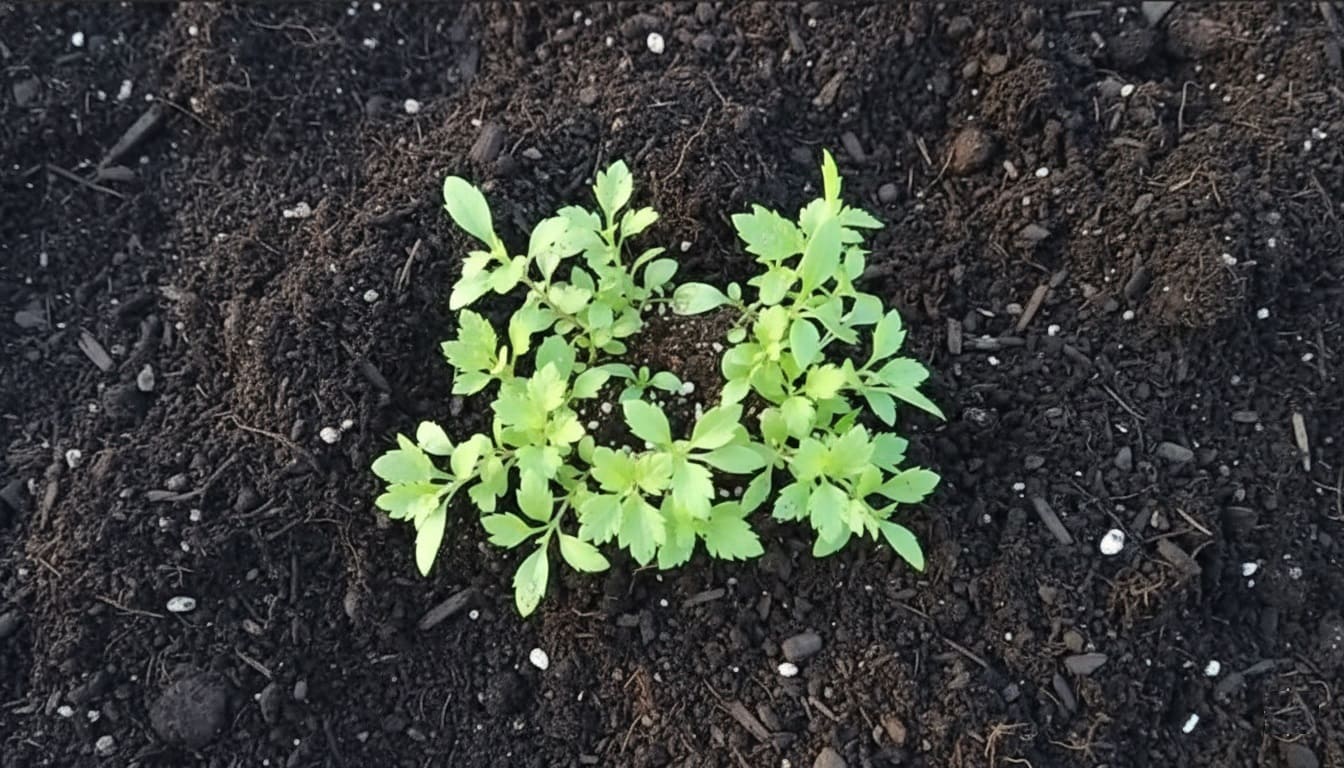
When seedlings develop their second set of true leaves, they’re ready for individual homes. Gently transplant them into larger pots, being careful not to damage their delicate roots.
This is also the stage where you might want to think strategically about containment—more on that in the management section.
Before moving plants outdoors permanently, harden them off over seven to ten days. Start by placing them outside in a sheltered, shaded spot for just an hour or two, gradually increasing their exposure to sun, wind, and temperature fluctuations.
This transition prevents shock and sets them up for vigorous outdoor growth.
Choosing the Perfect Location
Despite mugwort’s reputation for growing anywhere, thoughtful placement will save you headaches down the road and maximize the plant’s benefits.
Sunlight Requirements
Mugwort is remarkably adaptable to various light conditions, thriving in everything from full sun to partial shade. In fact, this flexibility is part of what makes it such a successful spreader in the wild.
For optimal growth and the most aromatic leaves, aim for a spot that receives at least four to six hours of direct sunlight daily.
Full sun locations will produce bushier, more compact plants with stronger scent profiles—ideal if you’re growing primarily for harvest. Partial shade works fine and may actually be preferable in hot climates where intense afternoon sun can stress the plants.
The plant will grow taller and leggier in shadier conditions as it reaches for available light, which isn’t necessarily a problem unless you’re aiming for a specific aesthetic.
 Here are 36 Shade-Loving Herbs & Vegetables That Grow With Less Sunlight
Soil Preferences
Here’s where mugwort really shows its easy-going nature. This herb tolerates a wide range of soil types and isn’t particularly fussy about fertility. It will grow in everything from sandy soils to heavier clay, though it performs best in well-draining ground.
Average to moderately fertile soil is actually preferable to rich, amended beds. In overly fertile conditions, mugwort can become even more aggressive in its growth, potentially making containment more challenging.
Think of it this way: this plant doesn’t need five-star accommodations to thrive—it’s perfectly content with a three-star situation.
The one soil condition mugwort dislikes is constantly waterlogged ground. While it tolerates brief periods of wet soil, prolonged saturation can lead to root rot.
Ensure your chosen site has adequate drainage, especially if you have heavy clay soil. A slight slope or raised bed can help excess water move away from plant roots.
Strategic Placement Considerations
I learned this lesson the hard way during my first year of intentional herb gardening. Enchanted by mugwort’s medicinal reputation, I planted it in the middle of my main perennial bed, thinking I could simply harvest it back each season.
Within two years, it had woven its rhizomes through the roots of my echinaceas and rudbeckias, creating an extraction nightmare. That experience taught me the value of isolation zones.
Consider these placement strategies to avoid similar scenarios:
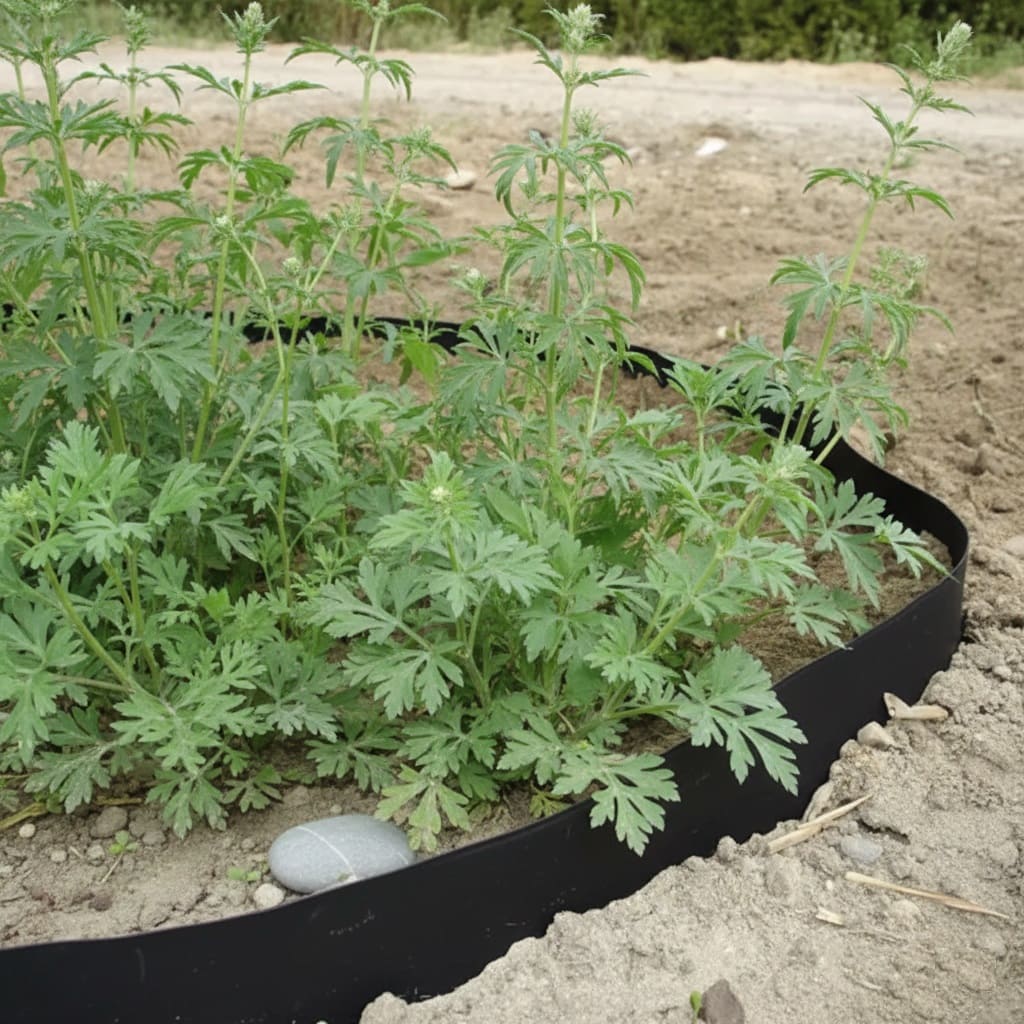
- Barrier Planting: Install the plant in areas bordered by hardscaping like driveways, sidewalks, or patios. These physical barriers naturally contain spread without requiring constant vigilance on your part.
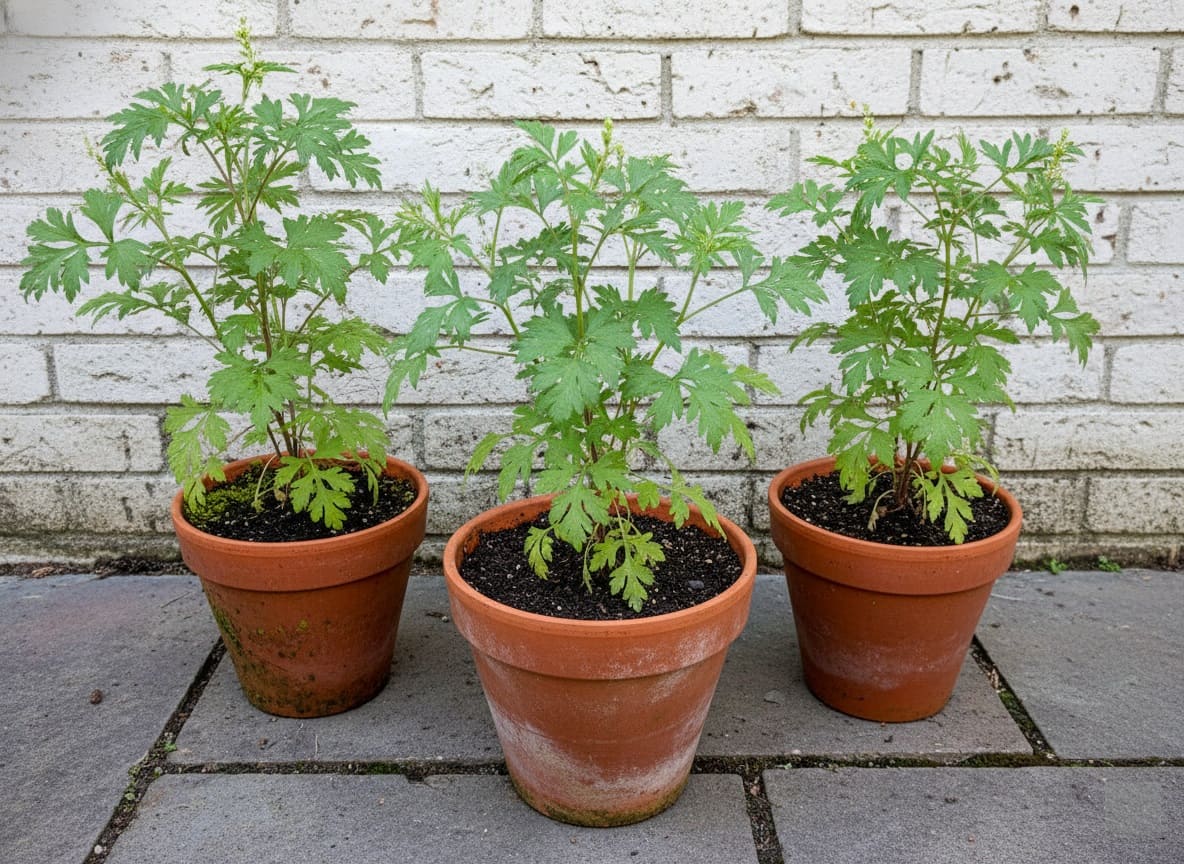
- Container Growing: For ultimate control, grow mugwort in large pots or raised beds with solid bottoms. This completely eliminates the rhizome spread issue while still allowing you to enjoy the plant’s benefits.
- Dedicated Herb Zones: Create a separate medicinal herb garden specifically for vigorous growers. This quarantine approach lets you grow mugwort alongside other spreaders like mint or comfrey without worrying about them infiltrating your ornamental beds.
- Buffer Zones: If planting in-ground, leave generous spacing between mugwort and other valued plants. A three to four-foot buffer gives you working room to catch and remove spreading rhizomes before they invade neighboring territories.
Planting and Establishment
Whether you’re working with seedlings, divisions, or purchased plants, proper planting technique sets the foundation for healthy growth.
Direct Planting Steps
Dig a hole roughly twice the width of your plant’s root ball and about as deep. This extra width encourages lateral root growth and establishment.
If your soil is particularly heavy or poor-draining, consider working in some compost or sand to improve texture—not to add fertility, but to enhance drainage.
Remove the plant from its container and gently tease apart any circling roots. This encourages them to grow outward into surrounding soil rather than continuing their circular pattern.
Place the plant in the hole at the same depth it was growing in its pot. Backfill with soil, firming gently as you go to eliminate air pockets.
Water thoroughly immediately after planting. This initial watering settles soil around roots and provides the moisture needed for the plant to overcome transplant stress.
Container Planting Best Practices
For container cultivation, select pots at least twelve to eighteen inches in diameter. This size accommodates the plant’s spreading tendencies while remaining manageable.
Ensure containers have adequate drainage holes—mugwort in waterlogged soil is an unhappy plant headed for root problems.
Use a quality potting mix rather than garden soil, which can compact in containers and restrict drainage. A standard commercial mix works perfectly fine, or you can create your own blend of compost, peat or coir, and perlite.
Place your container in its permanent location before filling and planting if possible. Large containers become extremely heavy once filled with moist soil and plants, and mugwort will grow quite substantial in good conditions.
Care and Maintenance Through the Seasons
Once established, mugwort requires minimal intervention to thrive. In fact, too much attention can backfire by promoting even more aggressive growth.
Watering Wisdom
Newly planted mugwort needs consistent moisture for the first few weeks while establishing roots. Water when the top inch of soil feels dry, providing enough to moisten the root zone without creating soggy conditions.
After establishment, mugwort demonstrates impressive drought tolerance. In most climates, rainfall provides sufficient moisture.
During extended dry spells, a weekly deep watering helps maintain plant vigor, but this herb can often go weeks without supplemental irrigation once mature.
Container-grown plants dry out faster than in-ground plantings and require more frequent watering. Check soil moisture every few days during hot weather, watering when the top two inches of soil feel dry.
 Here’s How to Build a Wicking Bed: DIY Self‑Watering Raised Garden Guide
Fertilizing Strategy
This is where less is definitely more. Mugwort grows vigorously without supplemental feeding, and added fertility often just creates more plant material to manage.
If you’re growing in containers or particularly poor soil, a light application of balanced, slow-release fertilizer in spring provides adequate nutrition for the season.
For in-ground plants in average garden soil, skip the fertilizer entirely. The plant will perform beautifully on whatever nutrients naturally occur in your soil and from decomposing organic matter.
 Read about Banana Peel Fertilizer: Truth vs. Myths About This Popular Garden Hack
Pruning and Harvesting
Regular harvesting serves double duty—it provides you with material to use while also keeping the plant more compact and manageable.
The best time to harvest mugwort is just before flowering, when aromatic oils in the leaves are most concentrated. In most regions, this occurs in midsummer.
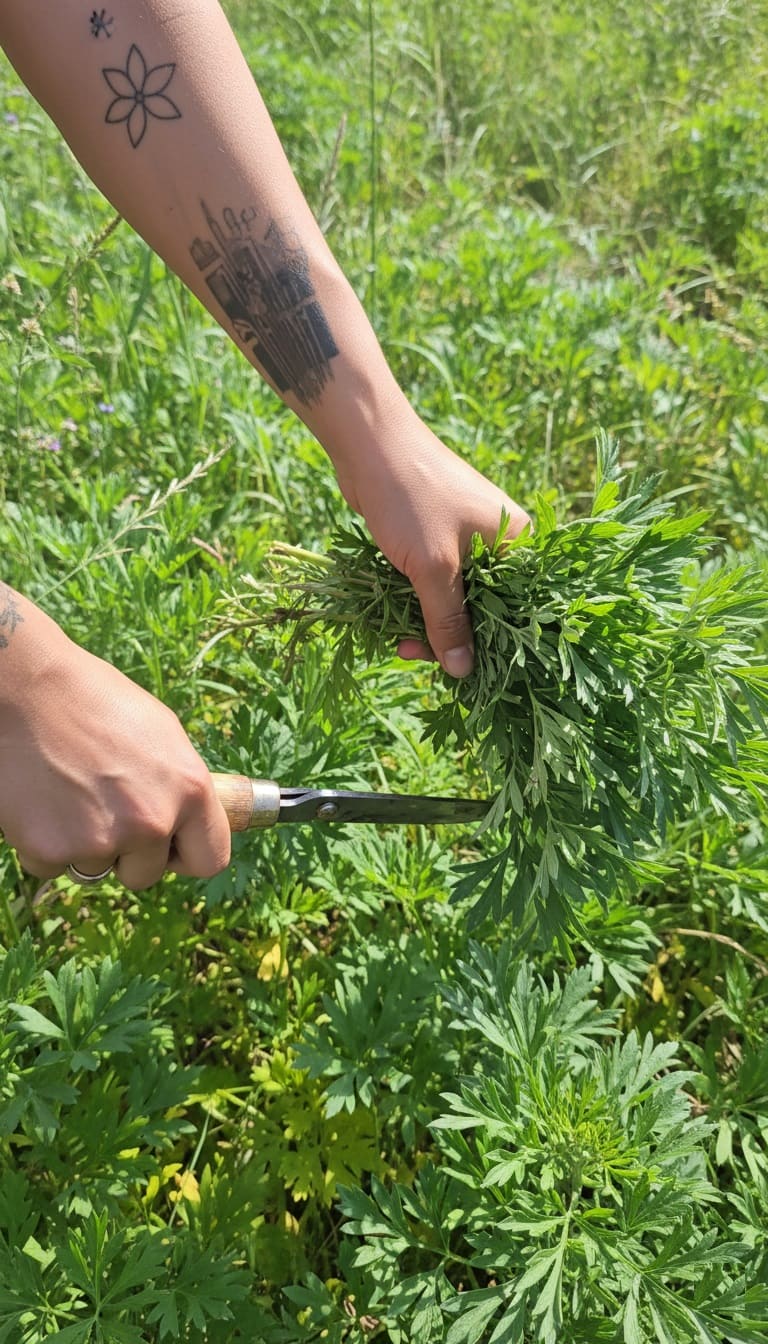
Cut stems back to about six inches above ground level using sharp pruning shears. This encourages bushier regrowth and prevents the plant from getting tall and floppy. You can harvest multiple times throughout the growing season if you’re using the plant regularly.
If you’re not harvesting for use, a midsummer pruning still benefits the plant. Cut back approximately one-third of the growth to maintain a tidier shape and reduce seed production.
Speaking of seeds, removing flower heads before they mature prevents volunteer seedlings from appearing throughout your garden—one less spreading mechanism to worry about.
Winter Care
Mugwort is herbaceous, meaning it dies back to the ground each winter and re-emerges in spring. In late fall after the first hard frost, cut all stems to ground level. This tidies the area and removes hiding places for pests.
Mulching isn’t necessary for winter protection even in zone 4, though a light layer of compost can suppress early spring weeds until mugwort re-emerges.
In zones 4 and colder, consider mulching container-grown plants or moving them to an unheated garage to protect roots from repeated freeze-thaw cycles that can crack pots.
Containment Strategies: Staying in Control
Understanding rhizome behavior is essential for successful mugwort management. These underground stems travel horizontally beneath the soil surface, sending up new shoots at intervals.
They can extend several feet in a single season, and breaking or cutting a rhizome often stimulates multiple new shoots rather than killing it—which explains why careless removal can worsen the problem.
Active Monitoring and Intervention
Walk the perimeter of your mugwort planting monthly during the growing season, checking for escapees. Young shoots that appear beyond your intended area are vastly easier to remove than established plants.
When you spot runners, trace them back to their source and remove the entire rhizome section if possible.
Create a “patrol trench” by digging a narrow channel around your mugwort bed once or twice during peak growing season, severing any rhizomes attempting to spread outward. This ongoing maintenance keeps the plant contained without requiring complete removal.
Aggressive harvesting redirects the plant’s energy toward producing new shoots from existing rhizomes rather than extending rhizomes outward—think of it as containment through consumption.
A thick layer of mulch around the perimeter makes emerging shoots more visible and easier to pull, though determined stems will eventually push through.
When Mugwort Escapes
If mugwort spreads beyond its welcome despite your efforts, you have several options. For small areas, persistent manual removal works if done thoroughly and repeatedly.
Don’t just pull shoots—excavate rhizomes with a garden fork, loosening soil in a wide circle and tracing rhizomes outward as far as practical. Even small rhizome fragments can regenerate, so thoroughness matters more than speed.
Plan on repeating this process monthly throughout the growing season to exhaust the plant’s reserves.
For larger infestations, solarization kills mugwort by blocking all light. Cover the area with heavy-duty black plastic sheeting after cutting shoots to ground level. Overlap edges by at least twelve inches and anchor firmly. Leave in place for a full growing season.
Clear plastic works faster in warm climates by creating a greenhouse effect—just water thoroughly before installing and seal edges completely.
Chemical control with glyphosate-based herbicides works when applied to actively growing foliage. The herbicide transports to roots, killing the entire plant system, though rhizomes may require multiple applications.
To minimize damage to nearby plants, use a sponge applicator wand rather than spraying. Wait for new growth to emerge and re-treat every few weeks throughout the growing season.
Harvesting and Using Your Mugwort
If you’re growing mugwort intentionally, proper harvesting and processing maximizes its potential uses.
When and How to Harvest
The optimal harvest window occurs just before the plant flowers, typically in mid to late summer depending on your climate. This timing captures the highest concentration of aromatic compounds and essential oils in the foliage.
Choose a dry morning after dew has evaporated but before the day’s heat becomes intense. Use clean, sharp scissors or pruning shears to cut stems about six inches above the base. This height allows for regrowth and potential secondary harvests later in the season.
Focus on newer growth from the top third of the plant, where leaves are most tender and aromatic. Older, lower leaves can become tough and less pleasant to work with.
Drying and Storage
Proper drying preserves mugwort’s properties and prevents mold during storage.
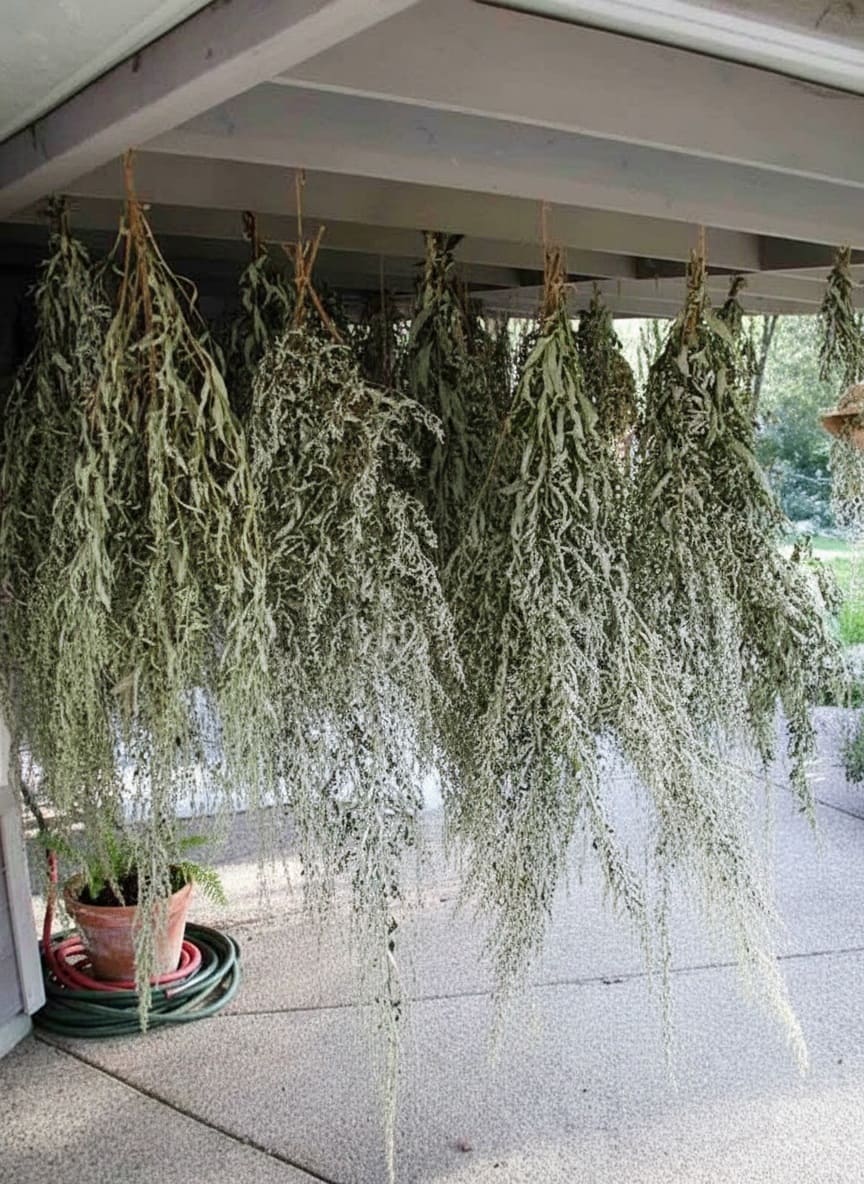
Gather stems into small bundles using string or rubber bands—small bundles dry more evenly and completely than large ones. Hang these bundles upside down in a warm, dry location with good air circulation.
Avoid direct sunlight, which can degrade aromatic compounds. An attic, covered porch, or spare room works well.
Depending on humidity and bundle size, leaves should dry completely within one to three weeks. Properly dried mugwort leaves crumble easily when rubbed between your fingers and no longer feel cool or damp to the touch.
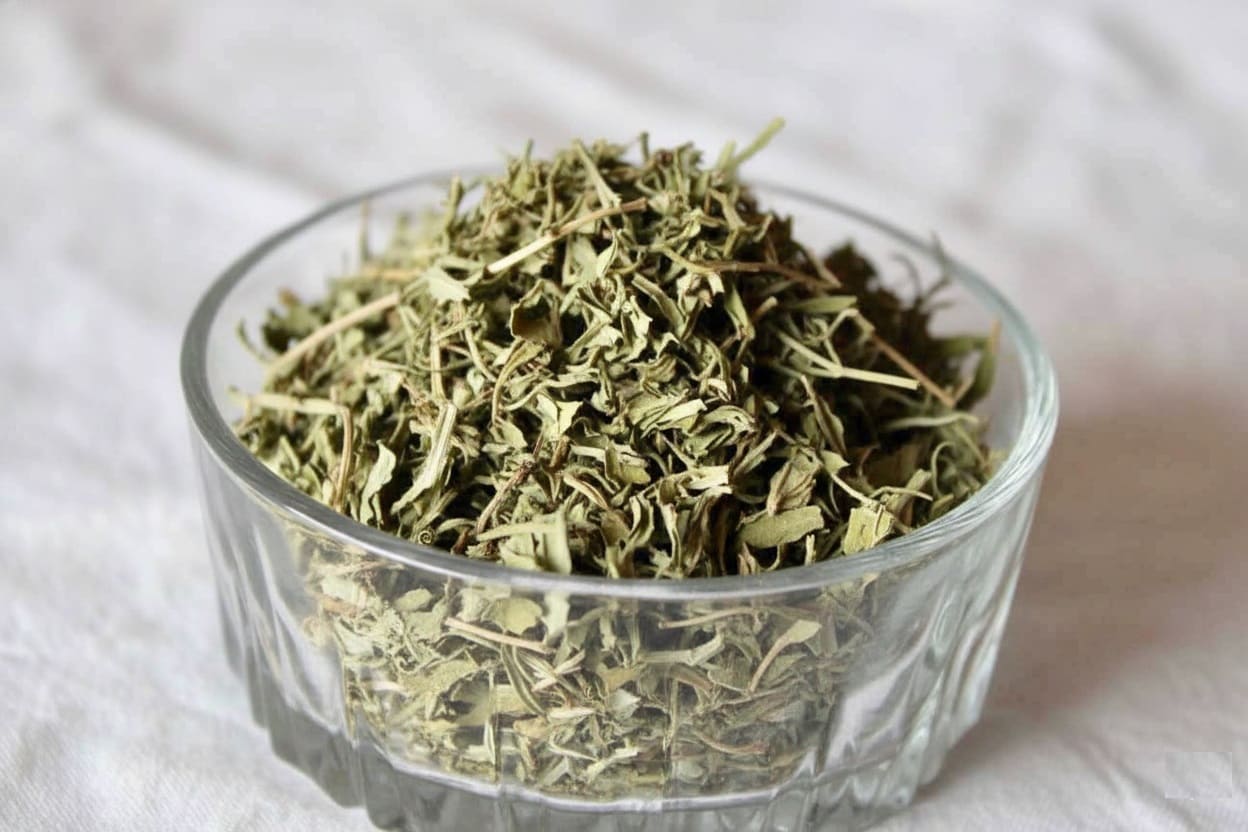
Once fully dried, strip leaves from stems and store in airtight glass containers away from direct light and heat. Label containers with the harvest date. Properly stored dried mugwort maintains quality for about one year, though potency gradually diminishes over time.
 Here’s How to Dehydrate Apples at Home: Easy Steps for Perfect Results
Traditional and Modern Uses
Mugwort’s applications span centuries and cultures, though it’s important to note that many traditional uses haven’t been extensively studied in modern clinical trials.
- Herbal Tea: Steep one to two teaspoons of dried leaves in hot water for five to ten minutes. The tea has a slightly bitter, earthy flavor. Traditional herbalists have used it to support digestion and as a mild relaxant before bed.
- Dream Pillows: The plant’s association with vivid dreaming has led to its inclusion in sachets placed under pillows. Combine dried mugwort with lavender and other calming herbs in a small cloth bag.
- Topical Applications: Some traditions use mugwort-infused oils or salves for minor skin irritations, though you should always test any new topical preparation on a small skin area first to check for sensitivity.
- Culinary Uses: While less common than medicinal applications, mugwort has been used as a flavoring in certain Asian cuisines and was historically used in beer making before hops became standard.
Important Safety Note:
Mugwort should not be used by pregnant women due to traditional contraindications regarding uterine stimulation. Anyone with ragweed allergies may also react to mugwort.
As with any herb, consult qualified healthcare professionals before using mugwort medicinally, especially if you take prescription medications or have existing health conditions.
Common Problems and Solutions
While mugwort is generally trouble-free, understanding potential issues helps you respond effectively.
Pest and Disease Issues
Mugwort’s aromatic compounds actually repel many common garden pests, making serious infestations rare. Occasionally, aphids may appear on tender new growth, though they rarely cause significant damage. A strong spray of water usually dislodges them effectively.
Fungal issues occasionally develop in conditions of poor air circulation or excessive moisture. Powdery mildew might appear as white patches on leaves in humid climates.
Improve air flow by thinning overcrowded plants and avoid overhead watering, which keeps foliage wet and vulnerable to fungal growth.
Root rot can occur in waterlogged soil. The best prevention is ensuring adequate drainage from the start. If you notice yellowing, wilting plants in consistently wet soil, improve drainage or relocate plants to drier ground.
Growth Problems
- Yellowing Leaves:
While some leaf yellowing at the base of mature plants is normal, widespread yellowing suggests either waterlogged soil or, occasionally, nutrient deficiency.
Check drainage first. If drainage seems fine and you’re growing in containers or very poor soil, try a light feeding with balanced fertilizer.
 Find out Why Are Your Cucumber Leaves Turning Yellow? Top Causes & Solutions
- Leggy, Weak Growth:
This typically indicates insufficient light. Mugwort stretches toward available light when shaded too heavily. If the plant seems floppy and pale, consider relocating to a brighter spot or accepting that this is its natural response to the available conditions.
- Lack of Vigor:
If your mugwort seems stunted and unhappy when it should be thriving, check for extremely compacted soil or competition from tree roots.
This tough plant can handle challenging conditions, but solid clay or dense root mats from nearby trees can slow even mugwort’s aggressive nature.
Managing Over-Aggressive Growth
Ironically, one of mugwort’s most common “problems” is growing too successfully. If your plant is spreading beyond its welcome despite containment efforts:
- Intensify Monitoring: Increase your perimeter checks to weekly during peak growing season. Catching runners early makes removal significantly easier.
- Harvest Heavily: Aggressive harvesting redirects the plant’s energy toward producing new shoots from existing rhizomes rather than extending rhizomes outward. Think of it as containment through consumption.
Accept Reality:
Sometimes the most practical solution is redesigning your space to accommodate mugwort’s territorial ambitions.
If you’re losing the containment battle, consider making that area an official mugwort patch, perhaps adding other vigorous spreaders that can compete (mint, anyone?), or accepting it as a designated low-maintenance ground cover zone.
Frequently Asked Questions
- Is mugwort invasive in my region?
Mugwort has naturalized throughout most of North America, Europe, and Asia. While not officially listed as invasive in most jurisdictions, it certainly exhibits invasive characteristics.
Before planting, check your local extension office or invasive species lists. Even if not restricted, it can absolutely invade your garden space if not managed properly.
- Can I grow mugwort alongside other herbs?
This depends on your other herbs’ spreading habits. Mugwort coexists with other aggressive spreaders like mint, comfrey, or lemon balm—they’re all tough competitors.
However, keep it far from well-behaved herbs like thyme, oregano, or sage, which can’t compete with mugwort’s rhizome system. The safest approach is creating a separate bed for vigorous growers.
- What’s the difference between mugwort and wormwood?
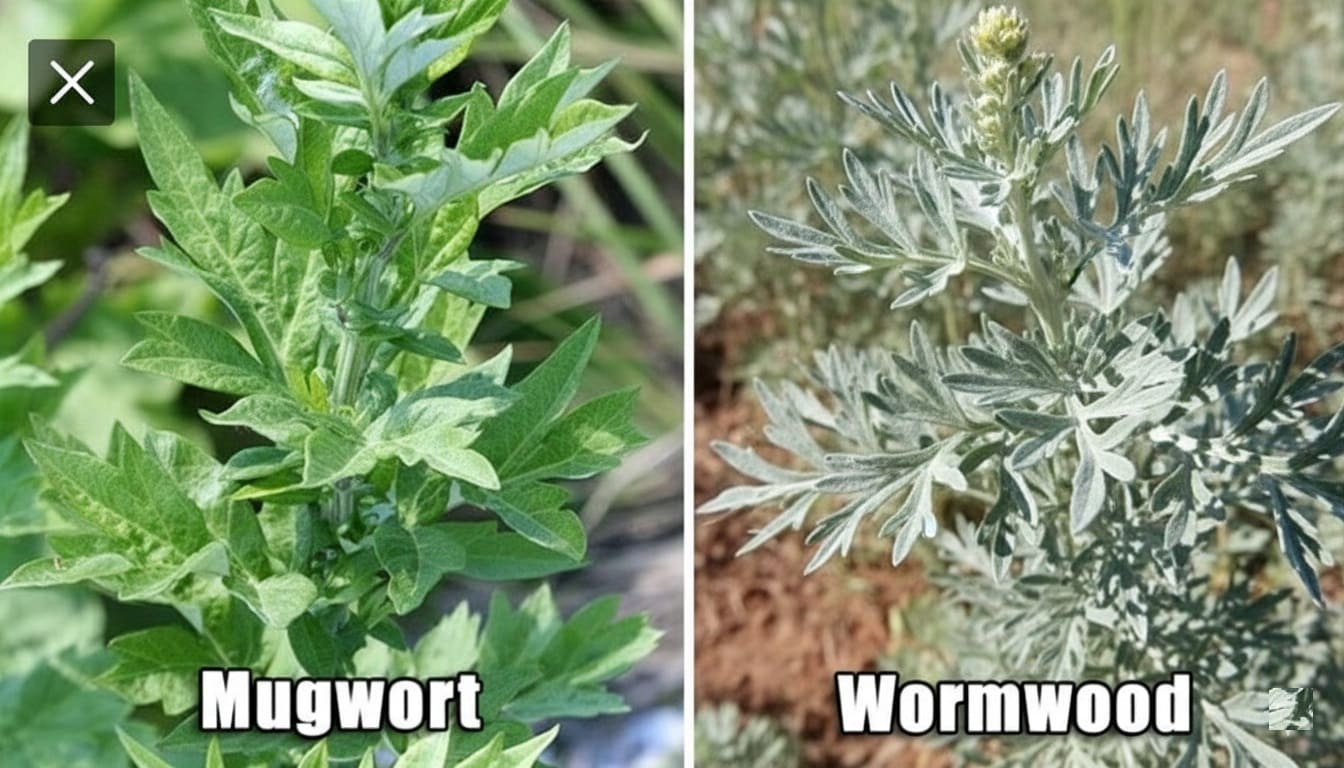
Both belong to the Artemisia genus and share similar feathery foliage, but they’re different species. Mugwort (Artemisia vulgaris) has greener leaves with white undersides and a milder scent.
Wormwood (Artemisia absinthium) has more silvery, highly aromatic foliage and is the source of absinthe. While related, they have distinct appearances and traditional uses.
- How fast does mugwort grow and spread?
First-year seedlings focus on root development and produce modest above-ground growth. Year two is when mugwort’s true nature reveals itself—expect substantial spreading to begin.
Established plants can extend rhizomes several feet per season under favorable conditions. Division or cuttings establish faster, often spreading noticeably within the first growing season.
- Does mugwort offer any garden benefits besides medicinal uses?
Absolutely. Mugwort’s aromatic foliage deters certain pests, making it potentially useful as a companion plant. Its deep roots help break up compacted soil and bring nutrients up from deeper layers. Some gardeners use it as a dynamic accumulator for compost.
The plant also provides habitat for beneficial insects—though whether these benefits outweigh management challenges depends on your situation.
Conclusion: Working With Mugwort’s Nature
Growing mugwort successfully requires understanding what you’re inviting into your garden. This isn’t a plant for casual experimentation—it demands respect, planning, and ongoing attention.
But for those willing to work with its vigorous nature rather than against it, mugwort offers genuine rewards.
Start with proper planning: choose locations with natural barriers or commit to container growing. Implement physical containment from day one if planting in-ground.
Monitor perimeters regularly throughout the growing season and address spread immediately. Harvest generously to redirect the plant’s energy while gathering material for traditional uses.
The secret to success lies not in taming mugwort completely—an exercise in futility—but in creating systems that channel its energy productively. Think of yourself as a river guide rather than a dam builder, directing flow rather than blocking it entirely.
Ready to add this historical herb to your garden? Begin with containment planning, stay vigilant during establishment, and commit to the ongoing relationship. Your garden will benefit from this remarkably resilient plant—kept firmly in its place.
What’s your experience with growing vigorous herbs? Share your mugwort questions or containment strategies in the comments below.
Related posts:
- Discover the Best Types of Basil to Grow and Spice Up Your Herb Garden
- Best Herbs for Cut Flower Gardens: 12 Essential Varieties to Grow
- Are Bananas an Herb? The Surprising Truth About This Everyday Fruit
source https://harvestsavvy.com/growing-mugwort/




No comments:
Post a Comment