The distress call cut through the afternoon air like a siren—a sound I’d never heard before from my backyard flock. When I reached the coop, one of my hens stood hunched and trembling, her left wing dragging awkwardly in the dirt. My stomach dropped. A broken wing. Now what?
If you’re reading this with a limping chicken nearby and panic rising in your chest, take a breath. You’re in the right place. Wing injuries in chickens are surprisingly common, but here’s the good news: these feathered warriors are tougher than they look, and many wing injuries heal beautifully with some basic first aid and a little patience.
By the end of this guide, you’ll know exactly how to assess your chicken’s injury, provide effective treatment, and give your bird the best shot at a full recovery—all without needing a veterinary degree or a trust fund.
Understanding What You’re Dealing With: Types of Wing Injuries
Before you grab the first aid kit, you need to figure out what’s actually wrong. Not all drooping wings mean the same thing.
- Broken Wings happen when one of the bones in the wing actually fractures. You might notice the wing hanging at an odd angle, visible swelling, or—in severe cases—a bone poking through the skin. The chicken will typically be unable to lift or move the wing normally.
- Dislocated Wings occur when the wing joint pops out of its socket, usually at the shoulder. The wing will hang lower than normal but may not look as dramatically “wrong” as a break. Your chicken might still have some limited movement.
- Sprained or Strained Wings are soft tissue injuries—think pulled muscles or stretched ligaments. The wing droops but doesn’t look deformed, and there’s usually swelling and inflammation at the injury site.
How to Examine Your Chicken’s Wing Safely
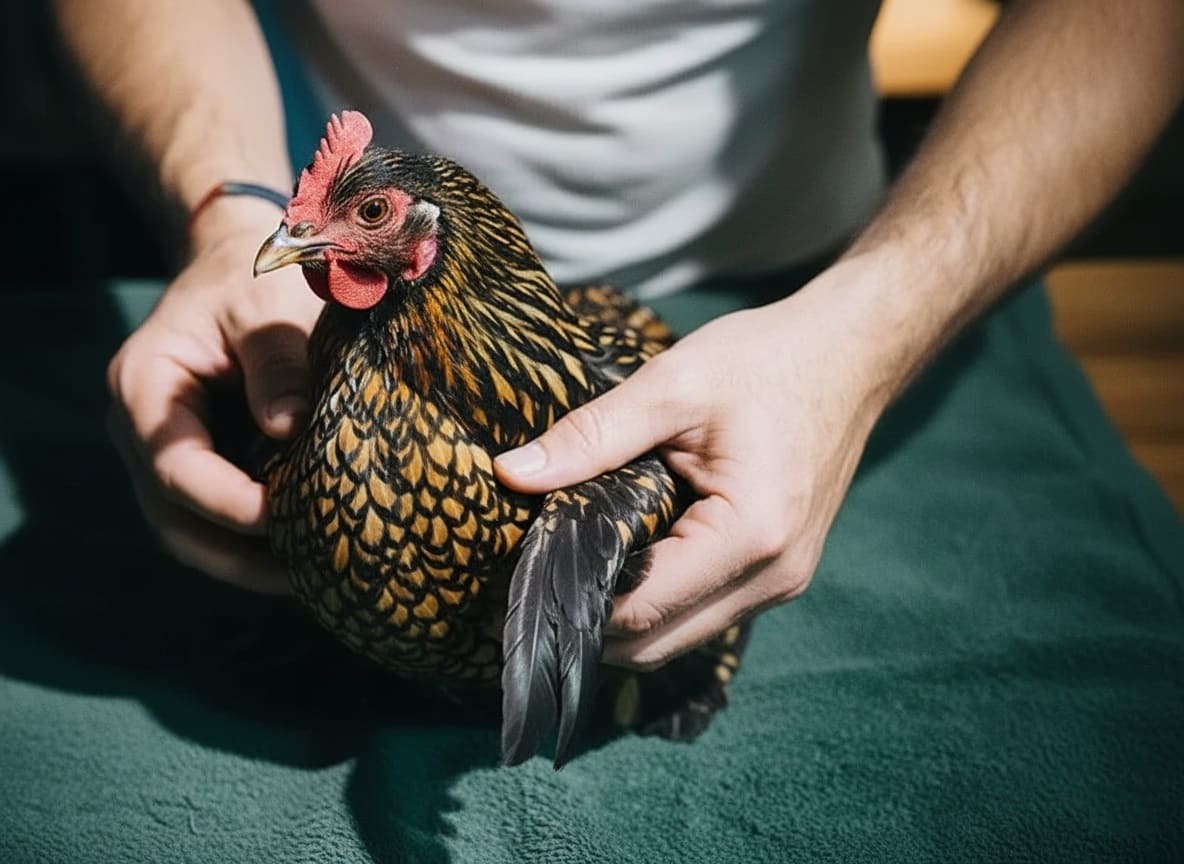
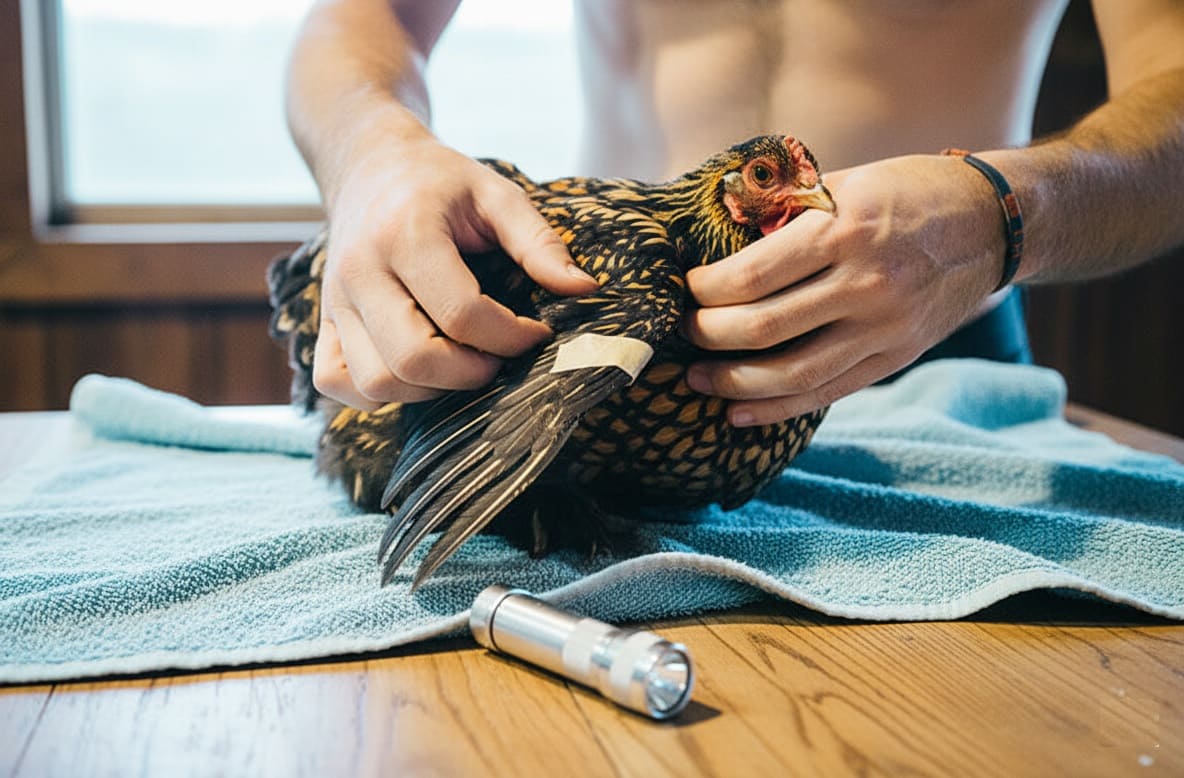
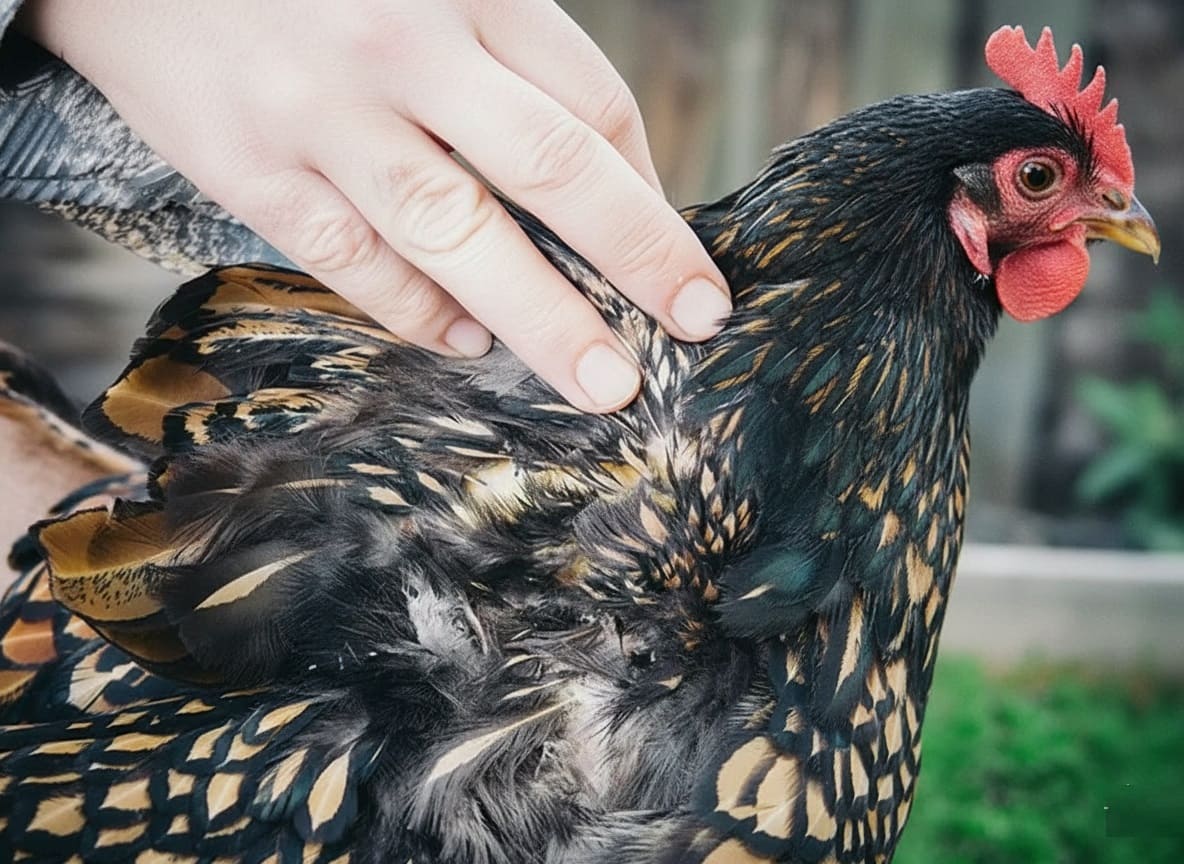
Put on gloves and gently secure your bird in your lap or under your arm, supporting her body firmly but not squeezing. Start by comparing both wings while they’re folded naturally—are they symmetrical, or does one hang differently? Then carefully extend the injured wing, supporting it from below so you’re not putting weight on the injury.
Feel along each bone from shoulder to wing tip, noting any of these red flags:
- Abnormal movement where bones should be solid (indicates a break)
- Crepitus (a grating, grinding sensation when you gently move the wing)
- Intense heat radiating from one specific spot (inflammation or infection)
- A hollow or misshapen joint (likely dislocation)
- Complete floppiness with no resistance (possible nerve damage)
- Visible wounds, punctures, or torn skin
If your chicken shrieks, tries frantically to escape, or becomes extremely agitated during examination, stop immediately. You might be causing additional pain or damage. Some injuries are simply too painful to allow home examination.
Common Culprits Behind Wing Injuries
Understanding how your chicken got hurt helps prevent future incidents. Predator attacks—especially from raccoons, dogs, hawks, and owls—top the list.
Raccoons in particular have a horrifying habit of reaching through chicken wire and grabbing whatever they can reach, then pulling violently. Dogs often grab and shake, causing both the initial injury and additional trauma from thrashing.
Environmental hazards cause plenty of wing injuries too. Automatic coop doors catching a slow-moving bird, getting tangled in netting or fencing, falling from high roosts (especially in older or heavy-breed birds), and aggressive mating from overzealous roosters who grip hen’s backs and wings can all result in broken or sprained wings.
Flock bullying during integration of new birds or when establishing pecking order may lead to wing injuries as well.
 Read about Chicken Foot Injuries: Prevention, Diagnosis, and Treatment Guide
When to Call the Vet (And When You Can Handle It Yourself)
Head to the veterinarian if:
- Bone is protruding through the skin (compound fracture)
- There’s severe bleeding you cannot stop
- The wing appears completely mangled or partially severed
- Your chicken is in obvious, severe shock
- You see signs of infection (foul smell, excessive heat, oozing pus)
- The injury involves the joint itself in a complex way
You can likely treat at home if:
- The wing is drooping but skin is intact
- There’s minor bleeding you’ve successfully stopped
- The bird is alert, eating, and drinking
- Swelling is moderate and localized
- The break appears simple (closed fracture)
Reality check:
Most chicken vets aren’t cheap, and some areas don’t have avian vets at all. A wing wrap typically costs $200-$800 at a vet clinic, and complex repairs can exceed $1,300. Many backyard chicken keepers successfully treat minor to moderate wing injuries at home with excellent results.
However, if your bird is suffering and you cannot provide adequate care, euthanasia may be the most humane option.
First Aid Essentials: Gear Up Before You Start
Gather these supplies before you touch your injured chicken:
Must-Haves:
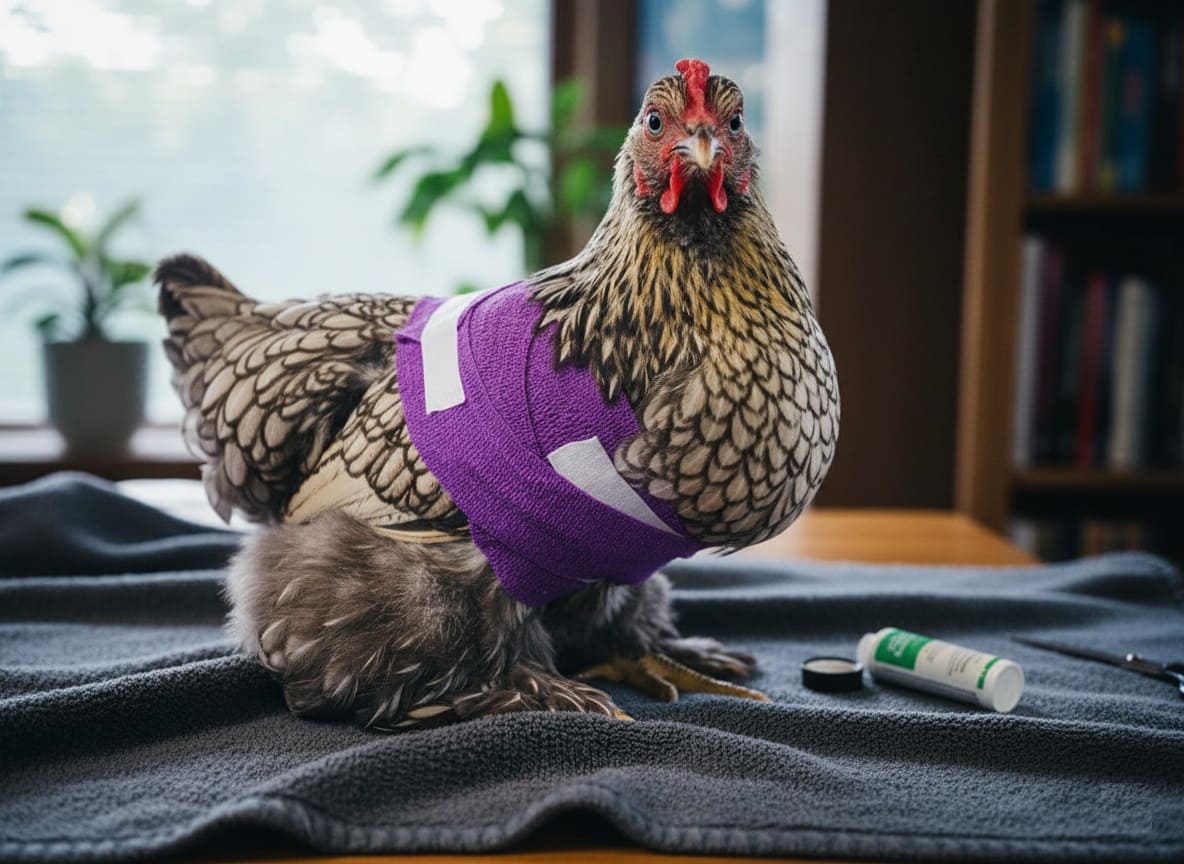
- Vet wrap or self-adhesive bandaging tape (1-2 inches wide)
- Clean gauze pads
- Sharp scissors
- Styptic powder or cornstarch (for stopping bleeding)
- Antibacterial wound spray (Vetericyn is excellent)
- Clean towel
- Protective gloves
Nice-to-Haves:
- Medical tape for securing wrap ends
- Antibiotic ointment (plain, NO pain relief)
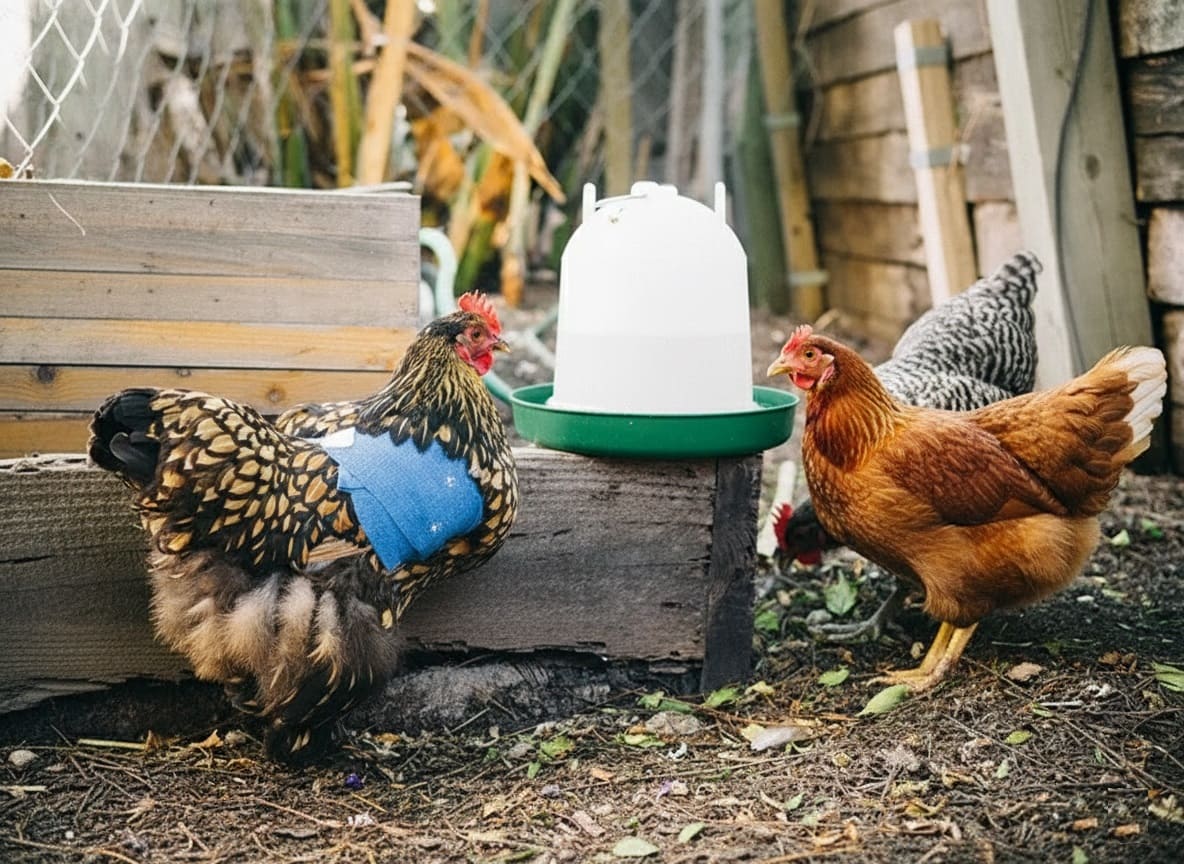
- Blue Kote wound spray (helps hide wounds from other chickens)
- Small dog crate or box for isolation
- Hydrogen peroxide for cleaning
A word on pain management:
While some chicken keepers use baby aspirin dissolved in water (80-325 mg per 250ml), this is controversial and comes with risks. Aspirin thins blood, so never give it if there’s active bleeding. It should only be used for a few days maximum. When in doubt, skip it—chickens mask pain naturally as a survival instinct.
The Golden Rule: Stop, Clean, Assess
Step 1: Secure Your Bird
Catch your chicken calmly but firmly. Injured birds can be unpredictable—they might be docile from shock or thrashing in panic. Wear gloves if needed. Gently wrap her in a towel with just the injured wing exposed. This calms most chickens and protects you from scratches.
Some folks flip chickens on their backs to work on them, which can induce a trance-like state. However, never do this if your chicken has a full crop (you could cause choking) or respiratory issues.
Step 2: Stop Any Bleeding
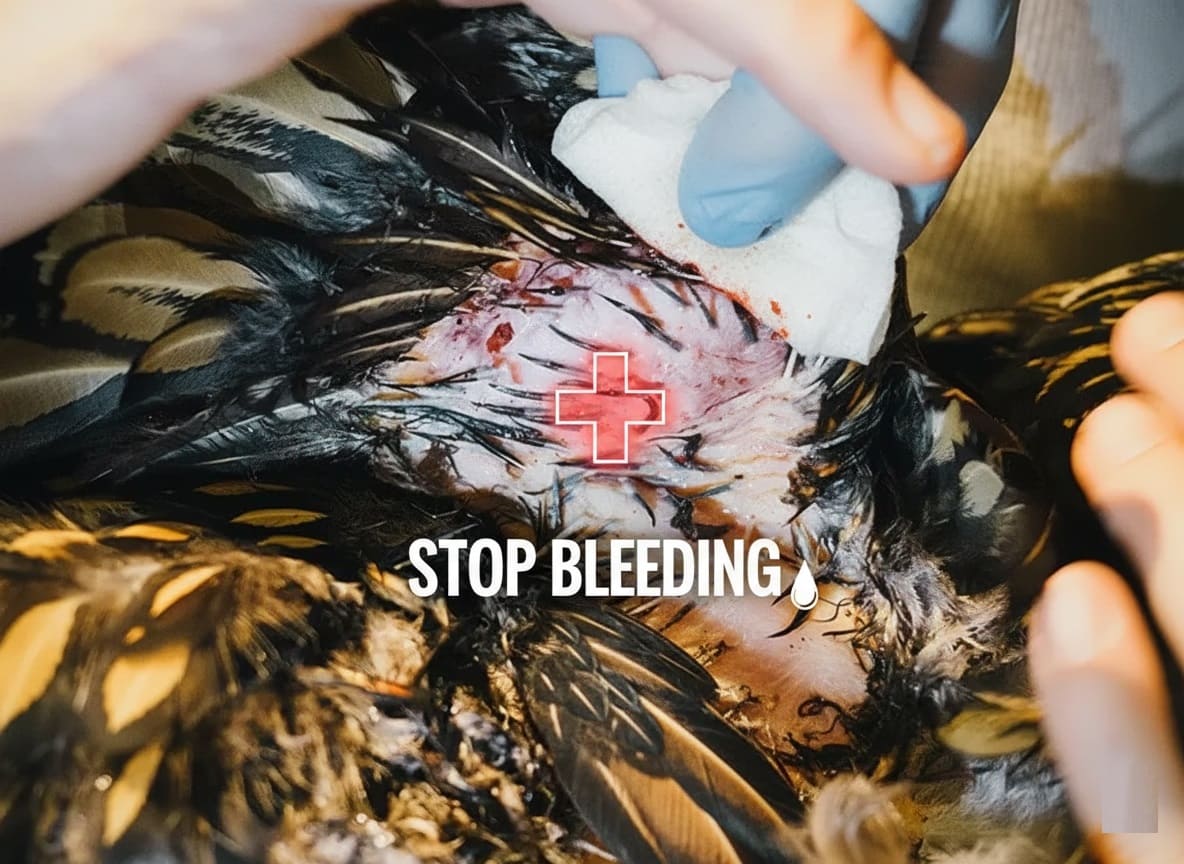
If you see blood, act quickly. Apply clean gauze with firm, gentle pressure directly to the wound for 3-5 minutes. Don’t peek! Lifting the gauze prematurely can dislodge clots and restart bleeding.
If bleeding continues, sprinkle styptic powder or cornstarch on the wound and reapply pressure. Wing injuries can bleed impressively because of all the feather follicles, but most bleeding stops within 5-10 minutes.
Step 3: Clean Thoroughly
Once bleeding stops, clean the area with warm water and a drop of Dawn dish soap, or spray with a saline wound wash like Vetericyn. Rinse away dirt, debris, and dried blood. Pat dry gently with clean gauze.
Trim away feathers near the wound if necessary—they harbor bacteria and make wrapping difficult. Clean scissors work fine for this.
Step 4: Inspect Carefully
Now examine the wing closely:
- Is the skin broken? How deep is the wound?
- Can you see bone, or is it purely soft tissue damage?
- Does the wing sit at a bizarre angle?
- Is there a visible lump or deformity along the wing bones?
- Can the chicken move the wing at all, or is it completely immobile?
If you’re looking at exposed bone, deep punctures from an animal bite, or a completely mangled wing, your chicken needs professional help or humane euthanasia. Don’t attempt heroics that will only prolong suffering.
The Figure-8 Wrap: Your Secret Weapon for Wing Healing
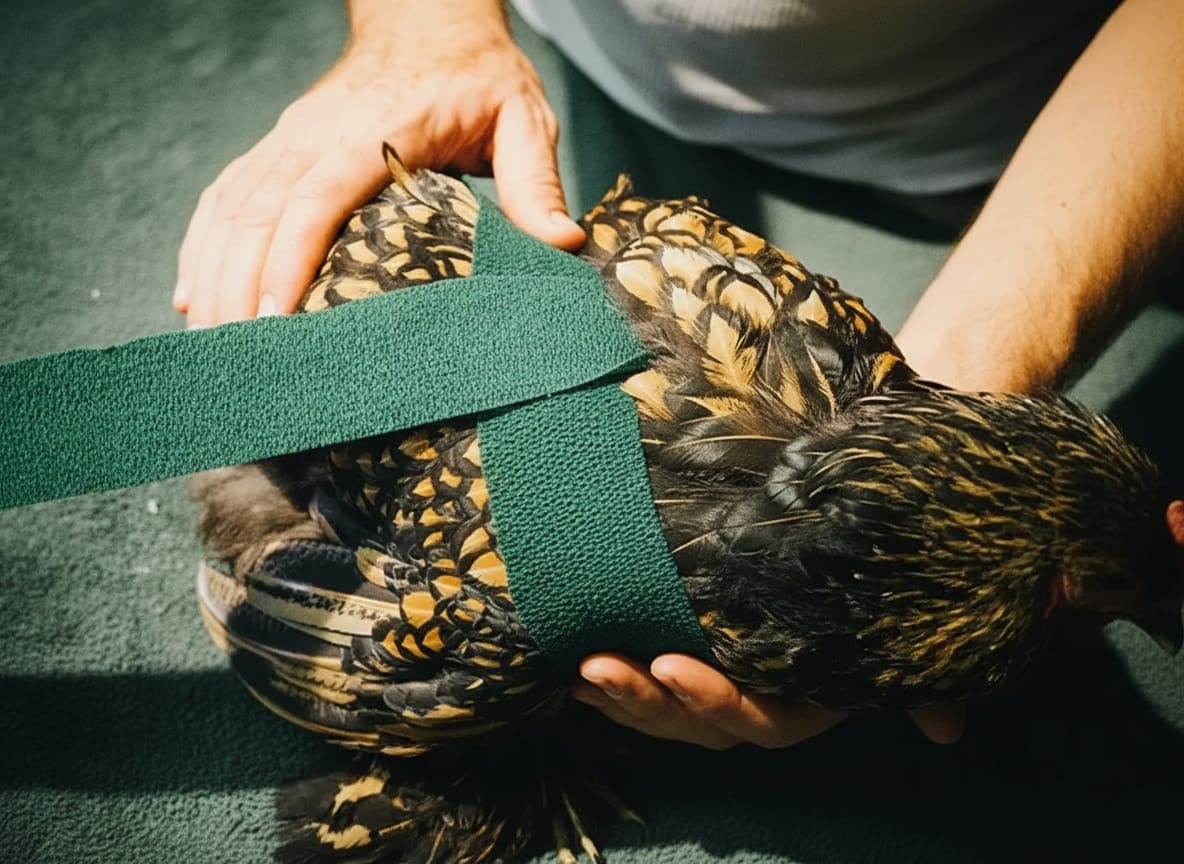
The figure-8 wrap immobilizes the injured wing against the body in its natural folded position, allowing bones to knit and soft tissues to heal. This is the gold standard treatment for simple breaks, dislocations, and sprains.
Here’s how to do it right:
Step 1: Position the Injured Wing Correctly
This is the most important step. Everything else depends on getting this right. Take the injured wing and gently fold it into its natural resting position as if the chicken were standing normally with both wings tucked. Use the healthy wing as your guide—they should mirror each other.
The wing should lie flat against the body with feathers smoothed down, not bunched up. The primary flight feathers should extend toward the tail, not sticking out sideways or drooping. The wing tip should be at or slightly above the level of the tail.
If the wing won’t fold properly because of swelling or structural damage, fold it as close to the natural position as you can achieve without forcing it. Never force a wing into a position it absolutely won’t go—you could cause additional fractures or tissue damage.
Step 2: Start Your First Pass
Begin with your vet wrap at the chicken’s lower back, just above the tail and below the wings. This anchor point is crucial for preventing slippage.
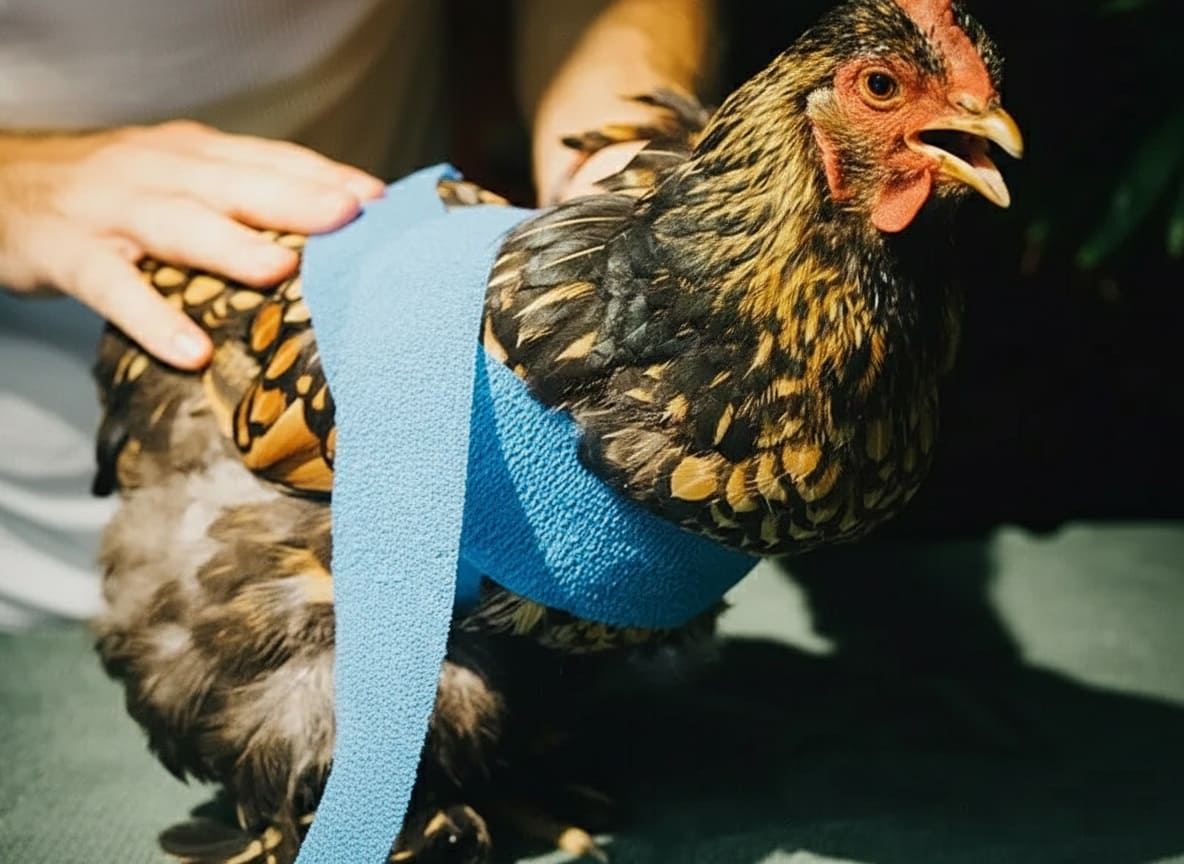
Bring the wrap diagonally up across the back and over the injured wing at its widest point (usually the “elbow” area). The wrap should cover the wing but not extend so far down that it includes the primary flight feathers—you’re stabilizing the wing bones, not mummifying her.
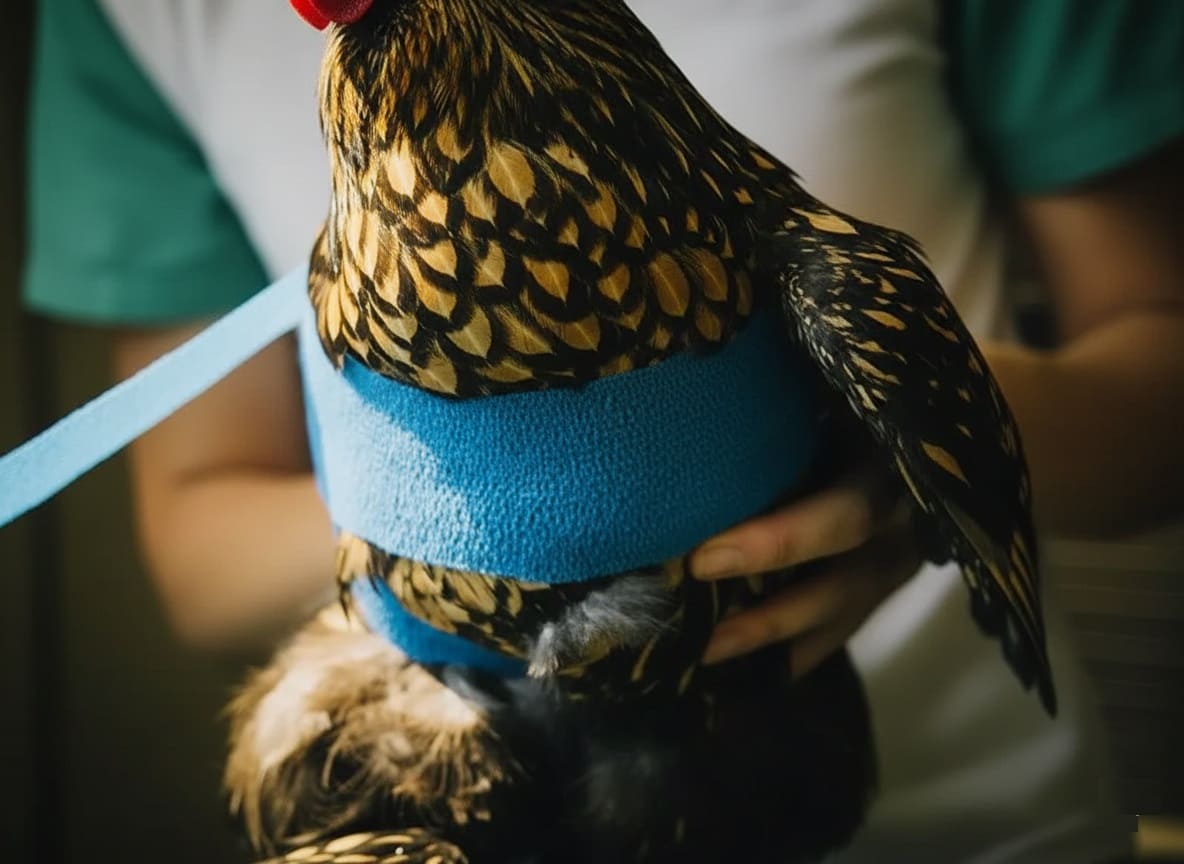
Continue the wrap across the chicken’s breast, then under the healthy wing—make absolutely certain this wing remains completely free and can move normally. The vet wrap should pass under it smoothly without binding or restricting it.
Bring the wrap back up across the back, over the injured wing again, and complete the circle. That’s one complete pass.
Step 3: Continue Wrapping
Repeat this figure-8 pattern 2-3 more times, with each pass overlapping the previous one by about half the width of the wrap. You’re creating a secure, even layer of support.
As you wrap, maintain consistent tension—snug but not tight. Think of it like wrapping a sprained ankle on a human: firm enough to provide support without cutting off circulation. The wrap should not compress your chicken’s body to the point where you can see her breathing harder.
Every couple of passes, pause and check that:
- The injured wing hasn’t shifted out of position
- The healthy wing is still completely free
- The wrap isn’t riding up toward her neck or down toward her legs
- Feathers aren’t bunching awkwardly under the wrap
Step 4: Critical Safety Checks Before Finishing
Before you secure the end, do these non-negotiable checks:
- The vent check: Look at your chicken’s rear end. Can you clearly see the vent (her bottom) is completely uncovered? She needs to poop, and if you’ve accidentally wrapped over or too close to the vent, you’ll create a disaster. Leave at least an inch of clearance.
- The crop check: Feel your chicken’s crop (the bulge on the right side of her breast). Press gently. The wrap should not compress the crop area. If you feel the wrap pressing into the crop, it’s too tight or positioned wrong.
- The leg check: Make sure the wrap hasn’t caught any leg feathers or isn’t positioned so low that it interferes with how her legs hang. She should be able to walk normally once you set her down.
- The breathing check: Watch your chicken breathe for 30 seconds. Her breathing should look normal—gentle rise and fall of her chest. If she’s gasping, breathing rapidly, or looks distressed, the wrap is too tight around her chest.
- The balance check: If possible, set your chicken on her feet (while still holding her) and see how she stands. She’ll be a bit off-balance with one wing immobilized, but she shouldn’t be falling over or unable to stand.
Step 5: Secure the Wrap
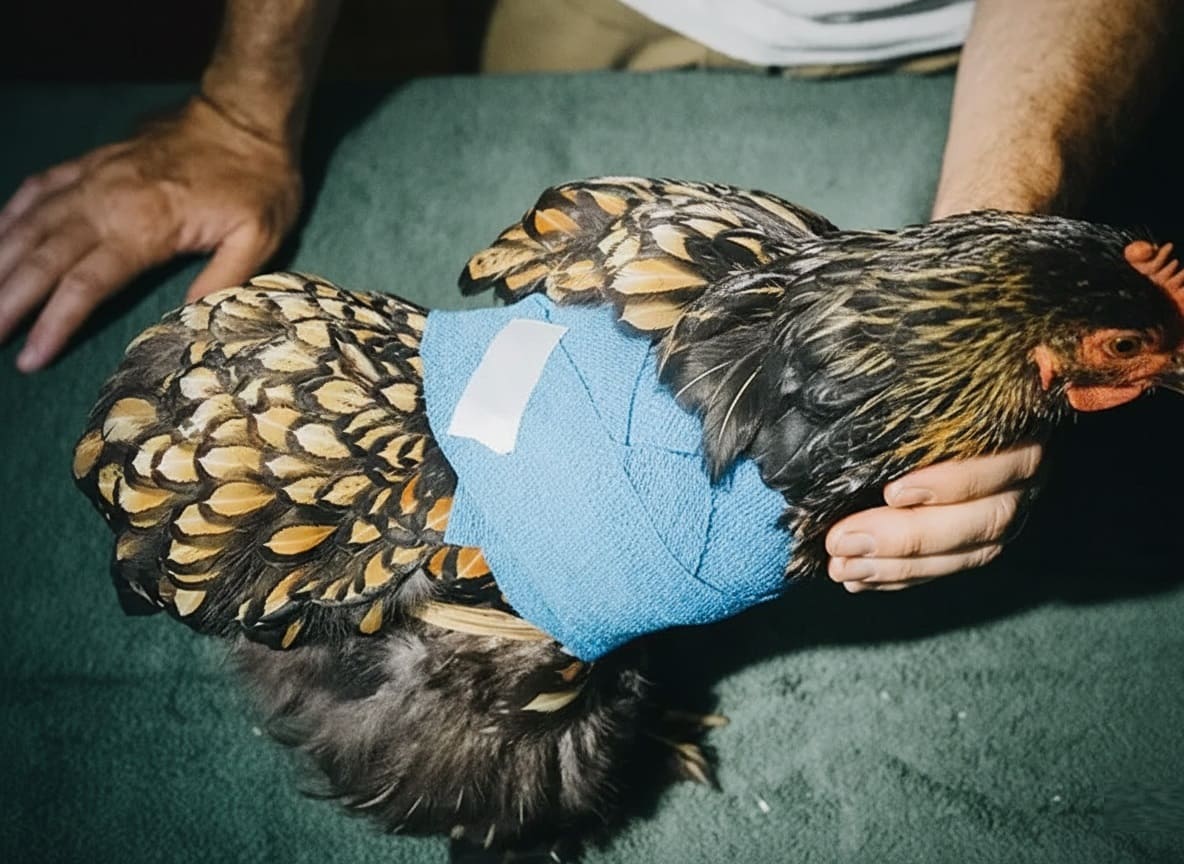
Vet wrap is self-adhesive and should stick to itself when you press the end firmly against the previous layer. Rub it down firmly to ensure good adhesion.
For extra security (especially with hens who are determined escape artists), add a 2-inch strip of medical tape over the end of the wrap at the chicken’s back. Don’t use duct tape or anything super sticky—you’ll want to remove this in a week or so, and you don’t want to damage skin or pull out feathers.
Some people reinforce the entire wrap with an X-pattern of tape across the back. This helps with chickens who pull at their wraps constantly, but make sure you’re using tape that won’t be agonizing to remove.
Step 6: The Critical Observation Period
Don’t just set your chicken down and walk away feeling accomplished. You must observe her behavior for at least 15-20 minutes to ensure the wrap is functional, not harmful.
Set her on the ground in her isolation area and watch carefully. Normal adjustment behaviors include:
- Shaking her whole body vigorously
- Pulling at the wrap with her beak for a few minutes
- Taking a few awkward steps as she figures out her balance
- Sitting down for a bit to contemplate her fate
- Eventually standing up and walking around semi-normally
Red flags that mean you need to rewrap immediately:
- Falling over repeatedly and unable to stay upright
- Breathing heavily or gasping
- Frantic, non-stop pulling at the wrap accompanied by distressed vocalizations
- Refusal to put weight on her legs and just sitting frozen
- A leg or the free wing looking trapped or bent weirdly
- Walking in circles or stumbling severely
- Any blue or purple discoloration in her comb or wattles (indicates circulation problems)
If you see any red flags, carefully remove the wrap and start over. Don’t feel bad—wrapping is a skill that takes practice. Even experienced folks sometimes need to try twice to get it right.
After 15-20 minutes, if your chicken is walking around, pecking at food, drinking water, and generally acting annoyed but functional, you’ve succeeded. She’ll continue to improve over the next few hours as she adjusts.
Common Wrapping Mistakes and How to Avoid Them
- Mistake #1: Wrapping both wings.
Unless your chicken has such severe balance issues that she literally cannot stand without both wings immobilized, never wrap both. She needs that free wing for balance and for minor flight adjustments (like hopping down from a perch). Wrapping both wings is like tying both arms behind someone’s back—cruel and unnecessary.
- Mistake #2: Too many layers equals too much bulk.
Your chicken should look like she’s wearing a neat bandage, not a puffy jacket. Three to four complete passes is plenty for most injuries. More than that and you’re restricting movement, breathing, and natural thermoregulation.
- Mistake #3: Not separating the wings enough.
The vet wrap must pass cleanly under the healthy wing, not sort of smoosh both wings together. Think of it like a cross-body purse strap—it should lie in the groove between the healthy wing and the body.
- Mistake #4: Starting too high.
If you start wrapping at the shoulders or neck, it will slide downward within hours. Always start low at the back above the tail, which creates a stable anchor point.
- Mistake #5: Wrapping when the wing is in the wrong position.
If the wing won’t fold right because you’re wrapping over a massive swollen lump, you need to address that inflammation first. Ice the area for 10 minutes, give it an hour to see if swelling decreases, then try wrapping. Or accept that for the first day or two, the wrap might not be perfect until initial swelling goes down.
Life After Wrapping: The Recovery Period
Isolation is Non-Negotiable
Move your injured chicken to a quiet, comfortable space away from the flock immediately. Why? Three words: chickens are dinosaurs. They will peck at wounds, attack weakened birds, and generally make recovery impossible.
Set up a small dog crate, spare coop, or even a large box in a garage or basement. Provide:
- Soft bedding (straw or pine shavings)
- Fresh water at floor level (no reaching)
- Regular feed within easy reach
- Dim lighting to reduce stress
- Warmth if the weather is cool (heat lamp at a safe distance)
Your chicken should be able to see and hear the flock if possible—complete isolation causes social stress—but physical separation is essential.
 Discover the Amazing Facts About Chicken Vision: What You Didn’t Know
Daily Examination and Wrap Maintenance
Every single day, you need to check your chicken and her wrap thoroughly. This takes about 10 minutes but it’s essential for catching problems early.
What to look for:
- Wrap integrity: Is the wrap still snug and in place, or has it slipped down toward her legs? Is she pulling it apart? Are there any wet or dirty spots on the wrap? Vet wrap should stay clean and white (or whatever color you used). Dark, wet, or dirty areas suggest the wrap is contaminated and needs changing.
- Smell: Sniff the wrap. Yes, really. A healthy wrapped wing smells like chicken—warm and slightly musty but not offensive. A foul, rotten smell indicates infection brewing under the wrap. If you smell something bad, remove the wrap immediately and inspect the wound.
- Behavior: Is she eating and drinking normally? Is she moving around her isolation space, or is she sitting hunched and lethargic? Has her activity level increased or decreased from yesterday? Improved behavior (more active, more interested in food) suggests healing. Declining behavior signals problems.
- Posture: Watch how she holds herself. Is she standing upright with normal chicken posture, or is she hunched with fluffed feathers (signs of illness or pain)? Are her eyes bright and alert, or dull and partially closed?
- Droppings: Check her poops daily. Normal chicken droppings are brown to green solid parts with white urates. Watery, bloody, or weird-colored droppings suggest systemic problems possibly from infection.
- The healthy wing: Is your chicken still using her free wing normally? Can she extend and fold it fully? If the healthy wing seems weak or isn’t moving right, your wrap might be too tight and cutting off circulation on that side.
Changing the Wrap: When and How
You’ll need to remove and replace the wrap every 3-5 days for wound inspection and cleaning, or immediately if:
- The wrap gets wet or dirty
- You smell infection
- It’s slipped out of position significantly
- Your chicken has managed to partially destroy it
- You see any circulation concerns (swelling below the wrap, discolored skin)
To remove vet wrap, carefully cut it with scissors along the chicken’s back, taking extreme care not to nick skin or clip feathers. Vet wrap scissors (the kind with a blunt tip that slides under bandages) make this easier, but regular sharp scissors work if you’re careful.
Peel the wrap away gently. If it’s stuck to feathers, work slowly—yanking will hurt. Once the wrap is off, let your chicken move her wing naturally for 5-10 minutes. This prevents the joint from completely freezing up.
During this unwrapped time, clean the injury site with saline or Vetericyn. Look carefully for:
- Signs of healing: Decreased swelling, less heat, scabbing over open wounds, new pink tissue forming, and increased mobility all indicate good healing.
- Signs of infection: Increased swelling, increased heat, red streaks extending away from the wound, discharge (especially yellow, green, or brown), foul smell, and soft or mushy tissue all spell trouble.
If everything looks good, apply a thin layer of plain antibiotic ointment to any open wounds, then rewrap using the exact same technique you used the first time.
Returning to the Flock: Slow and Steady Wins
After your chicken’s wing heals, don’t just toss her back into the coop. The flock pecking order has shifted in her absence, and she might be challenged or attacked.
The Reintegration Process:
- Days 1-2: Let your recovered hen spend supervised time with the flock during the day. Watch closely. If anyone starts pecking aggressively, separate them immediately. Return your hen to her isolation crate at night.
- Days 3-5: If daytime interactions are peaceful, let her roost with the flock at night. Position her between friendly birds if possible, not next to known bullies.
- Day 6+: If all is well, she’s fully reintegrated. Keep an eye out for a few more days to be sure.
If her wing healed crooked or droopy, it might attract unwanted attention. Spray the area with Blue Kote, which dyes the skin blue-purple and masks the defect. This usually prevents pecking.
 Learn about Mixing Birds in Your Backyard: Can Chickens and Ducks Live Together?
How Long to Keep It Wrapped?
Most wing injuries need 10-21 days of immobilization:
- Simple sprains: 7-10 days
- Dislocations: 10-14 days
- Clean breaks: 14-21 days
- Complex fractures: 21+ days, or veterinary intervention
Bones heal faster in younger birds. A pullet might be good in two weeks; an older hen might need three.
You’ll know it’s time to remove the wrap when:
- Swelling has completely resolved
- The wing doesn’t droop when unwrapped for inspection
- Your chicken tries to use the wing when preening
- There’s no heat or pain when you gently palpate the injury site
When Things Don’t Go According to Plan
Signs of Infection to Watch For:
- Foul, rotten smell from the wound
- Excessive heat radiating from the injury
- Thick yellow, green, or brown discharge
- Lethargy, loss of appetite, or fever
- Red streaks extending from the wound
If you spot infection, clean the wound twice daily with diluted chlorhexidine or Vetericyn, and apply antibiotic ointment. If it worsens despite your efforts, oral antibiotics from a vet may be necessary.
- The Amputation Question
If a wing is too damaged to heal—completely crushed, infected beyond repair, or with severe tissue death—amputation might be the only option. Chickens can live perfectly good lives with one wing. They won’t fly, but backyard chickens don’t need to. However, amputation requires a veterinarian.
Never attempt to euthanize a chicken yourself unless you know proper techniques. If euthanasia is necessary and you can’t reach a vet, contact animal control for assistance.
 Read the Guide to Preventing and Treating Common Chicken Illnesses
FAQ: Your Burning Questions Answered
- Q: My chicken keeps pulling off the wrap. What do I do?
A: She might be bored, or the wrap might be uncomfortable. Try adding a bit of Blue Kote or bitter apple spray to the outside of the wrap—the bad taste deters pulling. Ensure it’s not too tight or positioned incorrectly. Some chickens are just stubborn; you may need to rewrap daily until they give up.
- Q: Can a chicken’s wing heal on its own without wrapping?
A: Minor sprains might, but breaks and dislocations almost certainly won’t heal properly without immobilization. The wing will heal crooked, droop permanently, or develop chronic pain. Wrapping gives your chicken the best chance at regaining normal function.
- Q: How much does it cost if I take my chicken to the vet?
A: Expect $25-75 for an exam, $40-150 for X-rays, and $50-200+ for splinting or casting. Surgical repair for complex fractures can run $300-1,300. Many vets don’t see chickens at all, and those that do often charge rates comparable to treating a dog or cat.
- Q: Should I give my chicken antibiotics?
A: Only if there’s clear infection or significant risk of infection (like a deep puncture wound from a predator). Overuse of antibiotics contributes to resistance. Topical antibiotic ointment on wounds is generally safe and sufficient for most cases.
- Q: Will my chicken ever fly again?
A: Possibly! Many chickens regain near-normal wing function after healing. However, if the wing heals at an awkward angle or there’s permanent nerve damage, flight might be impaired. The good news? Backyard chickens don’t need to fly to live happy, healthy lives. They’ll adapt.
- Q: Can I use regular athletic tape or bandages instead of vet wrap?
A: In a pinch, yes, but vet wrap is far superior because it sticks to itself without adhesive touching feathers. Regular tape can pull feathers out when removed, causing pain and additional injury. If vet wrap isn’t available, gauze secured with medical tape can work—just be very gentle removing it.
The Bottom Line: You’ve Got This
Finding an injured chicken is scary, especially the first time. But armed with basic knowledge, simple supplies, and a little courage, you can give your bird an excellent shot at recovery.
Remember the essentials:
- Assess the injury calmly and determine if it’s something you can handle
- Stop bleeding and clean wounds thoroughly
- Immobilize the wing with a figure-8 wrap that’s snug but not tight
- Isolate your chicken and monitor daily for complications
- Keep the wrap on for 10-21 days depending on severity
- Reintegrate slowly and watch for bullying
Chickens are astonishingly resilient. I’ve seen birds recover from injuries that looked catastrophic, going on to lay eggs and boss the flock around for years afterward. Your hen might have a crooked wing or a slight limp when it’s all over, but she can still live a full, comfortable life.
Take action today: Even if your chicken is fine right now, bookmark this guide and add vet wrap to your farm first aid kit. When an emergency strikes—and eventually it will—you’ll be ready to spring into action instead of frantically Googling while your bird suffers.
Have you treated a broken wing successfully? Drop your story in the comments—your experience might be exactly what another panicked chicken keeper needs to hear!
source https://harvestsavvy.com/broken-chicken-wing/
No comments:
Post a Comment