Saturday, November 1, 2025

How to Grow Mulberry Trees: Best Varieties, Care, and Harvest Tips

I still remember the first time I tasted a sun-warmed mulberry straight from the tree—it was at my grandmother’s house, and my fingers were stained purple for days.

That didn’t matter one bit because those berries were pure summer magic: sweet, juicy, and unlike anything you’d find in a grocery store.

That’s the thing about mulberries—they’re too delicate to ship, which means growing your own is the only way to enjoy them fresh.

These fast-growing, low-maintenance trees produce abundant fruit, attract beneficial wildlife, and can fit into gardens of nearly any size with the right variety and pruning.

A mature tree can yield 60-100 gallons of berries annually, ripening over 4-8 weeks rather than all at once, and they’ll continue this generous production for well over a century.

By the end of this guide, you’ll understand how to successfully grow, harvest, and enjoy your own mulberry bounty while avoiding the common pitfalls that frustrate new growers.

Understanding Mulberry Species: Choosing Your Tree

Before you buy, you need to understand what you’re getting. The mulberry family includes three main species, and the differences matter for your climate, space, and taste preferences.

1. Black Mulberry (Morus nigra) hails from Iran and produces what many consider the finest fruit—large, juicy berries with a complex balance of sweetness and tartness, similar to blackberries.

These trees stay relatively compact at 25-30 feet and grow slowly compared to other species.

They’re the most cold-sensitive, thriving in zones 6-9, and often take 8-10 years to begin fruiting from seed (though grafted varieties fruit much sooner). The leaves have distinctly fuzzy undersides, which helps with identification.

Black Mulberry (Morus nigra)

2. Red Mulberry (Morus rubra) is North America’s native species, and it’s a substantial tree reaching 50-70 feet tall.

The fruit nearly matches black mulberries in quality—sweet with good depth of flavor. These are the champions for cold climates, hardy to zone 4 (withstanding temperatures down to -30°F).

Red mulberries have leaves with sandpaper-textured upper surfaces and prefer deep, rich soils near streams and bottomlands in their natural habitat.

Red Mulberry (Morus rubra)

3. White Mulberry (Morus alba) arrived from China during the silk industry boom (silkworms feed exclusively on its leaves). These are the tallest trees, potentially reaching 80 feet, and the fastest growing—sometimes adding several feet per year.

They’re also the most cold-hardy, surviving to zone 3 (-40°F). The fruit is typically very sweet but lacks the tartness that gives black and red mulberries their complexity. White mulberries have glossy, smooth leaves.

Here’s the confusing part: despite the name, white mulberry fruits can be white, pink, red, or black—the name refers to the color of the flower buds, not the fruit.

White Mulberry (Morus alba)

👉 Here’s How to Grow White Strawberries: Pineberry Growing Guide & Care Tips

  • The Invasive Issue:

White mulberries self-seed so aggressively that Illinois, Kentucky, and Tennessee have banned them. They grow in sidewalk cracks, poor soil, and anywhere birds drop seeds.

Before planting any mulberry, check with your local agricultural extension office—some cities, particularly in the desert Southwest (Phoenix, Las Vegas, El Paso), have banned male mulberry trees entirely due to the allergenic pollen they produce.

  • What About Sex?

Most cultivated mulberries are monoecious (bearing both male and female flowers on one tree) or parthenocarpic (producing fruit without pollination). However, some are dioecious, meaning you need both a male and female tree for fruit production.

Always verify with your supplier whether the variety you’re purchasing is self-fertile. Trees labeled as “fruitless” are males—avoid these unless you want shade without the mess.

Choosing the Right Variety for Your Situation

The variety you select should match both your space and your goals. Here’s a practical breakdown:

  • For Large Properties (30+ feet of space):

Standard black, red, or white mulberries make impressive shade trees. ‘Charlton House’ (black) and ‘Pakistan’ (white, with remarkable 3.5-inch fruits) are excellent full-size options.

Allow 25-30 feet between trees and plant them 40+ feet from buildings, septic systems, and underground utilities—their roots are as aggressive as their top growth.

  • For Average Gardens (15-25 feet):

Semi-dwarf cultivars like ‘Illinois Everbearing’ (a cold-hardy white/red hybrid reaching 20-25 feet) or ‘Wellington’ (black, 15-20 feet) balance productivity with manageable size. These can be kept even smaller with annual pruning.

  • For Small Spaces or Containers:

Dwarf varieties revolutionize mulberry growing. ‘Charlotte Russe’ reaches only 5 feet, produces fruit in its first year, and grows happily in large pots.

‘Gerardi Dwarf’ stays under 6 feet with full-size, excellent fruit. ‘Dwarf Everbearing’ thrives in containers as small as 12 inches, producing abundant half-inch berries continuously.

  • For Cold Climates (Zones 4-5):

‘Illinois Everbearing’ handles -25°F, while red mulberry selections tolerate zone 4. Avoid black mulberries in cold regions—they’ll struggle.

  • For Minimal Mess:

White-fruited varieties like ‘Tehama’ or ‘King White Pakistan’ stain less and attract fewer birds than dark-fruited types. ‘Kokuso’ varieties have minimal fruit but excellent leaves for those interested in silkworm raising or tea production.

Look for varieties marked with the RHS Award of Garden Merit (AGM)—they’ve proven reliable in trials. In the United States, some nurseries note “Cold Hardy” selections specifically bred for northern climates.

The Planting Decision: Location Matters More Than You Think

This is where many growers make costly mistakes. Mulberries have aggressive, wide-spreading root systems that can crack foundations, invade septic systems, and clog drainage pipes.

The general rule: plant the tree as far from structures as its mature height. A 50-foot tree needs to be 50+ feet from your house, septic field, and underground utilities. Add another third of that distance to be truly safe—so 65-70 feet for a large tree.

Choose a location with full sun (6-8 hours daily) for best fruiting, though they tolerate partial shade. The spot should be large enough to accommodate the wide canopy—and here’s the critical planning step—consider what’s under that canopy.

Those delicious berries will fall and stain concrete, decking, and anything else permanently. Some clever placement options:

  • Over a chicken run or pig pen (they’ll devour fallen fruit)
  • In a wild corner of your property where stains don’t matter
  • Where you can easily spread tarps for collection
  • Away from parking areas, patios, clotheslines, and sidewalks

One of my gardening mentors planted his mulberry so the canopy overhung his duck pond. The ducks cleaned up every fallen berry, and the tree provided them summer shade—a perfect permaculture design.

mulberry tree & duck pond

Soil, Planting, and First-Year Establishment

Mulberries famously tolerate poor soils, but “tolerates” and “thrives” are different things. They prefer loamy, organically-rich soil that drains well, with a pH between 5.5 and 7.0. What they absolutely cannot handle is waterlogged soil—standing water will rot the roots.

  • If you have heavy clay soil: Work in 2-3 inches of compost plus coarse sand or perlite to improve drainage. Consider planting on a slight mound to keep the root crown above soggy conditions.
  • If you have sandy soil: Mulberries will grow but may need more frequent watering and feeding. Amend generously with compost and plan for ongoing mulching to build organic matter.

👉 Here’s How to Prepare Land for Planting: A Comprehensive Guide for Gardeners & Farmers

Planting Steps

  1. Dig a hole twice as wide but only as deep as the root ball. Never plant deeper than the tree grew in its container—mulberries are sensitive to deep planting.
  2. Mix a bucketful of compost into the removed soil. Remove the tree from its container and gently untangle any circling roots (crucial for preventing future root problems).
  3. Place the tree in the hole, backfill with the amended soil, and create a shallow basin around the trunk to hold water.
  4. Water deeply, then apply 3-4 inches of organic mulch, keeping it 6 inches away from the trunk.
  5. For bare-root trees (available in late winter/early spring), soak roots for several hours before planting, then follow the same process, making sure roots spread outward, not circling.

Planting mulberry tree

First-Year Care Protocol

The first year determines your tree’s future success. Water deeply once or twice weekly in the absence of rain—about 1 inch per week, or 7-10 gallons for a standard planting hole.

Deep watering encourages deep roots; shallow, frequent watering creates weak, surface roots. In hot climates, check soil moisture twice weekly by sticking your finger 3 inches down—water if it’s dry.

Young trees need protection from deer, which find mulberry foliage irresistible. A simple cage of chicken wire or plastic fencing around the tree for the first 2-3 years prevents browse damage.

In harsh climates, wrap the trunk with tree wrap for the first winter to prevent sunscald and frost cracks.

Resist the urge to fertilize at planting time—it encourages weak, leafy growth instead of root development. Wait until the second spring to begin feeding.

Ongoing Care: Easy But Not Neglectful

Once established (typically by the second or third year), mulberries are remarkably self-sufficient. Here’s the minimal annual care they require:

  • Watering:

Established trees develop drought tolerance thanks to their deep taproots, but fruit quality suffers in extended dry periods.

During flowering and fruit development, provide 1 inch of water weekly if rain doesn’t deliver it. Container trees need consistent moisture—check daily in summer heat.

  • Feeding:

Mulberries are light feeders. Each spring, spread a 2-inch layer of compost around the root zone (from 6 inches out from the trunk to the drip line). This slow-release feeding is usually sufficient.

If your tree shows yellowing leaves, poor fruit set, or weak growth, apply a balanced organic fertilizer (10-10-10) in early spring.

Container trees benefit from liquid feeding every two weeks during the growing season or a spring application of slow-release granules.

  • Mulching:

Maintain a 3-4 inch layer of organic mulch year-round. This single practice does more for your tree’s health than any other—it regulates soil temperature, retains moisture, suppresses weeds, and feeds soil biology. Refresh the mulch each spring and after it breaks down.

Pruning: Keeping Trees Productive and Manageable

Here’s where mulberries truly shine—they tolerate pruning like almost no other fruit tree. You can cut them back hard, shape them creatively, and they respond with vigorous growth and abundant fruiting since they produce on new wood.

  • When to prune:

Late winter during dormancy (November through February in most climates) is ideal. Avoid pruning in early spring when sap flows heavily—mulberries “bleed” profusely from cuts made when growth begins, though this doesn’t harm the tree.

  • Formative pruning for young trees:

If you start with a bare whip (unbranched trunk), cut it back to about 5 feet tall to encourage branching at a harvestable height. As branches develop, select 4-6 well-spaced ones to form your main scaffold, removing others.

For an umbrella shape (excellent for easy harvesting), encourage branches to grow outward and slightly downward.

pruning mulberry tree for umbrella shape

Linda Grimo at Grimo Nut Nursery suggests standing as tall as you can with pruners raised and cutting off the top of the tree—this simple technique prevents trees from growing beyond reach.

umbrella shaped mulberry tree

  • Annual pruning for established trees:

Focus on three goals: remove dead, diseased, or crossing branches; maintain your desired size; and keep the center open for air circulation. You can be quite aggressive.

Some growers maintain full-size varieties at 8-10 feet by cutting back about half the new growth each winter. The tree responds by producing short, fruiting spurs along the remaining wood.

mulberry tree

👉 Here’s How to Prune Roses: A Simple Guide for Stunning Results

Specialized training methods:

  • Espalier:

Mulberries train beautifully against walls. Establish a central vertical trunk with horizontal lateral branches tied to wires spaced 18-24 inches apart. In late summer, prune new side shoots back to 3-4 leaves to create short, productive spurs.

  • Pollarding/Coppicing:

Cut the entire tree back to a permanent framework every 1-3 years. This produces straight poles useful for stakes and trellises, plus tender new foliage that’s excellent livestock fodder.

My neighbor ran a pollarded mulberry on a 3-year cycle, harvesting poles for bean trellises—the tree never exceeded 8 feet and produced fruit on the new growth each summer.

  • Weeping form:

Remove all upward-growing branches and encourage or weight horizontal ones to arch downward. This creates a fountain effect that’s both ornamental and keeps fruit within easy reach.

Container Growing: Mulberries for Patios and Small Spaces

Container culture offers tremendous flexibility—move trees to optimize sun exposure, bring tender varieties indoors during cold snaps, or grow mulberries where soil conditions are impossible. Success requires attention to a few key needs:

  • Container size:

Start young trees in 5-gallon pots, moving up to 15-20 gallon containers as they grow. Dwarf varieties can produce happily in 10-12 inch pots indefinitely. Terra cotta and wood containers work well, as do large plastic pots—just ensure multiple drainage holes.

  • Soil:

Use quality, soil-based potting mix, not garden soil. John Innes No. 3 or similar compost-based mixes provide the weight and structure container trees need. Avoid soilless mixes—they’re too light and dry out too quickly.

  • Watering:

This is the make-or-break factor. Container soil dries faster than ground soil, especially in summer. Check daily by sticking your finger 2 inches deep—water thoroughly when it feels dry.

In peak summer, you may need to water twice daily. Using a moisture meter eliminates guesswork. Elevate containers on pot feet so excess water drains freely.

Watering mulberry tree in pot

  • Feeding:

Container trees exhaust their soil nutrients within a growing season. Feed every two weeks with diluted liquid fertilizer (fish emulsion, seaweed extract, or balanced synthetic), or apply slow-release granules in spring and mid-summer.

  • Winter care:

In zones where ground freezes, container roots are vulnerable since they lack the ground’s insulating effect.

Move containers against a warm wall, wrap pots with burlap or bubble wrap, or store them in an unheated garage where temperatures stay between 25-40°F. Water minimally but don’t let soil completely dry out.

  • Repotting:

Every 2-3 years in early spring, move trees up to containers 2-4 inches larger. When maximum pot size is reached, root-prune and repot into the same container with fresh soil.

To root-prune, remove the tree, trim 2-3 inches off the bottom and sides of the root ball, then replant with fresh compost. Between repotting years, topdress by removing and replacing the top 2-3 inches of soil each spring.

Propagation: Growing More Trees

Mulberries propagate so easily that stories abound of “accidental” trees started from prunings used as garden stakes. White mulberries are especially cooperative, but even black mulberries can be propagated with basic technique.

Hardwood cuttings (highest success rate)

In late winter, select pencil-thick, healthy stems 20-30cm long from last year’s growth. Cut just below a bud at the bottom and just above a bud at the top. Remove all leaves and side shoots from the bottom two-thirds.

If desired, dip the cut end in rooting hormone powder (Rootone or similar), though white mulberries often root without it. Insert 2/3 of the cutting length into moist potting mix or directly into well-prepared garden soil.

Keep moist but not waterlogged. Roots develop in 4-8 weeks; new leaf growth signals success. Expect 50-100% success rate with white mulberries, 30-60% with red and black types.

Mulberries propagation

👉 Here’s How to Propagate Plants in Water: Easy Step-by-Step Method

Softwood cuttings

In early summer, take 6-8 inch tip cuttings from actively growing branches. Strip off all but the top 2-3 leaves, dip in rooting hormone, and plant in moist vermiculite or potting mix.

Place in bright, indirect light and mist daily to maintain humidity. Roots form within 3-4 weeks. This method works well for black mulberries and varieties difficult to root as hardwood cuttings.

Seeds

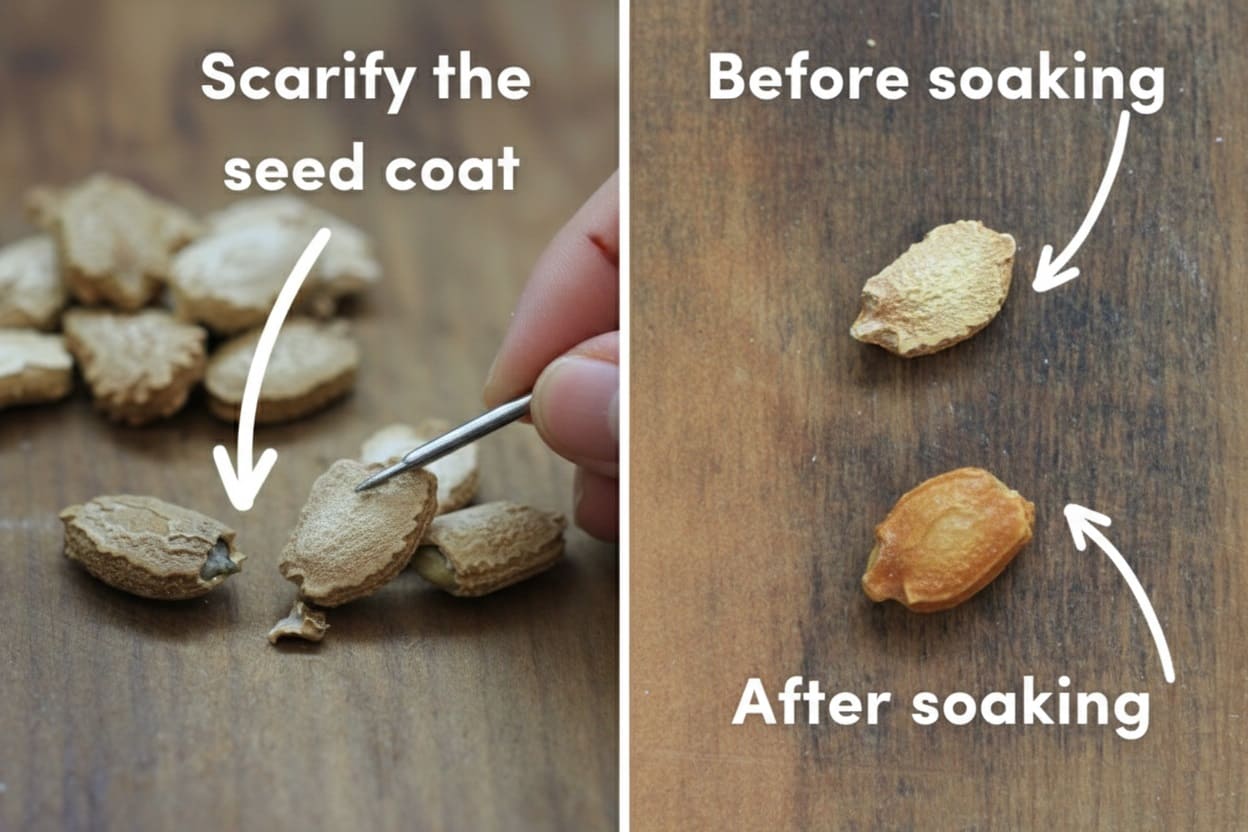
Growing from seed is a patience game—expect 5-10 years to fruiting, and seedlings won’t match the parent tree. If you’re game, extract seeds from ripe fruit by mashing and rinsing thoroughly.

Cold-stratify by storing in moist sand or paper towels in the refrigerator for 60-90 days at 33-40°F. Sow in spring 1cm deep; germination occurs in 2-4 weeks.

The biggest challenge: slugs devour mulberry seedlings. Protect with diatomaceous earth circles or copper tape around pots.

Air layering

In spring, select a healthy branch and wound it by removing a 2-inch band of bark about 12 inches from the tip. Wrap the wound with moist sphagnum moss, encase in clear plastic secured at both ends, and keep the moss moist by loosening weekly to water.

In 2-4 months, roots visible through the plastic indicate success. Cut below the new roots and pot up your new tree.

Mulberry Air layering

Troubleshooting: When Trees Don’t Fruit

Few things frustrate growers more than a healthy mulberry tree that won’t fruit. Here are the common causes and solutions:

  • Age: Trees grown from seed can take 8-10 years to begin fruiting. Grafted or cutting-grown trees typically fruit in 2-4 years. If your tree is young, patience is required.
  • Variety: Verify you purchased a fruiting variety, not a fruitless ornamental or male tree. If you bought a tree labeled simply “mulberry” from a non-specialized nursery, you may have gotten a male.
  • Insufficient chilling: Mulberries need 200-400 hours below 45°F to initiate flowering. In very mild climates, this requirement may not be met. Choose low-chill varieties like ‘Pakistan’ for zones 9-10.
  • Over-fertilization: Too much nitrogen pushes vigorous leaf growth at the expense of flowering. If your tree looks lush and green but doesn’t bloom, stop fertilizing for a year.
  • Improper pruning: While mulberries fruit on new wood, severe pruning in spring removes the buds that would develop into flowers and fruit. Prune in winter, and leave some 1-2 year old wood unpruned.
  • Stress: Severe drought, transplant shock, root damage, or pest pressure can cause trees to abandon fruiting to focus on survival. Address the stressor and expect fruiting to resume the following year.
  • Birds: Before concluding your tree doesn’t fruit, verify that birds aren’t eating every berry before you notice them. Watch the tree closely in late spring/early summer.

Managing the Mess: Practical Strategies

Let’s address the elephant in the garden: mulberries are messy. A mature tree drops hundreds of berries over 4-8 weeks.

Birds eat berries and leave purple droppings. Fallen fruit attracts ants and ferments in hot weather, creating a boozy smell. But the mess is manageable with planning:

  • Strategic tarps:

Keep old sheets, tarps, or drop cloths dedicated to mulberry season. Spread them under the tree and move them as the harvest progresses.

Shake branches over the tarps to accelerate collection. Wash and store them each year—the stains won’t come out, but that’s okay.

  • Companion animals:

Chickens, ducks, pigs, and rabbits all relish fallen mulberries. Design your landscape so the tree overhangs animal runs. This turns “waste” into valuable feed.

  • Hardscape placement:

Never plant mulberries where the canopy will overhang concrete, decking, or high-traffic areas. Stains are essentially permanent. If it’s too late and you’re living with this problem, pressure washing helps but won’t eliminate purple ghosts on concrete.

  • Frequent harvesting:

Pick or shake the tree every 2-3 days during peak season. This reduces ground accumulation.

  • Ant control:

When ants discover fallen fruit, they’ll farm aphids on your tree to increase honeydew production. Paint a band of sticky trap compound around the trunk to block their access. Refresh monthly during growing season.

  • Ground covers:

Plant something resilient and dark-colored under the tree. Mondo grass, ajuga, or even mulched pathways hide stains better than lawn grass.

  • Accept it:

Honestly, this is part of the mulberry bargain. The mess lasts 6-8 weeks. The fruit lasts a century. Choose joy.

Mulberries on the ground

Harvesting and Storage

Depending on variety and climate, mulberries ripen from May through August. White and red varieties typically ripen first, with black mulberries following.

The beauty of mulberries is their extended harvest period—instead of one overwhelming week, you’ll have manageable amounts ripening over 4-8 weeks.

  • Ripeness indicators:

Berries should be fully colored (white, deep red, or black depending on type), slightly soft to touch, and releasing easily from the stem with the gentlest pull.

Taste-test is the ultimate guide—ripe mulberries are sweet with balanced flavor. Under-ripe berries taste flat or tart.

  • The shake-and-catch method:

Position clean sheets or tarps under branches and gently shake. Ripe berries fall while green ones stay attached. This is far more efficient than hand-picking and can be done every 2-3 days. Wear old clothes—stains are inevitable.

  • Hand-picking:

For small or young trees, hand-harvest into containers. This method lets you be selective, taking only the ripest fruit. Pick in the cool morning when berries are firmest.

  • Yields:

A 3-year-old grafted tree might produce 2-4 cups of berries. By year 5, expect several quarts. A mature tree (10+ years) easily produces 60-100 gallons—far more than most families can use fresh.

  • Storage:

Fresh mulberries are highly perishable. Refrigerate unwashed in a single layer in shallow containers, covered loosely with paper towels. They’ll keep 2-4 days maximum. Wash just before using.

For freezing, wash and dry completely, spread on baking sheets, freeze until solid, then transfer to bags or containers. Frozen mulberries keep 8-12 months and work beautifully in smoothies, baking, and jam-making.

Drying concentrates the sweetness. Soak briefly in lemon water (1/4 cup lemon juice per quart of water) to preserve color, then dehydrate at 135°F for 8-12 hours until chewy like raisins. Dried mulberries store 6-12 months in airtight containers.

Soaking mulberries briefly in lemon water

👉 Here’s How to Dehydrate Apples at Home: Easy Steps for Perfect Results

Pest and Disease Management

One of mulberries’ best traits is their general freedom from serious pest and disease problems. Issues that do arise are typically manageable with organic methods:

  • Birds:

Your primary competition. Bird netting with 4mm or smaller holes works but is cumbersome on large trees. Reflective tape creates movement and flashes that deter some birds.

Alternatively, plant enough to share—mature trees produce far more than birds can consume. Interestingly, birds strongly prefer dark berries, so white-fruited varieties suffer less predation.

Causes black leaf spots, brown fruit spots, and eventually cankers on branches. It thrives in wet, humid conditions with poor air circulation. Prune out infected branches 6 inches below visible damage. Increase canopy airflow by thinning crossed branches.

Spray with copper fungicide (Bordeaux mixture) at bud break if the previous year saw infection. Sanitize pruning tools between cuts with 10% bleach solution.

Bacterial blight on mulberries

  • Popcorn disease (Ciboria carunculoides):

Makes developing fruit swell and turn white, resembling popcorn. It’s primarily cosmetic and doesn’t harm tree health, but ruins the affected fruit.

Collect and dispose of all infected fruit (trash, not compost) to break the disease cycle. A preventive spray of Bordeaux mixture in early spring helps.

Popcorn disease on mulberries

  • Leaf spot diseases (various fungi):

Create tan, brown, or red spots on leaves. Severe cases cause defoliation. Rake and destroy fallen leaves in autumn to eliminate overwintering spores. Thin the canopy for air circulation. Copper fungicide sprays in early spring provide control if problems persist.

  • Scale, aphids, whiteflies:

Sap-sucking insects occasionally attack stressed trees. Strong water sprays dislodge them. For persistent problems, spray insecticidal soap or neem oil, coating leaf undersides thoroughly. Repeat weekly for three applications.

  • Root rot:

The one potentially fatal disease. Caused by waterlogged soil and Phymatotrichum or Armillaria fungi. Symptoms include wilting, yellowing leaves, and decline despite adequate water.

Prevention through good drainage is key—there’s no reliable cure once established. If caught early, improve drainage and reduce watering.

  • Prevention is best:

Proper siting with good drainage and air circulation, annual dormant pruning to open the canopy, prompt cleanup of dead wood and fallen leaves, and maintaining tree health through appropriate water and nutrition prevents most problems.

Companion Planting and Understory Ideas

The space beneath a mulberry tree isn’t wasted. While the heavy shade of a mature tree limits options, there are plants that thrive in dappled shade and tolerate root competition:

  • Shade-tolerant herbs: Mint (contained in pots to prevent takeover), lemon balm, sweet woodruff, and wild ginger grow well under mulberries. They benefit from the dappled shade in summer.
  • Spring ephemerals: Bulbs like daffodils, crocus, and Spanish bluebells bloom before the tree leafs out fully, getting the sun they need, then go dormant as shade deepens.
  • Groundcovers: Ajuga, periwinkle (vinca minor), sweet woodruff, and pachysandra tolerate the dry shade under established trees. They also hide berry stains.
  • Nitrogen-fixers: If you’re planting a young tree, interplant with clover, which fixes nitrogen and tolerates partial shade as the tree grows. Mow periodically and leave clippings as mulch.
  • Livestock forage: The area under your tree can be part of a rotational grazing system for chickens, ducks, or small ruminants. They benefit from shade, fallen fruit, and insects attracted to the tree.

👉 Read The Ultimate Companion Planting Guide: 422 Plant Combinations That Actually Work

Culinary Inspiration

Fresh mulberries are wonderful eaten straight from the tree, but their culinary potential extends far beyond that:

  • Fresh uses: Top yogurt, oatmeal, or cereal; toss into fruit salads; blend into smoothies or fresh juices. Their high water content makes them refreshing on hot days.
  • Baked goods: Mulberries work in any recipe calling for berries, but reduce other liquid slightly—they’re juicier than most berries. Try them in muffins, pancakes, scones, quick breads, pies, and cobblers. Mix some under-ripe (tart) berries with ripe ones for better flavor balance.
  • Preserves: Mulberry jam, jelly, and syrup preserve the summer harvest. The natural pectin content is low, so add commercial pectin or combine with pectin-rich fruits like apples or currants.
  • Beverages: Mulberry juice is refreshing diluted with sparkling water. Fermentation enthusiasts prize mulberries for wine, which has a lovely color and fruity taste. Mulberry liqueur (like a berry brandy) is a traditional preparation.
  • Dried: Use dried mulberries anywhere you’d use raisins—granola, trail mix, oatmeal cookies, or just snacking. They’re sweeter than raisins with a hint of tartness.
  • Savory applications: In Middle Eastern cuisine, mulberry syrup accompanies grilled meats. The tartness complements rich, fatty dishes.

Living with Your Mulberry Tree

A mulberry tree is a multi-generational investment. These trees commonly live 100-150 years, with some specimens documented at 200+ years. The gnarled, characterful trunks of old mulberries add tremendous landscape value beyond their fruit production.

Your tree will change as it matures. The first few years focus on establishing roots and framework. Fruiting begins modestly around years 2-5 (depending on propagation method and variety), then increases dramatically through years 5-10.

By year 15, you’ll have a mature, heavy-bearing tree that requires minimal maintenance beyond annual pruning and occasional watering.

The seasonal rhythm becomes familiar: late-winter pruning, spring’s burst of bright green foliage, the subtle white flower catkins that develop into green fruits, then the anticipation as berries color up, followed by 6-8 weeks of daily harvesting in summer.

Come autumn, the leaves turn yellow and drop, and the tree rests through winter, its architectural branches creating winter interest.

Children who grow up with mulberry trees develop deep connections to them—climbing the branches, staining clothes purple, learning the patience to wait for ripeness. It’s a tree that creates memories.

Final Thoughts: Is a Mulberry Right for You?

Mulberries aren’t for everyone. If you demand neatness, can’t tolerate any mess, or have very limited space with no room for aggressive roots, consider other fruits. But if you value:

  • Abundant, delicious fruit that’s otherwise unavailable
  • A long-lived, generous tree that asks little in return
  • Wildlife benefits and biodiversity
  • A fast-growing shade tree that also produces food
  • Easy propagation to share with friends and neighbors

Then mulberries deserve serious consideration.

The keys to success are straightforward: choose the right variety for your climate and space, plant in full sun with room to grow and roots to spread, water during establishment and fruit development, prune annually to maintain size, and embrace the seasonal mess as part of the bargain.

Whether you choose a towering red mulberry that becomes a multi-generational legacy, a compact ‘Charlotte Russe’ for your patio, or something in between, you’re joining a lineage of mulberry growers stretching back thousands of years. That’s pretty good company.

Ready to plant your tree and start your own purple-fingered summer tradition?


source https://harvestsavvy.com/growing-mulberries/

How to Live Off the Grid: A Complete Guide to Self-Sufficient Living

Picture this: You wake to birdsong instead of traffic. Your coffee is heated by wood you chopped yourself. The only bill in your mailbox is a property tax statement. Your morning routine isn’t dictated by a commute, but by the sun’s position in the sky.

This isn’t vacation—it’s daily reality for thousands choosing to live off the grid. Whether you’re exhausted by skyrocketing utility bills, craving connection with nature, or ready to reclaim control over your life, off-grid living offers a compelling alternative.

But here’s what Instagram won’t tell you: it’s not just about solar panels and tiny houses. It’s about fundamentally rethinking how you meet basic needs—and accepting both profound rewards and genuine challenges.

What “Off the Grid” Actually Means

The term originally referred to disconnecting from the electrical power grid. Today, it’s broader: living off the grid means creating a self-sufficient lifestyle by disconnecting from public utility systems.

Instead of receiving electricity, water, and sewage from municipal providers, you generate power, source water, and manage waste independently.

The definition varies wildly. Some live in wilderness cabins without any modern conveniences. Others maintain comfortable homes with solar power, internet, and most amenities.

The common thread? Taking responsibility for your own resources rather than depending on centralized systems.

One couple I interviewed lives in a shipping container in Scotland, spending just £260 monthly compared to their previous £1,000 in utility bills.

Another family runs a full homestead in Idaho with livestock, greenhouses, and enough solar capacity to power modern appliances. Both are “off-grid”—the lifestyle adapts to your needs and goals.

Why People Make the Leap

1. Financial freedom tops most lists. The average household spends $2,000-6,000 annually on electricity alone, plus hundreds more on water and gas.

Many off-gridders report expenses dropping from $1,500 monthly to under $300 once systems are established—money freed for other purposes.

2. Environmental conscience drives others. Off-grid homes powered by renewables produce 50-90% lower carbon emissions than conventional homes. For those genuinely concerned about climate impact, this offers concrete action that actually matters.

3. Self-reliance appeals to those tired of dependence on fragile systems. When power outages hit grid-tied neighborhoods, off-gridders barely notice. There’s profound peace in knowing you can provide for your family regardless of external disruptions.

4. But perhaps the deepest motivation is simpler: escape from modern life’s relentless pressure. The constant stimulation, comparison culture, and consumption messaging wears people down.

Off-grid living offers distance from that noise and space to reconnect with what actually matters.

The Four Essential Systems

Success off-grid hinges on reliably addressing four needs: power, water, waste, and food.

Power: Your Energy Independence

Solar remains most accessible for most people. A 4-6 kilowatt system generates 10-30 kilowatt-hours daily, depending on sun exposure. Modern panels last 25-30 years with minimal maintenance. The challenge? Solar only works when the sun shines.

Solar

Battery storage bridges that gap. Lithium-ion batteries offer 3,000-5,000 charge cycles with 80-90% efficiency—far better than older lead-acid technology. A properly sized battery bank ensures power through cloudy stretches and nighttime.

This is also your largest expense: a complete system including panels, batteries, inverters, and installation typically costs $15,000-50,000.

Wind turbines complement solar effectively, generating electricity when solar production drops—during storms, at night, in winter. Small residential turbines (1-10 kilowatts) work well in consistently windy locations.

Wind turbine

Micro-hydro systems, if you have flowing water on your property, offer the holy grail: continuous power with 70-90% efficiency. Most properties lack suitable water resources, but for those that do, it’s remarkably effective.

Here’s what they don’t tell you: you’ll become obsessed with weather patterns. Cloudy weeks mean rationing power. You’ll unplug devices you previously left running indefinitely.

That awareness isn’t deprivation—it’s consciousness about a resource you previously took for granted.

One Vermont off-gridder described his system this way:

“I have about 200 watts of solar capacity and 576 watt-hours of battery storage. I can cook one pressure cooker meal, power my laptop for a few hours, and charge my phone.

That’s my daily energy budget. Sounds limited until you realize I haven’t paid an electric bill in three years.”

Water: Your Most Critical Resource

Wells provide the most reliable long-term solution. Professional drilling costs $5,500-12,000 and accesses water hundreds of feet underground. Paired with a solar-powered pump, you have sustainable running water.

The key question: what’s the water table depth in your area? Shallow water tables mean cheaper wells; deep ones can get prohibitively expensive.

1. Rainwater harvesting surprises people with its effectiveness. A 2,000-square-foot roof collects approximately 1,200 gallons from a single inch of rain.

With proper filtration and storage tanks, this can supply household needs—though careful management is essential during dry periods. Some regions legally restrict rainwater collection, so check local regulations first.

Rainwater harvesting

👉 Here’s How to Use Goldfish for Mosquito Control in Rain Barrels

Springs and streams work if you’re fortunate enough to have them, though they require consideration of water rights, seasonal flow variations, and thorough filtration.

Natural water sources can carry pathogens, agricultural runoff, or mineral content requiring treatment.

2. Water treatment isn’t optional. Multiple filtration stages—sediment filters, activated carbon, UV sterilization or reverse osmosis—ensure safety.

Slow sand filters offer an effective low-tech option for those avoiding electric systems, removing 99.98% of pathogens naturally.

Conservation becomes instinctive. When you pump, filter, and heat every drop yourself, wasteful 20-minute showers vanish.

Most off-gridders develop heightened awareness that seems extreme to conventional households but feels normal once you live it. Five-minute showers become luxurious; reusing cooking water for plants becomes automatic.

Water pump

3. Testing your water regularly matters more off-grid than on. Municipal water undergoes constant monitoring; yours doesn’t. Annual testing for bacteria, nitrates, and other contaminants (around $100-300) protects your family’s health.

👉 Learn about Farm Water Planning for Livestock & Land Management

Heating and Cooling: Comfort Without the Grid

This often catches newcomers off-guard. Heating and cooling consume massive energy—more than most realize until they’re generating power themselves.

1. Wood heat dominates off-grid homes in cold climates. A quality wood stove costs $1,000-3,000 but provides reliable heat for decades.

The catch? You’ll need to cut, split, and stack 3-6 cords annually (a cord is 4x4x8 feet of stacked wood). That’s substantial physical labor, though many find it meditative.

One Maine off-gridder noted: “I need about 1-5 acres of forested land to sustainably harvest my annual firewood without depleting the forest.”

wood stove

Passive solar design dramatically reduces heating needs. Strategic window placement, proper south-facing orientation (in the Northern Hemisphere), thermal mass like concrete floors or stone walls, and excellent insulation can cut heating requirements by 40-60%.

Many off-gridders wish they’d invested more in insulation upfront—it’s the gift that keeps giving.

2. Cooling proves trickier in hot climates. Air conditioning demolishes battery banks faster than almost anything else.

Successful hot-weather off-gridders rely on passive strategies: cross-ventilation through carefully placed windows, shade from quickly-growing trees on south and west sides, reflective roofing, and earth-bermed construction that leverages stable underground temperatures (55-60°F year-round).

Some install small, efficient mini-split systems running only during peak heat, powered by robust solar arrays. Others embrace the reality that off-grid living in extreme climates means accepting some discomfort.

As one Arizona off-gridder put it: “Three months of the year, I’m hot. But I’m not paying $300 monthly electric bills to cool a house to 68 degrees.”

Waste Management: Closing the Loop

1. Composting toilets eliminate 25-30% of typical household water use while producing compost. Modern systems are odorless and require minimal maintenance.

They separate liquid from solid waste, allowing aerobic decomposition to transform human waste into safe compost over 1-2 years. Prices range from $1,000-3,000.

Composting toilet

The psychological adjustment proves harder than the practical one. Americans are deeply conditioned to see human waste as disgusting refuse rather than nutrient cycling.

Yet humanure composting, properly managed with adequate aging time, safely returns nutrients to soil while eliminating water use for flushing.

👉 Here’s How to Compost Chicken Manure: A Complete Guide for Garden Success

2. Greywater systems recycle 50-80% of household water by routing shower, sink, and laundry water to garden irrigation. Simple systems cost under $1,000 and pay returns through extended water supplies.

The key: use biodegradable, plant-safe soaps and detergents since this water goes directly into soil.

Traditional septic tanks remain an option for those wanting conventional plumbing. Installation costs $3,000-15,000, but systems function largely maintenance-free for years, requiring only periodic pumping (every 3-5 years, typically $200-400).

Greywater system

Food: Cultivating Self-Sufficiency

Even modest 100-square-foot garden beds produce 100+ pounds of food annually. Raised beds generate about 1.24 pounds of produce per square foot when properly managed.

To feed a family of four year-round, you’re looking at roughly 4,000 square feet of productive growing space—manageable on most homesteads, but requiring real commitment.

1. Greenhouses extend growing seasons 2-3 months in temperate climates without supplemental heating.

Strategic planning means fresh greens in February and tomatoes into November. Four-season greenhouses with proper insulation can produce food year-round in many regions.

Greenhouse home

2. Permaculture principles maximize efficiency by designing gardens as self-sustaining ecosystems.

Instead of fighting nature with chemicals and constant inputs, you work with natural patterns: perennial food plants, beneficial insect habitat, companion planting, and zone design based on use frequency.

These systems require years to establish but eventually produce abundantly with less intervention.

👉 Here’s How to Start a Self-Sustaining Garden with Tips for Beginners

3. Livestock multiplies self-sufficiency but also workload. Chickens are the entry point—easy to manage, providing eggs and meat while controlling pests. Figure $300-500 to start with a small coop and initial flock. Daily care requires about 15-30 minutes.

Rabbits offer high-protein meat from limited space. Goats supply milk, meat, and brush clearing. Each species brings new skills to learn, new potential problems to solve, and new work to do.

One Idaho homesteader calculated her first year livestock costs:

“Between initial purchase, infrastructure, fencing, and feed, I spent about $2,500 before seeing any return. By year two, we were producing about $150 monthly in eggs, meat, and milk we’d otherwise buy. The payback is real, but slow.”

4. Food preservation extends harvest abundance through winter scarcity. Canning, dehydrating, fermenting, and root cellaring become essential skills.

A well-stocked root cellar can hold potatoes, squash, and other storage crops for 6-8 months. Fermented vegetables like sauerkraut and kimchi last even longer while providing beneficial probiotics.

👉 Here’s How to Dehydrate Apples at Home: Easy Steps for Perfect Results

  • Here’s the reality check: 

Most off-gridders don’t achieve complete food self-sufficiency. Even experienced homesteaders typically grow 40-70% of their food, purchasing staples like flour, rice, oil, and occasional treats.

That’s still remarkable compared to the average American’s 0% food self-sufficiency.

The Financial Reality: What Off-Grid Living Actually Costs

Let’s address the elephant in the clearing: Going off-grid requires significant upfront investment. The romantic notion of escaping to free, simple living crashes hard against financial reality.

Initial Costs

Here’s a realistic breakdown based on building a modest off-grid homestead:

  • Land: $50,000-185,000+ (highly variable by location and acreage)
  • Solar system: $15,000-50,000
  • Water system (well/rainwater): $5,000-20,000
  • Waste system (composting/septic): $1,000-15,000
  • Shelter (tiny home to cabin): $20,000-200,000
  • Tools and equipment: $5,000-15,000
  • Permits and fees: $1,000-5,000

Total initial investment: $100,000-500,000+

Yes, you read that correctly. Creating a functional off-grid homestead rarely costs less than six figures—and often substantially more.

Ongoing Expenses

The good news? Monthly costs drop dramatically once systems are established:

  • Property taxes: $1,000-2,000 annually
  • Insurance: $800-1,500 annually
  • Food (supplemental): $100-400 monthly
  • Fuel/propane: $50-150 monthly
  • Maintenance reserves: $100-300 monthly
  • Internet/phone: $50-150 monthly

Total monthly expenses: $250-600

Compare this to the average American household’s $1,500+ monthly utility and housing costs, and the long-term savings become apparent. Most off-gridders see payback periods of 8-15 years, after which their drastically reduced expenses free up resources for other pursuits.

The Hidden Costs Nobody Mentions

Beyond the obvious expenses, budget for these often-overlooked items:

  • Storage infrastructure: You need space for spare parts, tools, seasonal equipment, and bulk supplies—often requiring sheds or outbuildings
  • Transportation: Living remotely means driving more for necessities, often in vehicles capable of handling rough roads
  • Learning curve expenses: Mistakes cost money—the first garden that fails, the solar component you bought wrong, the livestock you lost to predators
  • Time investment: Your labor has value; factor in the hours spent maintaining systems, growing food, and managing your homestead

The Hard Truths: Challenges You’ll Face

Physical demands never stop

Chopping firewood. Hauling water. Tending gardens. Maintaining solar panels. Repairing infrastructure. Managing livestock.

One former city-dweller at 40 confessed: “I thought I’d spend days reading on the porch. Instead, I do manual labor that’s exhausting now and will be impossible at 70.”

Weather controls your existence

Cloudy weeks mean rationing power. Drought means water conservation. Heavy snow means isolation. Extended rain means muddy impossibility. You can’t control weather, but it controls you. This reality—liberating to some, maddening to others—defines off-grid life.

Isolation bites harder than expected

Remote living means fewer spontaneous social interactions. The coffee shop chat, neighborhood barbecue, after-work drinks—these casual connection points largely disappear.

Many off-gridders report unexpected loneliness, especially the first year. Some thrive in solitude; others find it unbearable.

Everything eventually breaks, and you fix it

The solar charge controller. The well pump. The roof leak. The fence breach. Unlike conventional living where you call a professional, off-grid problems demand immediate DIY solutions—often with limited resources, far from hardware stores.

This requires adaptability, problem-solving skills, and willingness to attempt tasks you’ve never done.

Medical access becomes a serious consideration rarely discussed

If you’re an hour from the nearest hospital, emergencies become more dangerous. Routine healthcare requires advance planning.

One family with a child requiring regular medical monitoring ultimately moved closer to town—their remote homestead dream conflicted with their son’s health needs.

Seasonal reality hits differently than you expect

Summer off-grid life feels idyllic—long days, abundant solar power, thriving gardens, comfortable temperatures.

Winter brings darkness by 5pm, marginal solar production, frozen water systems, challenging driving conditions, and cabin fever. Many beginners experience their first winter off-grid as a brutal wake-up call.

👉 Here’s How to Prepare Your Farm for Winter: Essential Tips for Farmers

Legal and regulatory hurdles persist

Off-grid doesn’t mean off-law. Zoning regulations, building codes, health department requirements, and permits still apply. Some jurisdictions actively discourage alternative living.

States like Tennessee, Idaho, and Missouri offer relatively friendly environments. Others, like California and Colorado, impose stricter requirements. Counties matter more than states—rural counties with minimal codes offer most flexibility.

If you have children, education becomes a major consideration. Homeschooling works for many off-grid families but requires significant parental time and capability. Long bus rides to distant schools mean kids spend hours commuting daily.

Some off-grid parents ultimately move closer to towns once children reach school age, maintaining their homestead but compromising on isolation.

Why It’s Still Worth It

Despite genuine difficulties, something keeps people committed. The benefits prove substantial even if harder to quantify than costs.

True independence means answering to yourself

When the power grid fails, you barely notice. When supply chains disrupt, you keep eating from your garden. When economic chaos strikes, your self-sufficiency provides insulation.

This security—knowing you can provide regardless of external circumstances—brings profound peace impossible to achieve when dependent on fragile systems.

Your lifestyle directly reflects your values. Every solar-powered hour, every gallon of rainwater, every home-grown meal represents conscious choice for sustainability over convenience.

The average off-grid home reduces carbon emissions by 3-7 tons annually—equivalent to taking a car off the road.

Financial liberation creates opportunities

Once systems are established, your dramatically lower expenses allow you to work less, pursue passions, or build savings impossible under conventional costs.

One couple works just two days weekly at part-time jobs, spending remaining time on creative projects they love.

You know where everything comes from

The electricity powering your laptop, water in your cup, food on your plate—you produced it all. This creates mindfulness and appreciation largely absent in consumer culture.

Nature surrounds you daily. Changing seasons aren’t abstractions viewed through windows—they’re immediate realities shaping your routines.

You become remarkably capable. Solar maintenance, carpentry, plumbing, gardening, animal husbandry, food preservation, mechanical repair—skills once distributed across dozens of specialists become your everyday competencies.

This mastery builds confidence extending far beyond practical tasks.

Getting Started: A Practical Roadmap

Ready to take the leap? Here’s how to actually make it happen—not someday, but with a concrete plan.

Phase 1: Education and Planning (6-12 months)

  • Consume information voraciously. Read books, follow off-grid bloggers, watch YouTube channels, listen to podcasts. Join online forums where experienced off-gridders share hard-won wisdom.
  • Develop skills before you need them. Take community college classes in carpentry, electrical systems, or permaculture. Volunteer at local farms to learn about livestock and food production. Practice starting fires, filtering water, and identifying edible plants.
  • Test the lifestyle incrementally. Spend weekends primitive camping. Try living without electricity for a week. Disconnect your refrigerator for a month. These experiments reveal what you can actually handle versus what sounds good in theory.
  • Audit your energy usage ruthlessly. Track every watt-hour you currently consume. Identify which uses are essential versus habitual. Begin reducing consumption to levels sustainable off-grid.

Phase 2: Financial Preparation (1-2 years)

  • Build substantial savings. Aim for $50,000-100,000 minimum before making the move—ideally more. This provides buffer for unexpected costs and allows you to build proper systems rather than cobbling together inadequate solutions.
  • Eliminate debt completely. Off-grid income streams are often uncertain, especially initially. Debt payments become crushing burdens when you’re learning to be self-sufficient.
  • Develop location-independent income. Remote work, freelancing, online businesses, or portable skilled trades provide financial stability while transitioning. Most off-gridders can’t achieve complete food self-sufficiency immediately; you’ll need income for supplies.

Phase 3: Land Acquisition (6-12 months)

  • Research locations intensively. Consider climate, growing season, water availability, sun exposure, soil quality, proximity to services, and local regulations. Some states and counties embrace alternative living; others create barriers through restrictive codes.
  • Visit potential properties multiple times across seasons. That charming land in spring might be inaccessible mud in winter or scorched desert in summer. Talk to neighbors about challenges specific to the area.
  • Verify access and rights. Ensure reliable year-round road access. Confirm water rights and mineral rights. Understand easements and restrictions. Consult real estate attorneys to avoid expensive surprises.
  • Start small if possible. You can always expand; you can’t easily reverse a property purchase that proves unsuitable. Some people begin with 5-10 acres while learning, then acquire more land later if desired.

How to Live Off the Grid

Phase 4: Infrastructure Development (1-3 years)

  • Build in stages based on priority. Start with:
  1. Basic shelter (even temporary)
  2. Water source and storage
  3. Power generation and storage
  4. Waste management
  5. Food production infrastructure
  • Consider living on-site during construction. Many off-gridders start in RVs, tiny homes, or even tents while building permanent structures. This saves money on temporary housing and keeps you present for the work.
  • Do as much yourself as possible. Every task you outsource drains your budget. While some jobs (well drilling, electrical work) require professionals, most construction and system installation suits determined DIYers willing to learn.
  • Build backup systems from the start. Redundancy prevents single points of failure. Two smaller water storage tanks beat one large tank. Backup generator supplements solar. Multiple gardens in different microclimates hedge against localized failures.

Phase 5: Ongoing Optimization (Indefinite)

  • Accept that you’ll never be “finished.” Off-grid living requires constant adjustment, improvement, and maintenance. Systems fail. Needs change. Solutions evolve.
  • Document everything. Keep maintenance logs, track energy production and consumption, note what works and what doesn’t. This data guides future decisions and helps troubleshoot problems.
  • Build community connections. Find other off-gridders nearby to share knowledge, resources, and occasional labor. These relationships prove invaluable when you need help beyond your capabilities.
  • Stay flexible and adaptable. Your initial vision will change through experience. Embrace modifications rather than rigidly adhering to original plans that prove impractical.

👉 Here’s How Joining Farming Organizations Can Benefit Your Farm & Community

Common Mistakes to Avoid

Learn from others’ expensive errors:

  1. Underestimating water needs: Most beginners calculate based on conventional usage, then find off-grid reality demands even more careful management. Build excess capacity into water systems.
  2. Oversizing shelter: Larger homes require more materials, energy, and maintenance. Most off-gridders find that 400-800 square feet feels spacious when well-designed—and dramatically reduces resource demands.
  3. Neglecting insulation: Proper insulation reduces heating and cooling needs by 40-60%. This investment pays returns daily for decades.
  4. Buying land without water access: Hauling water gets old fast. Either secure land with natural water sources or confirmed well potential, or accept the limitations of rainwater-only systems.
  5. Skimping on battery storage: Undersized battery banks mean running generators constantly or living without power during cloudy periods. Invest in adequate storage capacity from the start.
  6. Ignoring local regulations: Building without permits can result in orders to demolish your hard work. Research requirements before you build.
  7. Going too remote too fast: Some isolation can be adjusted to; total remoteness 50+ miles from services proves overwhelming for most people. Find balance between privacy and accessibility.

Is Off-Grid Living Right for You?

This lifestyle isn’t for everyone—and that’s perfectly okay. Answer these questions honestly:

  1. Can you handle physical labor daily? Off-grid living demands work your body won’t be used to—and that work never stops.
  2. Are you comfortable with discomfort? Cold showers when the water heater malfunctions. Dark evenings when batteries are low. Sweltering nights without air conditioning. These aren’t emergencies; they’re reality.
  3. Can you troubleshoot problems independently? When something breaks at 2 AM during a snowstorm, you’re the solution. Help might be hours or days away.
  4. Is your family fully on board? One person can decide to go off-grid; a family needs consensus. Dragging reluctant members into this lifestyle breeds resentment and often leads to failure.
  5. Can you handle isolation? If you thrive on frequent social interaction, remote off-grid living may prove psychologically difficult. Some people need the energy of community more than they realize.
  6. Do you have realistic expectations? This isn’t a permanent vacation. It’s harder than conventional living in many ways—though the rewards can justify the difficulties.

The Path Forward

Living off the grid represents fundamental shift—not just in generating electricity or sourcing water, but in how you relate to resources, time, and purpose. Will you struggle? Absolutely. Make mistakes? Constantly. Question the entire endeavor? Count on it.

But you’ll also experience profound satisfaction. The deep sleep from genuine exhaustion. The taste of tomatoes you grew. The quiet pride of solving complex problems with limited tools. The security of knowing you can provide regardless of external chaos.

You’ll develop capabilities you didn’t know you possessed. You’ll prove that alternative paths exist beyond prescribed modern lifestyle. You’ll leave a lighter footprint while treading more deliberately through your own life.

The obstacles are real, but so are the rewards. Thousands have successfully made this transition—learning skills, building systems, creating lives aligned with their deepest values.

The grid will always be there if you choose to return. But the opportunity to live more intentionally, sustainably, and independently is available right now.

Ready to take your first step? Start by calculating your current energy usage and researching land in your preferred location. Connect with off-grid communities online to learn from their experiences.

Test elements of self-sufficiency while maintaining your safety net. The dream of self-sufficient living is closer than you think—but only action transforms possibility into reality.


source https://harvestsavvy.com/living-off-the-grid/

How to Grow Mulberry Trees: Best Varieties, Care, and Harvest Tips

I still remember the first time I tasted a sun-warmed mulberry straight from the tree—it was at my grandmother’s house, and my fingers were ...