Have you ever watched ducks waddle contentedly around their yard and thought, “I could do this”? You absolutely can—but before those adorable ducklings arrive, you need to create a safe haven for them to call home.
Unlike their chicken cousins, ducks have unique housing needs that go beyond just four walls and a roof. Get it right from the start, and you’ll save yourself headaches (and heartbreak) down the road while giving your feathered friends the quality life they deserve.
This guide will walk you through everything you need to know about building a duck coop, from initial planning through construction and maintenance.
By the end, you’ll have the confidence and knowledge to create a predator-proof, weather-resistant home that keeps your ducks healthy, comfortable, and safe—without breaking the bank.
What Makes Duck Housing Different
Before diving into construction, understand what makes ducks unique. These aren’t chickens with bills. Ducks sleep on the ground, not perches. They rarely use traditional nesting boxes, preferring to lay eggs in cozy floor corners.
Their webbed feet make them clumsy on land—forget about ramps and raised coops. Most importantly, ducks are incredibly messy. Their poop is wetter, their water splashes everywhere, and they track mud like it’s their job.
Your duck coop serves three critical functions: protecting them from the countless predators that consider ducks a delicacy, sheltering them from weather extremes, and providing a clean space for rest and egg-laying.
Think of it as their bedroom and panic room combined. They’ll spend most waking hours outdoors, coming inside mainly to sleep and lay eggs.
 Learn about Raising Muscovy Ducks: Complete Care Guide for Beginners
Start With Smart Planning: Seven Critical Questions
How Many Ducks, and What Size?
Each duck needs 4 square feet of interior coop space as an absolute minimum. Larger breeds like Pekins need 5-6 square feet, while smaller breeds like Welsh Harlequins can manage with 3-4. For four medium ducks, you’re looking at 16-24 square feet minimum.
Here’s where most beginners stumble: they build for their current flock. Within a year, “just four ducks” becomes six, then eight. Ducks have a way of multiplying, whether through hatching or your inability to resist those fluffy ducklings at the farm store.
Build at least 25% bigger than you think you need. A coop that’s too large is a minor inconvenience. One that’s too small creates stress, fighting, and health problems.
If you have more than six ducks, build tall enough to walk inside comfortably. Cleaning a coop on your hands and knees in duck muck isn’t just unpleasant—it means you’ll avoid the task, letting sanitation problems build.
Male and Female Dynamics
If you’re keeping drakes (male ducks) with hens, you need a plan to separate them. During breeding season, drakes mate repeatedly and can injure hens through over-mating, especially at night when hens can’t escape.
Either build separate coops or include internal partitions with their own doors. Multiple drakes will fight viciously during breeding season and also need separation.
This is why experienced duck keepers recommend starting with an all-female flock. Eggs come regardless, and the drama stays minimal.
Climate Reality Check
A duck coop in Minnesota requires different features than one in Arizona.
In hot, humid climates, maximum ventilation becomes your primary concern—think open-air designs with wire-mesh walls. Ducks handle heat poorly, and a stuffy coop can cause serious health issues or death.
In harsh winter climates, you’ll need solid walls on at least three sides, positioned to block prevailing winds. But here’s what surprises many northern keepers: ducks don’t need heat.
They’re remarkably cold-hardy, comfortable in temperatures well below zero as long as they’re dry and out of the wind. Adding heat lamps creates fire risks and prevents natural cold adaptation. Your money is better spent on predator-proofing and ventilation.
One exception: if temperatures routinely drop below -20°F (-29°C), or you have extreme wind chill, provide extra bedding depth and ensure your coop can be temporarily sealed against blizzards while maintaining some ventilation.
Predator Pressure in Your Area
Every location has predators, but the threat level varies. Rural properties might face coyotes, foxes, and great horned owls. Suburban areas often have raccoons, possums, and neighborhood dogs.
Urban environments can have surprisingly high concentrations of raccoons—intelligent, dexterous predators that open latches and remember your routines.
Bears require fortress-level construction: posts set in concrete, reinforced walls, and no mesh that claws can rip through. Mink and weasels can squeeze through surprisingly small gaps. Hawks and eagles attack from above. Snakes eat eggs and occasionally kill young ducklings.
The solution isn’t to panic—it’s to build once, build right, and sleep soundly knowing your ducks are secure.
Site Selection Criteria
Walk your property looking for a spot that’s high and well-drained. During heavy rains, water flows to low points, creating muddy disaster zones that breed parasites and bacteria. Elevated ground keeps your coop dry and your workload manageable.
Consider sun exposure. In hot climates, afternoon shade from deciduous trees helps ducks cope with summer heat. In cold climates, southern exposure maximizes solar gain during winter.
Avoid placing coops under large trees where falling branches pose risks—but nearby trees and shrubs provide valuable protection from aerial predators.
Place your coop close enough to your house that twice-daily visits feel convenient, not like an expedition. You’ll be out there in scorching heat, pouring rain, and freezing cold. But position it far enough that summer flies don’t migrate to your back door.
Having the coop visible from a window lets you monitor for problems, and proximity to an outdoor light switch means you can investigate nighttime disturbances without fumbling for a flashlight.
Run Design: Covered or Free-Range?
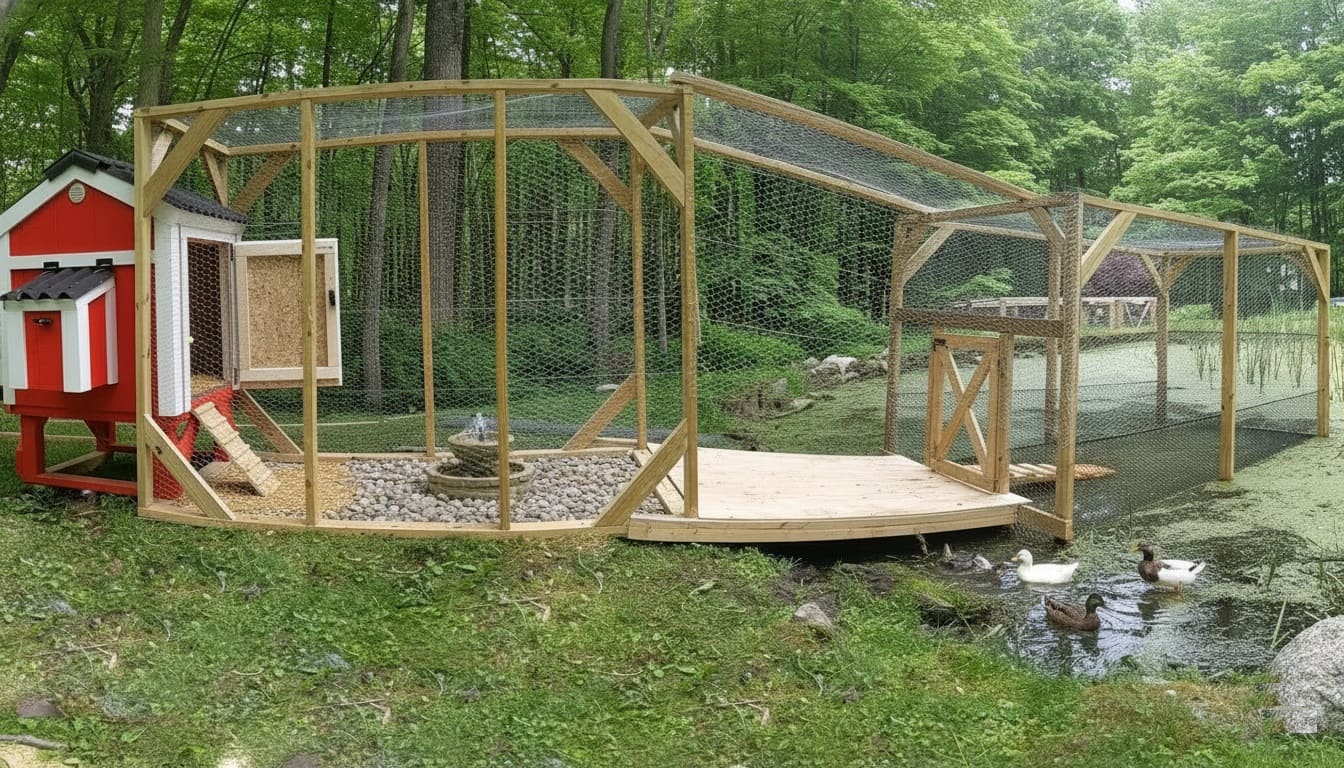
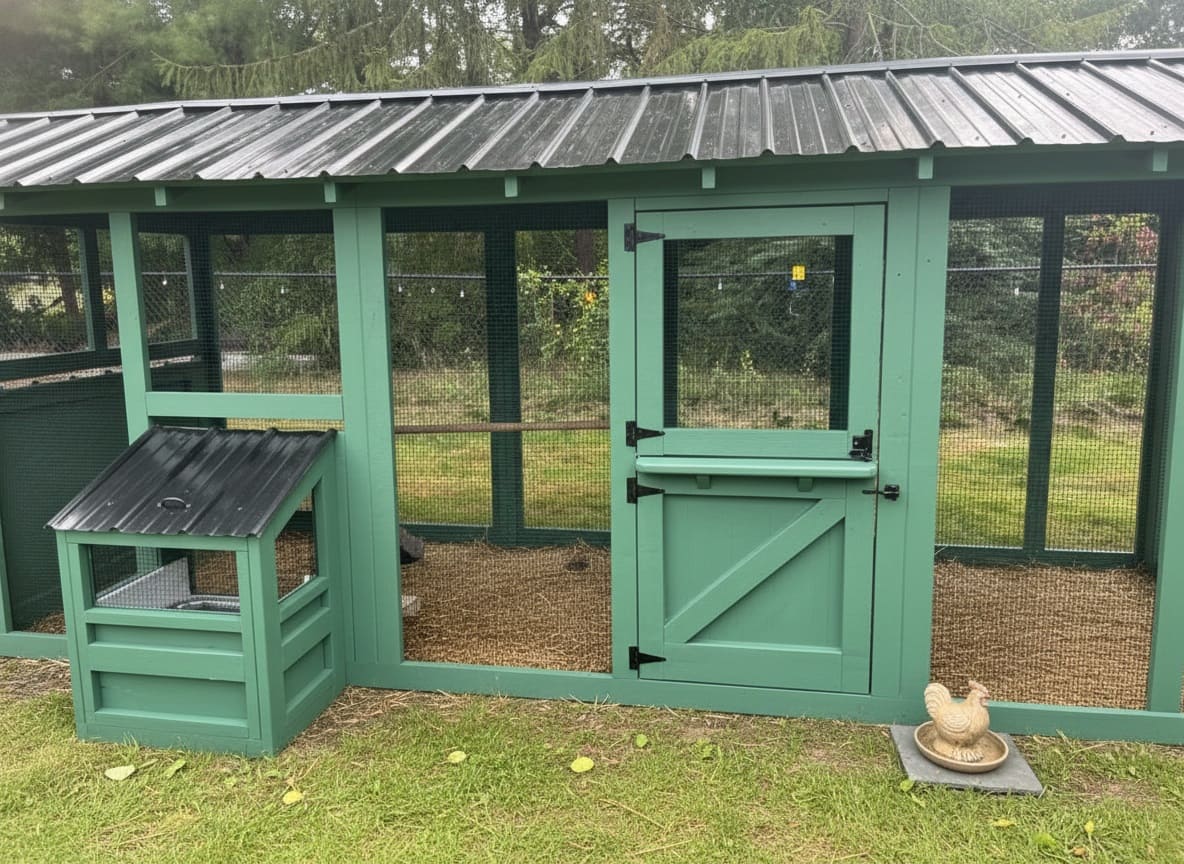
This decision shapes your entire project. A covered, predator-proof run attached to your coop creates a safe daytime environment where ducks can’t be attacked.
It requires more materials and money upfront but provides complete peace of mind. For most backyard duck keepers, this is the right choice.
Free-ranging—letting ducks roam your property during the day—works only in specific situations. You need minimal predator pressure, ideally with dense shrubs and trees providing cover from hawks.
You must be home and alert to respond if ducks sound alarms. And you need to accept that losses will eventually occur.
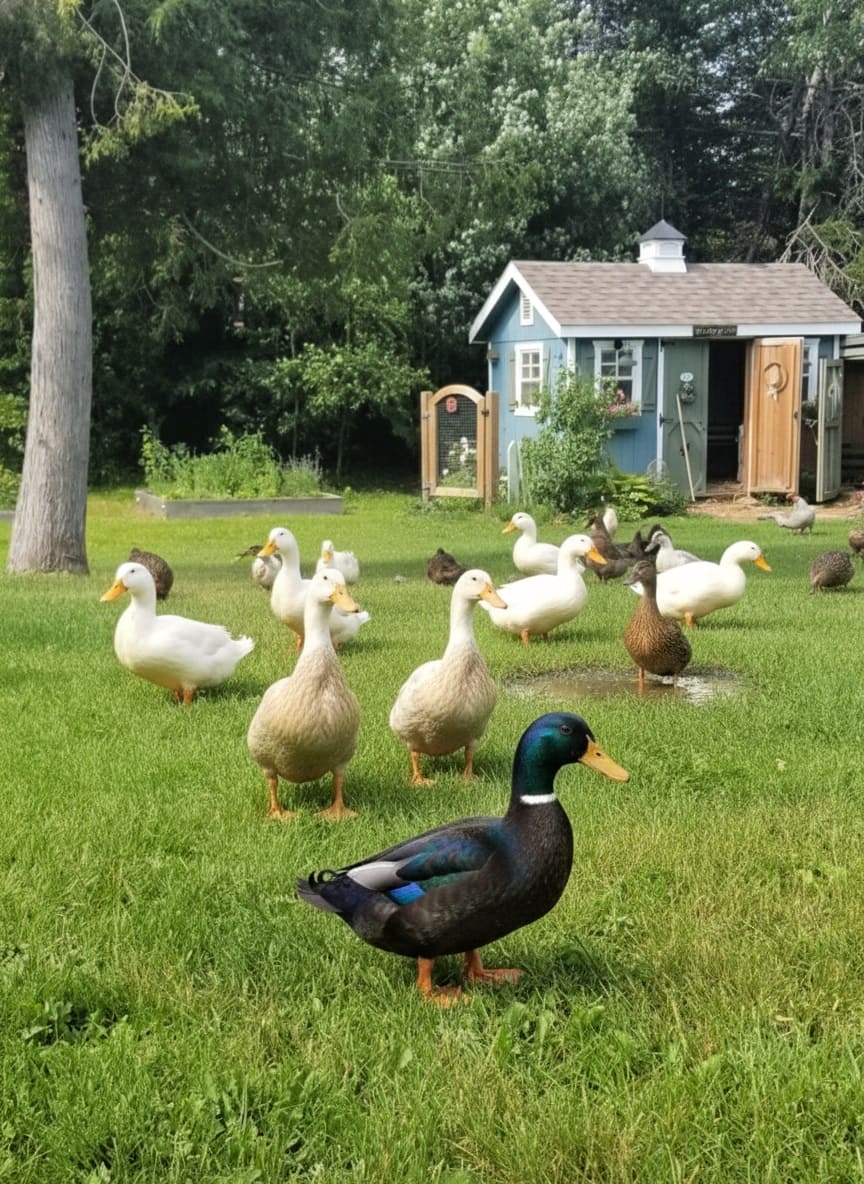
Our ducks free-range in a fenced backyard during daylight hours, but we’ve carefully cultivated multiple layers of protection: a 6-foot fence as the first barrier, numerous fruit trees and shrubs breaking up sight lines from above, and close proximity to our house so we hear distress calls immediately.
Even so, we’ve watched hawks circle and raccoons prowl. Our zero-loss record comes from luck and vigilance as much as strategy.
If you have bears, coyotes, or aggressive dogs nearby, don’t free-range. Build a proper run.
Water Access and Drainage
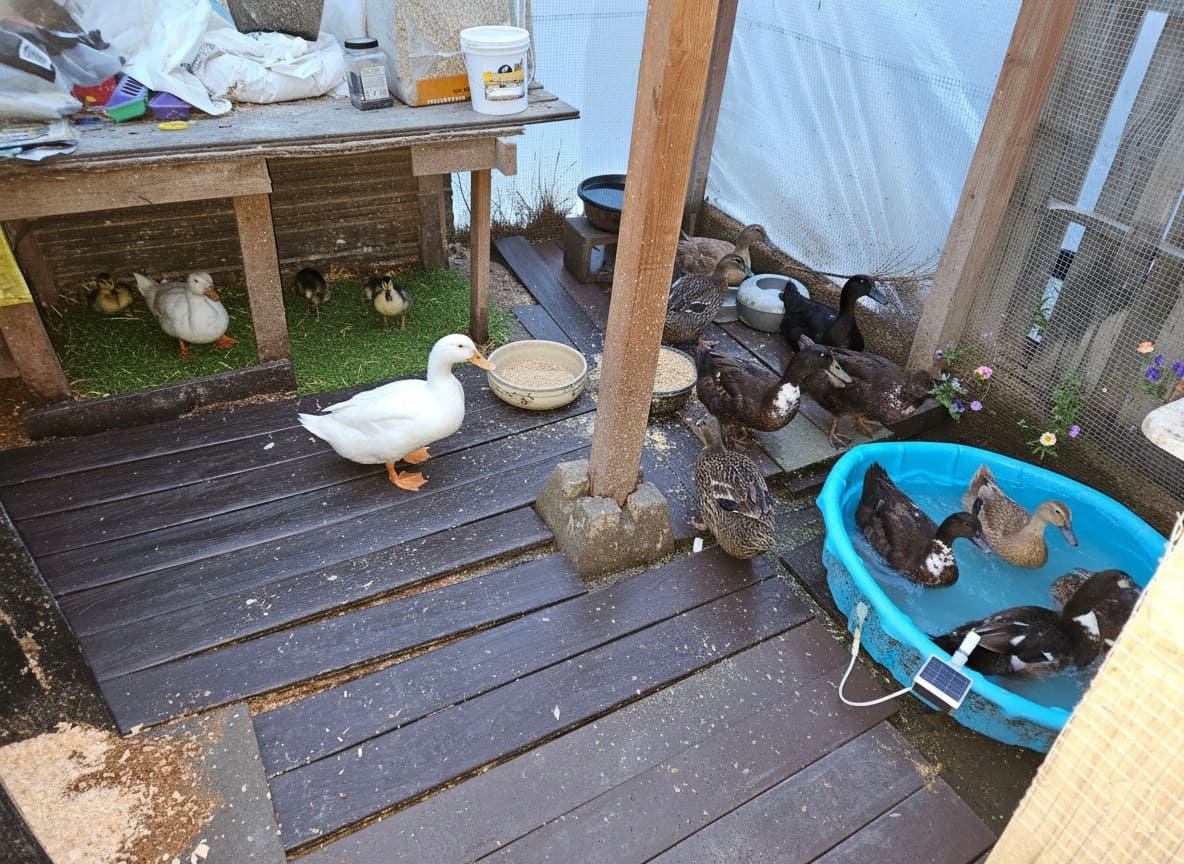
Ducks need significant water—not just for drinking but for dunking heads, playing, and staying clean. At minimum, provide buckets deep enough for complete head submersion. Ideally, offer a kiddie pool or larger water feature where they can swim and dive.

Here’s the challenge: ducks combined with water create mud spectacular in its mess-making ability. Where you place water sources matters enormously. Keep pools away from the coop entrance to prevent the area from becoming a swamp.
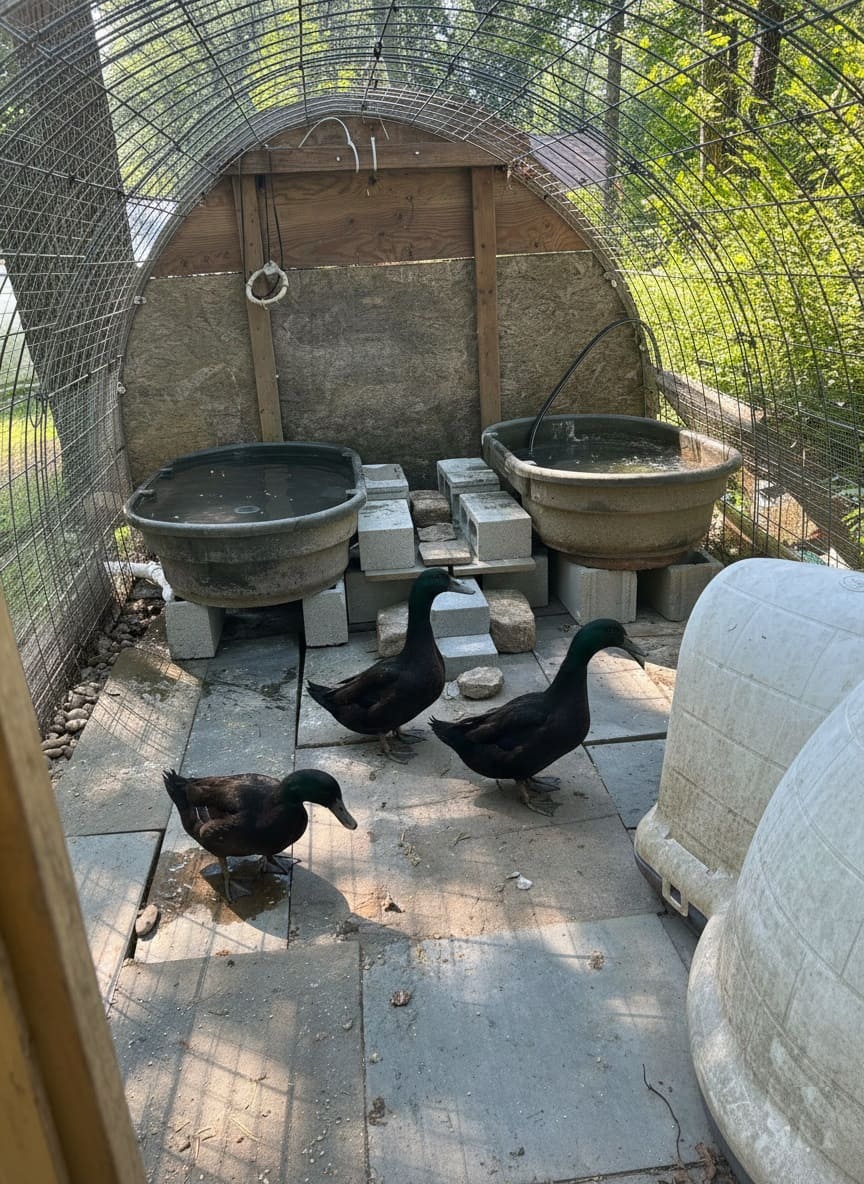
Consider installing a gravel or paver pad under water containers for better drainage.
You’ll also need to drain and refill pools every 2-3 days minimum. Where does that water go? Dumping 30-50 gallons in the same spot repeatedly creates a fetid bog. P
lan a drainage path that directs water away from the coop and run, or consider installing a small pond with filtration. Never keep water inside the sleeping coop overnight—the moisture creates health hazards and makes bedding management impossible.
Building a Predator-Proof Fortress
Let’s address the elephant in the room: predator-proofing determines whether your ducks live or die. This isn’t dramatic overstatement.
In our decade of duck keeping, we’ve encountered possums, raccoons, skunks, coyotes, snakes, and even a great horned owl trying to break into our coop.
We’ve watched raccoons methodically test every inch of the coop walls at 2 AM, searching for weaknesses. We once found a rat snake inside the run that had squeezed through a gap we didn’t know existed.
Yet we’ve never lost a duck to predation. Here’s how to achieve the same result.
The Hardware Cloth Rule
Chicken wire keeps poultry in. It does not keep predators out. This bears repeating because chicken wire is cheaper and more widely available, tempting budget-conscious builders.
Don’t fall for it. Chicken wire is flimsy, stretches easily, and creates gaps large enough for raccoon hands to reach through or weasels to squeeze through.
Use only ½-inch or ¼-inch galvanized hardware cloth for all openings—windows, vents, doors, floor barriers, everything.
Yes, it’s expensive. A 100-foot roll of ½-inch hardware cloth costs $150-$250. Buy it anyway. It’s the single most important investment in your ducks’ safety.
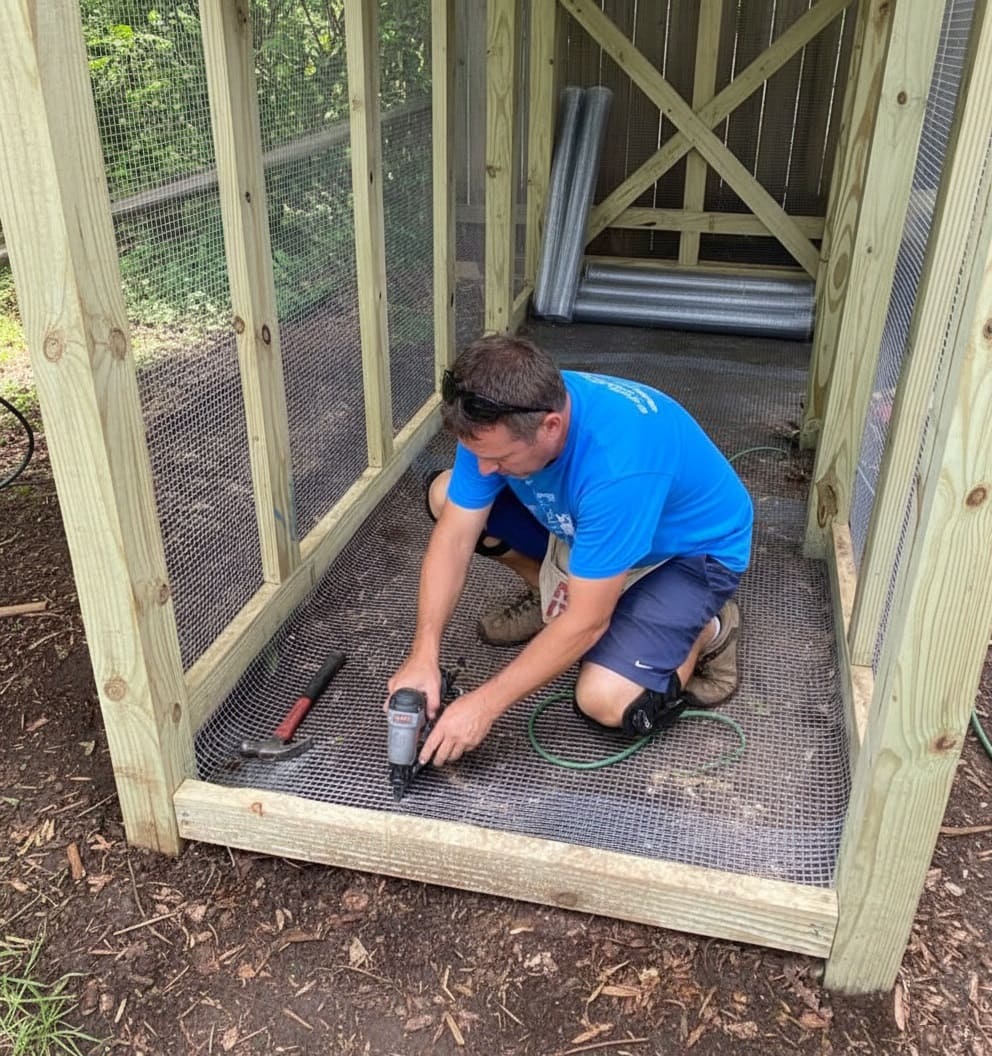
Install hardware cloth over every opening, attaching it securely with galvanized staples or u-nails. Then cover the edges with 1×2 trim boards screwed into place.
This serves two purposes: it reinforces the wire attachment, and it covers sharp cut edges that could injure your ducks (or you during cleaning).
Floor Protection: The Often-Forgotten Vulnerability
Most predators and rodents don’t attack from above—they dig underneath. Foxes, coyotes, rats, and even determined raccoons will excavate under coop walls. If your floor is just dirt or wood touching ground, you’re leaving the back door unlocked.
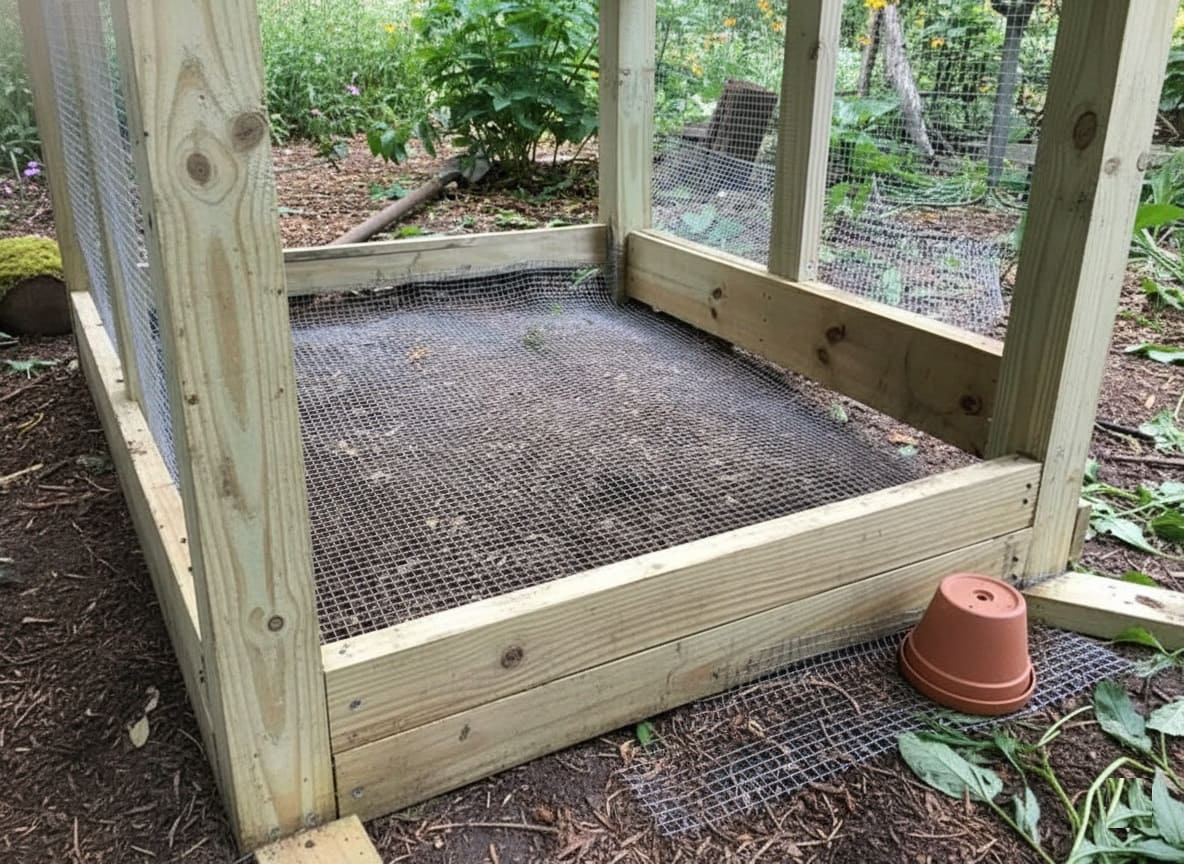
The solution is simple but requires forethought. Before placing your coop or during construction, lay ½-inch hardware cloth directly on the ground, extending at least 12 inches beyond all walls.
This creates a predator skirt—when animals dig and hit the wire, they stop. Cover this wire with 3-4 inches of bedding to protect duck feet, and the wire becomes invisible while remaining impenetrable.
For permanent coops, consider pouring a concrete floor. It’s expensive and irreversible, but absolutely predator-proof and easy to clean. If using concrete, top it with thick bedding to prevent foot injuries.
Alternatively, build your coop with a solid wood floor elevated a few inches off the ground, with hardware cloth skirting around the perimeter. This keeps predators from digging while allowing air circulation underneath to prevent wood rot.
Doors and Latches: Smarter Than You Think
Raccoons have remarkable problem-solving abilities and dexterous paws. Simple slide latches that you open with one quick motion? Raccoons figure those out easily.
We’ve seen videos of raccoons opening multiple types of latches, working persistently until they succeed.
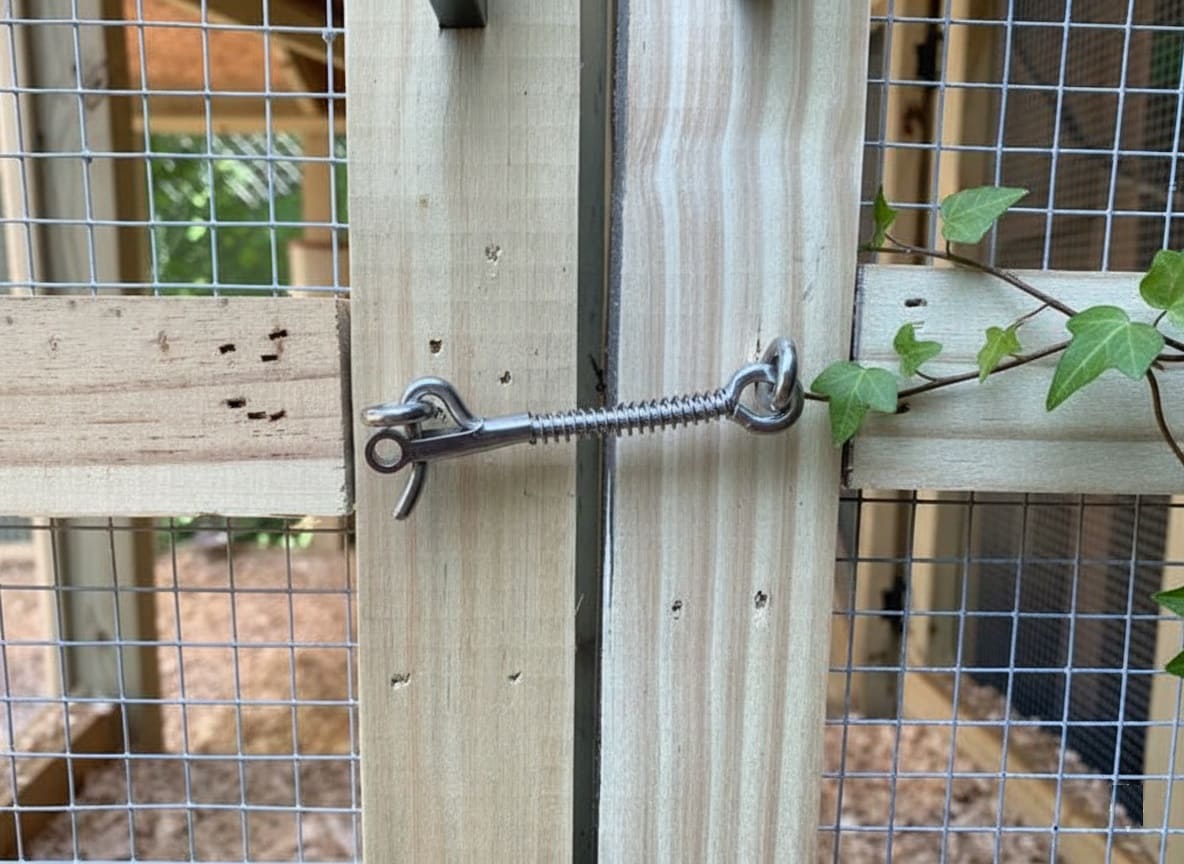
Use only spring-loaded hook-and-eye latches that require deliberate, two-step actions. The spring guard must be flipped up before the hook can be lifted off the eye.
This level of complexity defeats even clever raccoons. Install them at the top of doors where ducks can’t accidentally trigger them.
Door gaps matter too. Any space larger than 1/3 inch allows snakes to squeeze through or gives mice an entry point.
Ensure doors close snugly against the frame with no visible light gaps. Adding weatherstripping not only improves the seal but also provides draft protection in winter.
Wall and Window Construction
Solid walls on at least one or two sides provide wind protection and structural strength, but ducks need ventilation—which means openings. Any opening requires hardware cloth coverage.
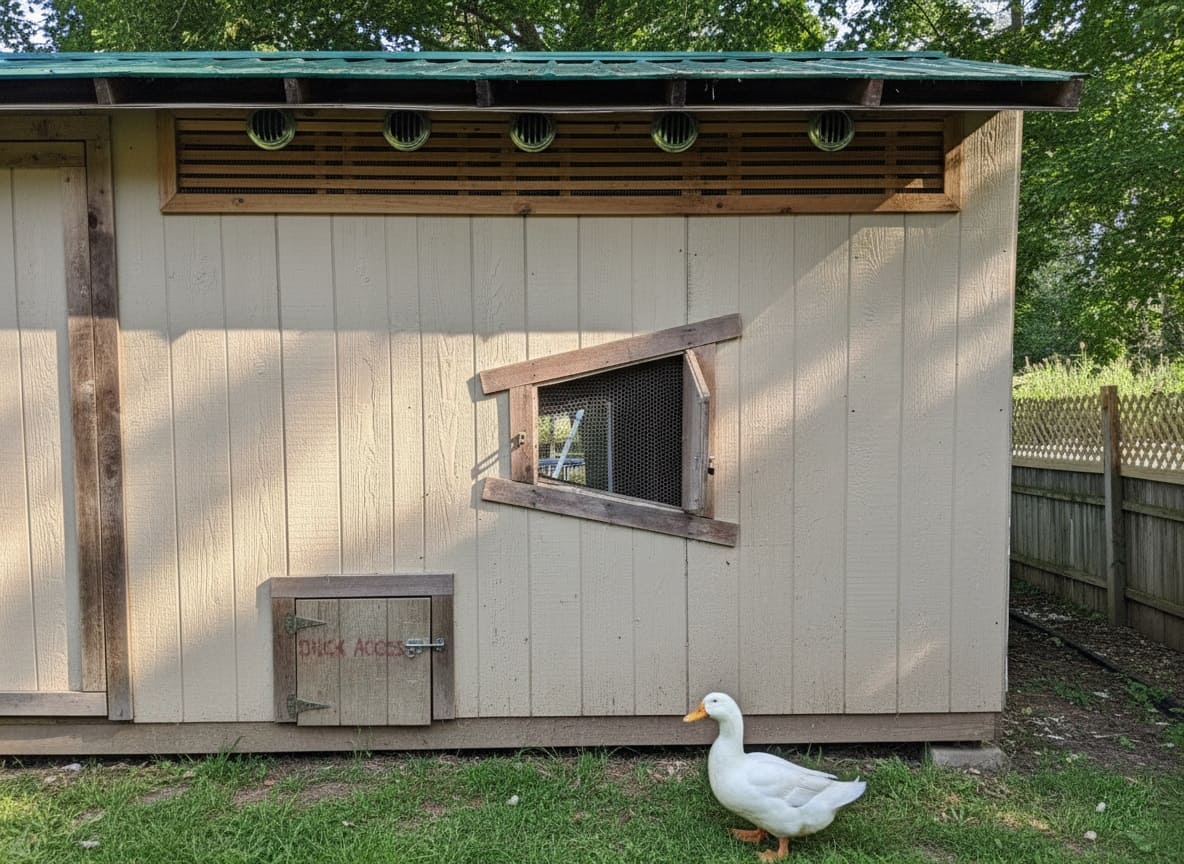
Windows should be positioned above duck head height (when standing) to prevent direct drafts from blowing on sleeping birds while still allowing air circulation.
In hot climates, entire walls can be hardware cloth-covered for maximum airflow. We built our coop with screened walls on three sides and solid walls only on the back corner where ducks nest.
This works beautifully in our Zone 7b climate but would be unsuitable for Minnesota winters without heavy modifications.
For cold climates, install shutters or removable plywood panels over windows that can be closed during blizzards and extreme cold while still allowing some ventilation near the roofline.
Run Security
If you’re building an attached run, the predator-proofing principles extend outward. A proper run has:
- Covered top: Use ½-inch welded wire, hardware cloth, or solid roofing to keep aerial predators out. Even if you’ve never seen a hawk in your area, they will find your ducks.
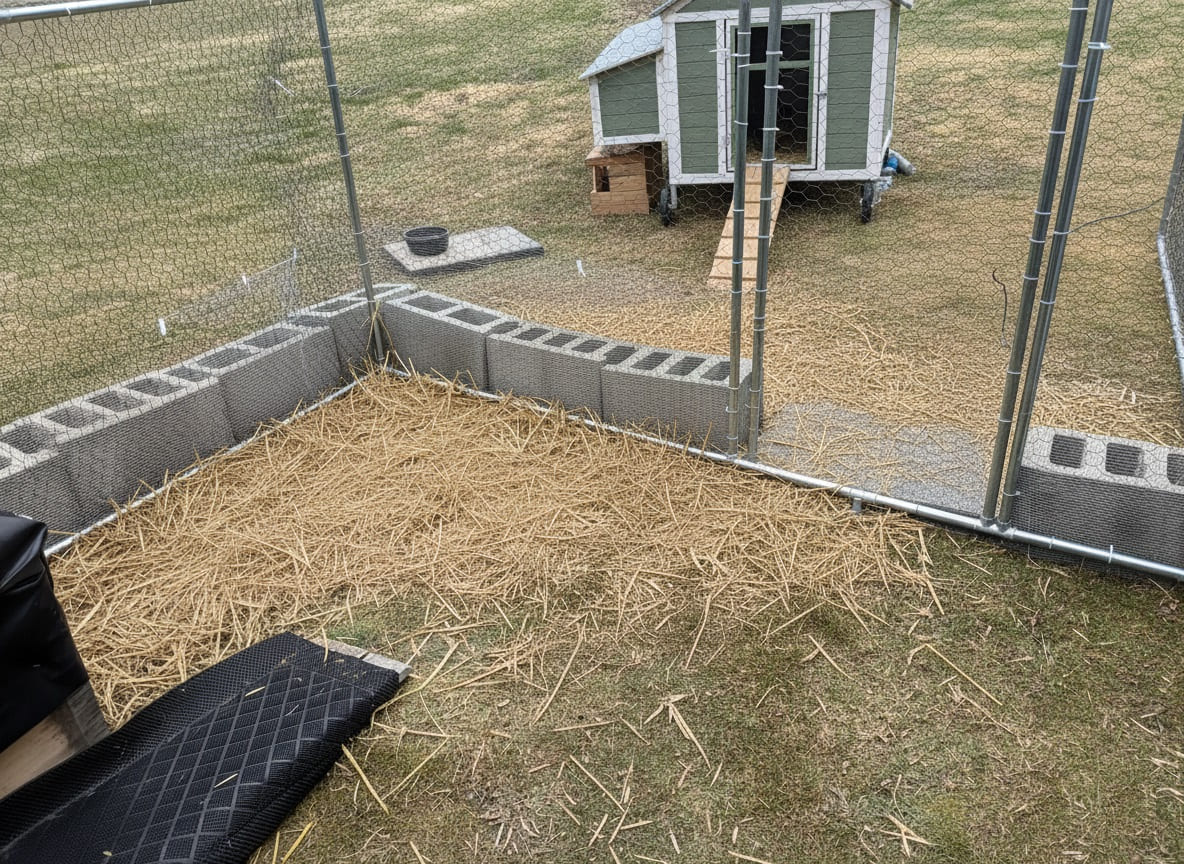
- Buried perimeter: Dig a 12-inch trench around the entire run and bury hardware cloth or welded wire, or install an above-ground predator skirt extending 12-18 inches outward from the walls and covered with soil, rocks, or pavers.
- Secure gates: Run gates need the same spring-loaded latches as coop doors. A simple chain with a carabiner is not sufficient—raccoons can work those open.
Minimum run size should be 15-20 square feet per duck, though 25+ square feet is better. Ducks destroy vegetation quickly in small spaces, turning grass into muddy muck. Larger runs stay cleaner and healthier.
Ventilation: The Silent Health Factor
Poor ventilation kills ducks slowly and invisibly. Ammonia from their nitrogen-rich droppings builds up in enclosed spaces, damaging respiratory systems and eyes.
The smell doesn’t have to be strong to be harmful—if you detect ammonia with your nose, levels are already too high.
Ducks also create enormous amounts of moisture. They breathe out humidity, track in water from pools, and produce wet droppings.
In a poorly ventilated coop, this moisture doesn’t escape. It condenses on walls and bedding, creating ideal conditions for mold, mildew, and harmful bacteria.
Ducks develop respiratory infections, and their wet feet become prone to bumblefoot—a painful condition that’s difficult to treat.
The solution isn’t complicated: provide at least one square foot of ventilation per duck, positioned high on walls to allow rising moisture and ammonia to escape while preventing drafts at duck level.
More ventilation is always better. There’s no such thing as too much as long as you’re not creating direct wind channels blowing on your birds.
In hot climates, open-air designs with screened walls provide maximum airflow. We can attest that even on 95°F summer nights with high humidity, our ducks are comfortable in their well-ventilated coop.
In cold climates, cut ventilation holes near the roof peak on the leeward side (opposite from prevailing winds) and cover them with hardware cloth. You can add hinged covers for temporary closure during extreme weather, but never seal the coop completely.
A musty smell signals ventilation problems. Your coop should smell earthy and mild, never sharp or acrid.
Material Selection and Budget Planning
Let’s talk money. Building a duck coop costs anywhere from essentially free (if you’re creative with salvaged materials) to several thousand dollars for an elaborate custom structure.
Most backyard duck keepers spend $200-$600 for a solidly built coop housing 4-6 ducks.
Framing and Structure
Use pressure-treated lumber or naturally rot-resistant wood like cedar or black locust. Standard construction lumber costs less but begins rotting within a few years when exposed to moisture—and duck coops are constantly moist.
Replacing rotted wood is expensive and time-consuming. The upfront investment in treated lumber pays for itself through longevity.
Pressure-treated lumber is now treated with micronized copper, not the arsenic-based compounds of decades past. It’s safe for poultry use.
For a basic 4×6-foot coop frame, expect to spend:
- Pressure-treated 2x4s: $80-$120
- Treated plywood for walls and floor: $100-$150
- Roofing (metal or shingles): $50-$100
- Hardware cloth (100-foot roll): $150-$200
- Hinges, latches, screws: $30-$50
- Bedding: $20-$30
Total: $430-$650 for new materials
Budget-Friendly Alternatives
The savviest duck keepers scavenge and improvise:
- Free wood sources:
Check construction sites (with permission), Craigslist free sections, and Facebook Marketplace.
Old fence panels, weathered barn wood, and pallets all work if structurally sound. When offered old fencing from a neighbor’s fence replacement, we acquired enough wood for several projects.
 Here’s How to Craft Wooden Fence Posts from Farm Trees: A DIY Guide
- Repurposed structures:
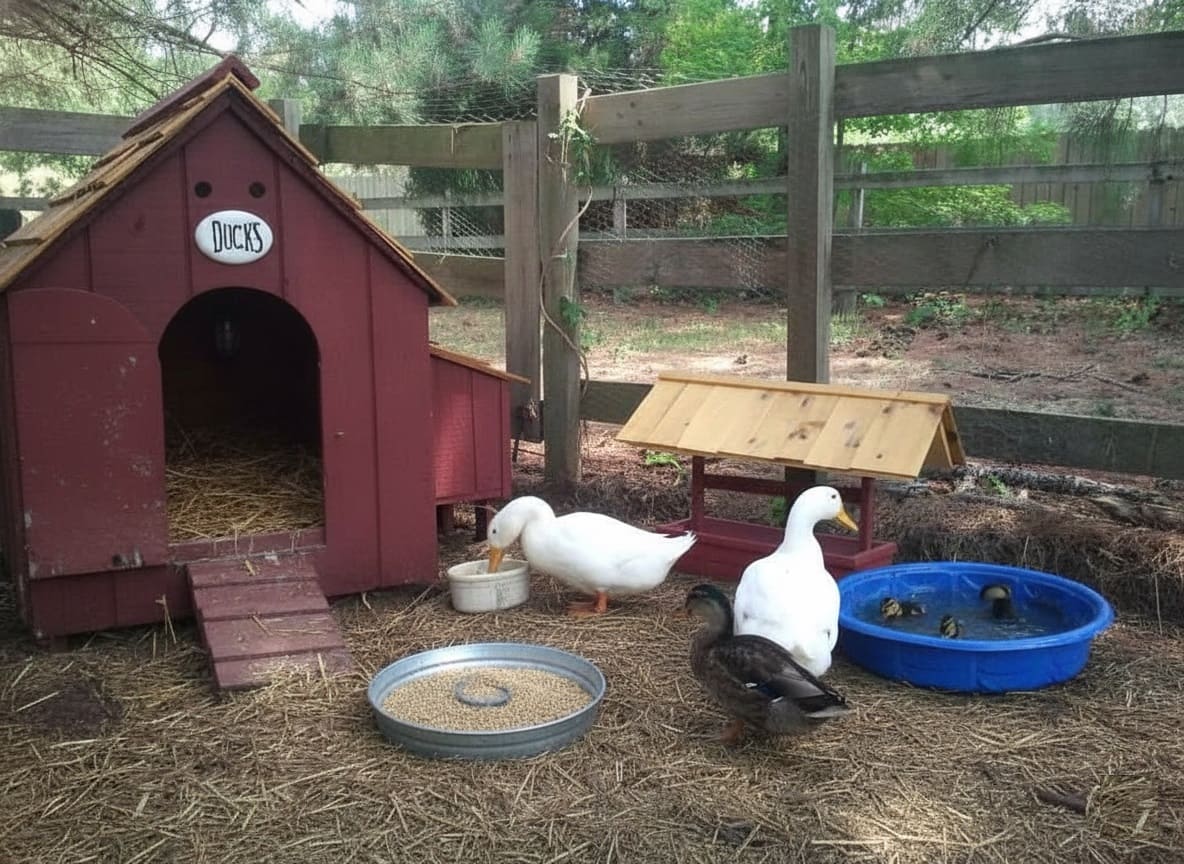
Large dog houses ($50-$150 used), plastic storage sheds ($200-$400), old playhouses, or garden sheds all convert into duck coops with modifications. Add ventilation, install hardware cloth over openings, secure the floor, and you’re done.
- Salvaged materials:
Yard sales, estate sales, and dump scavenging yield surprising treasures. We’ve built entire coops using materials that cost under $100 because we salvaged everything except hardware cloth and fasteners.
The one area you cannot cheap out on: predator-proofing materials. Always buy new, quality hardware cloth and latches. Your ducks’ lives depend on these items functioning correctly.
Roofing Choices
Corrugated metal roofing is inexpensive ($50-$80 for enough to cover a small coop), durable, and sheds water effectively. The noise during rainstorms doesn’t bother ducks.
Asphalt shingles look nicer and install easily but cost more. For temporary structures, heavy-duty tarps work, though they need replacement every few years.
Ensure your roof has adequate overhang (6-8 inches) to direct rain away from walls and the coop entrance. Even a slight pitch prevents water from pooling. A flat roof invites leaks and structural problems.
Construction Essentials
Door Sizing and Placement
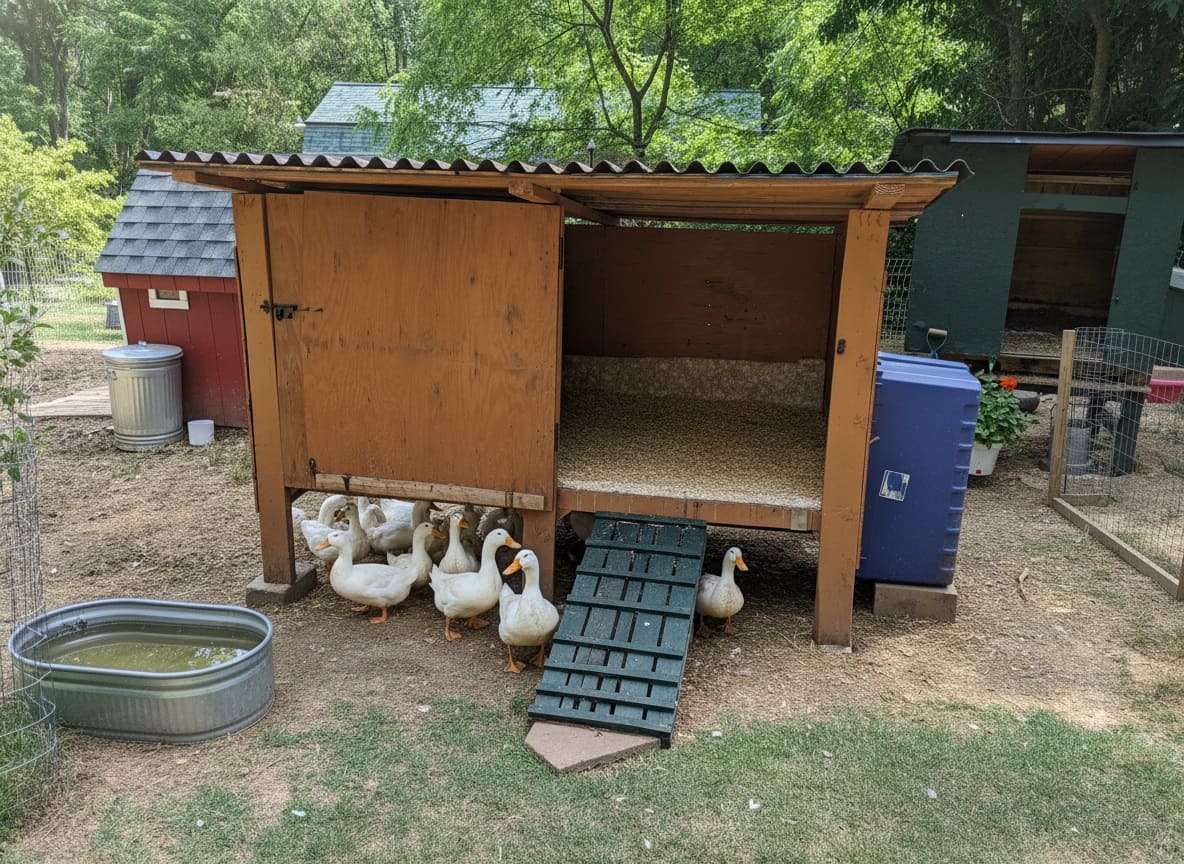
The duck entry door should be 14-16 inches wide and 12-14 inches tall—large enough for two ducks to pass simultaneously without fighting. Ducks are not patient about taking turns. A wider door prevents bottlenecks during the morning rush to get outside.
Position the door at ground level or as close as possible. Ducks and ramps are a dangerous combination. Those webbed feet slip easily, especially on wet or icy ramps.
We’ve seen older ducks fall and injure themselves on ramps that seemed perfectly safe. Build your coop low to the ground—a 4-inch step is manageable; anything more risks injury.
For human access, include at least one large door or hinged panel. If your coop is small, make an entire wall hinged so it swings open for complete access during cleaning.
For walk-in coops, standard-size doors work fine. Some keepers install doors on opposite ends for cross-ventilation and convenience.
Floor Covering and Bedding
If you have a solid floor (wood or concrete), cover it with waterproof material to prevent rot and ease cleaning. Peel-and-stick vinyl tiles work beautifully and cost $20-$40 for a small coop.
Vinyl sheet flooring is another option. These surfaces hose clean easily and prevent moisture from soaking into the underlying structure.
Top the waterproof layer with 3-4 inches of bedding. We prefer large-flake pine shavings for their absorbency, availability, and excellent composting characteristics. A compressed bale costs $7-$10 and lasts 3-4 weeks for four ducks.
Straw works well too, particularly in winter—its hollow structure provides superior insulation. Avoid cedar shavings, which contain phenolic compounds that can cause respiratory irritation.
Some duck keepers use the deep litter method: starting with 4-6 inches of bedding, they continuously add fresh layers on top rather than doing complete cleanouts. This works well in cold climates where the composting process generates heat.
In hot, humid climates, complete bedding changes every 3-4 weeks prevent smell and fly problems.
Sand is another option gaining popularity. Coarse construction sand or mason sand (not play sand) drains well and scoops clean like a giant litter box.
Initial installation requires 3-4 inches depth, and you’ll replace soiled areas periodically. Sand doesn’t compost, so disposal requires more planning.
Nesting Area Setup
Unlike chickens, ducks rarely use elevated nesting boxes. They prefer laying eggs in cozy, private floor corners. Create attractive nesting spots by:
- Piling extra bedding 6-8 inches deep in quiet corners
- Placing 12×12-inch wooden boxes (open-topped) filled with clean straw in dim areas
- Adding visual barriers like straw bales to create secluded nooks
Most ducks lay in pre-dawn hours. They’ll often share a communal nest, with multiple hens depositing eggs in the same spot. This makes collection convenient but sometimes results in soiled eggs.
Check nests early each morning, ideally by 7-8 AM, to collect clean eggs before they’re trampled or dirtied.
Special Considerations
Seasonal Adaptations
Despite their cold hardiness, ducks appreciate winter-specific features. Deep bedding creates insulation between their feet and frozen floors. We pile straw 6-8 inches thick during cold snaps, and ducks burrow into it overnight.
Block prevailing winter winds by hanging tarps or installing temporary plywood panels on the windward side of runs.
What ducks don’t need: supplemental heat. Heating lamps are fire hazards that cause more coop fires than any other single factor. They’re also unnecessary—ducks tolerate temperatures far below zero if they’re dry and sheltered from wind.
Artificially warming your coop prevents ducks from developing their full winter coat, actually making them more susceptible to cold.
In summer, shade becomes critical. Ducks handle cold far better than heat. Provide shaded areas in the run using tarps, shade cloth, or natural vegetation.
Ensure they have access to swimming water throughout hot days—ducks cool themselves by swimming and dunking their heads.
Food and Water Management
Feed and water inside the coop overnight? Generally, no. Ducks can comfortably go 8-10 hours without food, and withholding food prevents mice from being attracted to the coop.
Water inside the sleeping area creates a soggy mess that’s nearly impossible to manage. Wet bedding breeds bacteria and mold.
Offer food and water in the run during daytime hours. Ducks must have water available whenever they eat—they need water to wash food down their throats. Place waterers on a platform or in an area with excellent drainage to minimize mud.
Some keepers install a raised wire platform under waterers so spilled water drains through rather than saturating the ground.
 Here’s How to Feed Baby Ducks: A Complete Guide to Duckling Nutrition
For cold climates, heated water bowls prevent freezing without heating the entire coop. These plug-in bases keep water just above freezing and cost pennies per day to operate.
Biosecurity Basics
Duck health starts with clean housing. Establish routines that prevent disease introduction:
- Remove shoes worn to other poultry facilities before entering your duck area
- Wash hands before and after handling ducks
- Quarantine new birds for 30 days in a separate space before introducing them to your flock
- Clean and disinfect waterers weekly with a mild bleach solution (rinse thoroughly)
- Fully remove wet or soiled bedding promptly—don’t just add fresh layers on top
Watch for signs that your coop needs immediate attention: strong ammonia smell, flies clustering around the door, ducks spending time outside even in poor weather, or respiratory symptoms like wheezing or nasal discharge.
These problems rarely resolve on their own—they indicate urgent need for better sanitation or ventilation.
Simple Design Options
The Basic Box
A 4×6-foot rectangular coop with a simple shed roof serves four ducks beautifully. Frame it with 2x4s, sheath walls with plywood or T-111 siding, cover ventilation openings with hardware cloth, and top with metal roofing.
Build one wall as a hinged access panel for cleaning. Total build time: one weekend. Cost with new materials: $300-$450.
The A-Frame
Standing 5 feet tall at the peak with a 3×4-foot base, A-frame coops offer excellent headroom and weather protection while minimizing materials.
The steep angled walls shed rain naturally. Construction is slightly trickier due to angle cuts, but the design is attractive and functional. Perfect for 2-3 ducks.
The Lean-To
Building against an existing structure like your garage or shed cuts materials by roughly one-third. The shared wall provides stability and wind protection.
Ensure the existing structure can handle moisture without damage—avoid leaning duck coops against your house where humidity might cause problems.
The Conversion
Converting existing structures often provides the best value. Large plastic dog houses accommodate 2-3 ducks with modifications: drill ventilation holes near the top, install a secure latch, and add hardware cloth over any openings.
A plastic storage shed becomes a walk-in duck coop with minimal work. Even an old child’s playhouse converts easily.
Maintenance That Actually Gets Done
The best cleaning schedule is one you’ll follow consistently. For most keepers with 4-6 ducks, this rhythm works:
- Daily (5 minutes): Visual check for damage, collect eggs, refresh water, quick scan for health issues.
- Weekly (15 minutes): Spot-clean heavily soiled bedding, scrub waterers, remove any wet areas, check latches and hardware cloth.
- Monthly (1-2 hours): Complete bedding change, sweep or hose floor, inspect structure for needed repairs, trim back encroaching vegetation.
- Seasonally (2-4 hours): Deep clean with mild disinfectant, repair any damage before it worsens, adjust for upcoming season (add bedding before winter, enhance ventilation before summer).
If your coop smells strongly, you’re behind on maintenance. Address it immediately—for your ducks’ health and your neighbors’ happiness.
Common Pitfalls to Sidestep
New duck keepers make predictable mistakes. Avoid these:
- Building too small: The top regret. Build at least 25% bigger than current needs.
- Underestimating predator intelligence: If there’s a weakness, predators will find it. Assume every predator in a 5-mile radius will eventually test your coop.
- Forgetting about maintenance access: That cute design with the tiny door seems fine until you’re trying to muck out the coop. Always design with cleaning in mind.
- Placing in low, wet areas: Water finds low spots. Your coop will become a mud pit during the first heavy rain.
- Skimping on hardware cloth: Using chicken wire or larger-gauge welded wire instead of proper hardware cloth leads to losses.
- Inadequate ventilation: Sealing ducks in tight spaces creates health problems and shortens lifespans.
Your Next Steps
Ready to start building? Begin by sketching your design, taking measurements of your available space, and pricing materials.
Visit local hardware stores to handle different types of lumber and wire mesh. Talk to other duck keepers in your area about what works in your specific climate.
Remember, your duck coop doesn’t have to be perfect or Pinterest-worthy—it just needs to be safe, dry, and properly ventilated. Start with the basics, and you can always upgrade later as you learn what your flock needs.
Have questions or want to share your own duck housing setup? Drop a comment below. And if you found this guide helpful, share it with other aspiring duck keepers in your community. Here’s to many happy years of duck keeping ahead!
source https://harvestsavvy.com/building-a-duck-coop/




No comments:
Post a Comment