Standing on your apartment balcony or looking at your tiny patio, you might think a vegetable garden is impossible. Think again.
Container gardening transforms any sunny spot—a doorstep, balcony, porch, or even a windowsill—into a productive food source. No yard needed, no tilling required, and significantly fewer weeds to battle.
This guide will walk you through everything you need to know, from choosing the right containers to harvesting your first homegrown tomatoes.
Whether you’re a complete beginner or looking to expand your gardening skills, container vegetable gardening offers a flexible, manageable entry point.
Why Container Gardening Works
Container gardening solves problems that traditional gardening creates.
- Working with heavy clay soil? Bypass it entirely with containers.
- Dealing with soil-borne diseases or persistent weeds? Start fresh with clean potting mix.
- Renting and can’t dig up the yard? Containers move with you.
- Have mobility issues that make ground-level gardening difficult? Raise those containers to a comfortable working height.
The control factor is significant. You dictate the soil quality, manage watering precisely, and position plants exactly where they’ll get optimal sun. Containers warm up faster in spring, extending your growing season.
You can move heat-loving plants to the warmest microclimate on your property, or relocate tender herbs when frost threatens.
The trade-off?
Containers need more frequent watering and regular feeding since the limited soil volume dries out faster and nutrients get depleted quicker. But for the flexibility and accessibility you gain, it’s a worthwhile exchange.
Essential Equipment: What You Actually Need
Choosing Containers That Work
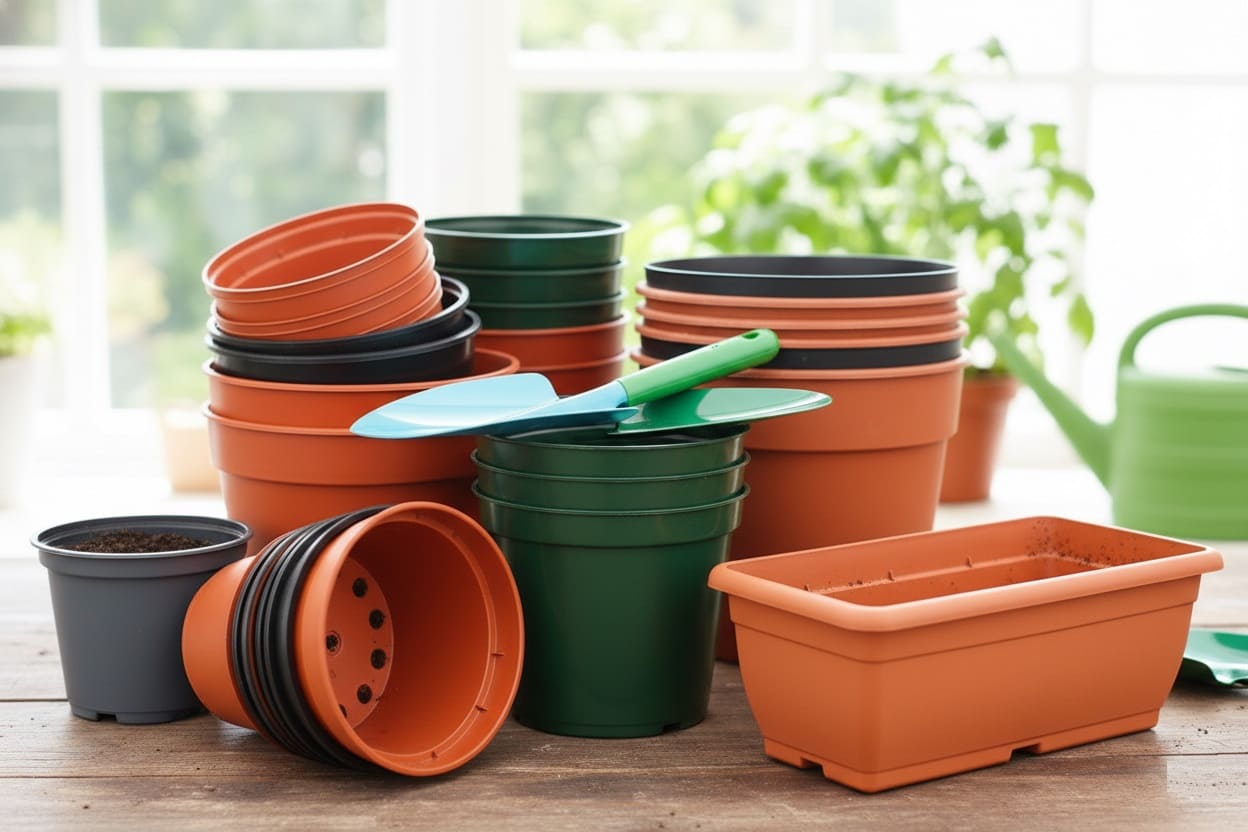
Almost anything that holds soil can become a vegetable container—terracotta pots, plastic buckets, wooden boxes, fabric grow bags, even repurposed items like whiskey barrels or storage bins.
The key is understanding what makes a container succeed or fail.
Size matters more than appearance
The most common beginner mistake is using containers that are too small. A tiny pot looks appealing, but it dries out in hours, gives roots no room to grow, and produces disappointing results.
As a general rule, go bigger than your first instinct.

Here’s a practical size guide:
| Vegetable Type | Minimum Container Size | Depth Needed |
| Tomatoes (large) | 5 gallons / 14″ wide | 18-24″ |
| Peppers, Eggplant | 3-5 gallons / 12″ wide | 12-18″ |
| Beans, Cucumbers | 3 gallons / 12″ wide | 12″ |
| Carrots, Beets | 2 gallons / 10″ wide | 12-18″ |
| Lettuce, Spinach, Greens | 1-2 gallons / 8″ wide | 6-8″ |
| Radishes, Herbs | 1 gallon / 6″ wide | 6-8″ |
| Green Onions | ½ gallon / 6″ wide | 4-6″ |
- Larger containers offer multiple advantages:
they hold moisture longer, provide more root space for robust plants, require less frequent watering, and buffer temperature fluctuations better than small pots.
Drainage is non-negotiable
Every container must have holes in the bottom for excess water to escape. Without drainage, roots sit in waterlogged soil, oxygen can’t reach them, and plants develop root rot.
If you find a perfect container without holes, drill some. Use a standard drill bit for plastic or wood, and a masonry bit for ceramic or clay. Aim for six to eight quarter-inch holes for containers larger than 12 inches across.

Material selection influences your workload
Different materials have distinct characteristics:
Plastic containers retain moisture well, are lightweight (important for balconies), cost less, and won’t crack in freezing weather.
They’re practical winners for most situations. Just verify you’re using food-grade plastic for edibles.
1. Terracotta and unglazed ceramic look beautiful but are porous—they allow water and air to pass through the walls.
This benefits root health but means you’ll water more frequently, sometimes twice daily in hot weather. Glazed ceramic holds moisture better while maintaining aesthetic appeal.
2. Fabric grow bags have gained popularity because they promote exceptional root health.
When roots reach the fabric edge, they “air prune” naturally rather than circling endlessly as they do in hard containers.
They’re lightweight, fold flat for storage, and drain excellently. The downside is more frequent watering due to evaporation through the sides.
 Read the Beginner’s Guide to Growing Carrots in Grow Bags
3. Wood planters (cedar or redwood) are attractive and long-lasting but eventually rot. Avoid treated lumber near food crops unless you know it’s been treated with modern, safer compounds.
4. Metal heats up dramatically in direct sun, potentially cooking roots. If using metal, position it where it gets afternoon shade or nest a plastic pot inside for insulation.
Consider weight if you’re on a balcony or want mobility. A large container filled with moist soil can weigh over 100 pounds. Place heavy containers on wheeled plant dollies before filling them.
Selecting Soil That Performs
This decision makes or breaks your container garden. Use garden soil, and you’ll fight compaction, poor drainage, and likely poor results.
Garden soil is formulated for the ground where it has proper structure and microbial activity. In a container, it becomes problematic.
Use potting mix designed specifically for containers
These mixes are engineered to drain well while retaining moisture—the holy grail of growing media.
They’re lightweight, contain the right balance of materials for healthy roots, and come sterilized without weed seeds or diseases.
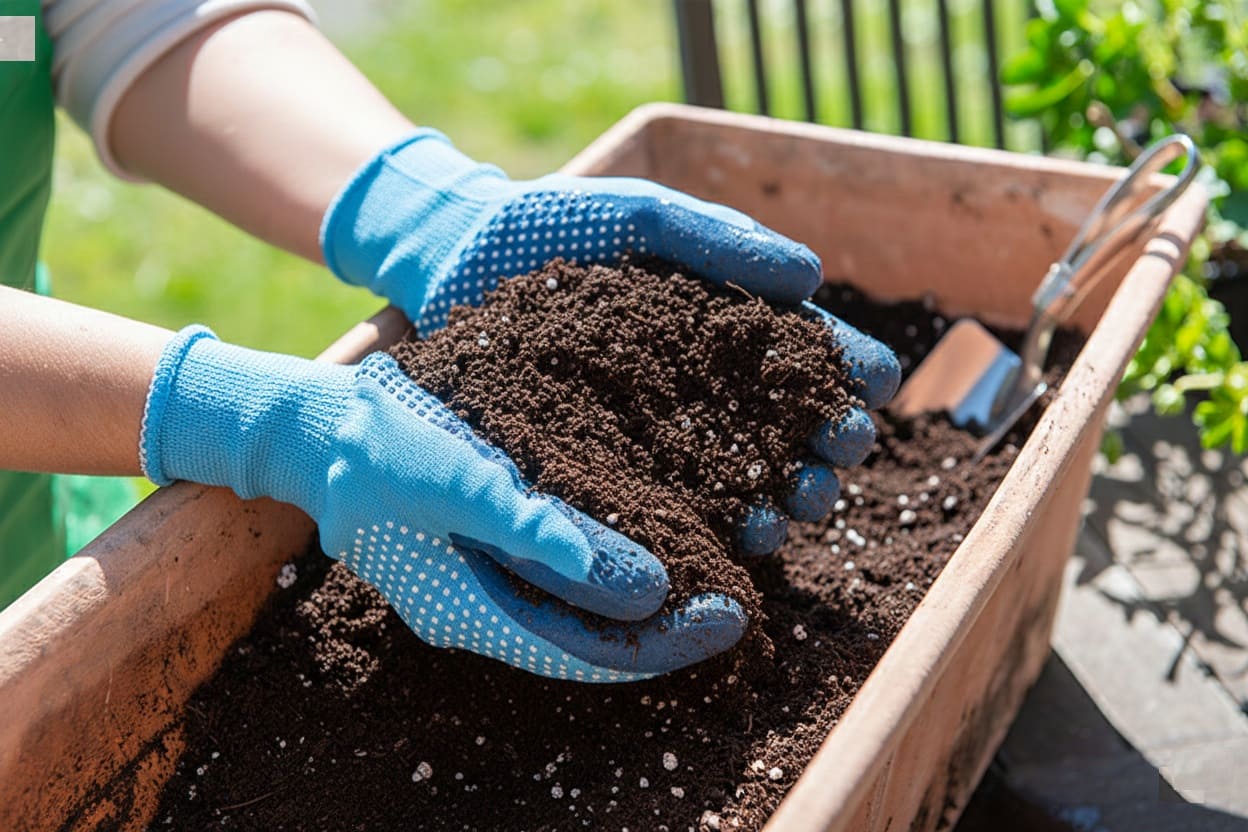
Quality potting mixes typically contain peat moss or coconut coir (for moisture retention), perlite or vermiculite (for drainage and aeration), and sometimes compost. Many come pre-loaded with fertilizer that feeds plants for 6-10 weeks.
Read labels carefully. Look for bags labeled “potting soil,” “potting mix,” or “container mix”—not “garden soil” or “topsoil.”
Making your own mix
Make your own mix to save money if you’re filling many containers. A simple recipe: equal parts quality potting mix, finished compost, and peat moss or coir, then add perlite for drainage.
Some gardeners use one part peat, one part compost, one part coarse sand or perlite, plus organic fertilizer. The goal is creating a medium that stays loose, drains well, yet holds moisture.
Whatever mix you choose, moisten it thoroughly before planting. Dry coir and peat can be hydrophobic. Wet it the day before planting if possible, allowing time for even moisture absorption.
Finding the Right Location
Sunlight drives photosynthesis, which drives plant growth and fruit production.
Most fruiting vegetables—tomatoes, peppers, eggplants, cucumbers, squash, beans—need full sun, meaning 6-8 hours of direct sunlight daily. Cheat them on light, and you’ll get spindly plants with few vegetables.
Leafy greens and herbs are more forgiving. Lettuce, spinach, arugula, kale, and most herbs can produce decent crops with 3-5 hours of direct sun or bright indirect light. This opens up partially shaded areas for productive use.
Before committing to a location, observe it throughout the day. Morning sun differs from afternoon sun.
A spot that seems bright at 9 AM might be shaded by 2 PM. South-facing and west-facing locations typically receive the most sun.
Position containers near a water source. You’ll be watering frequently—hauling watering cans across a yard gets tedious fast.
Easy access to a hose or spigot makes the difference between gardening being a pleasure or a chore.
Watch for wind. Strong winds dry out containers rapidly and can damage or topple plants, especially tall, fruit-laden ones.
Provide shelter with walls, fencing, or cluster containers together. Secure top-heavy containers with stakes or weight them with bricks.
Pay attention to microclimates. A spot beside a brick wall absorbs and radiates heat—perfect for heat-lovers like peppers but potentially too warm for lettuce.
An area near pavement heats up faster. A second-floor balcony might be windier than you realize. These subtle differences affect success.

Best Vegetables for Container Success
Not all vegetables adapt equally well to container life. Some thrive in pots; others struggle regardless of care.
Foolproof Choices for Beginners
1. Tomatoes top most container gardeners’ lists. The taste difference between store-bought and homegrown is dramatic, and growing them in pots is surprisingly straightforward.
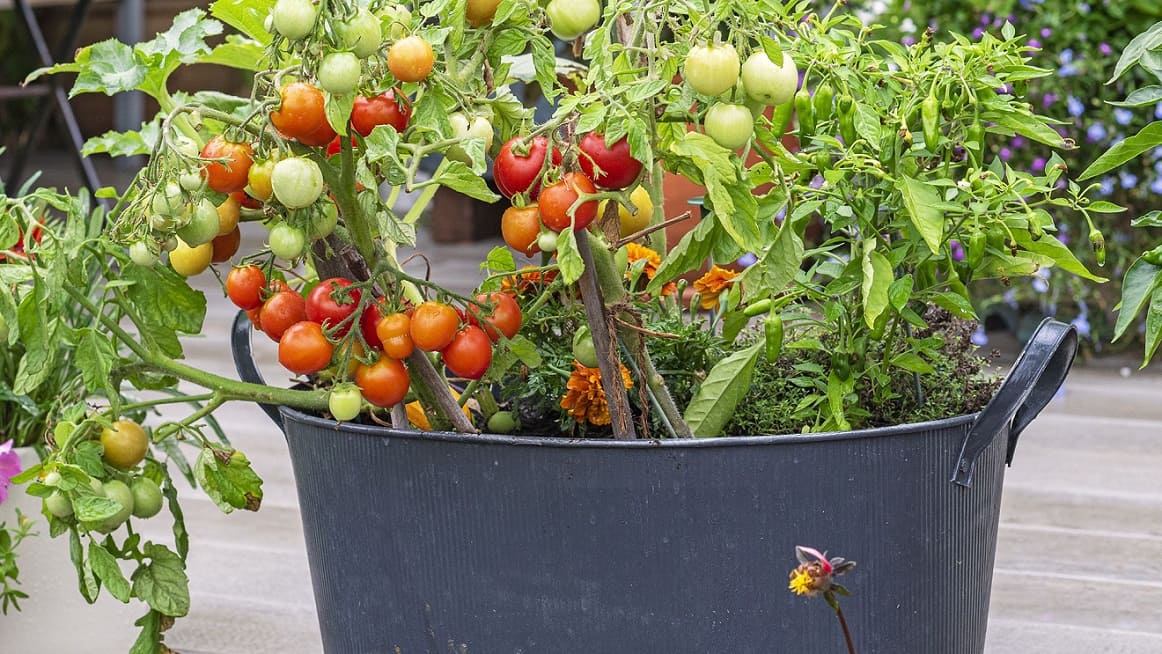
Choose determinate or dwarf varieties—these stay compact rather than sprawling uncontrollably.
Look for labels reading “patio,” “bush,” or specific varieties like ‘Tiny Tim,’ ‘Patio,’ ‘Bush Early Girl,’ ‘Sweet 100,’ or ‘Tumbling Tom.’
Cherry tomatoes generally outperform full-size slicers in containers, though both work with adequate space.
Give each plant at least a 5-gallon container. Install a cage or stake at planting time to support the plant as it grows.
Tomatoes have a useful quirk: you can bury the stem deeper than it grew in its nursery pot.
Bury up to the first set of true leaves, and the buried stem will develop additional roots, creating a stronger plant.
2. Peppers—both sweet bells and hot varieties—are naturally more compact than tomatoes and can produce prolifically.
Varieties like ‘California Wonder,’ ‘Jalapeño,’ ‘Cayenne,’ and ‘Shishito’ all excel in containers.
A 3-gallon container typically suffices. Peppers love warmth, making containers ideal since soil warms faster than in-ground beds.
3. Lettuce and salad greens deliver quick satisfaction—harvest in 30-60 days from seed.
Practice “cut-and-come-again” harvesting: snip outer leaves as needed while the plant keeps producing new growth from the center.
Try ‘Buttercrunch,’ ‘Salad Bowl,’ ‘Red Sails,’ or mesclun mixes. A window box or shallow container (6-8 inches deep) works perfectly. Sow seeds every two weeks for continuous supply through the season.
Learn about Cabbage vs. Lettuce: What’s the Difference? A Complete Guide to Nutrition, Taste & Uses
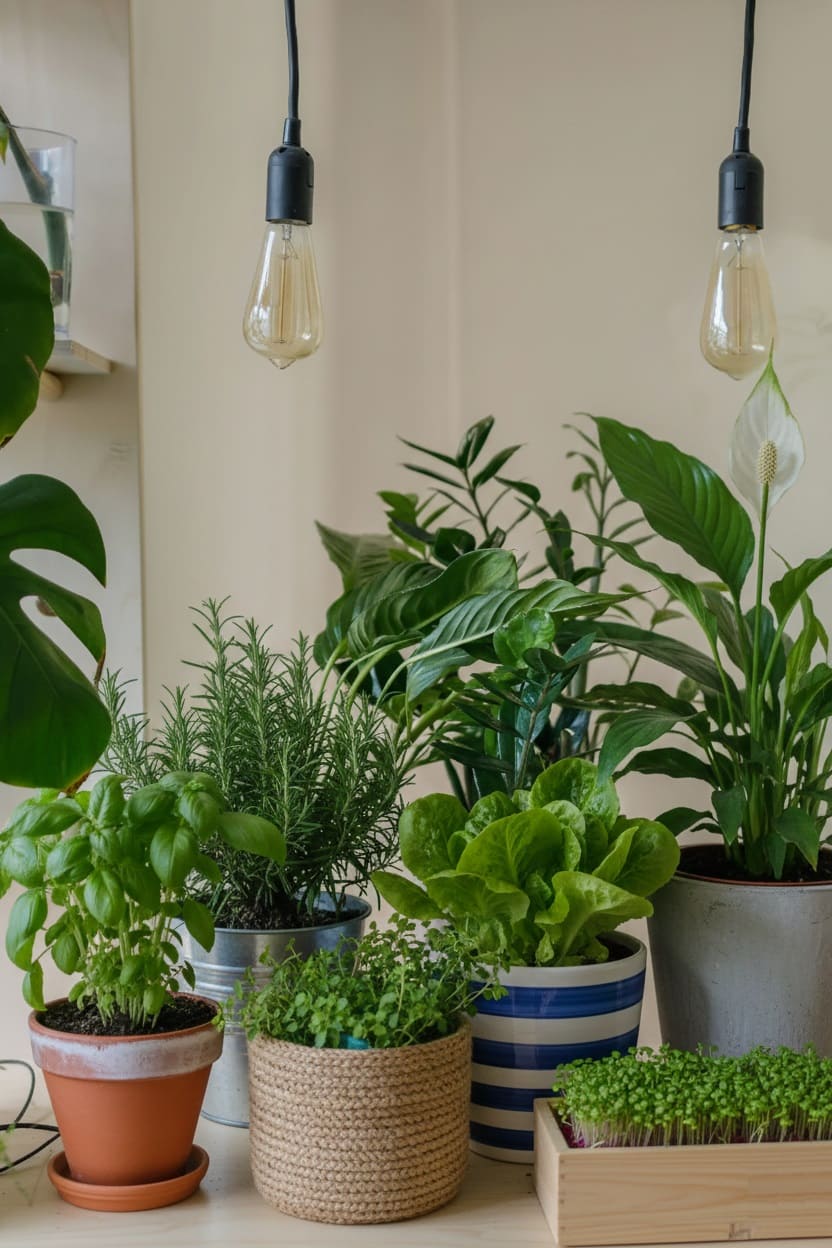
4. Herbs are naturals for container growing. Basil, parsley, cilantro, chives, thyme, oregano, and mint all flourish in pots.
Many herbs originate from Mediterranean climates and actually prefer the drier conditions containers provide.
Position them near your kitchen door for constant use. Most herbs thrive in containers as small as 6-8 inches across, though larger pots mean less frequent watering.
5. Radishes are the speed demons of the vegetable world—some varieties mature in just 20-25 days.
They need minimal space (a 6-inch deep container works) and are nearly foolproof. Sow a few seeds weekly, and you’ll have crisp radishes continuously.
6. Green beans succeed if you choose bush varieties or provide a trellis for pole beans. ‘Blue Lake,’ ‘Contender,’ and ‘Bush Romano’ are reliable. A 2-3 gallon container accommodates 4-5 bean plants.

Here’s How to Grow Yard Long Beans: Planting, Growing & Harvesting Success Tips
Intermediate Options Worth Trying
1. Carrots need depth (12+ inches) but reward you with homegrown sweetness. Choose shorter varieties like ‘Thumbelina,’ ‘Paris Market,’ ‘Short ‘n Sweet,’ or ‘Danvers Half Long’ rather than long slender types.

The advantage: you control soil texture, avoiding rocks or hard clay that cause forked, twisted roots.
2. Potatoes make surprisingly fun container crops. Use at least a 5-gallon bucket.
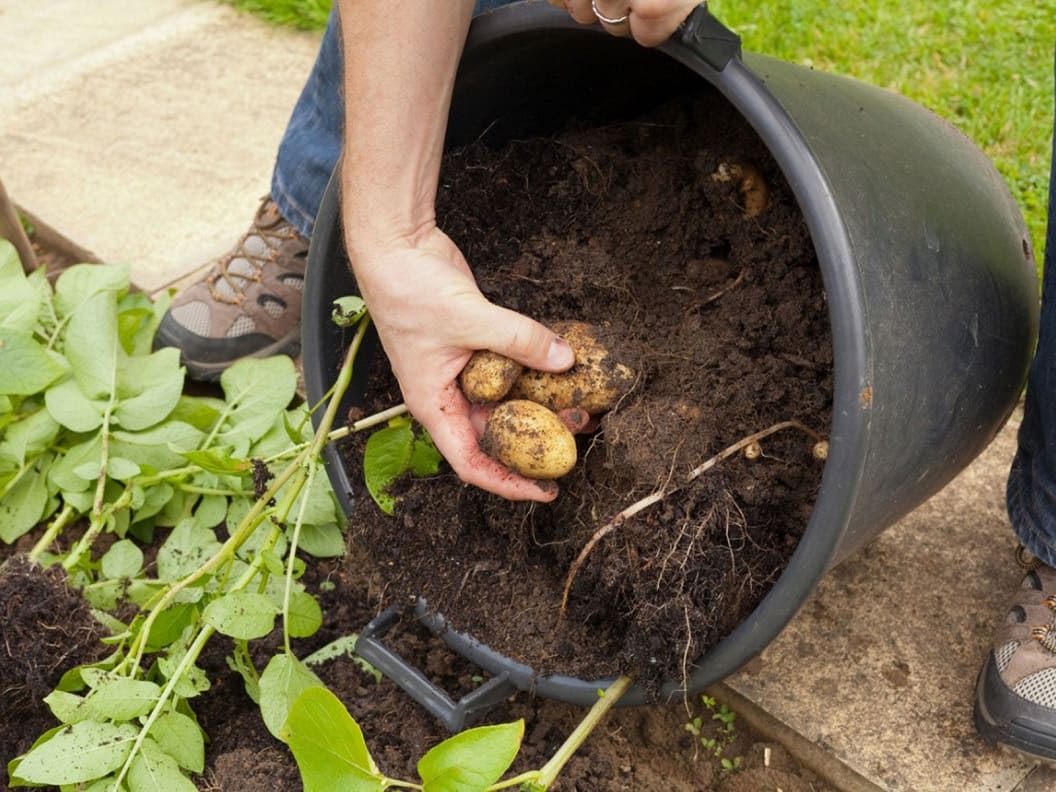
The technique differs slightly: fill the container only 1/4 full initially, place seed potatoes on top, cover with 4 inches of soil, then keep adding more soil as plants grow.
When foliage dies back, dump the container and collect your harvest—it’s like a treasure hunt.
3. Cucumbers work with compact varieties like ‘Bush Pickle,’ ‘Spacemaster,’ or ‘Salad Bush.’
Vining cucumbers need a large container (5+ gallons) and a trellis but reward you abundantly.
4. Zucchini and summer squash are possible but challenging due to their space requirements.
Choose bush varieties like ‘Patio Star’ zucchini, use a large container (5+ gallons), and expect the plant to sprawl. One plant per container is the rule.
What to Skip (or Save for Later)
1. Large sprawling vegetables—pumpkins, winter squash, watermelons, and full-size melons—are generally poor container choices. They need enormous space for vining growth.
Even in very large containers, they tend to underperform. If you want these, invest in a raised bed instead.
2. Corn needs block planting for pollination and occupies space for months while producing relatively little yield per plant. Not practical for most container gardens.
3. Long-season root vegetables like parsnips can work but require very deep containers and tie up that space for months. Usually not the best use of limited container real estate.
Planting Your Container Garden
Timing and Planning
Successful container gardening follows the same seasonal rhythms as traditional gardens. Understanding when to plant different crops is crucial.
1. Cool-season crops (lettuce, spinach, kale, peas, radishes, broccoli, cabbage) tolerate frost and prefer temperatures between 60-70°F.
Plant these in early spring, 4-6 weeks before your last frost date, or in fall for a second harvest. In mild climates, grow them through winter.
2. Warm-season crops (tomatoes, peppers, eggplants, cucumbers, squash, beans) need warm soil and air temperatures.
Wait until after all danger of frost has passed and nighttime temperatures consistently stay above 50°F. Soil temperature should reach at least 60°F, ideally 70°F for heat lovers.
Most gardeners find transplants easier than starting from seed. Nurseries sell seedlings at the right time for your region, eliminating timing guesswork.
However, some vegetables perform better from direct seeding: radishes, carrots, beans, and peas transplant poorly. Lettuce, herbs, and greens can go either way.
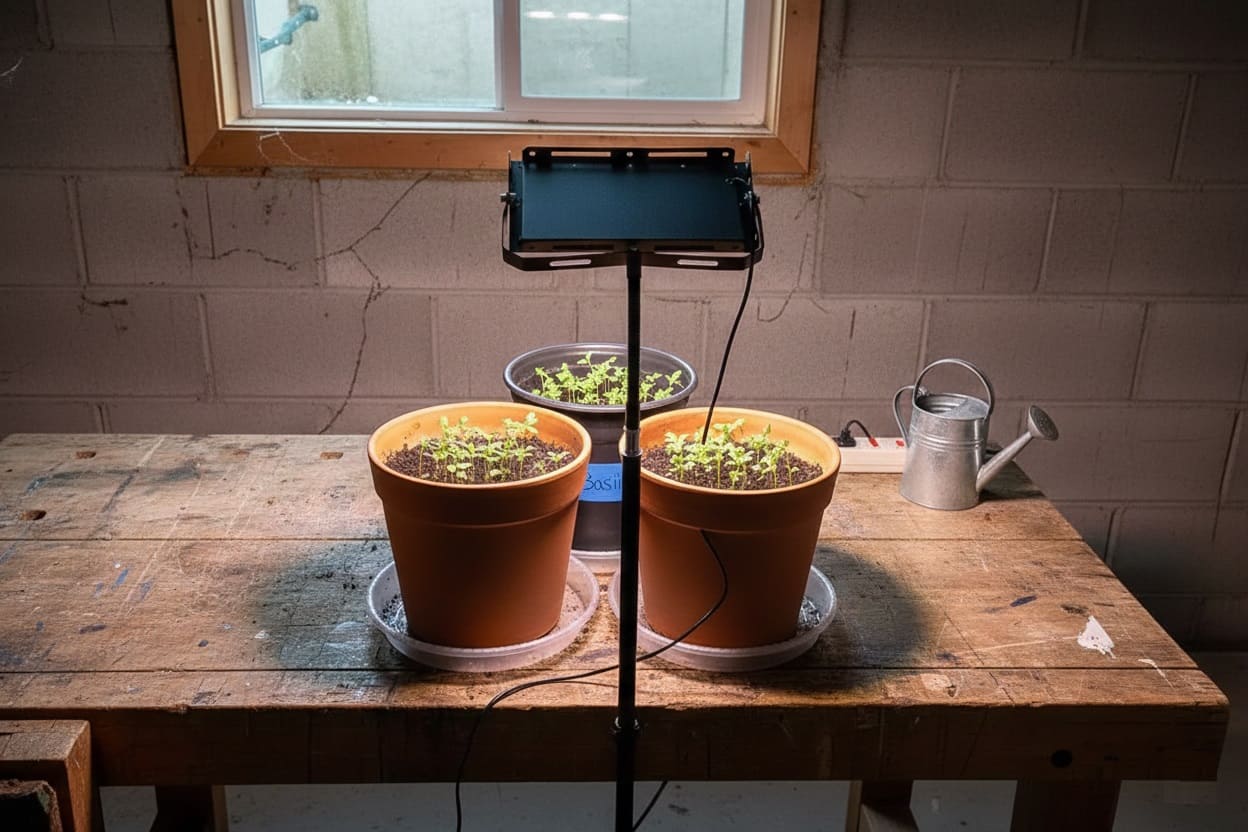
If starting seeds, begin indoors 6-8 weeks before your transplant date for tomatoes and peppers, 4-6 weeks for herbs and greens. Seed packets provide specific timing guidance.
Planting Technique
Fill containers to within 1-2 inches of the rim with moistened potting mix. Soil will settle as you water, so leave that gap for easier watering later.
1. For seeds, plant according to packet directions—generally 2-3 times deeper than the seed’s width. For tiny seeds like lettuce, barely cover them.
Plant more seeds than you need; you’ll thin later. Lightly water with a gentle spray to avoid washing seeds around.
2. For transplants, dig a hole slightly larger than the root ball. Gently loosen circling roots with your fingers—this encourages them to grow outward rather than continuing to circle.

Plant at the same depth it grew in the nursery pot, except tomatoes. Tomatoes benefit from deep planting: remove lower leaves and bury the stem up to the remaining foliage. The buried stem develops additional roots.
3. Spacing matters. Don’t overcrowd. While you can space slightly closer than in-ground recommendations due to richer soil and regular feeding, plants still need room.
One large tomato or pepper per 5-gallon pot. Three to four lettuce plants in a 12-inch container. Eight to ten radish seeds in an 8-inch pot.
Thinning is essential—remove weaker seedlings to give strong ones proper space.
4. Water thoroughly after planting to settle soil and eliminate air pockets. The soil should be evenly moist throughout, not soggy.
Daily Care and Maintenance
Mastering Watering
Container plants need frequent watering—this is your primary maintenance task.
The limited soil volume dries out much faster than ground soil, especially in hot, sunny, or windy conditions.
Check daily by sticking your finger into the soil. If the top inch feels dry, water thoroughly.
When watering, apply enough that it runs out the drainage holes. This ensures moisture reaches all roots and flushes out any fertilizer salt buildup.
In peak summer, expect to water once daily, possibly twice for small containers or in very hot, dry climates. Larger containers hold moisture longer—another advantage of going big.
- Water in the morning when possible.
Plants have all day to use the moisture, and foliage dries quickly, reducing disease risk. Evening watering works too, but avoid late-night watering that leaves foliage wet overnight.
Strategies to reduce watering frequency:
- Use larger containers that hold more moisture
- Mulch the soil surface with compost, straw, or shredded leaves
- Cluster containers together to create shade and reduce evaporation
- Use self-watering containers with built-in reservoirs
- Install drip irrigation or soaker hoses on timers for automatic watering
Feeding Your Plants
Container plants are hungry. Water flushes nutrients out the drainage holes, and the small soil volume gets depleted quickly.
If using potting mix with fertilizer included, you’re covered for 6-10 weeks. After that, begin regular feeding. Without pre-mixed fertilizer, start feeding 2-3 weeks after planting.
Two main approaches exist:
1. Slow-release granular fertilizers (like Osmocote or organic alternatives) get mixed into soil at planting and release nutrients gradually over 3-4 months. This provides a baseline feeding with minimal effort.
2. Liquid fertilizers (fish emulsion, seaweed, or balanced vegetable fertilizers) get diluted in water and applied every 1-2 weeks during active growth. They provide quick nutrient boosts and let you adjust feeding to plant needs.
The best strategy combines both: slow-release at planting plus liquid feeding every 2-3 weeks during active growth.
Once fruiting vegetables begin flowering, switch to fertilizers higher in phosphorus and potassium (the middle and last numbers on the label) to encourage fruit production rather than just foliage.
Follow package directions carefully. Over-fertilizing causes problems—excessive foliage with few fruits, salt buildup, yellowing leaves, or even plant death. More is not better.
Supporting Your Plants
Many vegetables need physical support. Install stakes, cages, or trellises at planting time or shortly after to avoid damaging roots later.
Tomatoes do best with sturdy cages or stakes. As plants grow, loosely tie the main stem to the support with soft ties or twine.

Pruning determinate tomatoes isn’t necessary, but indeterminate varieties benefit from removing suckers (shoots growing from leaf axils) to focus energy on fruit production.
Cucumbers, pole beans, and peas are natural climbers. Provide a bamboo teepee, trellis attached to the container, or stakes with string between them. Training plants upward saves space and makes harvesting easier.
Peppers and eggplants can get top-heavy once loaded with fruit. A single stake per plant often provides adequate support.
Troubleshooting Common Problems
Dealing with Pests
Container gardens typically have fewer pest issues than in-ground gardens, but problems still arise.
1. Aphids—small, soft-bodied insects clustering on new growth—usually dislodge with a strong water spray. For persistent infestations, use insecticidal soap.

2. Spider mites appear in hot, dry conditions. Spray plants with water, especially leaf undersides. Neem oil provides organic control for serious infestations.
3. Caterpillars might chew tomato, pepper, or cabbage plants. Hand-pick and drop them in soapy water, or use Bt (Bacillus thuringiensis), an organic bacterial insecticide safe for edibles.
4. Slugs and snails usually can’t reach elevated containers, but they can attack pots sitting on the ground. Use copper tape around rims, crushed eggshells as barriers, or hand-pick at dusk when they’re active.
Learn more effective strategies for controlling slugs and snails here!
The best pest defense is healthy plants. Stressed plants attract problems. Keep containers watered, fed, and in appropriate light, and you’ll have far fewer issues.
Preventing Diseases
- Root rot develops when soil stays too wet due to poor drainage or overwatering.
Prevention: ensure adequate drainage holes, use quality potting mix, water only when the top inch is dry.
- Powdery mildew appears as white, powdery spots on leaves, often in humid conditions with poor air circulation.
Prevention: space plants adequately, water at the soil surface rather than overhead, ensure good airflow around containers.
- Blight (especially tomato and potato blight) thrives in wet, cool conditions.
Avoid overhead watering, don’t work with wet plants, and remove affected leaves immediately at first sign of infection.

Early detection makes all the difference. Check plants regularly. Remove diseased leaves promptly to prevent spread. In severe cases, remove the entire plant to protect others.
Troubleshooting Growth Issues
- Plants looking pale or yellowish likely need nitrogen. Feed with a balanced fertilizer.
- Lots of foliage but few flowers or fruits suggests too much nitrogen, not enough phosphorus and potassium. Switch to a fertilizer formulated for fruiting vegetables.
- Leaf tips turning brown could indicate salt buildup from over-fertilizing, inconsistent watering, or low humidity. Flush containers thoroughly with water to leach excess salts.
- Wilting despite wet soil suggests root rot or root-bound conditions. Check drainage and consider whether the plant needs a larger container.
- Stunted growth usually means the pot is too small, insufficient light, or nutrient deficiency. Assess each factor and adjust accordingly.
Harvesting Your Container Garden
Growing vegetables is satisfying, but harvesting them is the payoff that makes it all worthwhile. Knowing when and how to harvest maximizes both yield and quality.
1. Tomatoes taste best when fully ripe on the vine. Pick when they reach full color and feel slightly soft when gently squeezed.
For slicing tomatoes, harvest when fully colored but still firm. Cherry tomatoes should be deep red, orange, or yellow (depending on variety) and come off the stem easily. Harvesting regularly encourages the plant to produce more fruit.
2. Peppers can be harvested at any stage. Green bell peppers are simply unripe—leave them longer and they’ll turn red, yellow, or orange, becoming sweeter but less crisp.
Hot peppers intensify in heat as they mature and change color. Regular harvesting encourages more production.
3. Lettuce and greens are ready when leaves reach usable size. For cut-and-come-again varieties, harvest outer leaves, leaving the center to continue growing.
Harvest before hot weather causes bolting (sending up flower stalks), which makes leaves bitter.
4. Herbs can be harvested once plants are established with several sets of leaves. Pinch or cut stems just above a leaf node—this encourages bushier growth.
Harvest regularly to prevent flowering, which reduces leaf production and changes flavor. Morning harvesting, after dew dries but before heat builds, captures peak flavor.
5. Cucumbers and zucchini taste best when harvested young and tender. Check plants daily once fruiting begins—these vegetables can grow from tiny to oversized in 48 hours.
Smaller cucumbers (6-8 inches) and zucchini (6-8 inches) are more tender and flavorful than giants.
6. Carrots and radishes can be gently pulled when they reach desirable size. Radishes are ready in 20-30 days; carrots take 60-80 days depending on variety. Both can stay in the soil longer if not needed immediately.
7. Beans and peas need regular harvesting to keep plants productive. Pick beans when pods are firm but seeds inside haven’t swollen.
Pick peas when pods are plump but before they become tough. Both should snap crisply when bent.
Learn When and How to Harvest Vegetables for Peak Flavor: Timing & Tips for Every Crop
The general rule: harvest regularly. Most vegetables taste best when picked slightly young rather than overly mature, and regular harvesting signals plants to keep producing.
End-of-Season Care and Storage
When the growing season ends, proper care of your containers ensures they’re ready for next year.
1. Remove spent plants completely, including roots. Compost healthy plants; discard diseased ones in the trash (not compost). Remove any debris or fallen leaves.
2. Clean containers thoroughly, especially if you had disease issues. Scrub with soapy water, then sanitize with a solution of 1 part bleach to 9 parts water. Rinse well and let dry completely.
3. Soil reuse depends on plant health. If plants were healthy and disease-free, you can reuse potting soil, but refresh it first.
Remove old roots, mix in 25-30% fresh compost and potting mix, and add slow-release fertilizer.
For vegetables, I prefer starting fresh each season to minimize disease risk, but amended soil works for annual flowers.
4. Store containers properly over winter. Stack plastic pots to save space.
Empty and clean ceramic or terracotta pots before storing in a shed or garage—filled pots left outside can crack when water freezes. Fabric grow bags should be cleaned, dried completely, and stored folded.
5. Plan for next season. Keep notes on what grew well, what struggled, and what you’d like to try differently.
Crop rotation applies even in containers—don’t grow tomatoes in the same pot two years running. Rotate plant families to prevent disease buildup and soil nutrient depletion.
Your Container Garden Journey Begins
Container vegetable gardening isn’t just a workaround for limited space—it’s a legitimate, productive, and often preferable way to grow food.
You don’t need acres, perfect soil, or even a green thumb. You need some containers, quality potting mix, the right vegetables for your conditions, and a willingness to water regularly.
Start small if you’re new to gardening. One tomato plant, a pot of basil, some lettuce. See what works in your specific situation. Learn through experience. Then expand from there.
The beauty of container gardening lies in its flexibility.
- Made a mistake with placement? Move the pot.
- Plant not thriving? Try something different next season.
- Want to experiment with unusual vegetables? Grow them in containers without committing garden space.
Before long, you’ll be harvesting sun-warmed tomatoes, snipping fresh herbs for dinner, and making salads from lettuce you grew on your balcony.
There’s something deeply satisfying about growing your own food, even in small quantities.
It connects you to your food source, saves money, tastes better than anything from a store, and gives you a productive hobby that gets you outside.
Grab a container, some potting mix, and seeds or transplants. Your container garden adventure awaits—and it’s simpler than you think.
source https://harvestsavvy.com/container-vegetable-gardening/


No comments:
Post a Comment