Picture this: a puffed-up, indignant hen sitting in a nest box, hissing at anyone who comes near—and four weeks later, waddling proudly through the yard with a gang of ducklings tumbling at her heels.
It’s one of the most unexpectedly charming sights in backyard poultry keeping, and it’s more achievable than you might think.
If you’ve got a broody hen and duck eggs (or ducklings) you’d like to raise, you’re in the right place.
This guide pulls together real-world experience from dozens of keepers to give you the complete, unvarnished picture: what works, what doesn’t, and what to do when things go sideways.
Why Use a Broody Hen?
A good mother hen regulates temperature and humidity instinctively, turns the eggs without you setting a timer, keeps ducklings warm after hatch, teaches them to forage, and acts as a one-bird security detail against the rest of the flock.
She also integrates the ducklings into your mixed flock far more smoothly than any brooder-raised bird could—because from the flock’s perspective, these babies belong to her.

That said, this arrangement has real quirks and genuine risks. Success depends on your hen’s personality, your setup, and your willingness to have a backup plan. Let’s walk through it all.
 Related post: Why Are My Ducks Not Laying Eggs? 12 Common Causes + How to Fix Them
Step 1: Choose the Right Hen
Not every broody hen is cut out for this. Broodiness just means a hen wants to sit on eggs—it says nothing about whether she’ll be a good mother.
And raising ducklings is a longer, more demanding version of normal motherhood.
The incubation timeline matters
Standard duck eggs (Pekin, Khaki Campbell, Mallard-derived breeds) take 28 days to hatch—a full week longer than chicken eggs. Muscovy eggs take even longer: 35 days.
That’s a serious commitment to ask of any hen, and some simply give up before the finish line. If you’re hatching Muscovy eggs, you need an exceptionally dedicated broody.
Learn about Raising Muscovy Ducks: Complete Care Guide for Beginners
What to look for
Choose a hen who has been sitting steadily for at least a week, returns reliably to her nest after daily breaks, and doesn’t startle easily.
Ideally, pick one who has successfully hatched and raised chicks before—a hen with that track record is far more likely to see this through.
Breeds known for strong brooding instincts include Orpingtons, Australorps, Cochins, Silkies, and Old English Game bantams.
Here are Top Egg-Laying Chicken Breeds for Your Backyard Flock
Test her commitment first
Move her gently to a brooding pen and give her dummy eggs (wooden eggs, ceramic eggs, or smooth stones).
A truly dedicated broody settles right back down. A half-hearted one abandons ship within a day or two—far better to find out before real eggs are involved.
The hard truth about personality
Even champion broodies can surprise you. Some hens hatch ducklings beautifully and then—apparently baffled by their strange appearance—immediately try to attack them. Always have a backup brooder ready.
Step 2: Set Up a Safe Brooding Space
Nest location is critical
Standard nest boxes mounted off the coop floor are fine for hatching chicks, but ducklings are different.
They have longer legs, are far more inclined to wander, and may attempt to explore within hours of hatching.
A duckling tumbling from an elevated nest faces real injury or, in cool conditions, fatal chilling before the hen can collect it.
Ideally, get your hen settled in a ground-level nesting spot from the start: a large crate, a wooden box, or a deep plastic tub with high sides all work well.

If she’s already committed to an elevated nest and moving her risks abandonment, don’t force it—but plan to relocate the whole family promptly within 12 hours of the first hatch.
Learn How to Build a Duck Coop: Expert Tips & DIY Plans for Beginners
Separate her from the flock
A broody hen needs privacy for several reasons: other hens may add eggs to her nest (confusing the hatch timeline), the flock may harass her off the nest, and once ducklings arrive, other birds can injure them before they’re old enough to hold their own.
A dog crate inside a shed, a partitioned coop corner, or a dedicated brooding pen all work well.
Mark your eggs
If you’re giving her duck eggs to hatch, mark each one with a permanent marker the moment you place them under her.
Check daily for any unmarked additions from other hens and remove them promptly. This keeps the clutch at a manageable size and ensures all eggs develop on the same schedule.
Step 3: Managing the Incubation Period
Once your hen is settled on her clutch, your main jobs are monitoring and light management—she handles the rest.
Humidity support
Duck eggs require more moisture than chicken eggs naturally provide. In the wild, a duck’s feathers are often damp from swimming, transferring moisture to the eggs during incubation.
Your hen can’t replicate this, but you can help: mist the eggs lightly with lukewarm water once daily, especially during the final ten days before hatch. This simple step meaningfully improves hatch rates.
Here’s Everything You Need to Know About Incubating Chicken Eggs
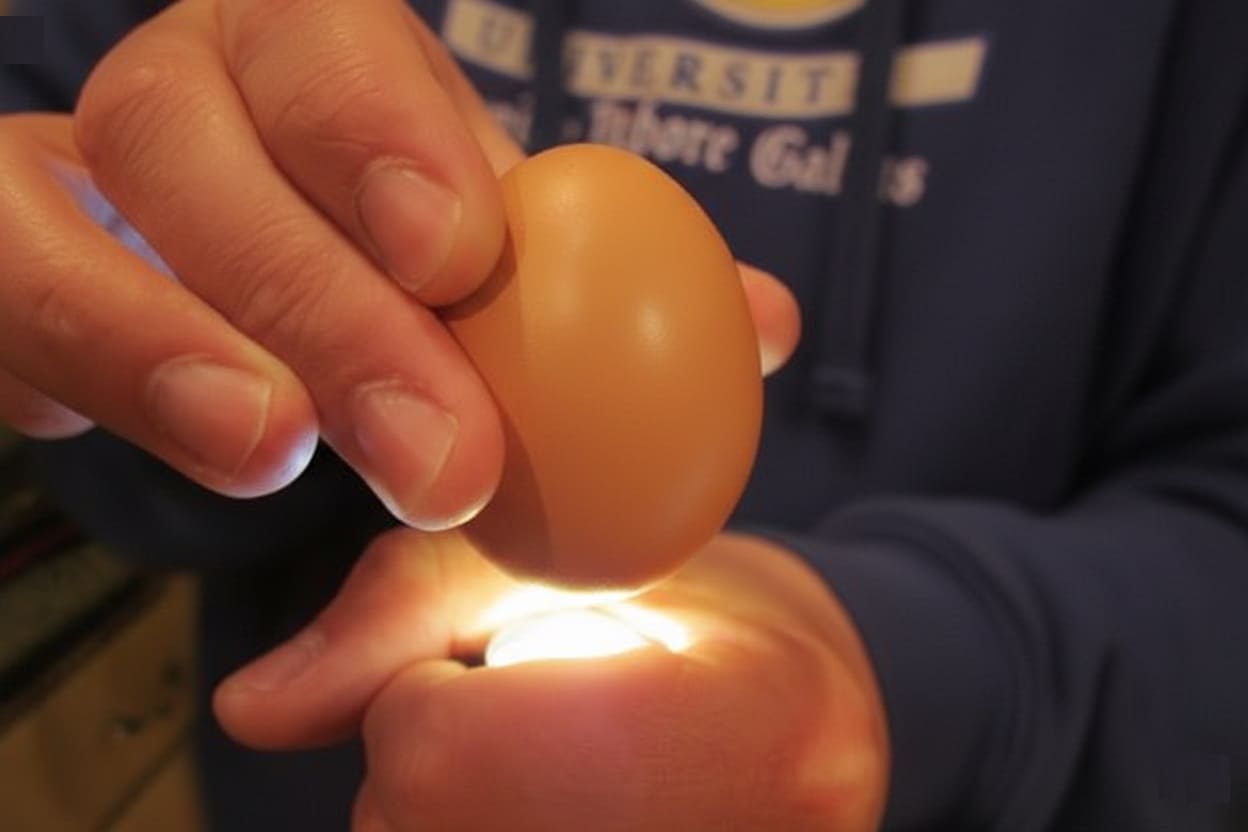
Candling
Candling—shining a bright light through the egg in a darkened room—lets you identify which eggs are developing and which aren’t, so you can remove duds before they contaminate the nest.
- First candle at day 7–10.
A developing egg will show a visible dark spot (the embryo) with a network of veins radiating outward, often described as a “spider” formation.
A clear or uniformly pale egg is likely infertile. A ring-shaped dark mass can indicate early embryo death.
- Second candle around day 14.
By now, a viable egg will appear mostly dark with a visible air cell at the wide end. Remove any that show no development or that smell off.
- Final check.
In the last three days before hatch, stop candling entirely—the embryos need undisturbed warmth and humidity as they move into hatching position.
Remove any eggs that clearly haven’t developed, and—critically—remove any that smell even slightly bad. A rotten egg can explode and contaminate the entire clutch, ending the hatch.
Keep a date
Mark your calendar from the day you place the eggs so you’re not caught off guard by hatch day. For standard duck eggs, that’s day 28. For Muscovy eggs, day 35.
Step 4: The Hatch—What to Expect
Around day 27–28 (or day 34–35 for Muscovies), things get exciting.
You may hear faint peeping from inside the eggs before any external cracking appears—this is the duckling making its first internal pip through the inner membrane.
- Leave her alone during hatch.
Resist the urge to intervene. The hen is maintaining exactly the temperature and humidity her eggs need.
Disturbing her risks chilling partially-hatched ducklings or rupturing the delicate membrane that surrounds them.
- Watch for wandering.
Unlike chicks, ducklings are surprisingly active within hours of hatching. If your hen is in an elevated or open nest, stay close as hatch progresses. The moment you see the first duckling up and moving, it’s time to act.

- Move within 12 hours.
Relocate your hen and her babies to a secure, enclosed nursery space: a large plastic-sided dog crate, a wooden box, or a deep plastic tub with sides the ducklings can’t yet climb.
Most hens accept this move readily once they have live, peeping babies—the maternal bond is now fully engaged.
Settle her in with the babies tucked under her, and she’ll usually resettle within minutes.
Step 5: Food, Water, and the Art of the Mess
Get food and water into the nursery immediately. Your hen has been working hard and will be grateful.

What to feed
Use a good quality, unmedicated chick crumble or multi-flock feed.
This is non-negotiable: medicated feeds contain anticoccidial drugs that ducklings—because they eat so much more by volume than chicks—can effectively overdose on, causing serious illness. Always check the label.
Sprinkle brewer’s yeast over the food, or mix it in at a ratio of about two tablespoons per cup of feed.
Ducklings have significantly higher niacin (Vitamin B3) requirements than chicks, and standard chick feed doesn’t always supply enough.
Niacin deficiency presents as leg weakness and failure to thrive; brewer’s yeast is the simplest fix. Transition to unmedicated grower pellets at three to four weeks.
The mother hen will actively demonstrate eating to her ducklings—one of the genuine advantages of this method. Hen-raised ducklings typically learn to forage days earlier than brooder-raised birds.
Learn How to Feed Baby Ducks: A Complete Guide to Duckling Nutrition
Water setup
Ducklings need to fully submerge their bills to keep nostrils and eyes clean, but can’t safely swim unsupervised yet.
For the first one to two weeks, use a small bowl with a few rocks inside: deep enough for bill-dunking, stable enough not to tip, and shallow enough that a duckling can’t get trapped. Scale up as they grow:
- Weeks 1–2: Small bowl with rocks, or a paint-roller tray
- Weeks 3–4: Larger shallow tray or cat litter tray
- Week 4+: A small paddling pool with bricks as steps in and out

On waterproofing
Without a mother duck transferring preening oils to her ducklings, young birds lack natural water resistance until their own oil gland matures (around day 4–5) and proper feathers grow in.
Brief, supervised swimming from week two is fine and actually helps stimulate oil production—but always dry the ducklings off afterward and ensure they can warm up under the hen.
A cold, wet duckling can chill and die with alarming speed.
The swimming crisis
When her ducklings first discover they can float, many hens experience what can only be described as an existential crisis—pacing at the water’s edge, calling frantically, unable to process why her babies are choosing to be in mortal danger.
Most hens adjust once they see the ducklings getting out safely and coming back to them. Be patient. She’s doing her best.
Step 6: Week by Week After Hatch
Understanding the natural arc of this arrangement helps you respond to each stage rather than worry about it.
- Days 1–3:
Ducklings are mostly under the hen, absorbing the last of their yolk reserves. They don’t urgently need food or water for the first 24–36 hours, but have both available. Keep the family in the enclosed nursery.
- Days 4–7:
Ducklings become noticeably more active and start eating and drinking properly. The hen is in full maternal mode—clucking, demonstrating food, fluffing up protectively whenever you approach. Keep them contained but observe closely.
- Weeks 2–3:
The family is ready for a small outdoor area during the day—a moveable pen or rabbit run on grass is ideal.
This is when the hen’s foraging instincts really shine: she’ll scratch, cluck, and present bugs and worms to her ducklings with visible pride. Ducklings grow visibly by the day and may already be approaching their mother’s size.
- Weeks 3–4:
The hen begins stepping back from intensive brooding. She’ll still supervise and protect, but roosts separately at night.
The ducklings, now well-feathered and increasingly independent, need this transition. Continue providing supplemental warmth if nights are cool.
- Week 5 onward:
The hen gradually returns to normal flock life. The ducklings are largely self-sufficient.
Because the rest of your flock has seen these ducklings from the beginning—and because the hen provided a layer of social legitimacy—integration is typically far smoother than introducing strangers.
Skipping the Eggs: Introducing Day-Old Ducklings to a Broody Hen
Maybe you have a persistently broody hen and a batch of day-old ducklings arriving from a hatchery. Can you simply slip the ducklings under her? Often, yes—here’s how to do it well.
Prepare the hen first
Let her sit on dummy eggs for at least one to two weeks before the ducklings arrive.
The deeper her broodiness, the more readily she’ll accept live babies as the natural conclusion to all that devoted sitting.
The introduction, step by step
- Set up the nursery area with food and water before you begin.
- Wait until full dark—chickens have poor night vision, and darkness removes the visual shock of the switch.
- Carry the ducklings to the broody hen. Let them peep near her for a minute or two; you’ll often hear her shift into a soft, attentive clucking in response.
- Gently slide each duckling under her from the side, one at a time. Expect a defensive peck—move slowly and use a hand to shield the duckling.
- Remove a dummy egg for each duckling you add, until all eggs are gone.
- Stay nearby for at least an hour. Signs of acceptance: soft clucking, wings spread to cover the babies, body flattening down over them. Signs of trouble: aggressive pecking, standing up and refusing to settle.
Age matters
Day-old or newly hatched ducklings integrate most reliably. Beyond three to four days old, ducklings become more independent and less inclined to imprint on a new mother. Don’t push it much beyond that window.

When Things Go Wrong
- The hen rejects the ducklings.
If you see pecking that draws blood, or a hen who won’t settle over the babies despite multiple attempts, remove the ducklings immediately and move them to a brooder.
Some hens are simply not the mothering type, regardless of how devoted a sitter they were. This is why having a backup brooder ready isn’t optional—it’s essential.
- The hen abandons the nest mid-incubation.
This happens, especially if the nest is disturbed or the hen is not fully committed. Have a backup incubator or another broody hen available if possible.
Minimize nest disturbances, and if you must move the hen, do it gently just before dark when she’s calmer and more likely to resettle.
- The hatch drags on.
Not all eggs hatch within the same few hours. A hen will often stay on her nest to continue incubating remaining eggs even while early hatchlings peepin around her.
If she ultimately leaves the nest with some eggs still unhatched, carefully candle those eggs before discarding them—a faint pip or movement means a duckling may still be working its way out.
- The hen loses interest at weeks 3–4.
This is normal, not failure. It’s the natural end of the intensive mothering phase. The ducklings, now well-feathered and capable, are ready for more independence anyway.
- A note on drakes:
If any of the ducklings you raise turn out to be drakes, and you plan to house ducks and chickens together long-term, be aware that drakes raised by hens sometimes direct mating behavior toward chickens—and can seriously injure or kill them.
This is especially true for the hen that raised them. Plan your housing and flock composition accordingly.
Broody Hen vs. Broody Duck: Which Should You Choose?
The answer—while counterintuitive—generally favors the hen for incubating eggs.
Broody ducks, particularly domestic production breeds, are less reliable sitters. They take longer breaks, startle off their nests more easily, and often fail to maintain the consistent warmth duck eggs need across the full incubation period.
Many keepers with far more heartbreak than expected discover this the hard way.
Broody hens, by contrast, tend to be single-minded. The extra week of incubation can challenge less committed hens, but a calm, maternal breed will sit through it reliably.
The one thing a hen can’t replicate is the moisture a duck naturally transfers to her eggs from swimming—which is why daily misting during incubation matters (see Step 3).
Bottom line: if you want eggs hatched reliably, use the hen. If waterproofing oil transfer is a priority and you have a genuinely dedicated broody duck available, she can raise the ducklings after hatch—but the hen is usually the stronger choice for the incubation itself.
FAQ
- Will ducklings raised by a hen know they’re ducks?
Yes, instinct wins. Even ducklings raised entirely by a chicken will be drawn to water, dabble naturally, and integrate comfortably with other ducks once they encounter them.
They may follow their hen mother around like chickens for the first weeks, but duck nature eventually asserts itself—sometimes to the hen’s considerable confusion.
- Can I brood ducklings and chicks together under the same hen?
It’s not recommended. Ducklings grow significantly faster, quickly outsize their nestmates, and create far more water mess than chicks tolerate well. Give the hen one species or the other.
- How many duck eggs can a hen incubate?
A full-sized hen can typically cover eight to twelve average duck eggs comfortably.
The practical test: if eggs poke out from under her and can’t fit beneath her body, reduce the clutch. Eggs she can’t fully cover won’t develop properly.
- My hen hatched the eggs but now won’t sit near the ducklings—what do I do?
Move the ducklings to a brooder with heat immediately. A hen can be a devoted sitter and a poor mother—these are genuinely separate traits. Don’t wait to see if she comes around; a cold duckling deteriorates quickly.
- How long will the hen mother the ducklings before losing interest?
Most hens step back noticeably around weeks 3–4 as the ducklings feather out and become more independent. By weeks 5–6, she’s typically more guardian than mother.
Some particularly devoted hens—especially those who seem to genuinely prefer ducklings—stay engaged longer. Let her lead.
- Can I use a broody duck to hatch chicken eggs instead?
This is strongly discouraged. A duck mother will eventually lead her babies to water, and chicks that follow will get dangerously wet and chilled.
The communication mismatch between species also means duck mothers often fail to brood chicks properly. The cross-species arrangement works far better with chickens mothering ducklings than the reverse.
Quick Takeaways
- Choose a committed, proven broody hen from a calm maternal breed; test her dedication with dummy eggs first
- Standard duck eggs take 28 days to hatch; Muscovy eggs take 35—choose your hen accordingly
- Candle eggs at day 7–10 and again at day 14 to remove infertile or failing eggs
- Mist eggs lightly once daily, especially in the final ten days, to support humidity
- Set up a ground-level, enclosed nursery and move the family there within 12 hours of first hatch
- Feed unmedicated crumble only, supplemented with brewer’s yeast for niacin
- Scale water vessels gradually as ducklings grow; supervise early swimming and dry birds off afterward
- Always have a backup brooder ready—hen rejection happens, and a cold duckling won’t wait
Watching a small hen shepherd a band of ducklings that will soon outweigh her by a considerable margin—waddling devotedly at her heels because she was the first thing they knew as warmth and safety—is one of those small homestead moments that makes all the planning worthwhile.
It doesn’t always go perfectly, but when it does, it’s genuinely magical.
Give it a try this season. And if your hen rises to the occasion, share your story in the comments!
source https://harvestsavvy.com/raising-ducklings-with-a-broody-hen/


No comments:
Post a Comment