American households pour roughly 9 billion gallons of water onto their yards every single day, and the EPA’s WaterSense program estimates as much as half of it is wasted — evaporated, blown onto the sidewalk, or run straight into a storm drain.
That number explains why so much sustainable gardening advice falls flat. You get handed a list of 40 ideas with no sense of which ones matter, so you buy bamboo plant labels and never touch the sprinkler that has been watering your driveway for years.
This list is ordered differently. It runs from the changes that reshape a whole garden down to the small swaps that are pleasant but will not move much.
By the end you will know which two or three things to do first in your own yard, which popular tips are weaker than they look, and roughly what each one costs you in money and weekends.
The short version:
Compost your food and yard scraps, keep bare soil covered with mulch, and shrink the lawn you do not actually use. Those three carry most of the weight. Everything below is refinement — useful refinement, but refinement.
Start Here: The Three Habits That Do the Most Work
Almost every idea further down this page works better once these three are in place. They also happen to be the cheapest — two of them are free.
Compost your kitchen and yard scraps
Composting is the one habit that closes a loop instead of just reducing a harm.
Food scraps and yard trimmings sent to a landfill break down without oxygen and give off methane, a far more potent greenhouse gas than carbon dioxide.
The same material, piled in your yard with air moving through it, becomes the soil amendment you would otherwise buy in a bag.
The recipe is forgiving. Aim for roughly one part soft green material — vegetable peels, coffee grounds, grass clippings, spent flowers — to two parts dry brown material like fallen leaves, shredded cardboard, straw, or small prunings.

Keep it about as damp as a wrung-out sponge, turn it when you remember, and leave out meat, dairy, and pet waste so you do not invite rodents.
Left alone, a pile takes six months to a year to finish; turned every few weeks, closer to two or three months.
Two things nobody tells beginners.
- Browns are the bottleneck — most households have plenty of kitchen greens and nowhere near enough dry material, so bag the leaves you rake off the lawn and keep them beside the bin.
- And a pile that smells sour is simply too wet: add browns, fluff it, done.
Never let soil sit bare
Bare soil bakes, crusts over, sheds water, and grows weeds. A layer of organic mulch 2 to 3 inches (5–7.5 cm) deep fixes all four at once.
It is the highest-return hour of work in the garden, and if you have a compost pile or a maple tree, it costs nothing.
Shredded leaves, wood chips, straw, pine needles, and grass clippings all work, and tree crews often drop off chips free.

Leave a few inches of clear space around trunks and crowns — mulch heaped against bark traps moisture and rots it, which is how “mulch volcanoes” kill young trees.
Where you cannot mulch, plant instead — groundcovers and densely spaced perennials do the same job permanently.
Water deeply, early, and less often
Most gardens are watered wrongly rather than too little. Short daily sprinkles keep roots shallow, right where the first hot week kills them.
Soaking the top 6 to 8 inches (15–20 cm) less often drives roots down to where the soil stays cool and damp.
Water early in the morning. You will often see evening recommended, and it does beat midday — but foliage that stays wet all night invites mildew and other fungal trouble, so morning wins on balance.
Skip windy days entirely, when a surprising share of the spray never lands where you aimed it.
If you have an irrigation system, spend one Saturday walking it while it runs.
Broken heads, heads aimed at the fence, and a controller still on its April schedule in October waste more water than any plant choice you will ever make.
A rain sensor, which shuts the system off when it is already raining, is the easiest fix there is.

Build Soil So You Can Stop Buying Inputs
Compost and mulch add organic matter. These four keep it working — and between them they retire most of the fertilizer aisle.
Test your soil before you feed it
Your state extension service will run a full test for roughly $15 to $25 and tell you the pH plus what is genuinely short.
Most established home soil is short of very little, which means the fertilizer you have been buying mostly ran off into the groundwater.
A test also tells you what your ground will grow happily, which saves years of fighting the site.
Stop turning the soil
Digging shreds fungal networks, burns through organic matter, and lifts a fresh batch of weed seeds to the surface every time.
Build upward instead: lay cardboard over what is there, pile compost and mulch on top, and plant into that.
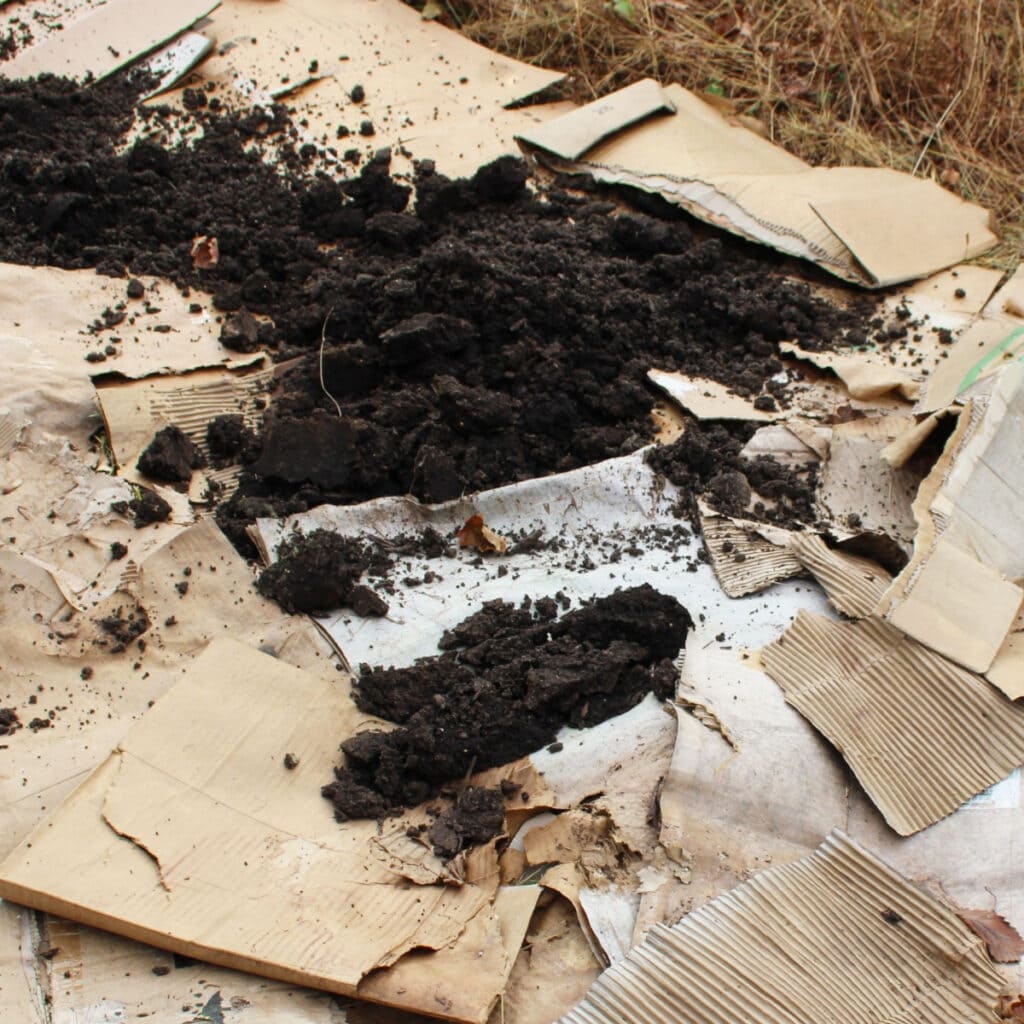
If your ground is genuinely compacted, loosen it once with a fork without flipping it, then leave it alone.
Keep living roots in the ground
Beds left bare over winter leak nutrients and erode.
Sow a cover crop after the last harvest — crimson clover, field peas, or winter rye — then cut it down in spring and leave it lying as mulch.
Legumes fix their own nitrogen, so the bed quietly feeds itself while it waits.
Make your own liquid feed
Comfrey or nettle leaves packed into a bucket of water and left a few weeks make a free, potassium-rich tea; dilute it roughly one part to nine parts water. It smells genuinely awful and it works.
Treat it as a supplement for hungry crops like tomatoes, not a replacement for compost.
Rethink the Lawn — the Biggest Single Win in Most Yards
Nothing else in a typical American yard consumes as much water, fuel, fertilizer, and Saturday morning as turfgrass. It is also the easiest thing to reduce, because most of us do not use most of it.
Keep the lawn that has a job
Walk the yard and mark where people actually stand, play, or let the dog out. That part stays. The strip along the fence that exists only to be mowed does not have to.
Mow higher and less often

Raise the deck — 3 to 4 inches (7.5–10 cm) for cool-season grasses like fescue and bluegrass, lower for warm-season lawns like Bermuda and zoysia, which are bred to be cut short.
Taller grass shades out weed seedlings, roots deeper, and needs less water. Leave the clippings where they fall — they return nitrogen to the soil and do not cause thatch, despite the myth that refuses to die.
You will see No Mow May recommended everywhere, and it is a fine way to notice what is already living in your lawn. But it is not the strongest version of the idea.
The study that popularized it was later retracted, and the Xerces Society now points somewhere simpler: lawns mowed every two to three weeks produced about twice as many flowers as frequently mowed ones, and drew a wider range of bee species.
One shaggy month followed by a hard scalp helps less than a lighter touch from spring through fall.
Replace the rest with something that earns its space
Roughly from least to most effort: widen the mulched bed around a tree, plant a groundcover like creeping thyme or a native sedge, sow a low meadow mix mowed once or twice a year, lay a gravel sitting area, or build a vegetable bed.
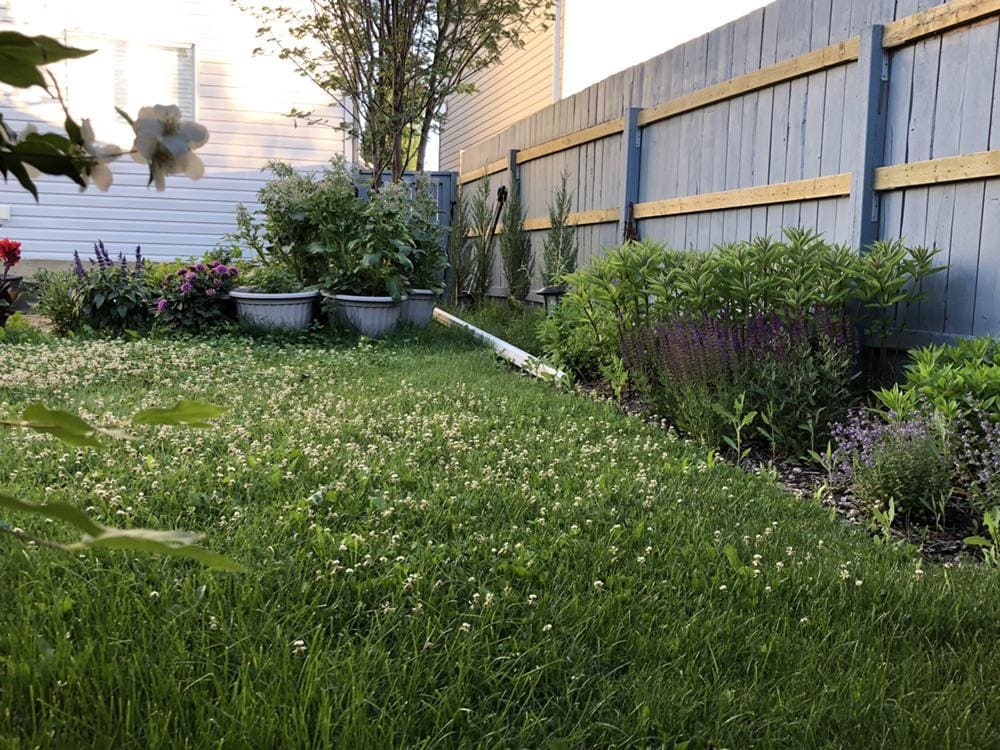
Overseeding clover into existing turf is the gentlest start — it feeds pollinators, fixes its own nitrogen, and stays green in dry spells.
Swap the gas engine when it dies
For smog-forming pollutants, a small gas engine emits far more per hour than a modern car.
Do not junk a working mower, but when it quits, battery tools are now good enough that you will not miss anything.
California stopped selling new gas-powered lawn equipment in 2024.
Plant So the Whole Food Web Shows Up
Most yards offer wildlife a decent lunch and nowhere to live. These four moves fix both halves — what shows up to eat, and what stays.
Build a native backbone
Every list tells you to plant natives. Almost none tell you how to find them, which is the part that actually stops people.
Start with three sources: your state native plant society, your state land-grant university’s extension service, and the National Audubon Society’s native plant database, which takes a ZIP code and returns plants plus the birds they support.
Local native plant sales are the best place to buy — the stock is grown regionally, and the volunteers will tell you what thrives two streets over.
Ask one question wherever you shop: whether the plants were treated with systemic insecticides. Nursery stock sold as pollinator-friendly is sometimes grown with neonicotinoids, which linger in the plant’s own pollen and nectar.
Pick three to five anchor species and repeat them in groups rather than buying one of everything — groups read as intentional from the street and give insects a target big enough to find.
As for how many natives you need, the widely quoted 70 percent figure comes from a study of Carolina chickadees in the Washington, D.C. suburbs, which found that yards below roughly that share of native plant biomass could not sustain a stable chickadee population.
Treat it as a direction to move in over several years, not a reason to tear out the lilac you love.
One caveat kills more new native plantings than anything else: “low water once established” means established. Water them through their first full growing season, then taper off.
Chase the bloom calendar, not the flower count
A garden with 40 kinds of flowers that all peak in June is a feast followed by a famine.
Pollinators need something open from the first warm days to the last, and early spring is the real pinch point — queen bumblebees emerging in March find almost nothing to eat.
Aim for at least three plants blooming in early spring, in summer, and in late fall. Willows, crocus, and native currants cover the early gap; asters, goldenrod, and sedum carry the late one.

One detail worth knowing: choose single flowers over doubles. Those ruffled, many-petaled varieties have often been bred to the point where the pollen-bearing parts are gone, so a bee works its way in and finds nothing waiting.
Simple, open, daisy-shaped flowers feed the widest range of insects.
Put a tree where it pays you back
A tree is the largest carbon-storing thing you can add to a yard, and placement decides whether it also cuts your energy bills.
Deciduous trees on the west and southwest sides shade the house through summer afternoons, then let sun back in when the leaves drop. Evergreens on the north or northwest side blunt winter wind.
Check mature size against the site before you buy, not after. Look up for power lines, out for the sidewalk and foundation, and leave an air conditioning unit at least 3 feet (0.9 m) of clearance if you are shading it.
Water deeply through the first two growing seasons, and the tree will ask almost nothing of you for the next 50 years.

Related posts:
- 30 Best Flowering Trees for Every Yard Size, Climate, and Bloom Season
- 22 Fast-Growing Shade Trees That Cool Your Yard in 5 Years
- The 80 Best Columnar Trees for Privacy, Small Yards & Narrow Spaces
Give wildlife somewhere to live, not just to eat
Flowers feed adult insects. Nearly everything else in their life cycle happens in the places you are probably tidying.
Leave the leaves and the stems where they fall in beds
Moth and butterfly pupae, queen bumblebees, and beetles overwinter in leaf litter and hollow stalks, so cutting borders back to bare ground in fall throws out next year’s pollinators along with the mess.
Clear leaves off the lawn and paths, where they smother grass and turn slippery, and let them lie under shrubs.
Leave some bare, sunny ground
Most native bee species nest in soil rather than in a bee hotel, and they need undisturbed, unmulched patches to do it.
A few square feet on a sunny bank or at the back of a bed is plenty — this is the one spot where the cover-every-inch rule bends.
Add structure
A log pile in a shaded corner, a stack of prunings behind a shrub, or a nest box on a north or east wall all cost nothing and get occupied within a season.
If you build a pond, give it one gently sloping side or a ramp of stones so anything that falls in can climb out.

Turn the lights off
Outdoor lighting left on all night disorients moths, which are major nocturnal pollinators, and suppresses fireflies.
Put security lights on a motion sensor, aim them down rather than out, and choose warm-toned bulbs.
Grow Some of Your Own Food
Food you grow skips the truck, the packaging, and the sprays entirely. One bed can carry three seasons if you plan it.

Grow what you already buy
The crops worth the space are the expensive, fragile, or noticeably-better-fresh ones: herbs, salad leaves, cherry tomatoes, snap peas, and soft fruit.
Potatoes and onions are cheap and sturdy in stores, so they earn their room only if you enjoy growing them.
Get three seasons from one bed
Sow cool-weather crops such as lettuce, spinach, and radishes in spring, interplant heat lovers like tomatoes and peppers as those fade, then resow the cool crops as fall arrives.
Sowing small batches every few weeks beats one big planting that all matures the same week.
Move the plant families around each year
Growing the same family in the same spot lets its diseases and pests build up in the soil.
A simple four-bed rotation — brassicas, roots, legumes, then everything else — breaks the cycle with no chemicals at all.
Buy resistance on the seed packet
Varieties bred to shrug off common problems are the cheapest pest control there is. Check the resistance codes on the back of the packet or in the catalog description before you order.
Plan for the glut
Freezing, drying, and pickling are what keep a good harvest from becoming compost. Herbs dry in paper bags, and most surplus vegetables freeze well after a quick blanch.
Catch the Rain Before It Runs Down the Street
Put a barrel under a downspout

The water is free, unchlorinated, and slightly acidic, which suits most plants better than tap water. One caution most advice skips: check your local rules first.
A few Western states regulate rainwater collection, and plenty of cities offer rebates, so search before you buy.
 Learn How to Use Goldfish for Mosquito Control in Rain Barrels
Send the overflow somewhere useful
A barrel fills faster than people expect. Rather than letting the overflow spill onto the driveway, route it into a shallow planted basin — a rain garden — or a gentle swale.
Size it to drain within 24 to 48 hours, which is quicker than mosquitoes can finish a life cycle.
Make hard surfaces permeable
Gravel, decomposed granite, permeable pavers, and stepping stones with planted joints all let water soak in where it lands — and if you are replacing a path anyway, this costs nothing extra.
Group plants by thirst
Called hydrozoning, this is the least glamorous idea here and one of the most effective.
Put thirsty plants together near the house and drought-tolerant ones further out, then water each group on its own schedule.
It stops you drowning the lavender to keep the hydrangea alive. Drip lines make the gain bigger still.
Handle Pests Without the Spray Cabinet
The goal is not a pest-free garden. It is a garden where something else eats the pests for you — and that only happens if there are some pests around to be eaten.
Tolerate more, then feed the predators
Most plants shrug off a fair amount of chewing. Aphids arrive first; ladybugs and lacewings turn up a week or two later and clear them out.

Spray at the first sign of damage and you kill the cleanup crew too, which is how people end up spraying every year forever.
Keep those predators around with small, shallow flowers — dill, fennel, yarrow, sweet alyssum, cilantro left to bolt — plus a shallow water dish with a stone in it.
Related posts:
- How to Attract Dragonflies to Your Yard Naturally (What Works)
- How to Attract Praying Mantis to Your Garden (+ What Most Guides Miss)
Reach for barriers first
Floating row cover stops cabbage worms outright, copper tape around pots slows slugs, and fine mesh keeps squash vine borers off the vine.

Barriers are unglamorous, reusable for years, and they work on exactly the pests predators are slowest to handle.
Be honest about companion planting
Parts hold up: trap crops like nasturtiums pulling aphids off beans, flowers that draw predatory insects in, and dense interplanting that makes a crop harder to find.
Parts are folklore — marigolds do not repel most insects on contact, though French marigolds grown as a cover crop and turned into the soil really do suppress root-knot nematodes.
Plant the combinations because they are pretty and mildly useful, not as a force field.
A few things to skip
Salt for slugs and vinegar-and-salt weed brews circulate constantly, and both leave salt behind in your soil, where it lingers and damages structure and roots long after the weed is gone.
Boiling water does the same job in pavement cracks without the aftermath.
And “organic” does not mean harmless: diatomaceous earth and neem kill bees and beneficial insects too, so treat them as targeted last resorts applied in the evening when pollinators are not flying — never as routine cover sprays.
Buy Less, Reuse More
Shop secondhand, and get plants for free
Tools, pots, and furniture turn up constantly at estate sales and marketplace listings, and old steel hand tools beat new ones.
Perennials divide every few years and hand you more than you started with; seeds saved from open-pollinated annuals like zinnia and sunflower sow perfectly well the next spring.
Plant swaps and a neighbor with an overgrown clump of daylilies are the most reliable source of plants already proven to grow in your soil.
Learn How to Get Free Plants: 24+ Easy Ways to Fill Your Garden
Reuse the hard materials, not just the pots
Concrete, brick, and imported stone carry by far the highest carbon cost of anything in a garden, and the greenest version of each is the one already sitting on your property.
Old pavers stack into low walls or crush into path gravel. Salvage yards sell brick, timber, and stone for a fraction of the price of new, and buying locally cuts the transport, which is most of the footprint of anything that heavy.

Plant a boundary instead of building one
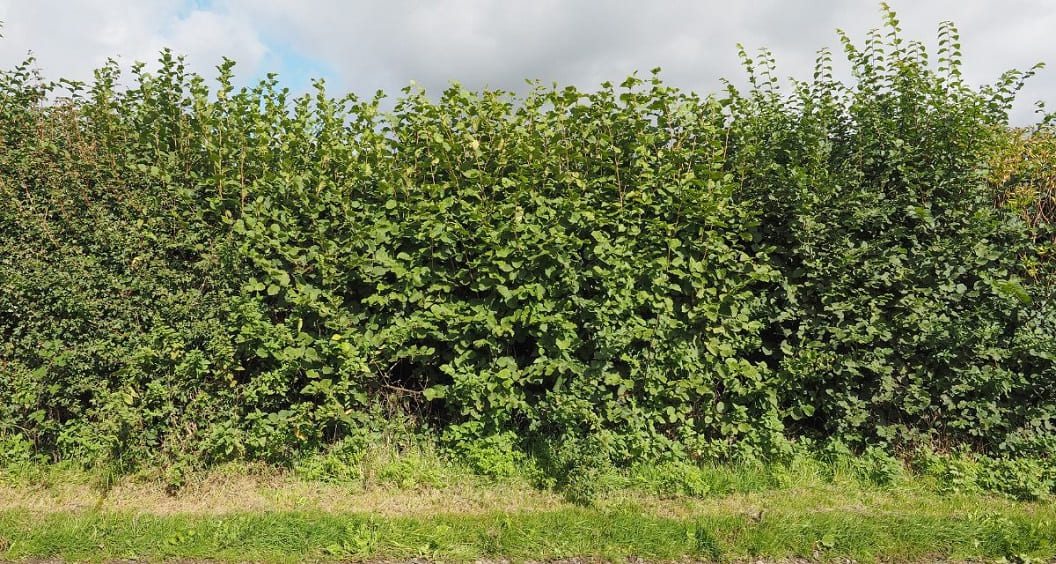
A hedge does everything a fence does and also feeds birds, shelters insects, filters air, and links your yard to the next one as a wildlife corridor.
It usually costs less up front than fence panels, carries almost no embodied carbon, and it does not blow down in a storm. The honest trade-off is that it takes a few years to fill in and wants trimming once or twice a year.
Swap the plastic that wears out fastest
Wooden or metal plant labels, jute twine, and jute netting all outlast their plastic equivalents and do not shed fragments through your beds.
This one is small next to everything above it — worth doing as things need replacing, not worth a special trip.
On peat, aim for less rather than none
Peat bogs store enormous amounts of carbon and take centuries to rebuild, which is a real reason to cut back.
But the alternatives are not automatically clean: coconut coir ships across an ocean and often needs rinsing to clear salts, and quality swings widely by brand.
Use your own compost and leaf mold wherever they work, buy peat-free mixes for seed starting and containers, and do not agonize over the last bag.
One safety note on raised beds
The old warning against pressure-treated lumber dates to the arsenic-based CCA treatment, which the EPA barred from residential use at the end of 2003.
Wood sold today is treated with copper-based preservatives such as ACQ and copper azole, and extension services generally consider it fine for vegetable beds.
If you are reusing salvaged lumber of unknown age, though, that is the case for lining the bed or simply choosing cedar.

Explore 30 Raised Garden Bed Ideas for Every Yard, Budget, and Skill Level
Sustainable Garden Ideas for Balconies, Patios, and Rentals
None of this requires a yard. A few square feet of railing does real work if you use it well.
Match the pot to the crop
Herbs and salad leaves give the most back per square foot and are happy in shallow containers; anything with a taproot, like carrots, needs depth. Bigger pots dry out more slowly, which matters more on a hot balcony than anywhere else.
Go vertical
Trellises, pocket planters, and stacked shelves multiply a balcony’s growing area, and pole beans, cherry tomatoes, and cucumbers are happy to climb.
Compost small

A worm bin fits under a sink, does not smell once it is balanced, and handles a household’s vegetable scraps. Where curbside food-scrap collection exists, it does the same job with no bin at all.
Add water and flowers
A watertight bowl with a stone in it becomes a drinking station within days, and lavender, thyme, and calendula in one sunny window box will pull bees to an upper floor. Height is far less of a barrier than people assume.
Make It Look Deliberate (This Matters More Than You Would Think)
The most common reason a wildlife-friendly yard gets torn out is not that it failed. It is that it read as neglect — to a neighbor, a landlord, or an HOA board.
A messy garden and an intentional one can hold exactly the same plants. What separates them is a handful of visible signals that a person is in charge.
Picture two front yards on the same street, both converted from lawn to native meadow the same spring. One is planted right up to the sidewalk and left to do its thing.
The other has a mowed strip a mower’s width along the walk, a low edging of salvaged brick, and a small sign naming it a pollinator garden.
By August the plants look nearly identical. Only one of those yards has generated a complaint.
Practical versions: keep edges crisp, repeat plant groupings so the planting reads as composed rather than random, keep one tidy focal point such as a bench or birdbath, and knock on a door before converting a front yard.
Check your weed ordinance and HOA rules too — height limits are common, and far easier to design around than to fight.
What Each Idea Costs and What You Get Back
Rough figures, and they vary by region — but the pattern holds: the highest-impact ideas are also the cheapest.
| Idea | Rough cost to start | What you get back |
| Composting | A shady corner, or about $50 for a bin | Free soil amendment; less household trash |
| Mulching beds | Free, up to about $40 a load of chips | Far less watering and weeding |
| Soil test | About $15–$25 through your extension service | Stops you buying fertilizer you do not need |
| Cover crops | A few dollars of seed per bed | Free nitrogen; no bare soil over winter |
| Watering deeply and early | Free — a schedule change | Deeper roots, lower water bill |
| Mowing higher, less often | Free | Fewer weeds, more lawn flowers, fewer Saturdays |
| Shrinking the lawn | A weekend per section | Big drop in water, fuel, and fertilizer |
| Native plant backbone | About $10–$30 a plant; free at swaps | Birds and insects; little watering after year one |
| Rain barrel | Roughly $80–$150 installed | Free unchlorinated water; less runoff |
| Rain garden or swale | A weekend of digging | Keeps stormwater on site instead of in the drain |
| Drip irrigation | Roughly $50–$150 per zone | Less evaporation, fewer leaf diseases |
| Seed saving and division | Free | Plants already proven to grow in your soil |
How to Roll This Out Over One Season
You do not do all of this at once. Here is an order that works.
- Start the compost pile in week one. Pick a shady corner and stockpile bags of dry leaves beside it. You will know it is working when the middle of the pile feels warm within about two weeks.
- Audit your water and your soil next. Walk the irrigation while it runs, fix or re-aim broken heads, and shift to early morning — less often, longer runs. Send a soil sample off the same week, since results take a few weeks to come back. You will know it is working when a screwdriver slides 6 inches into the bed a day after watering.
- Mulch every bare patch, 2 to 3 inches deep and pulled back from trunks. Common pitfall: heaping it against bark. You will know it is working when you are weeding noticeably less by midsummer.
- Raise the mower deck and stretch the interval to every two or three weeks, leaving the clippings. Common pitfall: scalping more than a third of the blade height after a long gap — take it down over two passes.
- Convert one lawn section in fall, when roots keep growing in still-warm soil. Sheet-mulch with cardboard and chips, then plant your native anchors through it. You will know it is working when pollinators are on it the following June.
- Add water management last. Put a barrel under the nearest downspout and route the overflow into a planted low spot.
Do that much in one year and you will have moved further than a decade of bamboo plant labels ever would.
Sustainable Gardening FAQs
- Does a sustainable garden cost more to set up?
Usually less, once you are through the first season. The expensive parts of conventional gardening are the recurring ones — bagged compost, fertilizer, sprays, replacement annuals, and water.
Native perennials, saved seed, and homemade compost ask for more attention up front and less money every year afterward.
- Will letting my yard get wilder bring rats, mosquitoes, and ticks?
Not if you are specific about what you leave alone. Rodents come for food and shelter, so keep meat and dairy out of the compost and keep piles away from the foundation.
Mosquitoes need standing water for more than a few days, which is why rain gardens are built to drain in 24 to 48 hours and birdbaths get emptied weekly.
Ticks are the one to plan around seriously — keep a mowed or gravel buffer between wild areas and the paths people walk.
- Can I water plants with dishwater or shower water?
Lightly used gray water from a shower, bath, or rinse basin is generally fine for ornamental plants and trees.
Keep it off anything you plan to eat, and skip water containing bleach, boron-heavy detergents, or fabric softener.
Use it the same day rather than storing it, and check your state and city rules first — gray water reuse is regulated very differently around the country.
- Do I have to replace all my non-native plants?
No. The realistic move is to make every new addition count: when something dies or you widen a bed, choose a regional native.
The one exception is anything on your state’s invasive species list, which is worth removing sooner, because it spreads well past your fence.
- What is the fastest way to see wildlife show up?
Water first, then flowers. A shallow dish with a stone in it draws birds and bees within days, long before any planting matures.
After that, a cluster of native flowers in bloom will bring insects in during the first season — grouped plantings get found far faster than single plants scattered around a yard.
- Does this all work in my climate?
The principles hold everywhere; the specifics shift. Mowing height, mulch choice, cover crop species, and planting dates all change between the desert Southwest, the humid South, and the cold North.
That is why this article keeps pointing you at your state extension service and local native plant sales rather than one national plant list — and where local guidance conflicts with anything here, follow the local guidance.
Start With One Corner
Sustainable gardening is not a standard you either meet or fail.
It is a direction, and everything above collapses into three moves: feed the soil, use less water on purpose, and let more of the yard do a job for something other than looking mowed.
Compost, mulch, and a smaller lawn get you most of the way, and none of the three costs money.
What surprises most people is not the environmental math — it is how much less work the garden becomes.
Deeper roots need less watering. Covered soil grows fewer weeds. Predatory insects deal with the aphids while you are indoors. A garden built this way asks less of you every year instead of more.
So do not plan the whole thing. Pick one corner this weekend — the strip nobody sits on, the bed that always looks thirsty — and change that one. Next spring, pick another.
source https://harvestsavvy.com/sustainable-gardening-through-ecosystem-design/


