Thursday, October 29, 2026

Beekeeping for Beginners: How to Start Your First Hive

When a first colony dies, it’s rarely because the beekeeper got stung or bought the wrong hive.

It usually dies over its first winter, from varroa mites nobody counted or from honey stores that ran out in late winter.

Both problems are predictable, and both are preventable.

This guide takes you through starting beekeeping in the order you’ll actually do it: deciding whether it suits you, budgeting, checking the rules, picking a site, buying gear and bees, and then managing your colony from install day to its first spring.

Your goal for year one is simple. Have live bees next spring. Honey comes after that.

Beginner Beekeeping at a Glance

  • When to start: learn in the fall and order bees by January or February for spring delivery.
  • Time: 30 to 60 minutes per hive every week or two from spring through summer, very little in winter.
  • First-year cost: roughly $650 to $1,000 for one hive with bees, gear and mite supplies (US prices, 2026).
  • How many colonies: two if you can manage it.
  • Honey in year one: little or none. Plan on your first real harvest in year two.
  • The biggest threat: varroa mites. Test for them monthly from spring to fall.

Is Beekeeping Right for You?

Keeping bees is closer to keeping livestock than to gardening. The colony depends on you for space, health checks and parasite control, and some of that work can’t wait for a convenient weekend.

Time

Through spring and early summer, plan to open each hive about once a week. A routine inspection takes 20 to 45 minutes once you know what you’re doing; your first ones will take longer.

From late fall to late winter there’s almost nothing to do inside the hive.

Stings

You will get stung, usually because a bee got trapped in a fold of clothing or you rushed.

For most people that means sharp pain, then redness and swelling that fade over a day or two. Scrape or pull the stinger out right away; the venom sac keeps pumping, so speed matters more than technique.
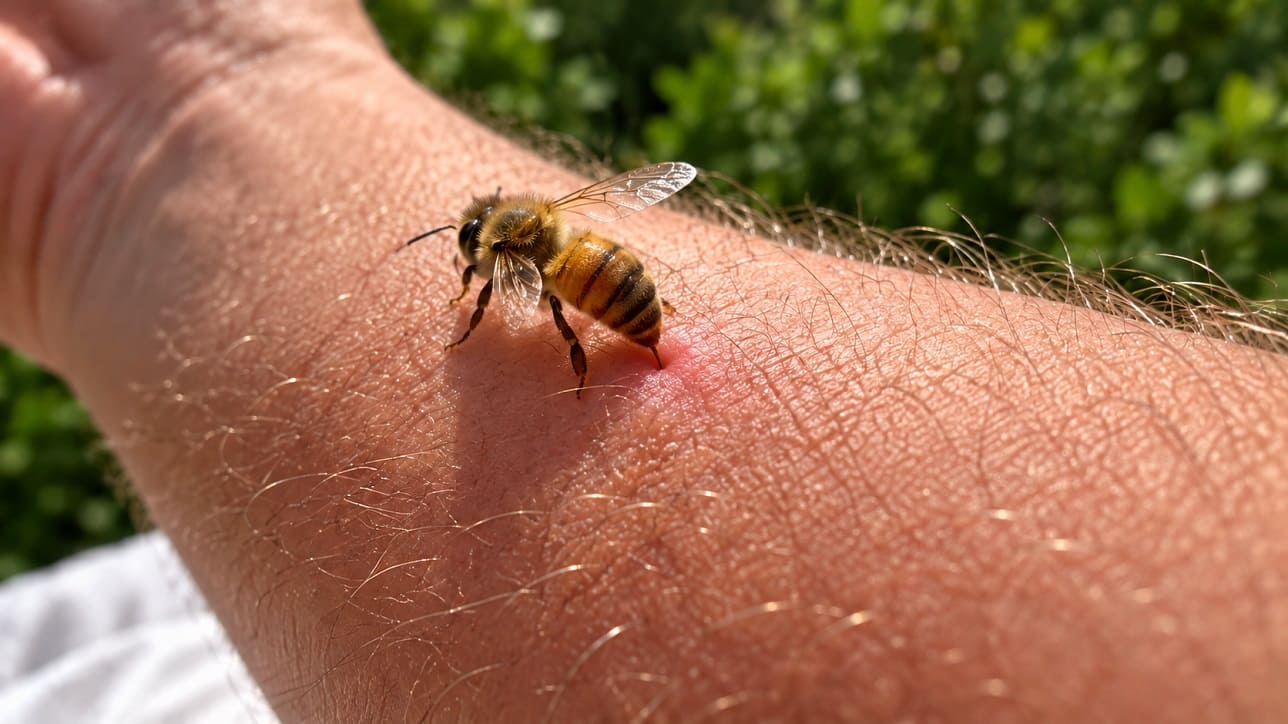
bee stings

A systemic reaction is different: hives or itching away from the sting, swelling of the lips or throat, wheezing, dizziness or trouble breathing.

Treat that as an emergency: use epinephrine if it’s been prescribed and call 911 or your local emergency number.

If anyone in your household has reacted that way to any insect sting, see a doctor before you get bees; in the US an epinephrine auto-injector needs a prescription. Until you know how your own body responds, don’t work a hive alone.

Lifting

A deep box full of honey can weigh up to 90 pounds (41 kg), and a full medium box up to about 60 pounds (27 kg).

You don’t need to be strong, but you do need a plan: lighter boxes, a helper on heavy days, or both.

Your reasons

Honey bees aren’t endangered; they’re managed like chickens or goats. As Lisa Mason of Colorado State University Extension puts it, “raising honey bees to save the bees is like raising chickens to save the birds.”

Planting flowers does more for wild bees. Keep honey bees because the bees themselves fascinate you.

What It Costs to Start

Here’s what one hive’s first year typically costs in the US at current supplier prices:

  • Hive: a 10-frame Langstroth setup with bottom board, two deep boxes, one or two medium honey supers, frames with foundation and covers, $250 to $400.
  • Protective gear: a veiled jacket or suit plus gloves, $80 to $200.
  • Tools: smoker, hive tool and feeder, $60 to $110.
  • Bees: a package or nucleus colony, about $160 to $250.
  • Mite supplies: a testing kit and a season of treatments, $50 to $80.

That’s roughly $650 to $1,000 for one hive. A second colony adds about $450 to $650, since you share the gear. Skip the honey extractor; many clubs lend one.  After year one, budget $100 to $200 a year per hive.

Be wary of used equipment: old comb can carry American foulbrood spores that stay infectious for decades, so never reuse someone else’s comb unless a state apiary inspector has checked it.

Check the Rules Before You Buy Anything

Start with city or county ordinances and any homeowners’ association covenants.

Local rules may cap hives by lot size, set distances from property lines, or require a flyway barrier, such as a solid fence or hedge about 6 feet (1.8 m) tall, that makes bees climb above head height.

  • Some US states require you to register every hive and others don’t; your state’s apiary program will tell you.
  • Registration is mandatory in Australia, New Zealand and several Canadian provinces, including Ontario.
  • In England and Wales, registering on BeeBase is voluntary but free, and it means you’re warned when a notifiable disease turns up nearby.

Ask your insurer, too, whether your liability coverage includes a hive. Then talk to your neighbors before the bees arrive, especially anyone with small children, a pool or an allergy. A conversation now heads off most complaints later.

πŸ‘‰ Read the Urban Beekeeping Guide: How to Start Your Hive in the City

Learn First: Club, Class and Mentor

The best move you can make is to join a local beekeeping club in the fall; your state beekeepers’ association or county extension office can point you to one.

Clubs run winter courses, know which suppliers sell healthy local bees, and can usually pair you with a mentor. Local knowledge matters, because nectar flows, mite pressure and winter length all depend on where you live.

If you can, help a mentor open hives a few times before you commit, and choose one who uses the hive type you plan to buy so your equipment is interchangeable.

πŸ‘‰ Learn How Joining Farming Organizations Can Benefit Your Farm & Community

Read one solid beginner book cover to cover, such as The Beekeeper’s Handbook by Diana Sammataro and Alphonse Avitabile.

Online advice is plentiful and contradictory, and what works in Georgia can be wrong in Minnesota. Here’s how the first year usually runs in the temperate Northern Hemisphere:

  1. Fall: join a club, start reading and ask who sells local nucs.
  2. December to February: order bees before suppliers sell out, and order equipment.
  3. Late winter: assemble and paint boxes, and set up the stand and a water source.
  4. Early spring: install bees once early trees and flowers bloom, often March or April in the southern US and April or May farther north.
  5. Spring and summer: inspect, add boxes as the colony grows, and test for mites monthly.
  6. Late summer and fall: bring mite levels down, top up winter stores and shrink the entrance.

Time your start to local bloom rather than the calendar. In the Southern Hemisphere, nucs usually appear around September and October; in the tropics you can start whenever colonies and forage are available.

Choosing a Spot for Your Hive

Bees forage 2 to 3 miles (3 to 5 km) from home, so you don’t need acreage. What matters is the ground under the hive and the space in front of it:

  • Morning sun: face the entrance east or southeast (northeast in the Southern Hemisphere), with afternoon shade where summers are hot.
  • Shelter: a fence, hedge or building against the prevailing wind, away from exposed hilltops and damp low spots.
  • A clear flight path: point the entrance away from doors, walkways, play areas and pools.
  • Water close by: a shallow dish with stones or corks, set up before the bees arrive. They settle on their first reliable source, and a neighbor’s hot tub is hard to compete with later.
  • Firm, level footing: a stand 12 to 18 inches (30 to 45 cm) high, tipped slightly forward so rain drains out, with about 3 feet (1 m) of working room beside it.
  • Easy access: you’ll be carrying heavy boxes, and a hive you pass every day gets better care.

In bear country, put up an electric fence before the bees arrive. A raised stand discourages skunks, and stand legs set in containers of water keep ants out. Avoid sites next to fields or orchards that are sprayed often.

Equipment: What You Need on Day One

Choosing a Hive

Start with a Langstroth hive, the stacked rectangular boxes with removable frames. Nearly every book, course and mentor in North America assumes it, parts are easy to find, and nucs are sold on Langstroth frames.
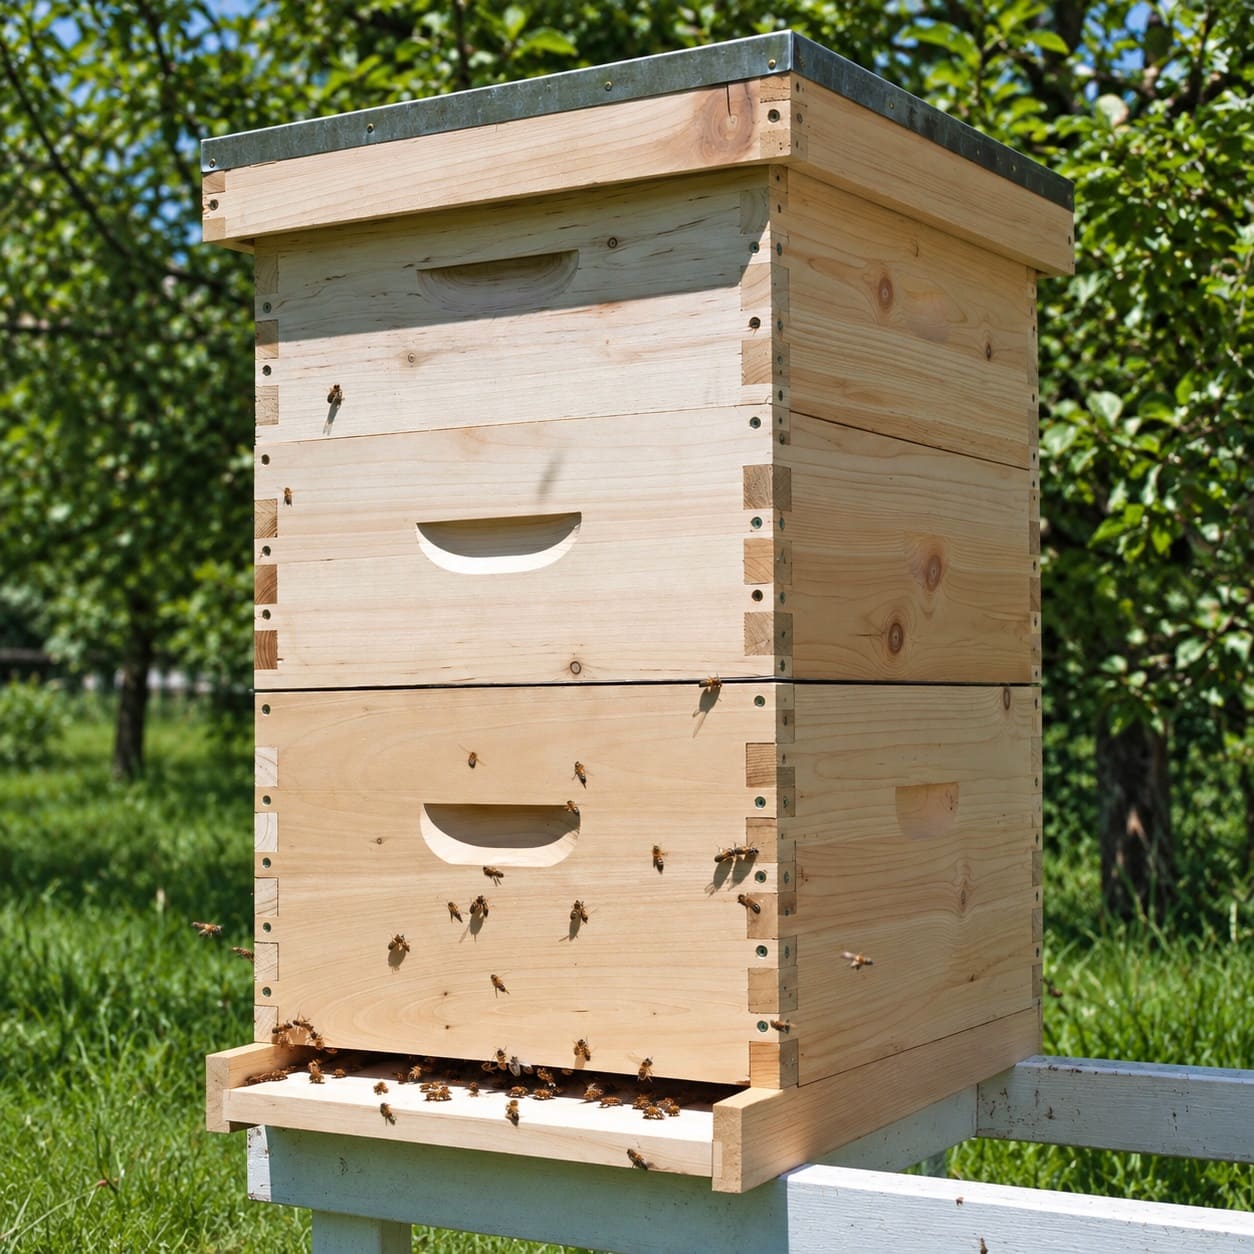
Start with a Langstroth hive

Top-bar and WarrΓ© hives work, but they’re harder to buy bees for, so they make better second hives. In the UK and Ireland the National hive is standard, so follow your club there.

Box size comes down to weight. The classic setup is two deep boxes for brood and medium boxes for honey.

If lifting worries you, choose narrower 8-frame boxes or run all mediums so every frame fits everywhere. Stick to one or two box sizes.
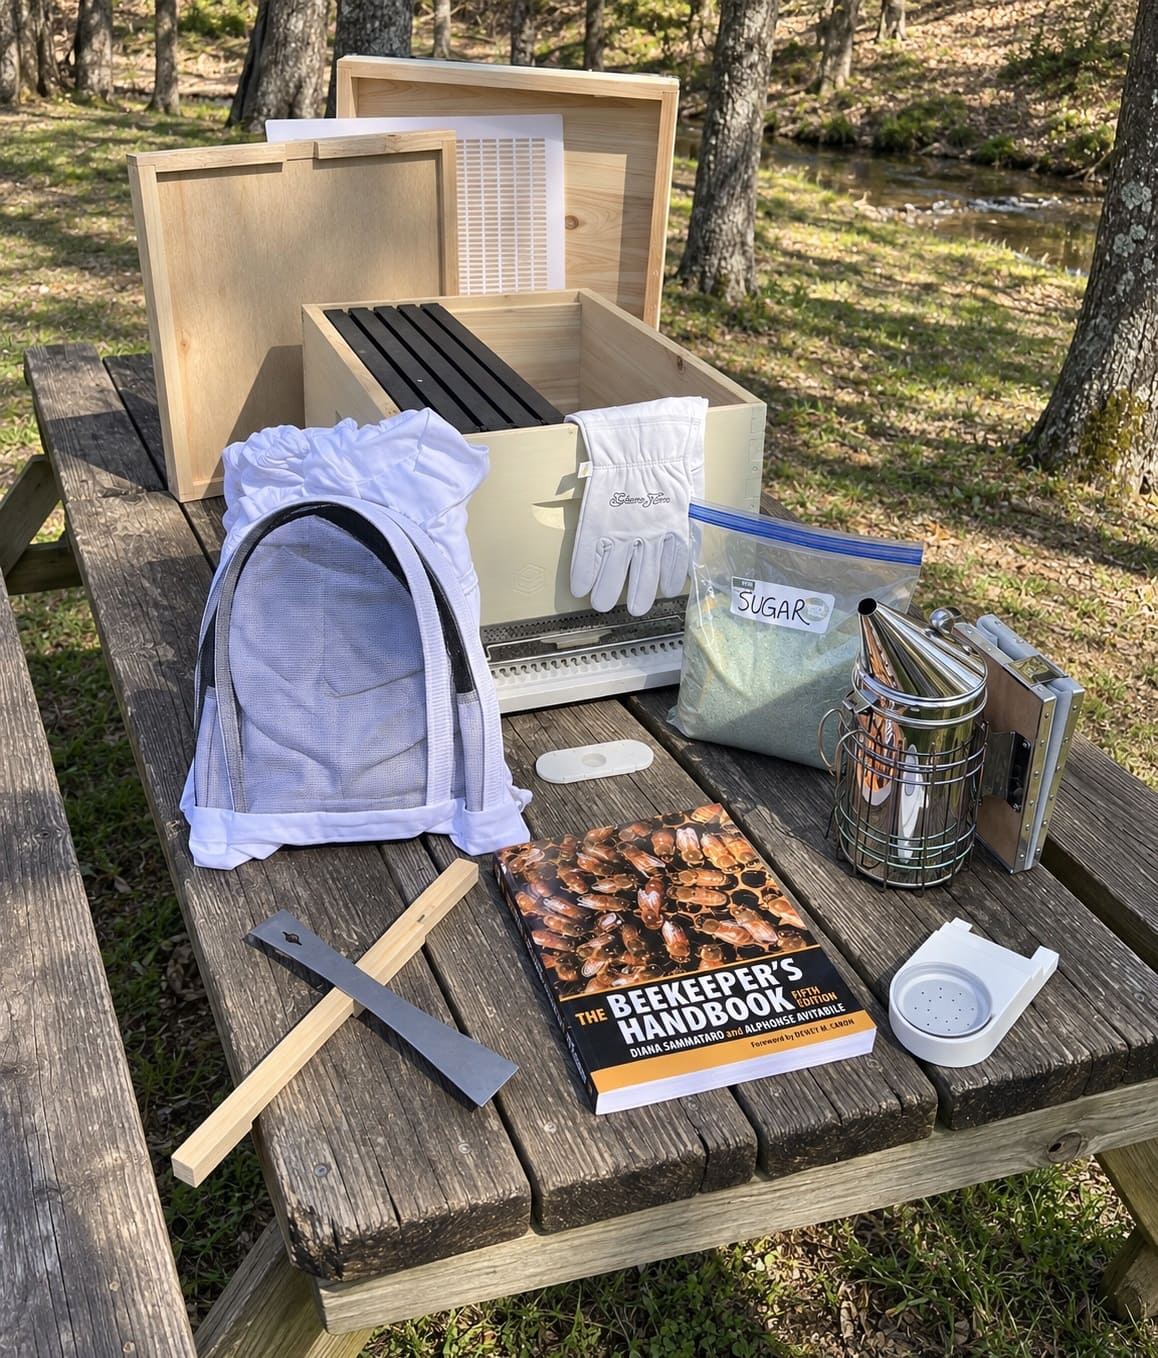
Essential beekeeping equipment

For each colony you’ll need:

  • A bottom board with an entrance reducer.
  • Two deep boxes for brood (or three mediums), with frames and wax-coated foundation.
  • Two medium supers with frames for honey.
  • An inner cover and a telescoping outer cover.
  • A feeder that sits inside or on top of the hive, since entrance feeders invite robbing.

Protective Gear and Tools

Always wear a veil; bees defend the head first. As a beginner you’ll want a veiled jacket or suit and gloves too, and thin nitrile or snug goatskin gloves let you handle frames more gently than thick gauntlets.

Choose light, smooth fabrics, tuck your pants into boots, and wash your suit regularly, because stingers left in the fabric keep releasing alarm scent.

Buy a medium or large smoker with a heat shield, two hive tools, a mite-testing kit and a notebook. Everything else can wait.

Getting Your Bees: Nuc, Package or Swarm

If you can find one, buy a nuc. It’s a small working colony with a laying queen the bees have already accepted, which gives you a head start on comb and brood.
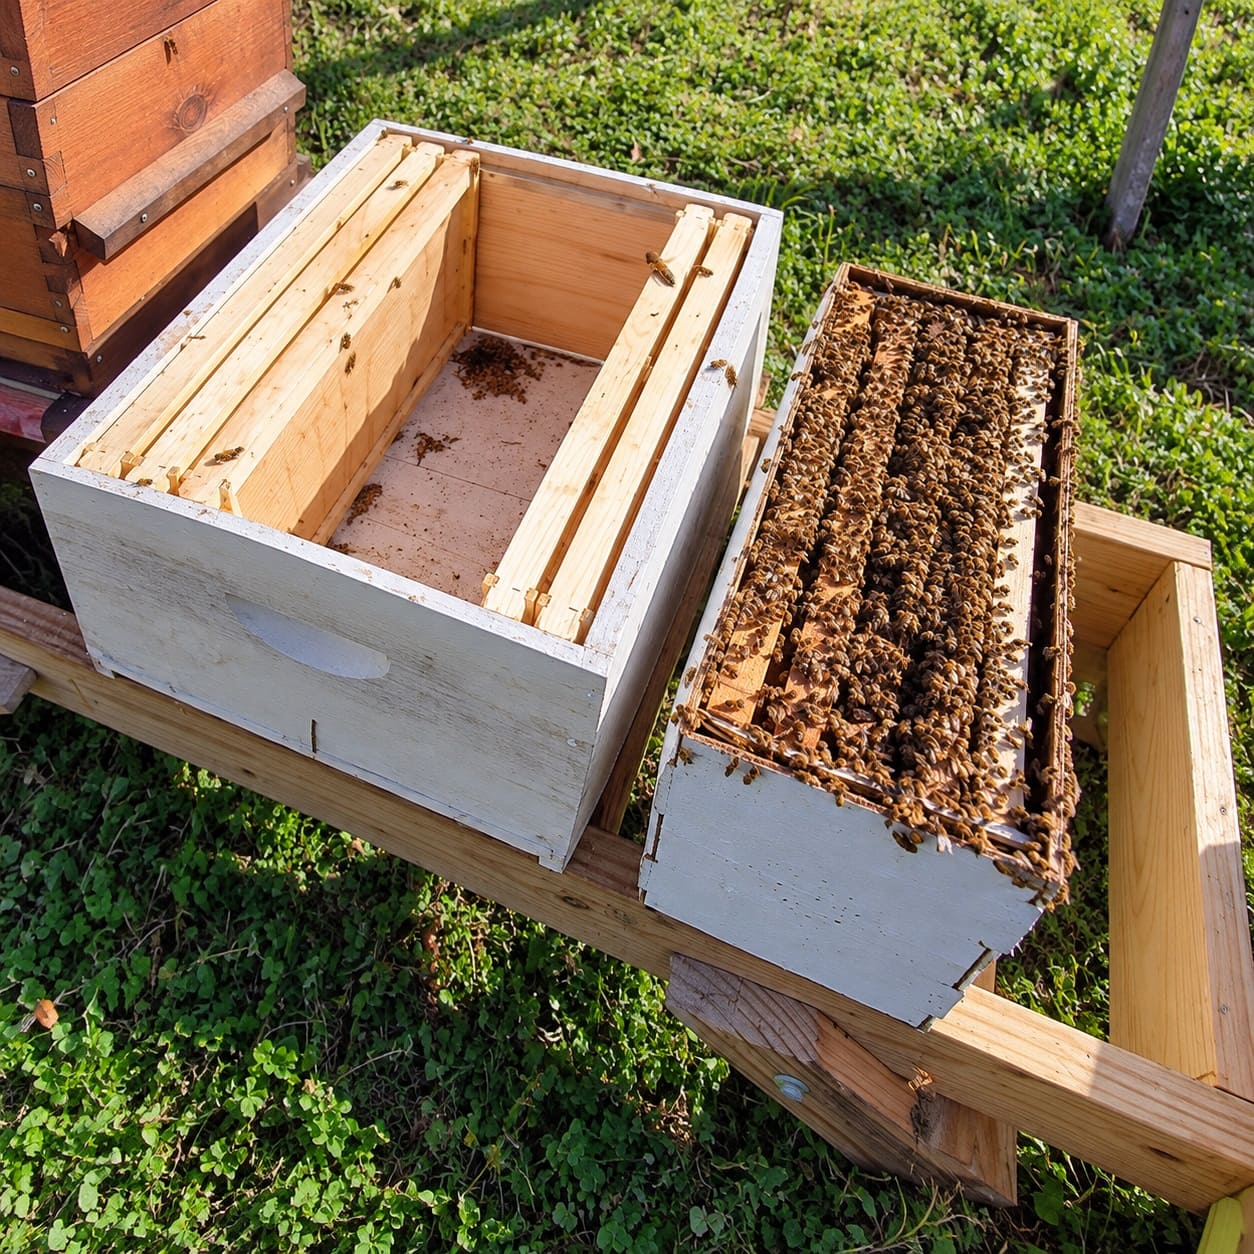
Getting a Bee Nuc

Option What you get Strengths Drawbacks
Nuc (nucleus colony) 4 to 5 frames of comb, brood, food, bees and a laying queen; about $200 to $250 Fastest, most reliable start for beginners Costs more, sells out early, frames must fit your boxes
Package About 3 pounds (1.4 kg), roughly 10,000 bees, plus a caged queen; about $160 to $200 Widely available, can be shipped, cheaper No comb or brood, slower start, queen must be accepted
Swarm A cluster that left another colony with its queen; free Vigorous comb builders Unknown health and temper, unpredictable timing

Buy locally if you can. Local bees suit your climate, and picking them up spares them a trip through the mail.

Ask when the queen was mated, whether the colony has been tested or treated for mites, and whether the queen can be marked with a paint dot so she’s easier to spot.

Start with two colonies if your budget allows. With two, you can tell whether a brood pattern is normal for the season, and if one loses its queen you can give it a frame of eggs from the other so it can raise a new one.

Where Africanized bees are established, including parts of the southern and southwestern US, buy from a supplier who requeens with gentle stock.

Install Day

Have the hive set up, the water filled, and a feeder of 1:1 sugar syrup ready: equal parts white granulated sugar and water, by weight or volume.

To light the smoker, start crumpled paper or dry grass in the bottom, pump until it catches, add loosely packed pine needles, burlap or wood pellets, and keep pumping until the smoke runs cool and white.

Installing a Nuc
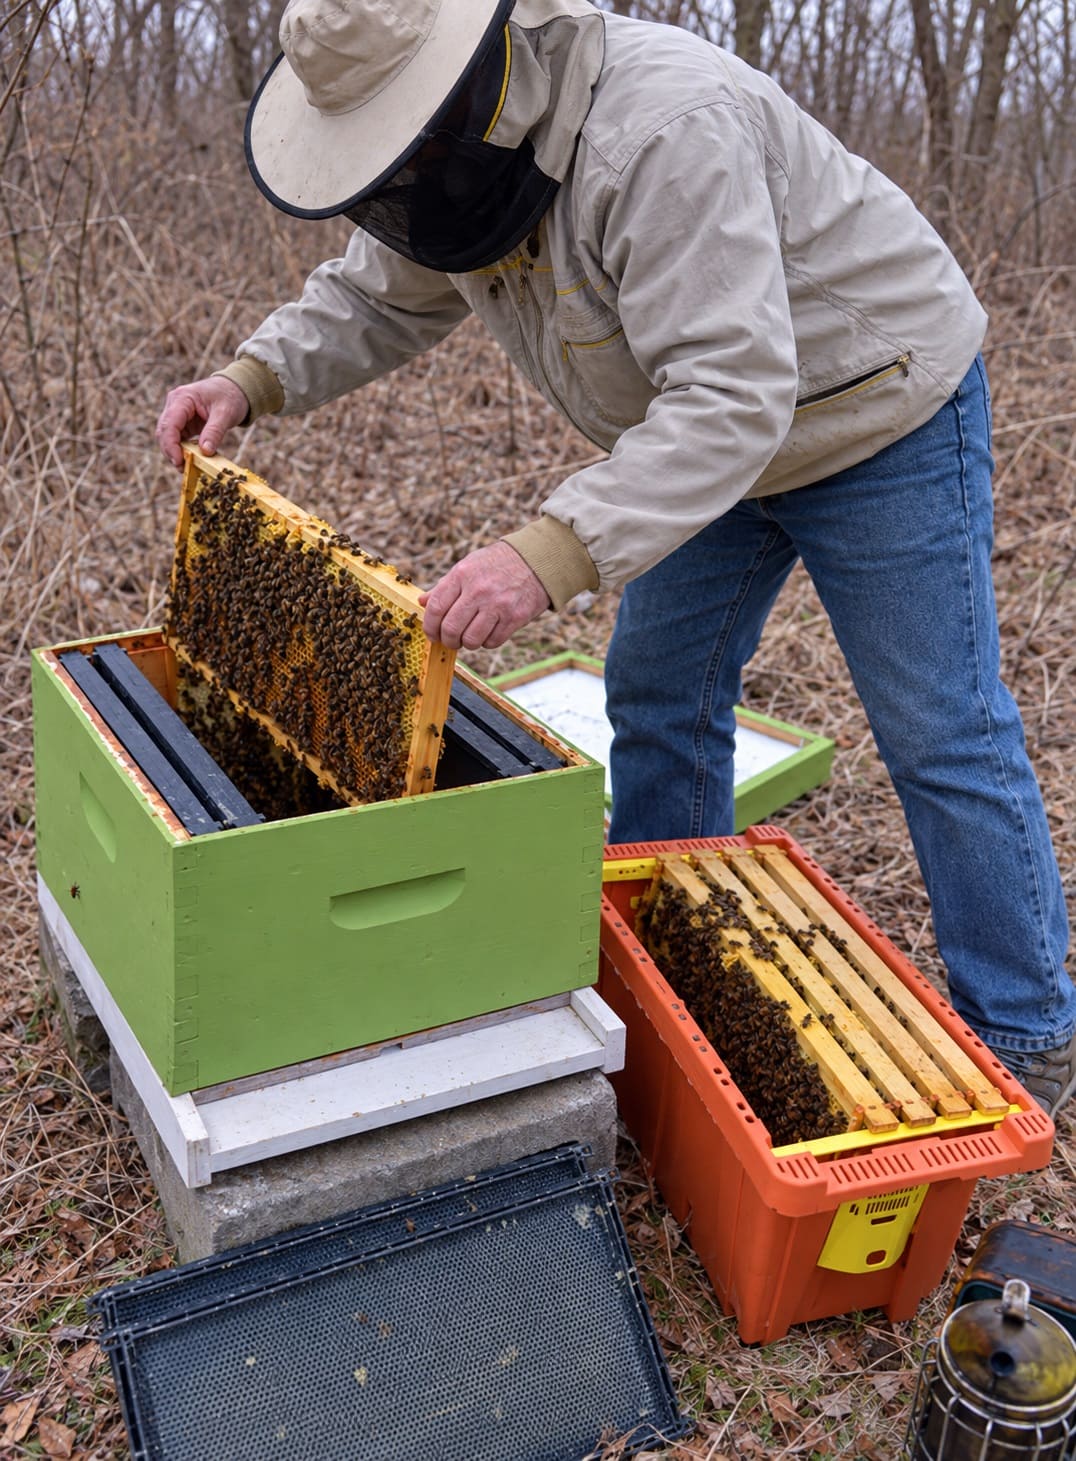
Installing a Nuc

  1. Puff a little smoke into the nuc entrance and wait a minute.
  2. Lift four or five empty frames out of the middle of your deep box.
  3. Move the nuc frames one at a time into the gap, keeping their order and facing. Go slowly; beginners crush queens during this step more often than at any other.
  4. Slide the empty frames back in on either side, push everything snugly together and center it.
  5. Shake leftover bees in front of the entrance, close the hive, add the feeder and set the entrance reducer to a small opening.

Installing a Package

  1. Mist the bees lightly through the screen with 1:1 syrup.
  2. Remove four or five frames from the middle of the box.
  3. Tap the package down, pry off the lid, and lift out the feeder can and queen cage.
  4. Check the queen is moving, remove the cork from the candy end only, and hang the cage between two center frames with the screen exposed.
  5. Shake the bees into the gap, ease the frames back in, close the hive and add the feeder.
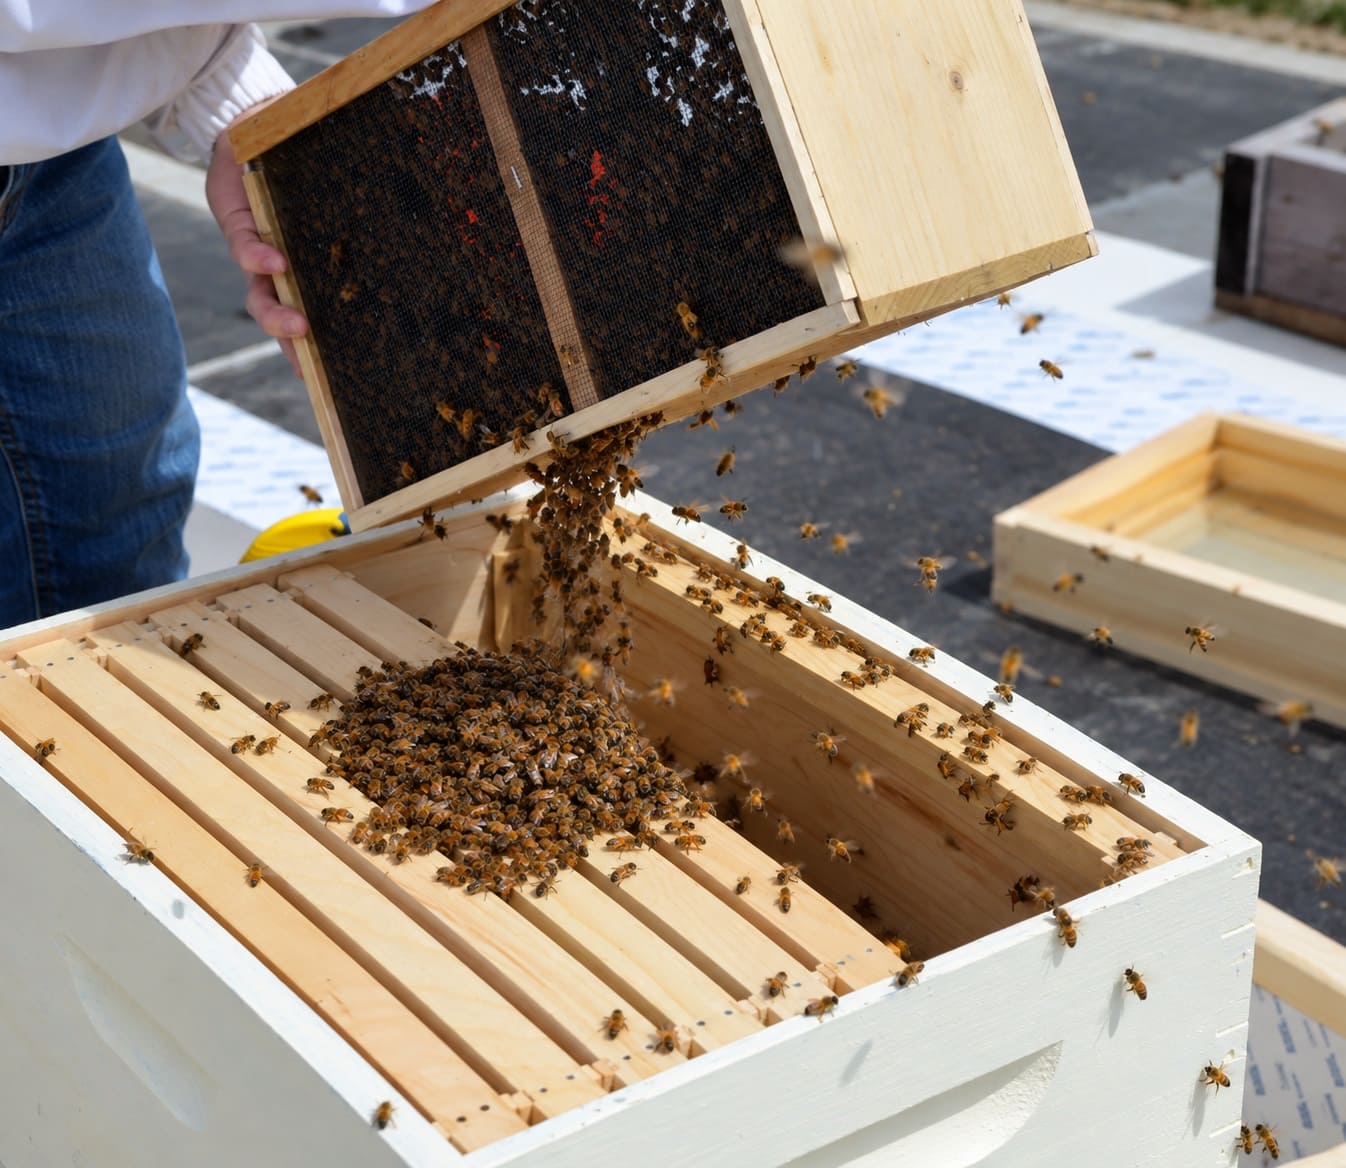
Installing a Bee Package

Leave them alone for a few days except to refill the feeder. After three to five days, check that a package queen is out of her cage and free her gently if not.
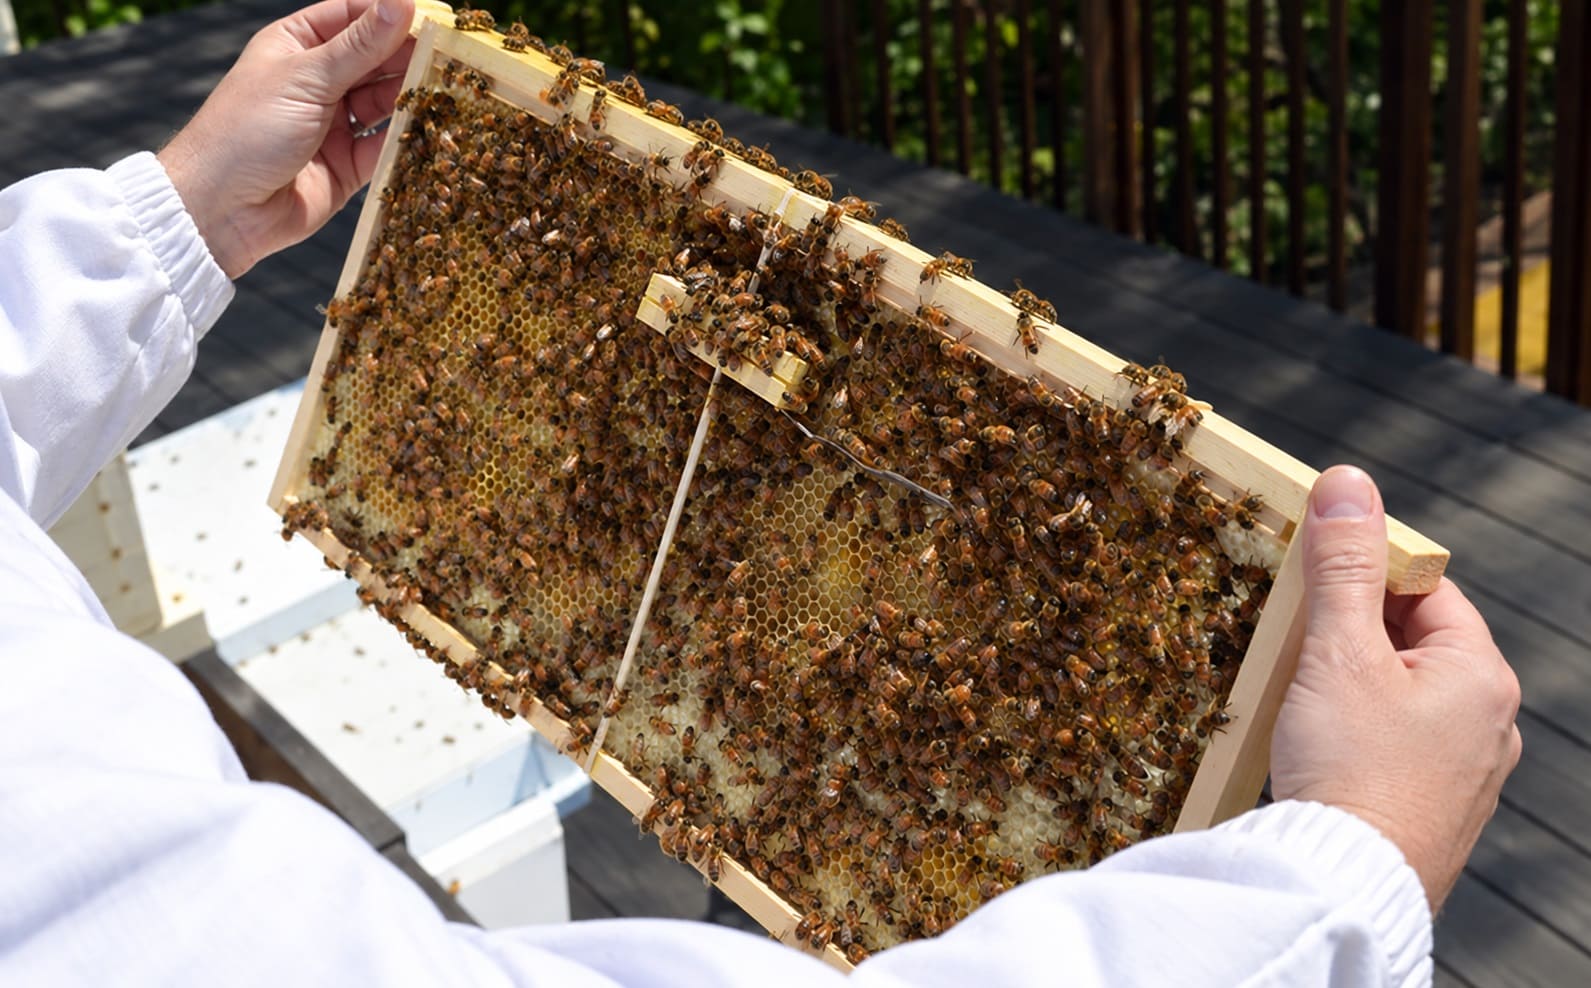
checking package queen bee

At about a week, look for eggs. Keep feeding until the bees have built comb on most of the frames in the first box or a strong nectar flow takes over.

Inspecting Your Hive in the First Season

Through your first spring and early summer, inspect about once a week; it’s swarm season, and you’re learning what normal looks like. After that, every two weeks is enough.

Pick a calm, sunny midday, ideally above 60°F (16°C), so you don’t chill the brood. Each visit answers four questions.

  • Is there a laying queen?
  • Do the bees have room?
  • Do they have food?
  • Are there signs of disease or swarming?
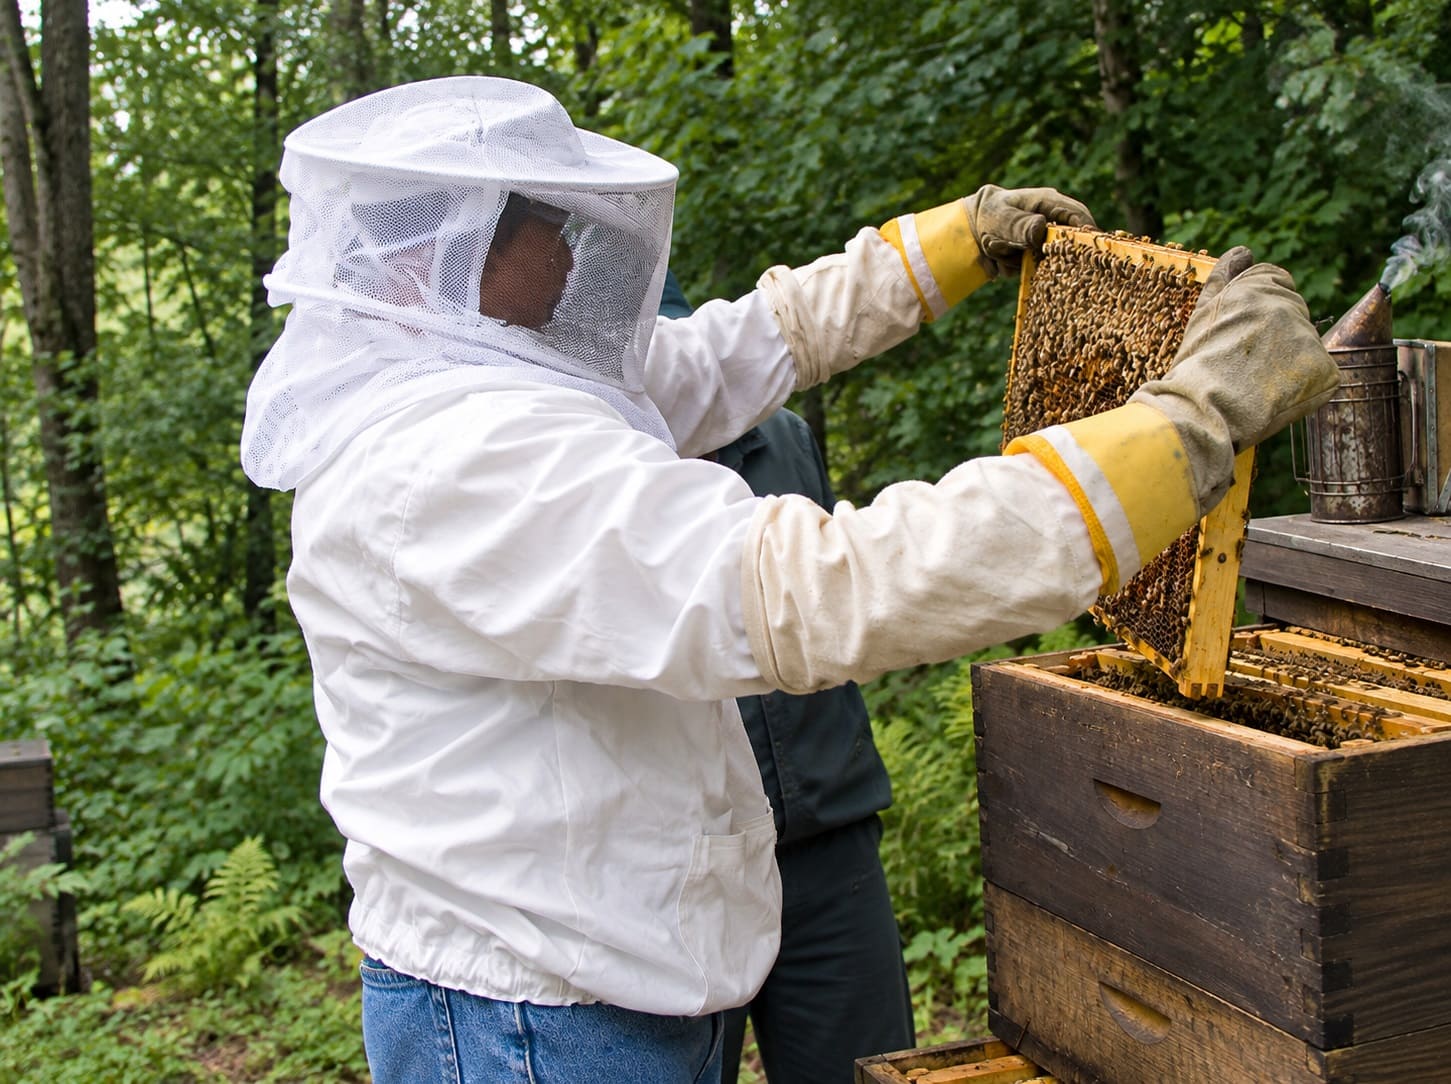
Inspecting Your Hive

Approach from the side, puff smoke into the entrance, and wait 30 seconds. Lift the cover, puff across the top bars, and take out an outer frame first to make room.

Hold each frame over the box so a dropped queen lands inside, view it with the sun over your shoulder, and put frames back in the same order, squeezed tight.

If bees line up facing you or bump your veil, smoke and slow down; if they stay agitated, close up and come back another day.

What You’re Looking For

Eggs are the key sign. They look like tiny grains of rice standing on end in the cells, and they hatch in three days, so seeing them means a queen was laying within the last three days. You don’t need to find her.

Then look at the capped brood, the tan, slightly domed cells in the middle of the frame: a good queen lays a solid patch with few gaps. Around it you should see an arc of pollen and honey along the top corners and outer frames.

Note how many frames the bees cover each visit; it’s your best measure of growth.

Adding Space

When bees cover about seven of the 10 frames in a box, or six of eight, add the next one: your second deep, then medium honey supers. Too early and they struggle to warm and defend it; too late and a crowded colony prepares to swarm.
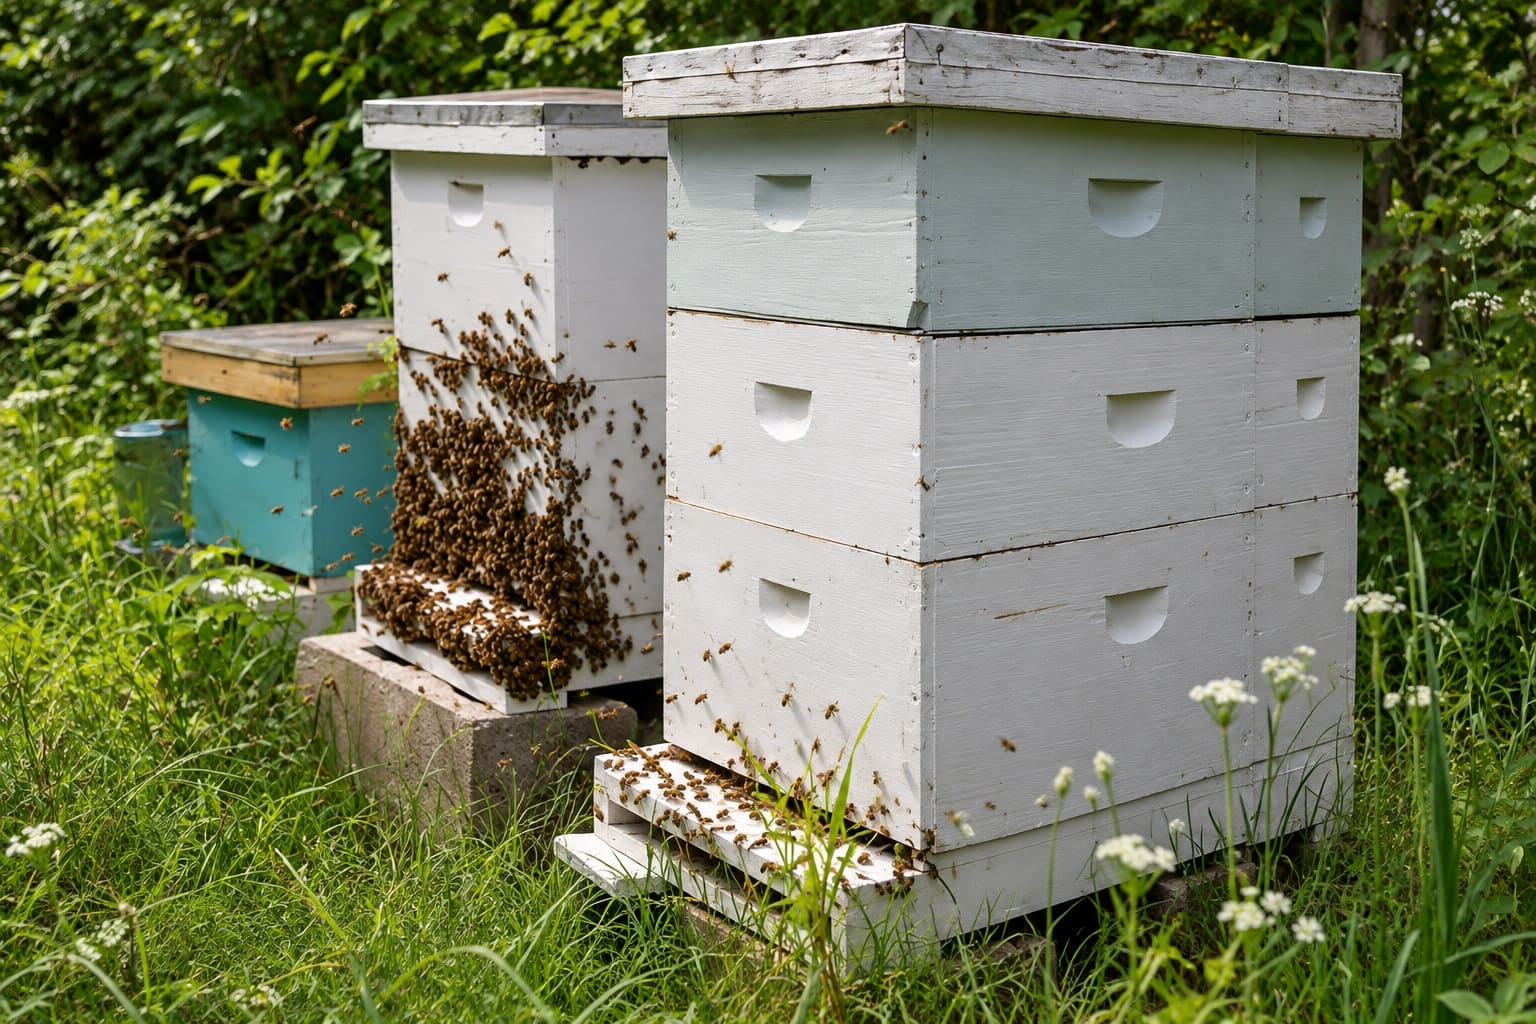
Adding Space for bees

Bees build new comb, which shows as bright white wax at the frame edges, only when nectar is flowing or you’re feeding. Once honey supers go on, stop feeding syrup so it doesn’t end up in your honey.

Reading Queen Cells

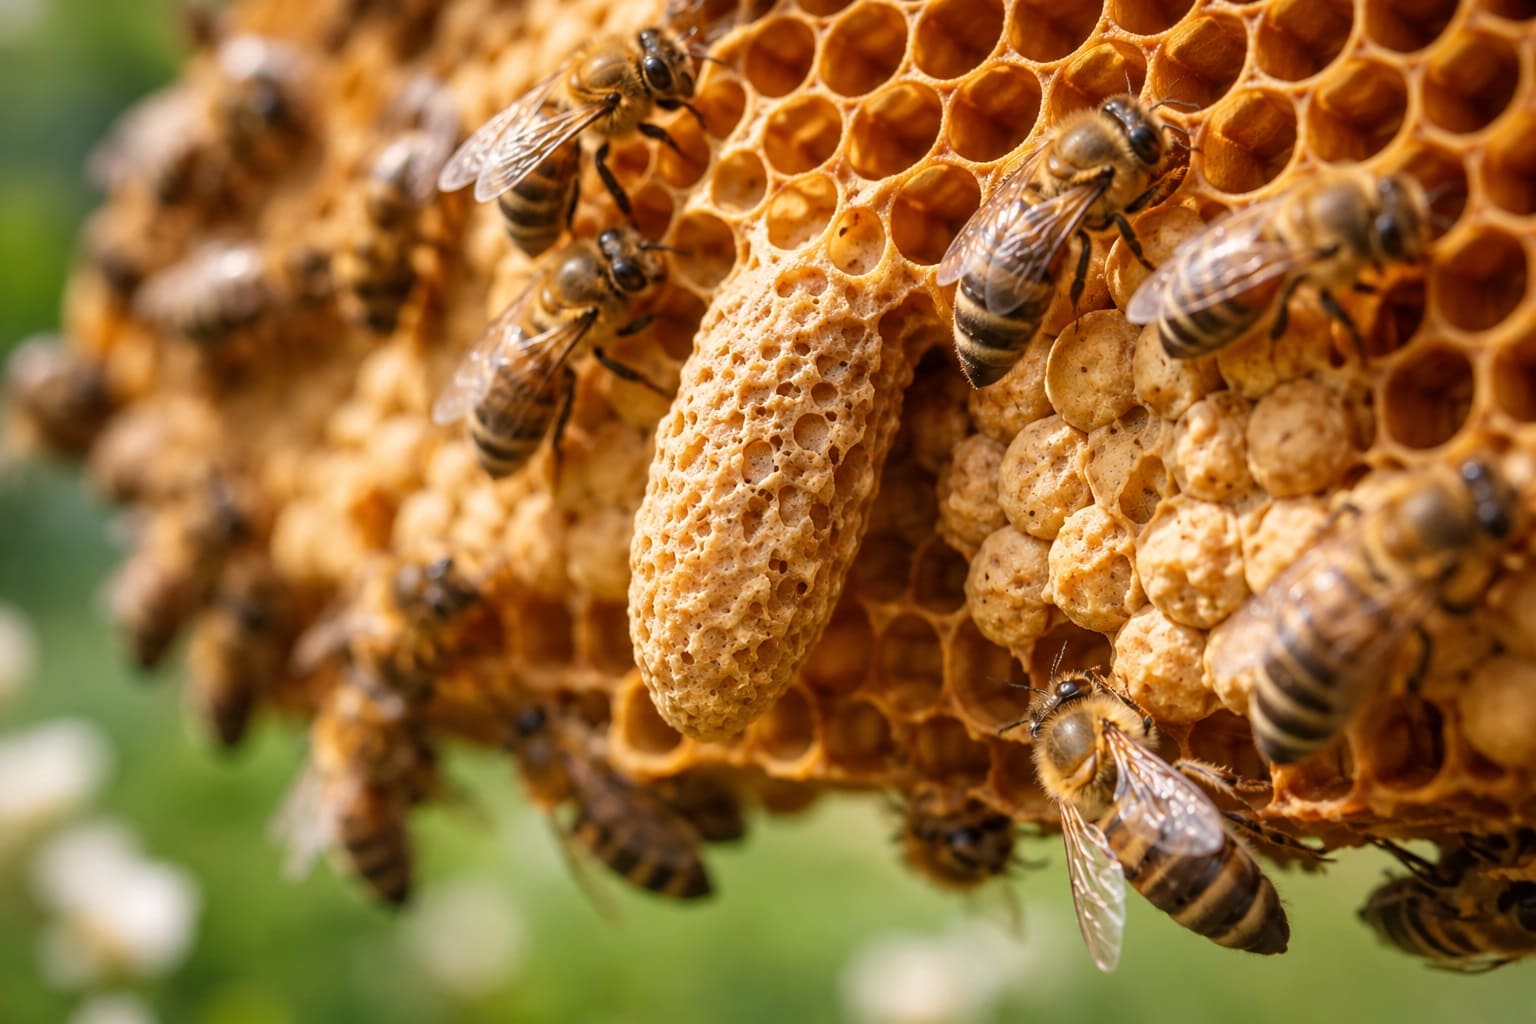
Queen cells look like peanut shells hanging off the comb, and their position tells you the colony’s plan. Empty cups are normal.
Reading Queen Cells

Several cells along the bottom edges of frames usually mean swarm preparations. One or two in the middle of a comb face usually mean the bees are replacing a failing queen, which you should allow.

Cells scattered across the comb after a stretch with no eggs mean an emergency replacement. Don’t scrape them all off, because they may be the colony’s only way to get a new queen.

When you find swarm cells, call your mentor about making a split.

A split moves the old queen, a few frames of brood and food, and some bees into a separate box, leaving the queen cells behind, so the colony gets the fresh start it’s after without half of it flying over the fence.

Keep a spare box, bottom board and cover on hand for exactly this.

Varroa Mites: Test, Then Treat

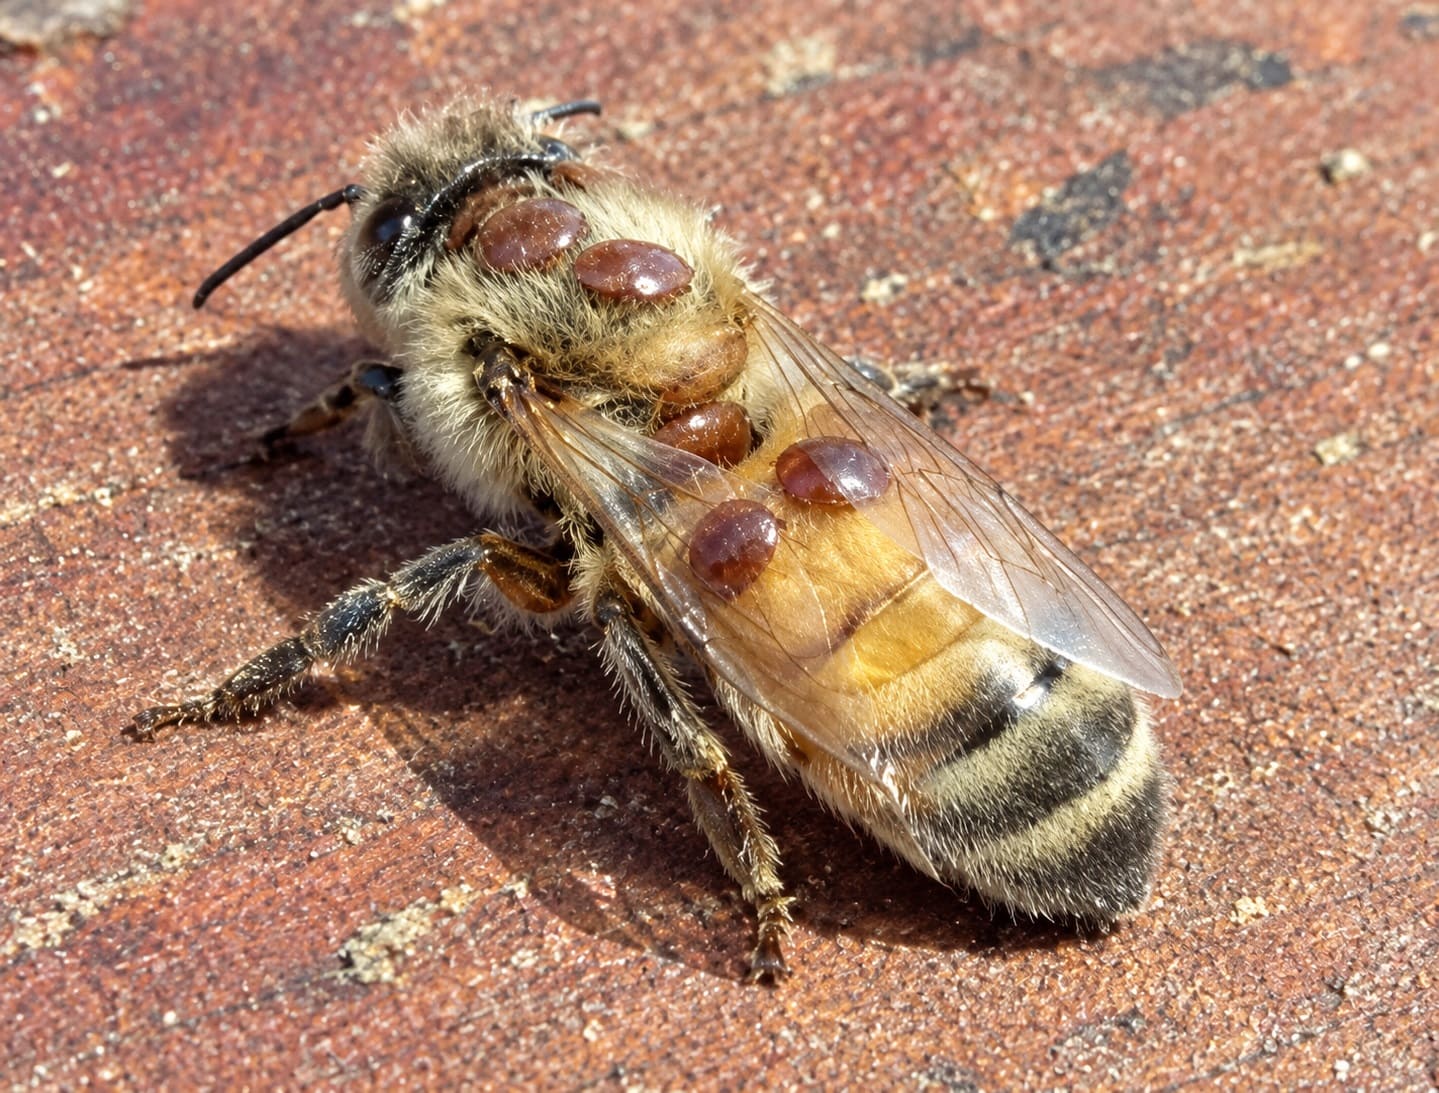
Varroa mites feed on bees and their brood and spread viruses such as deformed wing virus. Every colony has them, and their numbers climb all season, so a colony that looks busy in August can collapse by late fall.
Varroa Mites

The Honey Bee Health Coalition, whose varroa guide is the standard North American reference, warns that the overwhelming majority of colonies can’t survive unless the beekeeper controls mites.

Losses run high even with care: the Auburn University-led US Beekeeping Survey found beekeepers lost 39.9% of colonies from April 2025 to April 2026, after losses above 55% in each of the two previous years.

How to Do an Alcohol Wash

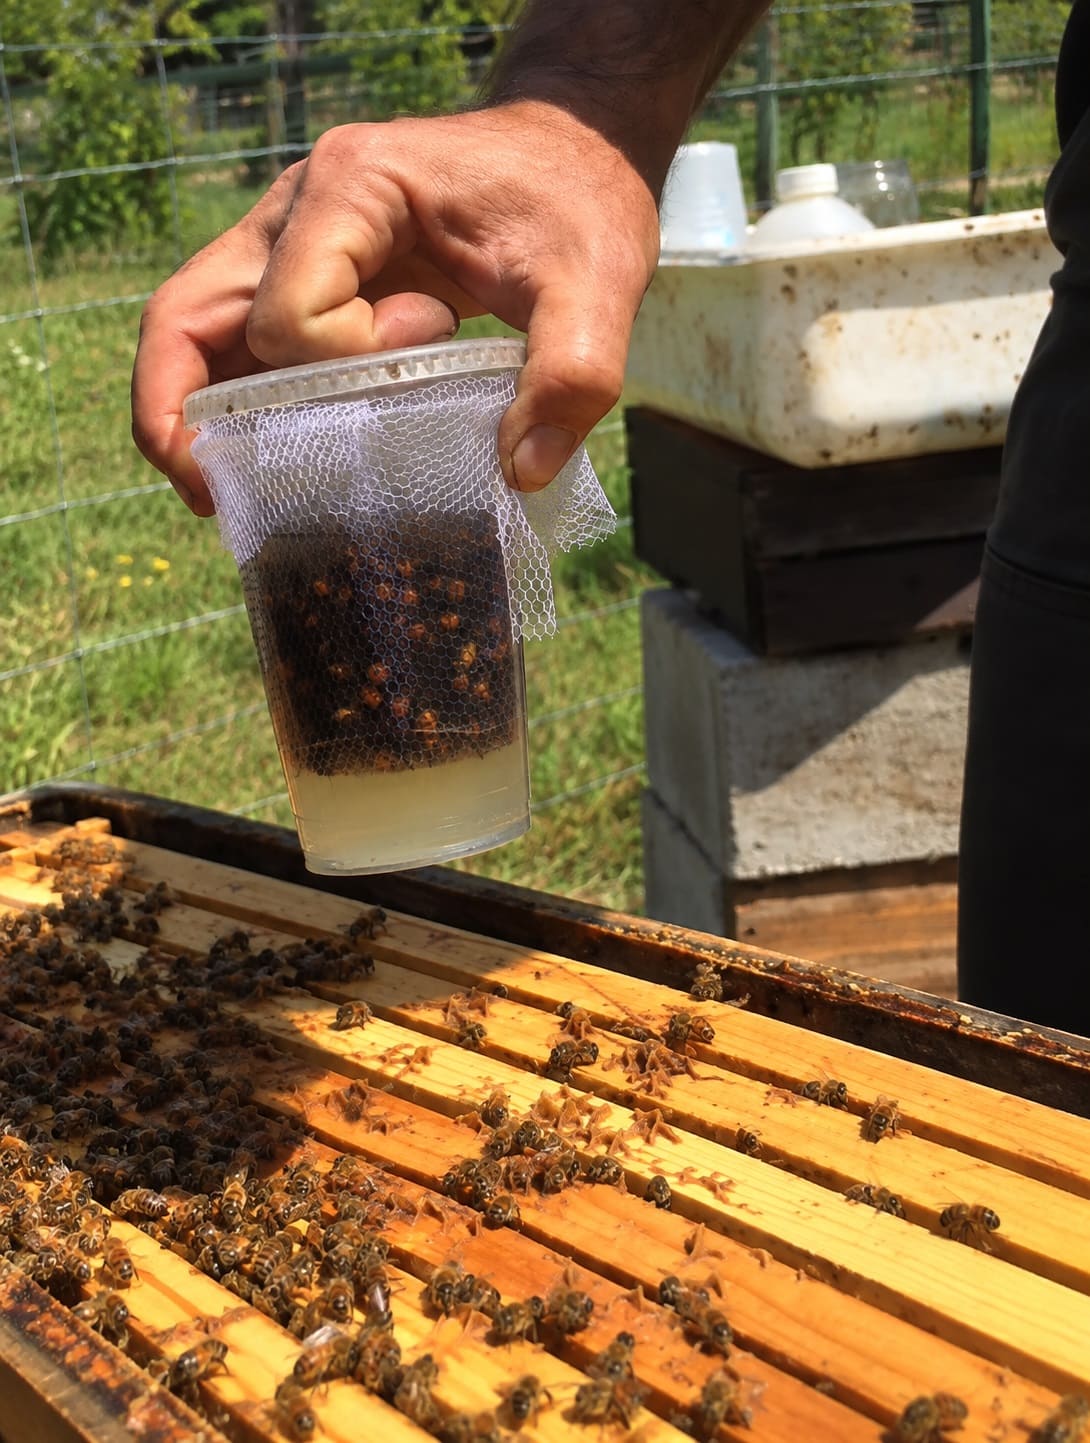
You’ll need a mite-wash cup, or a wide-mouth jar with a mesh insert that lets mites through but not bees, plus rubbing alcohol and a white pan.

  1. Pick a frame of open brood, where nurse bees carry the most mites, and check that the queen isn’t on it.
  2. Shake the bees into a tub and scoop a level half cup, which is about 300 bees.
  3. Pour them into the jar with enough alcohol to cover them and close the lid.
  4. Swirl hard for a full minute, pour the liquid through the mesh into the pan, then repeat once.
  5. Count the mites, reddish-brown ovals about the size of a pinhead, and divide by three to get mites per 100 bees.
How to Do an Alcohol Wash

The coalition’s thresholds are straightforward.

In spring and summer, a count under 2 mites per 100 bees (fewer than six in your sample) means you don’t need to treat yet. Once counts reach 2 to 3 per 100 (six to nine mites), treat promptly.

Going into winter, more than 1 per 100 (over three mites) is too many.

Test monthly from spring to fall and after every treatment. A sugar roll returns the bees alive but is less accurate in humid weather.

Choosing a Treatment

The right product depends on the season, whether honey supers are on, and the temperature. This summary follows the coalition’s guide, but the label is the legal instruction, so read it every time.

Treatment Works best Honey supers on? Temperature limits
Formic Pro or MAQS (formic acid) Spring through fall; reaches mites under brood cappings Yes Daytime highs 50 to 85°F (10 to 29.5°C)
HopGuard 3 (hop beta acids) When little capped brood is present Yes Above 50°F (10°C)
Oxalic acid dribble or vapor (Api-Bioxal) Broodless periods: early winter, new packages, splits Only if your product’s label allows it Vapor requires an acid-rated respirator
Apiguard (thymol gel) Late summer, after harvest No 59 to 105°F (15 to 40°C)
Apivar (amitraz strips) Spring before supers, or after harvest; stays in 42 to 56 days No Slow-acting, so start early

A simple plan suits most beginners. Test in spring and treat before supers go on if counts are high.

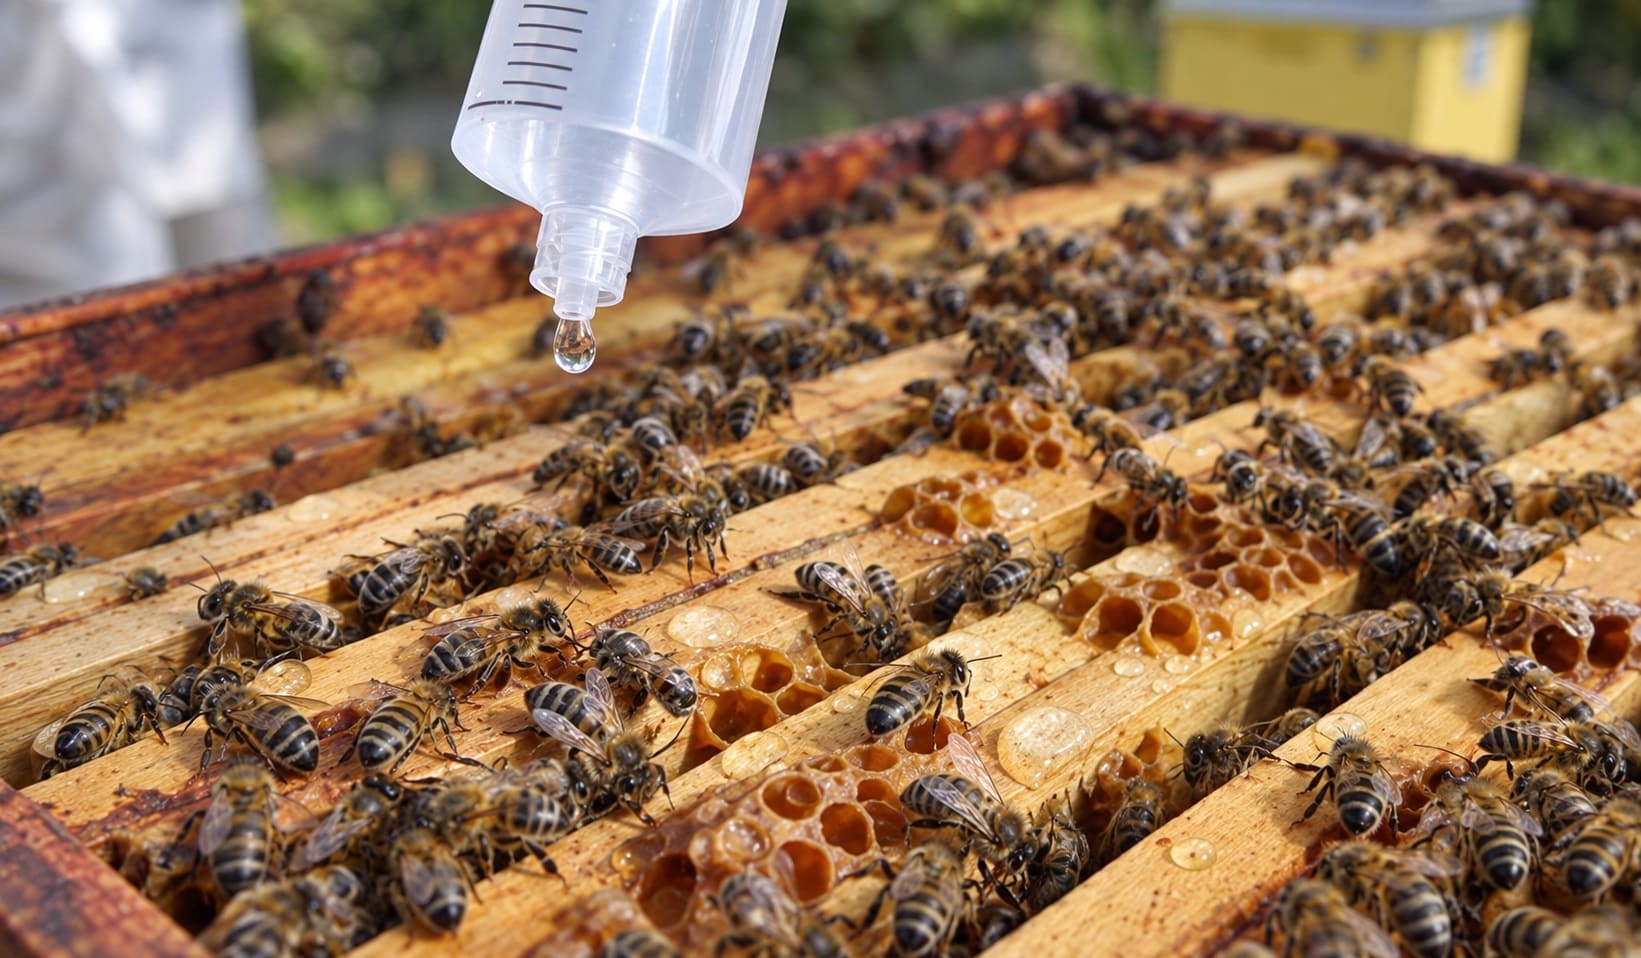
After the summer harvest, usually August in much of the US, bring mites down hard so the colony raises healthy winter bees, then follow up with oxalic acid in early winter when there’s little brood.
Oxalic acid treatment

Wear the protective gear the label specifies, since formic and oxalic acids are corrosive, and rotate products over the years so mites don’t build resistance.

Treatment-free beekeeping is a reasonable goal for experienced keepers with mite-resistant stock, but for a beginner it usually means a dead colony and mites spread to every hive nearby.

Don’t confuse mite treatments with antibiotics, either: since 2017, US beekeepers need a veterinarian’s prescription or feed directive for bee antibiotics, which are for diagnosed disease.

Older guides recommending routine medication are out of date.

Getting Through the First Winter

As a rough guide, a colony needs about 90 pounds (41 kg) of honey to get through winter in the northern US, around 60 pounds (27 kg) in the middle states and about 40 pounds (18 kg) in the South.

Ask local beekeepers what works in your area. Learn to judge stores by hefting: tip the hive back an inch from behind and feel the weight. It means little the first time and a lot by the tenth, especially with a second hive to compare.

If a colony feels light in early fall, feed thick 2:1 syrup (two parts sugar to one part water) while days are still above about 50°F (10°C), so the bees can store it.

After that, use fondant or a sugar board placed right above the cluster. Feed only white granulated sugar; brown or raw sugar can cause dysentery, and honey from another source can carry foulbrood spores.

Before the first cold nights, reduce the entrance and fit a mouse guard.

In cold climates, add a windbreak, insulate the top of the hive so moisture doesn’t condense and drip onto the cluster, and give moist air a way out through a small upper entrance.
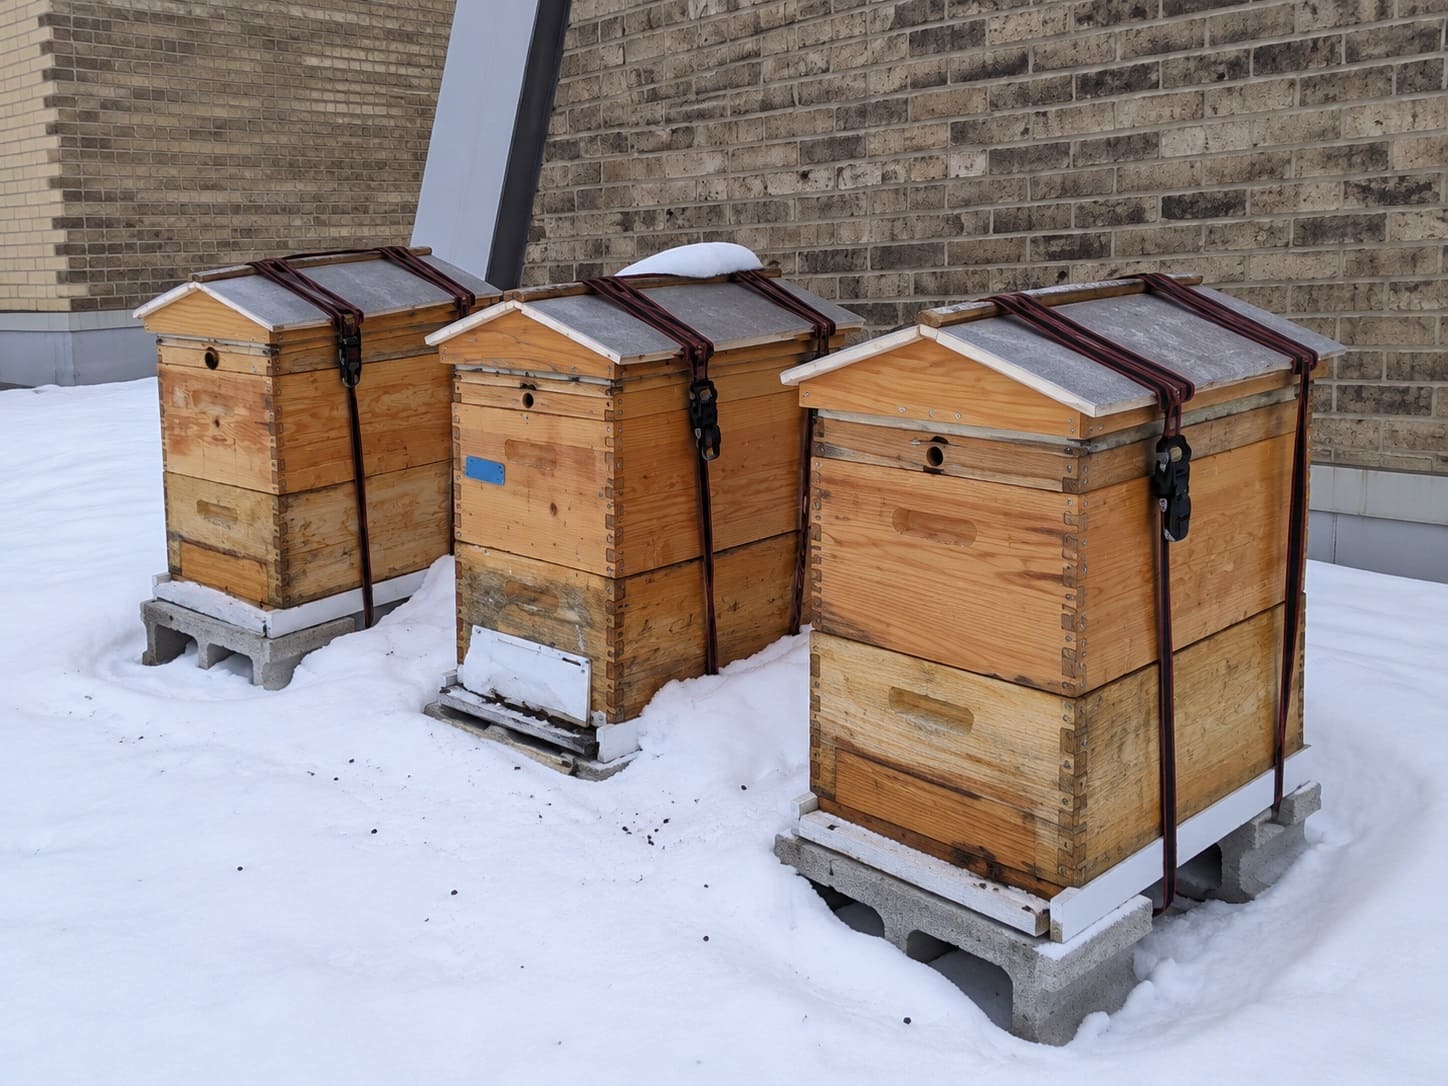
Beekeeping in winter

Late summer and fall bring nectar shortages and robbing, so keep entrances small and never spill syrup near the hives.

Keep the hive closed through winter, clear snow and dead bees from the entrance, and heft it again in late winter. That’s when starvation catches most beginners, because the colony starts raising brood and burns through food fast.

If a colony dies, look for the cause before cleaning up: white mite droppings stuck in brood cells point to varroa, while bees head-first in empty cells point to starvation.

Honey: What to Expect in Year One

A new colony spends most of its first year building comb, so there’s often little or no surplus. Take honey only from supers above the brood boxes, never from the brood nest, and only after the colony has its winter stores.

Wait until frames are at least 80% capped, which means the honey is dry enough not to ferment. For a few frames, you can crush the comb and strain it through a fine mesh bag instead of using an extractor.

In year two, a healthy colony in a decent season might give 30 to 60 pounds (14 to 27 kg), though weather and forage swing that widely.

Troubleshooting Your First Year

  • No eggs or young larvae for two inspections:

The queen is lost or failing, or a new queen hasn’t started laying, which can take two to three weeks. If there’s no sign of a new queen, give the colony a frame of eggs from your other hive or buy a mated queen.

  • Several eggs per cell or bulging drone cappings on worker comb:

Laying workers in a long-queenless colony. Combine it with a healthy colony, using newspaper between the boxes.

  • Bees wrestling at the entrance and wax flakes on the landing board:

Shrink the entrance, close gaps and clean up spilled syrup.

  • Patchy brood with sunken, darkened or perforated cappings and a foul smell:

Possible American foulbrood. Close the hive, keep its equipment separate and call your state apiary inspector.

  • Bees with shriveled, crumpled wings:

Heavy mites spreading deformed wing virus. Do an alcohol wash and treat.

  • Webbing in comb or small black beetles running from the light

Wax moths or small hive beetles in a weak colony. Don’t give bees more space than they can cover, and freeze stored frames for 48 hours.

Frequently Asked Questions

Is it too late to start beekeeping this year?

If local suppliers are sold out, probably, and that’s fine. Use the season to help a mentor, assemble equipment and put your name on a swarm list.

A colony started in early summer has far less time to store honey for winter, so a prepared start next spring usually beats a rushed one now.

What kind of honey bees should a beginner buy?

Italians are gentle and build up fast but eat through stores quickly. Carniolans are gentle and thrifty in winter but quick to swarm.

Russian and other mite-resistant lines handle varroa better but can be more defensive. A healthy, locally adapted colony matters more than the label.

Will a backyard hive get my family or neighbors stung?

A well-placed hive with a barrier in front rarely causes trouble away from the hive itself.

Most stings happen to the beekeeper during inspections, and Colorado State University Extension notes that many stings blamed on honey bees actually come from yellowjackets.

Can I keep bees at a second home?

It’s hard for a beginner. In spring you need to check about weekly to catch swarm preparations, and you’ll miss the everyday signs you’d notice at home. If a monthly visit is all you can manage, spend a season helping a mentor first.

Where to Start

The beekeepers whose first colonies survive aren’t the ones with the fanciest gear. They’re the ones who joined a club early, started with a nuc and counted mites before the bees looked sick.

If you take one habit from this guide, make it the monthly alcohol wash and a note after every inspection.

This week, find your nearest beekeeping club and ask when its next beginner course starts and who sells local nucs. Then save this guide for install day.


source https://harvestsavvy.com/beekeeping-for-beginners/

Wednesday, October 28, 2026

Are Eggs Dairy? What to Know If You’re Avoiding Milk

No, eggs are not dairy. Dairy means milk, whether it comes from a cow, a goat or a sheep, plus the foods made from it.

Eggs are laid by birds, which don’t make milk, so an egg contains no lactose and none of the milk proteins behind a milk allergy.

The mix-up is easy to make when eggs sit in the same cold case as milk in most American stores. It matters, though, if you’re avoiding dairy, cooking for someone who is, or reading an allergen label.

By the end you’ll know whether eggs fit your particular dairy-free diet and how to spot the egg dishes that quietly contain milk.

At a Glance

  • Dairy = milk from a mammal and anything made from it.
  • Eggs come from birds: no lactose, no casein, no whey.
  • Lactose intolerant or allergic to milk? Plain eggs are fine, unless you’re also allergic to egg.
  • Vegan? Eggs are out, along with dairy.
  • The real trap: egg dishes such as scrambled eggs, quiche and custard often contain milk, cream or butter.

What Counts as Dairy

Dairy is milk from a mammal and anything made from it. Cows supply most of it, but goat, sheep, buffalo and camel milk count too, along with butter, cream, cheese, yogurt, kefir, ghee and ice cream.

What Counts as Dairy

Milk carries two things that matter if you avoid it.

  1. Lactose is its natural sugar, the one that causes trouble in lactose intolerance.
  2. Casein and whey are its main proteins, the ones the immune system reacts to in a milk allergy.

An egg has neither. USDA nutrient data list zero lactose in a whole egg, and egg proteins (mostly in the white) belong to a different family from milk’s.

Even the two oddball mammals that lay eggs, the platypus and the echidna, don’t change the answer: they feed their young with milk, and the egg is a separate thing.

One wrinkle explains some of the confusion.

For years, the USDA’s MyPlate Dairy Group was a nutrition category, not an ingredient list: it counted fortified soy milk because it matches cow’s milk for calcium, and it left out butter, cream, cream cheese and sour cream because they supply little calcium.

If you’re avoiding dairy, ignore that framing. Butter is dairy, soy milk isn’t, and neither label applies to eggs.

Food Dairy? What to know
Butter and ghee Yes Made from milk fat. Ghee has only traces of milk protein, but it’s still dairy.
Lactose-free milk Yes The lactose is broken down; the milk proteins stay, so it isn’t safe with a milk allergy.
Whey or casein protein powder Yes Concentrated milk protein.
Chicken, duck or quail eggs No From birds, with no lactose or milk protein.
Almond, oat or soy drinks No Plant-based, though some are made on lines shared with dairy.
Carton egg substitutes No Most are egg whites, so they’re no help with an egg allergy.
“Non-dairy” coffee creamer Often contains milk protein US rules allow caseinate in products labeled non-dairy.

Where Eggs Belong Instead

Nutritionally, eggs are a protein food. From the Basic Four food groups of 1956 through MyPlate, USDA food guides placed eggs with meat, poultry, fish and beans, never with milk. Canada’s Food Guide and the UK’s Eatwell Guide also count eggs among protein foods.

The 2025–2030 Dietary Guidelines for Americans, released in January 2026, reshuffled things. Their new food pyramid merges protein foods, dairy and healthy fats into one group, so eggs now share a tier with cheese and milk.

That grouping is about what the foods supply, not where they come from, and it doesn’t make eggs dairy.

Agriculture and food-safety agencies usually file eggs under poultry, since they come from domesticated birds. Eggs aren’t meat, though, which is why many vegetarians eat them.

Goose Egg vs Chicken Egg

Why So Many People Think Eggs Are Dairy

The shelf is the biggest reason. In the US, eggs are washed before sale, which removes the shell’s natural protective coating, and federal rules require them to be held at 45°F (7°C) or colder on the way to the store.

The obvious home for a cold staple is the dairy case, often right under a sign that says DAIRY.

The shelf isn’t the whole story, though. EU egg-marketing rules have long barred washing top-grade eggs, and stores there usually sell them unrefrigerated; in Britain you’ll often find them near the flour and sugar.

People still mix up eggs and dairy in both places, so habit plays a part too.

A few other things feed the habit:

  • Farms and milk delivery services often supplied both, and stores shelved what arrived together.
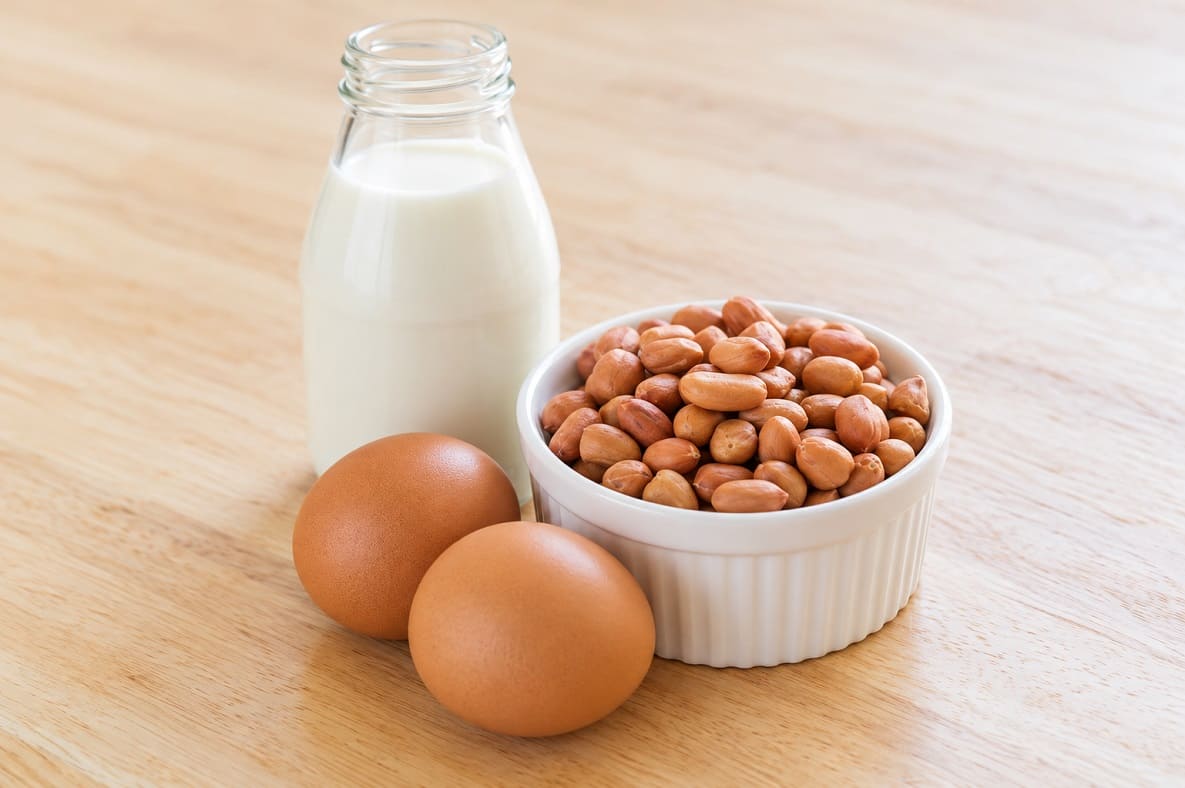
  • Stock photos of “dairy foods” often tuck a few eggs in beside the milk and cheese.
  • A shared mental bucket. Both come from animals without the animal being killed, and vegans skip both, so they feel like a set.

Can You Eat Eggs If You Avoid Dairy? It Depends on Why

For most dairy-free diets, yes. The exceptions are diets where the reason you avoid dairy also rules out eggs.

Why you avoid dairy Eggs OK? Keep in mind
Lactose intolerance Yes Eggs have no lactose; the milk or cheese in the dish is the issue.
Milk allergy Yes, unless also allergic to egg They’re separate allergies, so confirm each one with testing.
Vegan No Eggs are an animal product.
Lacto-vegetarian No Allows milk but not eggs; common in many Hindu and Jain households.
Ovo-vegetarian Yes Eggs in, dairy out.
Kosher (milk and meat kept apart) Yes Eggs are pareve, the neutral category that can go with either.
Elimination diet from a doctor Ask first Some plans remove milk and egg at the same time.

Lactose Intolerance

Lactose intolerance is a digestion problem, not an allergy. Your gut makes too little lactase, the enzyme that splits milk sugar, so lactose ferments and causes gas, bloating, cramps or diarrhea. Eggs contain no lactose, so a plain egg can’t set it off.

Many people with lactose intolerance handle small amounts of lactose without trouble. If eggs seem to upset you, look at what went in with them: the milk whisked into a scramble or the cheese in an omelet is the likelier culprit.

Milk Allergy and Egg Allergy

A milk allergy is the immune system reacting to milk protein, and even a trace can cause hives, vomiting, wheezing or anaphylaxis.

Egg proteins are different, so a milk allergy on its own is no reason to avoid eggs.

Milk Allergy and Egg Allergy

The catch is that milk and egg are both among the most common food allergies in young children, and a child with one food allergy is more likely than most to have another.

If you’re managing a milk allergy, ask your allergist whether egg was tested too rather than assuming either way.

Many children outgrow egg allergy, often by their teens, which is another reason to retest instead of avoiding eggs for life.

It works in reverse as well. Someone allergic to egg can usually eat dairy but needs to check baked goods, fresh pasta and mayonnaise, all of which usually contain egg.

Where Dairy Hides in Egg Dishes

Plain eggs are dairy-free. Plenty of egg dishes aren’t, and this is where most dairy-free mistakes happen:

  • Scrambled eggs and omelets: milk or cream whisked in, butter in the pan, cheese folded through.
  • Quiche, frittata and strata: usually built on cream, milk and cheese.
  • Custard, flan, crΓ¨me brΓ»lΓ©e and eggnog: eggs thickened into milk or cream.
  • Hollandaise and bΓ©arnaise: egg yolks emulsified with butter.
  • French toast, pancakes and most baked goods: milk and butter alongside the eggs.

At home the fix is easy: cook eggs in oil, and use water or an unsweetened plant drink when a scramble wants extra liquid.

When you order out, name the ingredients instead of the category: “no milk, butter, cream or cheese” is clearer than “dairy-free,” because some kitchens count eggs as dairy while others forget the butter in the pan.

Reading Labels Without Getting Caught Out

In the US, milk and egg are both major food allergens under federal law (sesame brought the list to nine in 2023), so packaged foods must name them in the ingredients or in a “Contains” statement.

Read for each word separately: “Contains: Egg” tells you nothing about milk, and the reverse is true too. The EU, UK, Canada, Australia and New Zealand also require milk and egg to be declared, though the label format varies.

  • “Non-dairy” isn’t “dairy-free.”

FDA rules let a product labeled non-dairy contain caseinate, a milk protein, as long as the ingredient list flags it “(a milk derivative).” The FDA has said it doesn’t treat the two terms as equivalent.

  • Kosher pareve isn’t an allergy guarantee.

Pareve is a religious category, and Food Allergy Research & Education (FARE) warns that a pareve product can contain tiny amounts of milk protein. A “D” beside the kosher symbol means dairy ingredients; “DE” means dairy equipment.

  • Egg substitutes and egg replacers differ.

Carton substitutes are usually egg whites. Powdered baking “egg replacers” are usually egg-free, but check them for milk.

⚠ Cooking for Someone With a Severe Milk Allergy
Don’t rely on the store shelf, a “non-dairy” claim or a pareve symbol. Read the full ingredient list and allergen statement on every package, every time, and ask restaurants about butter in the pan as well as milk in the eggs.

If Eggs Are Replacing Dairy, Mind the Calcium

Eggs are a fine stand-in for dairy’s protein but not its calcium. A large egg has about 28 mg of calcium, against roughly 276 mg in a cup (240 ml) of whole milk, according to USDA nutrient data.

If you’ve dropped dairy, get calcium from fortified plant drinks, calcium-set tofu, canned fish with soft bones or greens such as collards and kale.

Eggs and Dairy FAQ

Is mayonnaise dairy?

No. Standard mayonnaise is egg yolk, oil and vinegar or lemon juice, with no milk. Mayo-based dressings are another matter: ranch usually contains buttermilk, and Caesar dressing usually contains Parmesan.

Are eggs gluten-free?

Yes, plain eggs contain no gluten. Gluten gets in through what’s cooked with them, such as breading, batter, toast or flour used to thicken a sauce, so ask about those when you eat out.

Does egg white protein powder contain dairy?

Pure egg-white protein doesn’t. Many protein powders blend egg with whey or casein, though, so check the ingredient list and the “Contains” statement for milk.

The Bottom Line on Eggs and Dairy

Eggs come from birds and dairy comes from milk, so a plain egg is always dairy-free.

Whether eggs belong on your plate depends on why you’re avoiding dairy: they’re fine for lactose intolerance and for most milk allergies, and they’re out for vegans and anyone allergic to egg.

Next time you order eggs, ask one question that covers most of the risk: what goes into them besides egg?


source https://harvestsavvy.com/are-eggs-dairy/

Tuesday, October 27, 2026

Easy Apricot Jam Recipe (3 Ingredients, No Added Pectin)

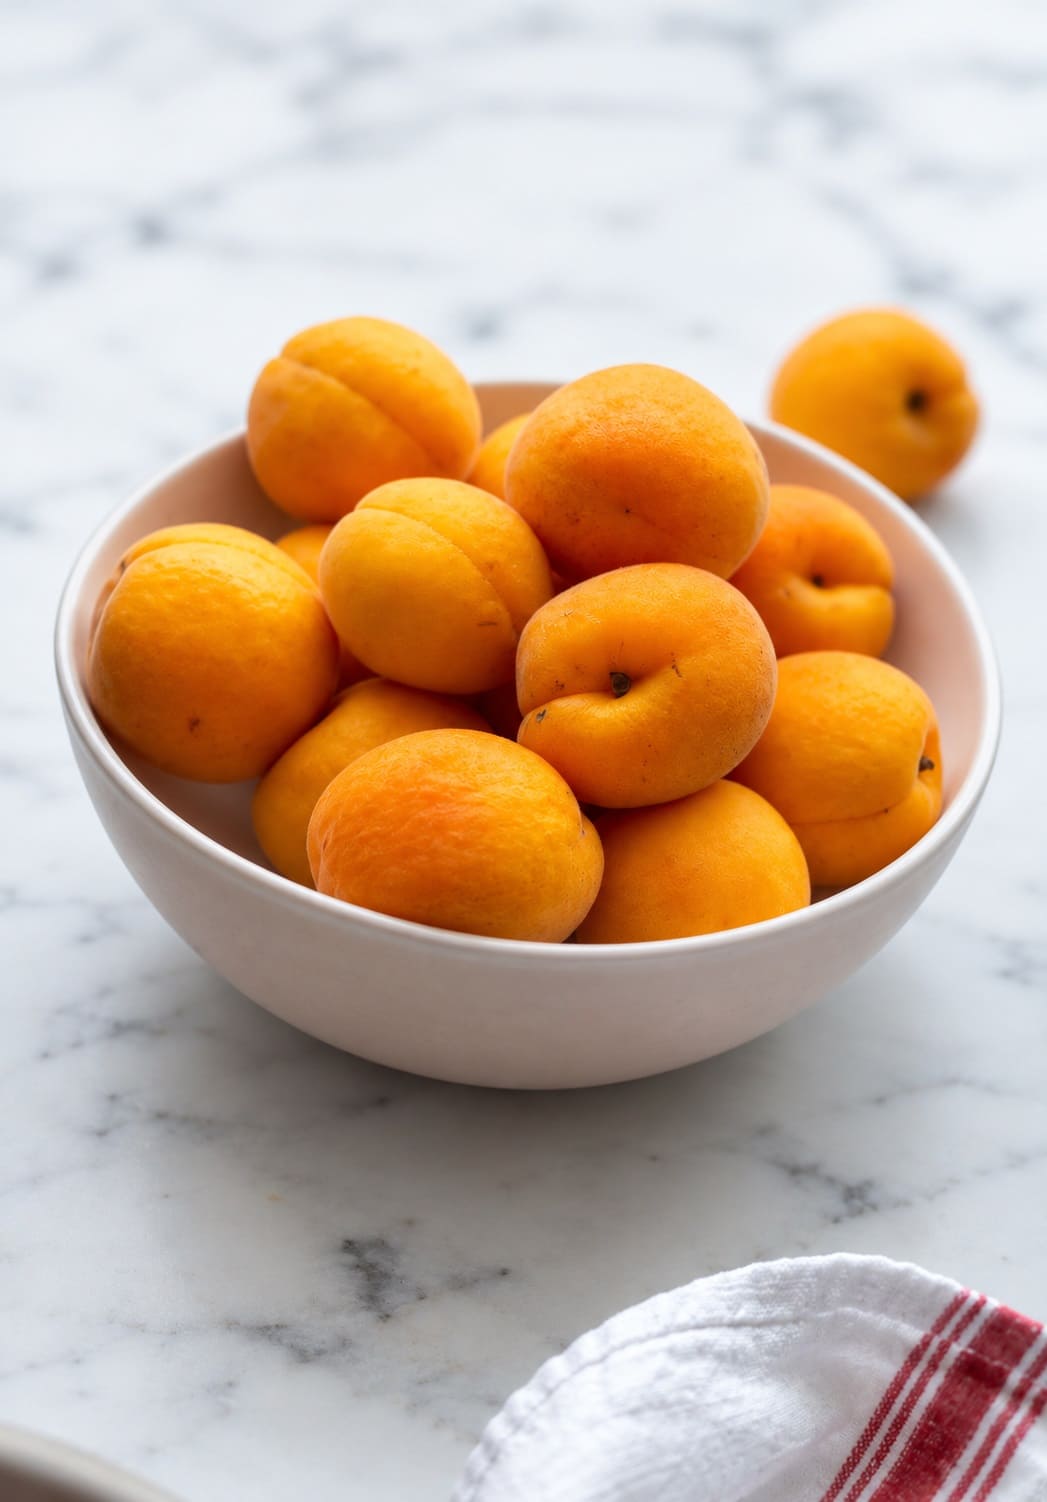
Apricot jam is one of the easiest preserves to get right. You need apricots, sugar and a squeeze of lemon, no boxed pectin, and about an hour.

Two decisions separate a bright, tart, spreadable jam from a dark, sticky one: how much sugar goes in, and the moment you take the pot off the heat.

Here you’ll get one method with two batches, a fruit-forward one for the fridge or freezer and a USDA-tested one for canning and the pantry shelf, plus how to tell when jam has set and how to rescue a batch that hasn’t.

Apricot Jam at a Glance

  • Ingredients: apricots, granulated sugar, lemon juice
  • Added pectin: none needed
  • Time: 15 minutes of prep, then 20 to 40 minutes at the stove
  • Done at: 220°F (104°C) at sea level, or when a chilled spoonful wrinkles
  • Keeps: about 3 weeks in the fridge, 6 months frozen, a year canned and sealed

Choose Apricots That Taste Like Apricots

  • Bite into one before you commit to a whole flat

Cooking concentrates the flavor already in the fruit but can’t add any, so mealy, bland apricots make mealy, bland jam. Good jam fruit smells like apricot the moment you pick it up and tastes tart as well as sweet.

  • Ripeness is a trade-off

Soft, fully ripe apricots bring the most flavor and juice, but pectin, the natural fiber that lets jam gel, weakens as the fruit softens.

Firm-ripe fruit sets more easily and tastes sharper, so a mix of mostly ripe fruit with a handful of firmer ones gives you both.

Bruises, scabby patches and bird pecks are fine once trimmed; anything moldy or smelling of alcohol goes in the compost.

  • Leave the skins on

Choosing Apricots

Apricot skin is thin enough to melt into the jam, and it adds color and a little extra pectin.

For a silky jam, run the finished batch through a food mill instead of peeling. The canning batch is the one exception, as you’ll see below.

  • Pits and trimmings account for roughly a tenth of the weight, so weigh your fruit after pitting.

Out of season, frozen apricots work well straight from the freezer with a few extra minutes of cooking. Canned apricots don’t: they’re already cooked, usually sit in syrup, and make a flat, oddly sweet jam.

How Much Sugar? Pick Your Version

Apricot jam recipes range from equal weights of fruit and sugar to a few spoonfuls of honey. Some of that is taste, and some is measuring.

Sugar is denser than chopped fruit, so a recipe using 3 cups of apricots to 1 cup of sugar works out close to two to one by weight. Compare recipes by weight and they look far more alike.

More sugar gives a firmer set, holds the orange color longer and keeps longer. Less sugar tastes tarter and fresher, sets softer, darkens sooner and spoils faster once opened.

Cut it far enough and the jam won’t gel on its own at all; that’s where a pectin made for low-sugar jam comes in.

Don’t trim the lemon juice either. Pectin needs acid to gel, and in the pantry batch it’s part of the tested balance that keeps the jam safe on the shelf.

That’s why this recipe comes in two batches that share one method:

Batch Fruit to sugar Use it for
Everyday Roughly two to one by weight Fridge or freezer jam with a soft set and lots of apricot flavor
Pantry Roughly 1¼ to one by weight (USDA-tested) Water-bath canning and storing jars on the shelf

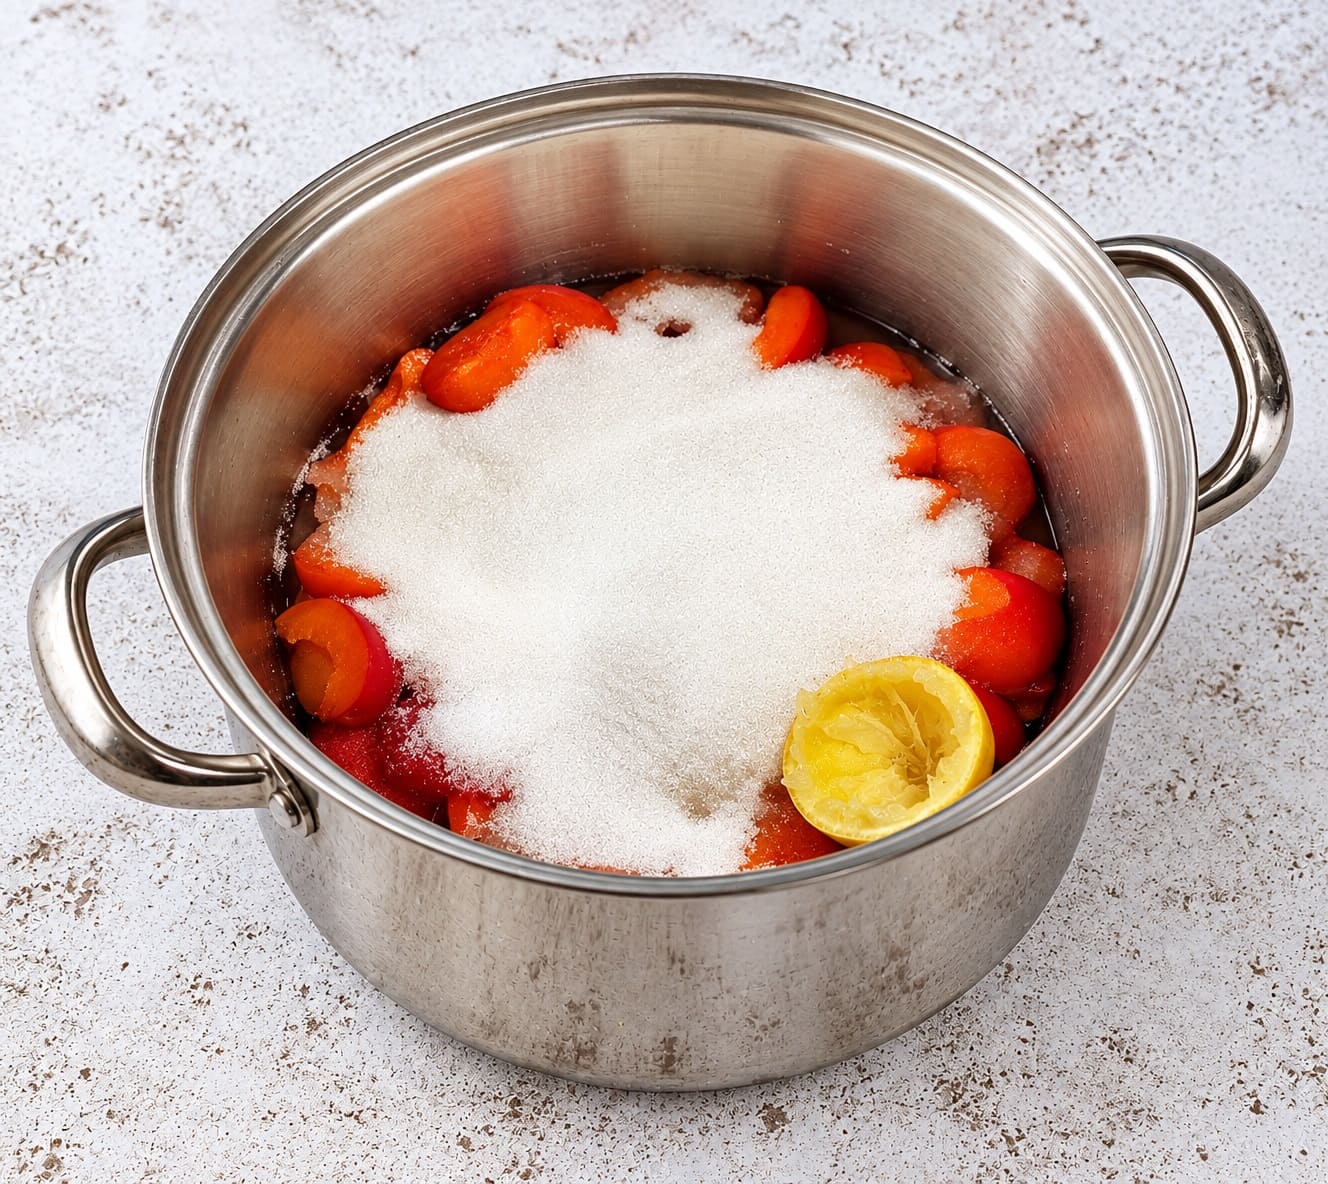
Ingredients for making apricot jam

If your jars are going into a cupboard, use the pantry batch exactly as written. Its sugar, lemon juice and processing time were tested together by the USDA, and the National Center for Home Food Preservation (NCHFP) publishes it.

Lower-sugar jam is perfectly good, but it belongs in the fridge or freezer.

πŸ‘‰ Learn How to Can Vegetables: Complete Beginner’s Guide to Safe Home Canning

How to Make Apricot Jam

Equipment

  1. a wide, heavy pot that holds at least 5 quarts (4.7 liters), such as an enameled Dutch oven, because jam foams up as it boils (a deep 12-inch/30 cm skillet works for the everyday batch)
  2. a wooden spoon or heatproof spatula
  3. a potato masher
  4. two or three small plates
  5. clean jars with lids
  6. and a candy thermometer if you have one

Skip bare aluminum, which reacts with the fruit’s acid.

Everyday batch (fridge or freezer)

  • 2 pounds (900 g) apricots, weighed after pitting, chopped (about 5½ cups)
  • 2 cups (400 g) granulated sugar
  • 2 tablespoons lemon juice
  • ½ teaspoon butter, optional, to calm the foam
  • Makes about three 8-ounce (250 ml) jars

Pantry batch (for water-bath canning)

  • 4 to 4½ cups crushed apricots, from roughly 2½ pounds (1.1 kg) whole fruit
  • 4 cups (800 g) granulated sugar
  • 2 tablespoons bottled lemon juice
  • Makes 5 to 6 half-pint (8-ounce) jars

The USDA method for the pantry batch uses peeled, crushed fruit and goes straight to the boil, so follow it that way and skip the rest in step 3.

Bottled lemon juice is the better choice for canning because its acidity is standardized, while a fresh lemon’s varies.

Method

  1. Chill two or three small plates in the freezer; you’ll use them to check the set.

2. Halve the apricots, pull out the pits and trim any damaged spots. Chop the everyday batch into rough ½-inch (1 cm) pieces.

cutting apricots

For the pantry batch, peel the fruit (30 to 60 seconds in boiling water loosens the skins), crush it with a potato masher and measure.

3. For the everyday batch, stir the fruit with the sugar and lemon juice, cover the bowl and chill it for at least 4 hours, or overnight.

Stir the apricots with sugar and lemon juice

The sugar draws out the juice, so the jam needs less boiling and stays brighter. Even 30 minutes on the counter helps, but longer than that at room temperature invites fermenting.

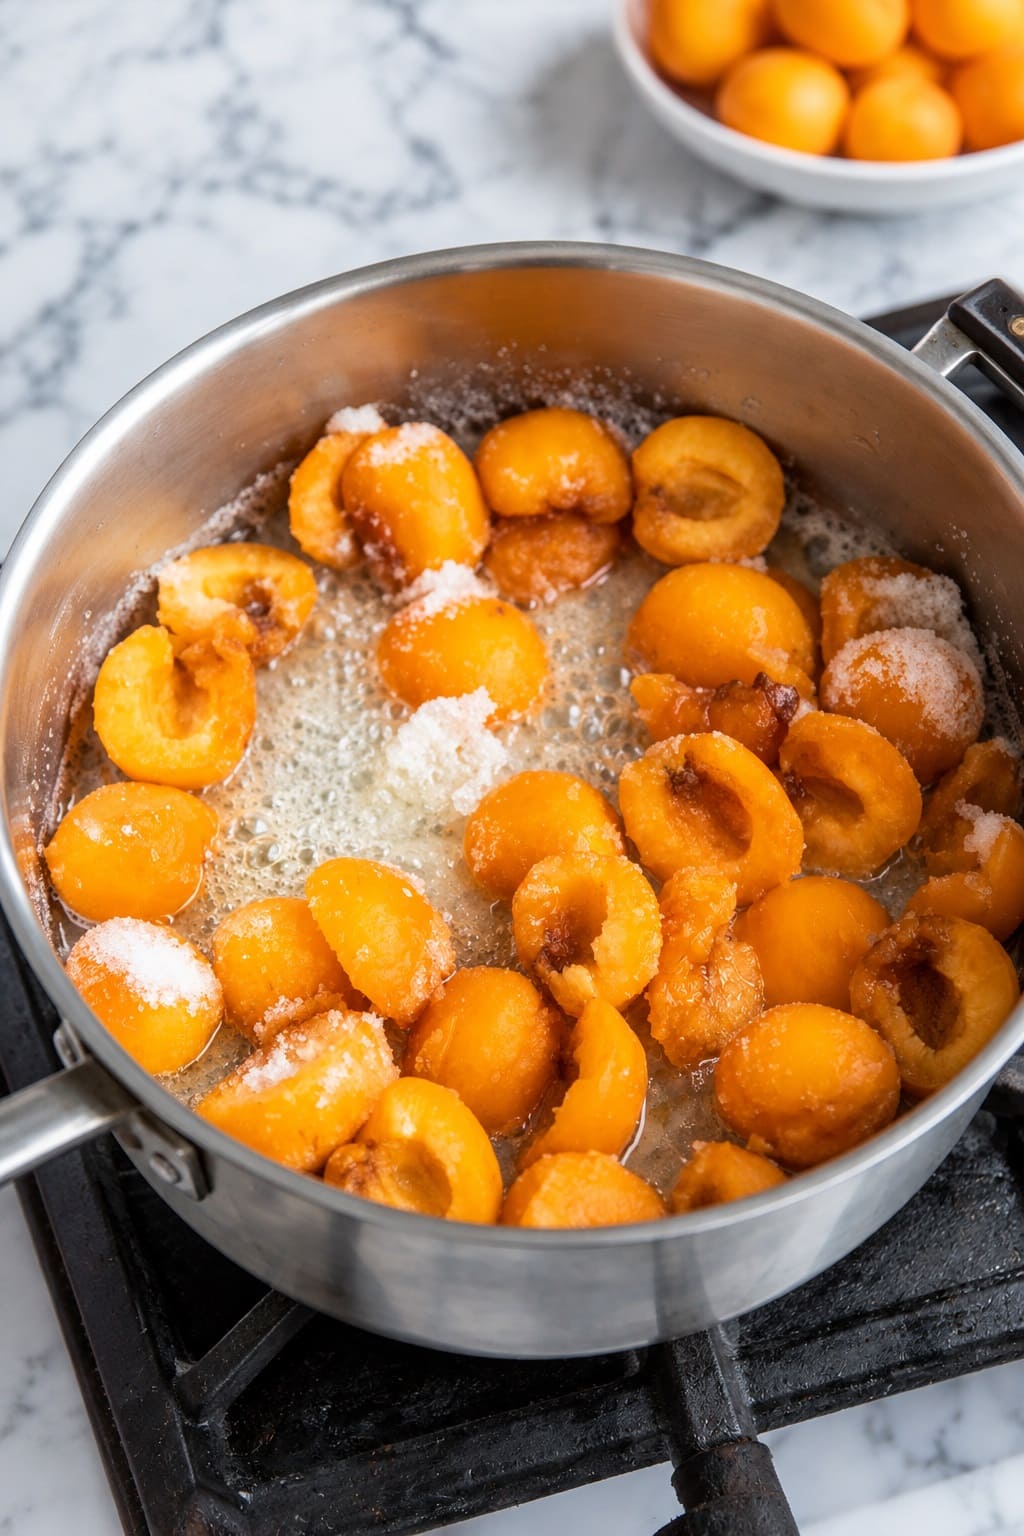
4. Scrape everything into the wide pan over medium heat. Stir until you no longer feel sugar grinding against the bottom, adding the butter now if you’re using it.

Stir then cook ingredients slowly over medium heat

Don’t let it boil before the sugar has dissolved, or you risk gritty crystals later.

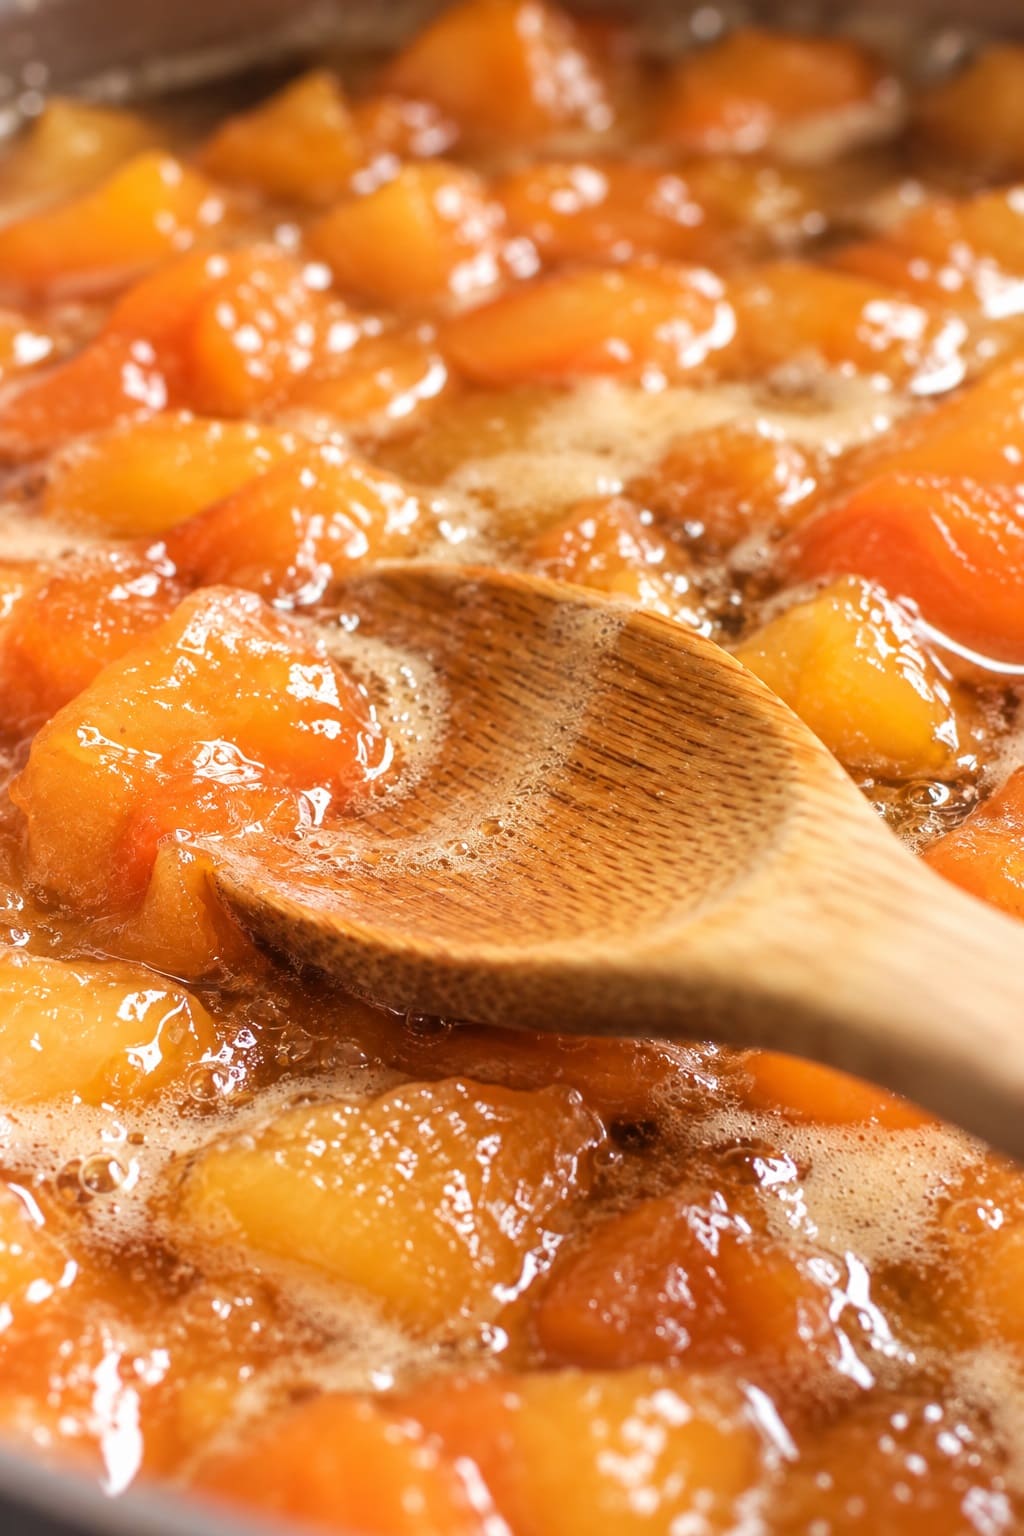
5. Turn the heat up to a full boil that keeps rolling while you stir. Stir often at first and constantly once it thickens, scraping the corners where the base meets the sides.

bring the mixture to a boil and stir well

Skim foam as it gathers, and mash the fruit mid-boil if you like a smoother jam.

6. Start testing after about 10 minutes of hard boiling. In a wide pan, the everyday batch often sets within 15 to 25 minutes; a deeper pot or very juicy fruit can take 40 or more.

Start testing after about 10 minutes of hard boiling

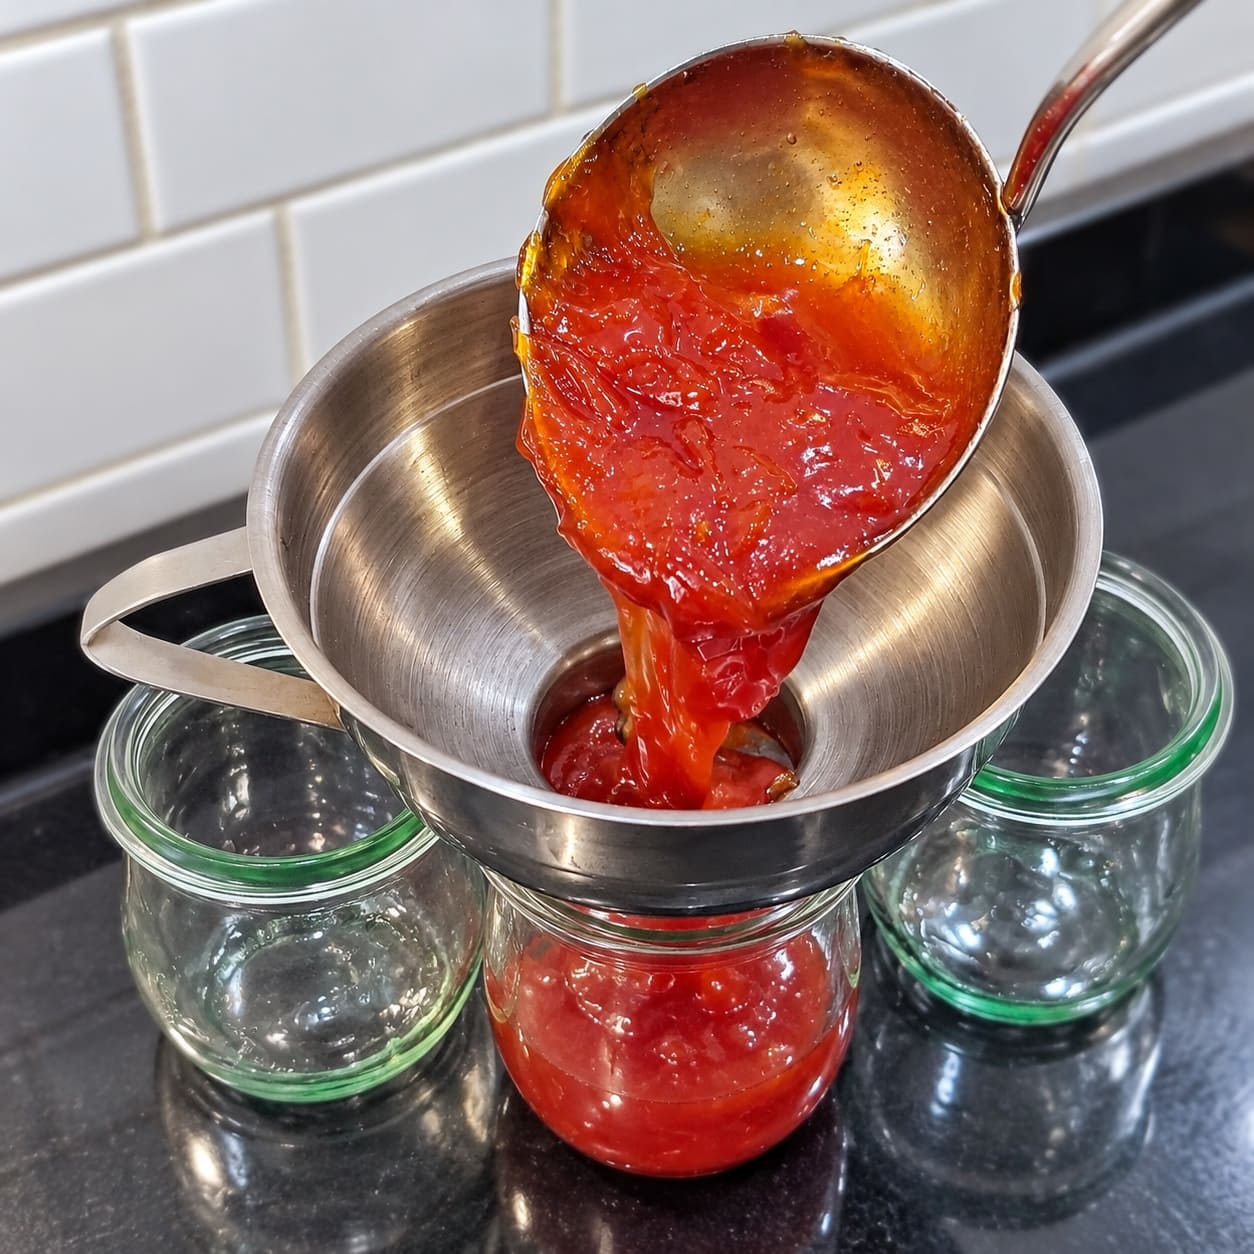
7. Once it passes, take the pan off the heat and let it sit for 5 minutes. Skim any last foam and stir once, so the fruit spreads through the jam instead of rising to the top of each jar. Fill your jars, then refrigerate, freeze or can.

pour the apricot jam into a jar

How to Tell When Apricot Jam Is Set

Stop too soon and you have apricot syrup. Keep going too long and the jam turns brown, gummy and caramel-flavored. Use at least two of these checks together.

The cold plate test

The cold plate test

Pull the pan off the burner while you test, because jam keeps cooking on the heat. Drop half a teaspoon onto a frozen plate and put it back in the freezer for 60 seconds, then push the edge with your finger.

A wrinkled surface and a clear path through the jam mean it’s ready. If the jam runs back together, boil for another 2 to 3 minutes and try a fresh plate.

The thermometer

Jam gels at 220°F (104°C) at sea level, which is 8°F (about 4°C) above the boiling point of water.

Water boils cooler at altitude, so the target drops: the NCHFP lists 218°F (103°C) at 1,000 feet, 216°F (102°C) at 2,000 feet, 212°F (100°C) at 4,000 feet and 209°F (98°C) at 6,000 feet.

Not sure of your elevation? Bring plain water to a boil, read the thermometer and add 8°F. In a shallow pan the tip can touch the metal and read high, which is one more reason to confirm with a plate.

What you see

Near the set, the small, frantic bubbles turn into larger, slower ones that pop with a lazy plop.

Jam slides off the side of a spoon in a sheet rather than thin drips, and a spatula dragged across the bottom leaves a track that holds for a moment.

Whichever test you use, expect the jam to look looser in the pan than you want it in the jar. It firms up as it cools, and it goes on setting for another day or two.

If it already looks like finished jam while it’s still boiling, it will be stiff by morning.

How to Store Homemade Apricot Jam

In the Fridge or Freezer

Cool the jam briefly, spoon it into clean jars, cap them and refrigerate once they’re at room temperature.

The everyday batch keeps for about 3 weeks, and a full-sugar jam for closer to a month. Use a clean spoon every time; crumbs and butter carry in the mold that the sugar is holding back.

For the freezer, choose straight-sided or wide-mouth jars, or plastic tubs, with ½ inch (1.3 cm) of room at the top for expansion.

Chill them in the fridge first so the glass is less likely to crack. Frozen jam tastes its best for about 6 months; thaw it overnight in the fridge.

Water-Bath Canning for the Pantry

Use the pantry batch, new lids and canning jars, and follow the NCHFP steps for jams without added pectin:

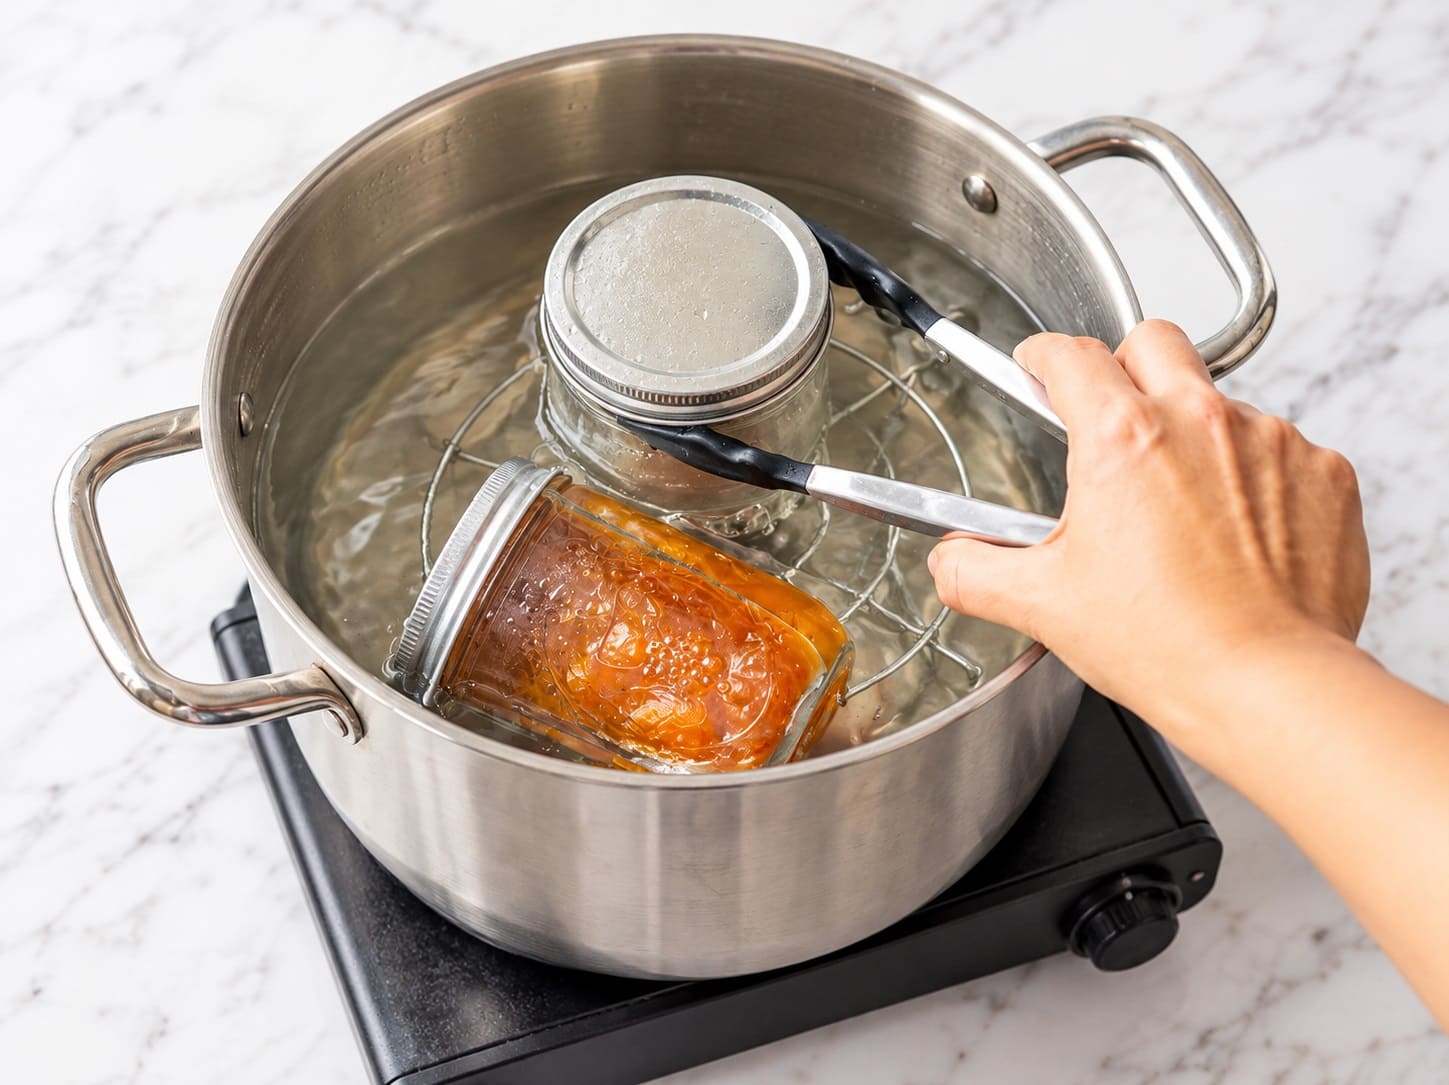
  1. Sterilize the jars, since this jam is processed for less than 10 minutes. Stand them on the rack in your canner, fill the jars and canner with hot water to 1 inch (2.5 cm) above the tops, and boil for 10 minutes, adding 1 minute for every 1,000 feet above 1,000 feet. Keep them hot until filling.
  2. Prepare the lids following the manufacturer’s directions.
  3. Fill the hot jars with hot jam, leaving ¼ inch (6 mm) of headspace. Clean the rims with a damp cloth, center the lids and turn the bands until fingertip-tight.
  4. Lower the jars into boiling water that covers them by at least 1 inch. Once it returns to a full boil, process half-pints or pints for 5 minutes at up to 1,000 feet, 10 minutes from 1,001 to 6,000 feet, and 15 minutes above 6,000 feet.

Canning apricot jam using the water-bath method

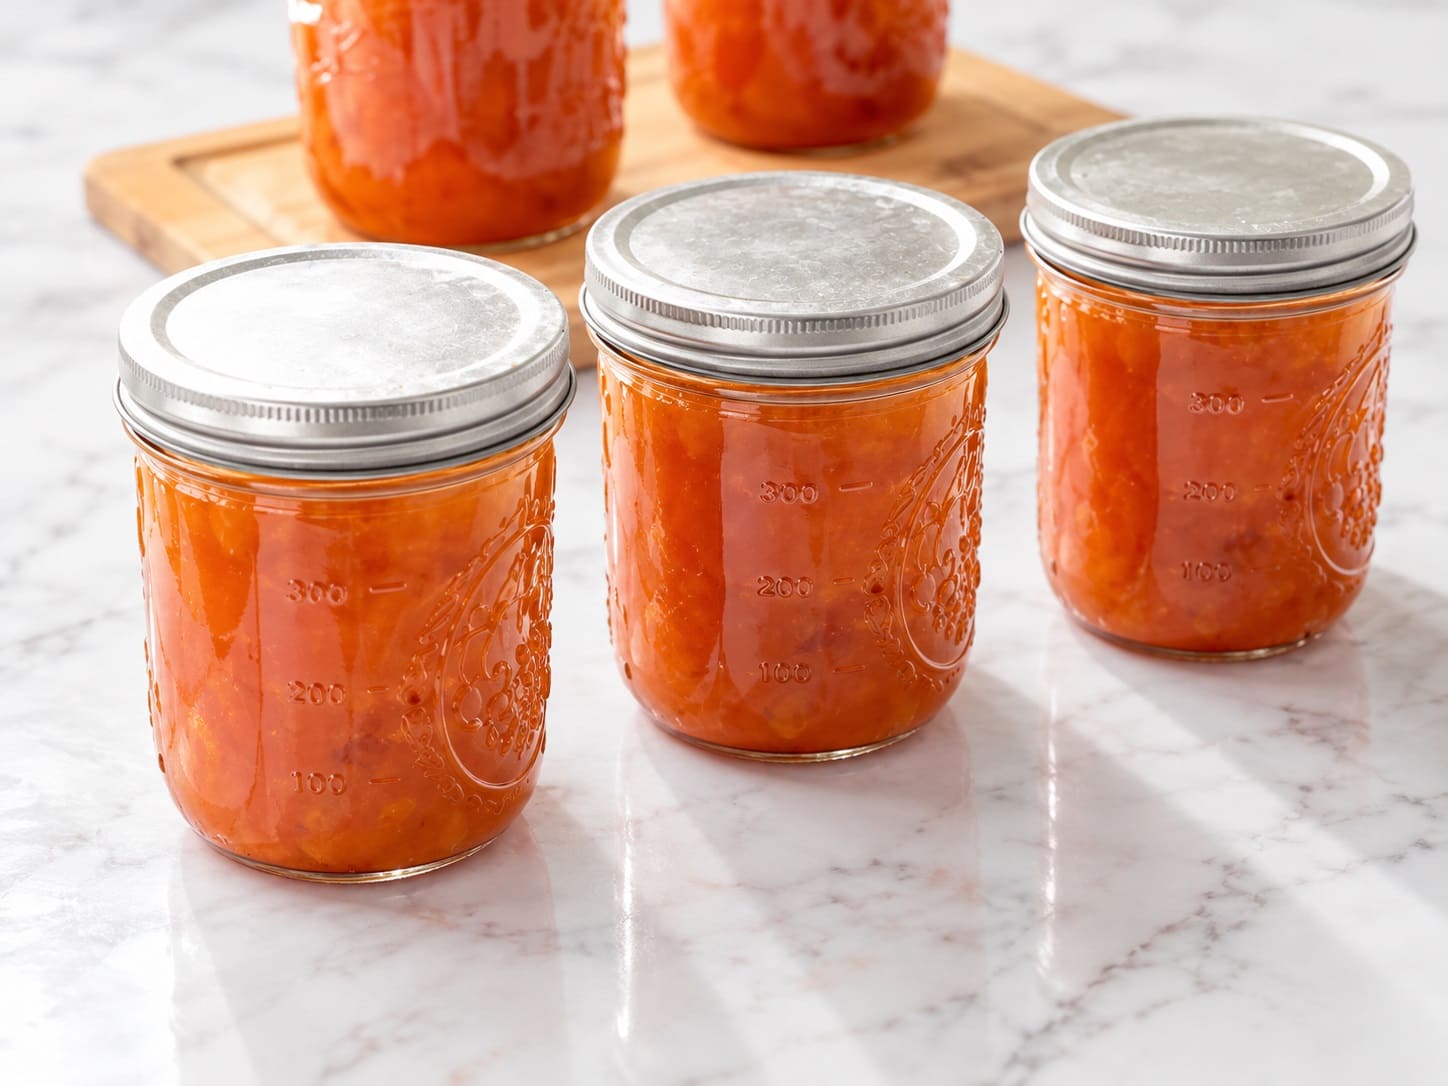
  1. Turn off the heat, wait 5 minutes, then lift the jars onto a towel and leave them untouched for 12 to 24 hours. Press each lid’s center: if it doesn’t flex, the jar has sealed. Refrigerate any jar whose lid flexes and use it soon.

sealed jars of apricot jam

Sealed jars hold their best quality for around a year stored somewhere cool and dark, and once opened, a jar belongs in the fridge like any full-sugar jam.

Look each one over before opening. A bulging or loose lid, rising bubbles, mold or a fermented smell means the whole jar goes in the trash; scraping off mold doesn’t help, because the growth runs deeper than you can see.

Skip these shortcuts: sealing hot jam in jars with no water bath (often with the jars turned upside down), or processing filled jars in the oven.

They’re traditional across much of the UK, Europe and Australia, but the NCHFP advises against them because they don’t prevent all spoilage. If you’d rather not use a water bath, store the jam cold, in the fridge or freezer.

πŸ‘‰ Learn How to Make Crispy Dill Pickles (Refrigerator & Canning Methods)

Fixing Runny, Stiff or Dark Jam

  • Still runny. Wait a full 48 hours first. If it’s still loose, bring it back to a hard boil for a few minutes and retest on a cold plate; canned jam that you reboil needs clean, hot jars, new lids and the full processing time again. Or enjoy it as a sauce over pancakes.
  • Too stiff to spread. Warm it gently with a splash of water or lemon juice, a spoonful at a time, until it loosens. Keep the result in the fridge.
  • Dark and caramel-tasting. It boiled too long, usually because the jam was too deep for the width of the pan. It’s still good and makes a fine glaze for ham or chicken. Next time, go wider, smaller and stop earlier.
  • The moment you smell it, pour the jam into a clean pan without scraping the bottom. If the burned taste has already spread, there’s no saving it.
  • Gritty sugar crystals. The sugar wasn’t fully dissolved before the boil, or crystals clinging to the pan fell back in. Dissolve it completely and brush the pan sides with a wet pastry brush.

Simple Ways to Flavor Apricot Jam

Plain apricot jam needs nothing, but a small addition can be lovely. Use modest amounts and remove anything solid before jarring.

  • Vanilla: ½ teaspoon of extract once the pan is off the heat, or a split vanilla bean cooked in the pot and removed before jarring.
  • Almond: ¼ teaspoon of almond extract off the heat. Apricots and almonds are close botanical relatives, so it tastes natural rather than added.
  • Earl Grey: one tea bag in the pot for the last 10 minutes of boiling.
  • Rosemary or thyme: one sprig simmered with the fruit. Very good with cheese.
  • Heat: a pinch of dried chili flakes or ground ginger. For canned batches, stick to small amounts of dried spices; fresh chili or ginger in any quantity adds low-acid material and belongs in a fridge batch.

enjoy apricot jam

A warning about the kernels. Some traditional recipes crack the pits and add the almond-like kernel inside. Apricot kernels contain amygdalin, which the body breaks down into cyanide.

In 2016 the European Food Safety Authority (EFSA) concluded that an adult could exceed the safe single dose by eating more than about three small raw kernels, and a toddler with less than one.

There’s no tested guidance on how much passes from kernels into a pot of jam, so I’d leave them out and reach for almond extract.

Apricot Jam Questions

Can I make apricot jam with dried apricots?

Yes, and it’s a good option out of season. Soak the dried fruit overnight in boiling water, blend it with the soaking liquid, then cook it with lemon juice and roughly half its dry weight in sugar until it passes the plate test.

Bright orange sulfured apricots keep their color, while unsulfured brown ones give a darker, more caramel-flavored jam. There’s no tested canning recipe for it, so keep it in the fridge or freezer.

Can I sweeten apricot jam with honey or stevia?

Honey can stand in for part of the sugar in the everyday batch and adds a floral note, though the set will be softer.

Stevia, monk fruit and similar sweeteners do none of sugar’s gelling work. For a sugar-free jam, use a pectin made for low- or no-sugar recipes and follow its package directions.

Can I double the recipe?

Make two batches instead. A deeper layer of jam takes far longer to boil down, and by the time it sets it has usually darkened and lost its fresh taste. With a big harvest, freeze some fruit and cook in rounds.

Does this work with peaches or plums?

Plums and nectarines behave much like apricots in the everyday batch. Peaches need peeling because their skins stay tough, and they’re juicier, so expect a longer boil and a softer set.

For canning, use a recipe tested for that fruit; the USDA’s peach proportions differ from its apricot ones.

Make Your First Batch

If this is your first jam, start with the everyday batch: it teaches you what the set looks and feels like without the canning steps on top. After that, the pantry batch is only a few extra steps.

Apricot season is short wherever it grows, so buy a little more fruit than you think you need and freeze the extra for a second round.


source https://harvestsavvy.com/apricot-jam-recipe/

Sunday, September 13, 2026

Do Possums Eat Chickens? What Flock Owners Should Know

You walk out to the coop at first light, coffee in hand, and something feels off. A hen is missing, or there’s a cracked, empty shell in the nesting box, or one of your birds is pacing and rattled.

You start running through the list of usual suspects, and sooner or later somebody says the word: possum.

Here’s the honest answer, right up front: yes, possums (properly called opossums) will eat chickens — but they are rarely the cold-blooded flock-killers their reputation suggests. The real story is far more useful than the panic.

By the end of this post you’ll know exactly when a possum is a genuine threat, how to read the evidence it leaves behind, and the specific coop upgrades that keep it out for good — without declaring war on an animal that’s mostly just hungry and opportunistic.

The 30-Second Version

  • Possums eat chickens, but they’re opportunists, not hunters — eggs, chicks, and vulnerable birds are the real targets.
  • A possum usually kills a single bird per visit and eats it on the spot; that alone helps rule out a raccoon, fox, or weasel.
  • Almost every “possum problem” is really a coop-security problem you can fix in a weekend.
  • Possums are not the tick-eating heroes the internet claims — but they’re still low on your list of predator worries.

The Short Answer: Yes, But Not the Way You Fear

Possums are opportunistic scavengers first and foremost. Left to their own devices, they’d rather clean up carrion, raid a compost pile, or crunch through a bowl of cat food than pick a fight with a bird that can peck back.

When they do turn up around a coop, they’re almost always following an easy meal: spilled feed, unguarded eggs, or chicks small enough to swallow whole.

That’s why the birds most at risk aren’t your big, healthy hens. They’re the eggs, the chicks, the little bantams, and any bird that’s already sick, injured, or trapped against the fencing.

A large, determined possum can kill a full-grown standard hen, but it’s the exception, not the rule — and it usually happens when the animal is desperate.

On the ladder of backyard predators, possums sit well below raccoons, foxes, and weasels in both cunning and body count.

Meet the Animal Behind the Reputation

A little biology explains almost everything about how possums behave. The one you’ll meet in North America is the Virginia opossum — the continent’s only marsupial, which means the females carry their young in a belly pouch.

A grown adult is roughly the size of a house cat, with a pointed pink snout, a naked tail, and a mouthful of about 50 small, sharp teeth. That last detail looks alarming and does most of the work of their scary reputation.

Those teeth aside, this is a slow, timid generalist, not a wolf. That bare tail is prehensile and the hind feet have opposable, thumb-like toes, which makes possums genuinely good climbers — no fence is tall enough to stop one on its own.

They’re nocturnal, mostly solitary, and so conflict-averse that their signature defense is to faint: a stressed possum can lock up and “play dead” for anywhere from one to four hours, sometimes oozing a foul smell for good measure.

Their diet is a junk drawer: insects, slugs and snails, mice and rats, snakes (they shrug off snake venom), fallen fruit, garbage, and yes, chicken feed and eggs. Worth filing away for later — they are pushovers for cat food, which makes them easy to trap.

When a Possum Actually Becomes Dangerous

If possums are usually harmless, why do so many keepers have horror stories? Because opportunity plus hunger flips the switch.

The risk climbs sharply when one or more of these line up:

  • Easy access: gaps around doors, loose or torn mesh, or a pop door left open overnight.
  • An easy target: chicks, bantams, a sick or injured bird, or a hen roosting right against the run wire — a possum can reach through mesh and injure a bird it can’t fully drag out.
  • Winter and early spring, when natural food is scarce and a warm coop full of birds looks like a buffet.
  • A mother feeding a litter. Possums often have young from late winter into early summer, and a nursing mom takes bigger risks.
  • Crowded possum populations competing for lean pickings nearby.

Notice that most of those are about circumstance, not some bloodthirsty streak. Take away the opportunity and the odds of a bad night drop through the floor.

How to Tell If It Was Really a Possum

Predator identification saves you from fixing the wrong problem. Possums leave a fairly distinctive calling card, so before you blame one, check the scene against this list:

  • A single bird killed and left right where it died, rather than carried off.
  • Bites around the neck, with the crop, breast, and belly eaten but much of the carcass left behind — they seldom finish a whole bird.
  • Eggs gone, with just bits of shell scattered in or near the nest box.
  • Missing chicks, sometimes with only a few damp feathers left behind.
  • Ransacked feed, a tipped compost pile, or emptied bird feeders nearby.
  • Tracks like a tiny human handprint — five toes, with a thumb-like toe set off at an angle on the hind foot.
  • Droppings that look a lot like dog poop, roughly 3/4 inch across with a tapered end. Handle any scat with gloves.

If the evidence is muddy, play detective for a few nights. Dust a patch of fine flour or sand across the likely entry point and check for prints at dawn.

Better yet, aim an inexpensive trail camera at the coop door and run gate — not the feeder — for three to seven nights to catch both the culprit and the route it takes in.

Timing helps too: overnight raids point to possums, raccoons, skunks, or owls, while daytime losses lean toward hawks, dogs, or foxes.

When you’re still not sure, this quick comparison covers the usual overnight suspects:

Predator Signs They Leave Behind Usual Attack Pattern
Possum One bird killed and left on-site; crop, breast, and belly eaten; handprint-like tracks; eggs gone with only shell bits left Opportunistic; a single bird per visit; slow and a bit clumsy
Raccoon Birds pulled partway through the wire; missing heads or crops; latches popped open; eggs taken Dexterous and bold; may kill several; picks simple locks and reaches through mesh
Fox Whole bird carried off; a scatter of feathers and little else at the scene Fast grab-and-go, often at dawn or dusk; removes the bird entirely
Skunk Eggs eaten in place; a killed bird with the neck or head targeted; lingering musky odor Usually after eggs and chicks; may take a bird or two
Weasel or mink Many birds killed in one night; small neck punctures; bodies piled or stashed Surplus killer; slips through tiny gaps; kills far more than it eats
Hawk or owl A ring of plucked feathers; a bird struck in the open run; owls hit after dark Aerial; hawks by day and owls by night; usually one bird at a time

Ask a few longtime keepers and you’ll hear a version of the same night: a couple of hens acting spooked, an egg reduced to a rinse of shell, and a slow gray visitor blinking back at the flashlight from the corner of the coop — looking far more startled than menacing.

More often than not, it shuffles off the moment it finds the gap it came in through. The lesson is almost always the same: the possum didn’t outsmart the coop, it simply found the one spot that never got finished.

Predator-Proofing That Actually Works

Here’s the reassuring truth underneath all of this: a possum problem is almost always a construction problem, not a wildlife problem. Fix the coop and the animal loses interest. Tackle it in three layers.

Harden the Coop and Run

Start with the physical barrier, working through these steps in order:

  1. Lock your birds in at dusk — every single night. A covered run is not a substitute for closing the coop’s pop door. The classic mistake is skipping that door because “the run is secure.” Success looks like a nightly headcount by flashlight, with everyone accounted for on the roost.
  2. Trade chicken wire for hardware cloth. Cover every vent, window, and gap with 1/2-inch (or 1/4-inch) hardware cloth, fastened with screws and washers rather than staples. That flimsy hexagonal netting is built to pen birds in; a motivated predator pushes right through it.
  3. Stop the digging with a buried apron. Bend hardware cloth into an L-shape and sink it about 12 inches down and out along the base of the run so nothing can tunnel underneath.
  4. Put a roof on the run. A solid cover or a securely attached wire top defeats a climber — and a possum can scale just about any open fence — while also shutting out hawks and owls.
  5. Upgrade your latches. Possums lack a raccoon’s lock-picking hands, but a latch that jiggles loose is still an open door. Use a two-step latch or add a spring clip. When you can walk the whole coop and find no gap wider than about 1/2 inch, no loose mesh, and no latch you can pop one-handed, this layer is done.

Remove the Invitation

Even a fortress gets tested if it smells like an all-you-can-eat buffet. Cut the attractants:

  • Store feed in a sealed, rodent-proof bin, and never leave feeders out overnight.
  • Collect eggs often, and don’t let them sit in the nest boxes after dark.
  • Sweep up spilled grain, secure the trash and compost, and pick up fallen fruit.
  • Take up pet food bowls at night, and keep wild-bird feeders well away from the run.

A coop with no free meal on offer rarely earns a second visit.

Add Deterrents — With Realistic Expectations

These help around the edges, as long as you don’t lean on them instead of a tight coop:

  • Motion-activated lights startle night visitors and, just as usefully, help you spot activity; plenty of keepers swear by cheap solar floodlights, and some string up ordinary holiday lights.
  • A radio playing low during the day can suggest people are nearby.
  • Electric fencing, or a single hot wire around the top of the run, discourages climbers.
  • Guardians help but aren’t magic. A trained livestock-guardian dog is a real job, not a default setting, and an ordinary pet dog may chase or even harm your birds. A rooster will raise the alarm and stand his ground, but he’s a warning system, not armor. Your coop is the only guard that never sleeps.
  • Scent repellents — ammonia-soaked rags in ventilated cans, garlic sprays — get mentioned constantly. Treat them as minor add-ons, keep the fumes away from your birds, and don’t expect them to replace a solid barrier.

You Found a Possum in the Coop — Now What?

First, don’t panic, and don’t corner it. The animal is far more frightened than you are, and a cornered possum may hiss, drool, bare those teeth, or simply keel over and “play dead.” It’s almost all bluff and reflex.

Crack the coop open, give the possum a clear exit, and use a long pole or a broom to steer it gently toward the door. Offered a way out, it will usually take it.

If you’ve got a repeat visitor, a live box trap baited with cat food (they can’t resist it) or a bit of fruit works reliably.

Before you decide its fate, know the rules. Relocating wildlife is illegal or restricted in many states, and killing a possum usually isn’t necessary.

For a persistent problem, the safest move is a call to animal control or a licensed wildlife-removal professional. And whatever you do, wear gloves when handling a trap, a carcass, or droppings.

If a Bird Survives the Attack

Sometimes you’ll find a bird that’s hurt but still hanging on. Resist the urge to play doctor — puncture wounds and injuries around the vent can turn serious fast, and a frightened, bleeding hen needs calm more than experiments.

Move her somewhere quiet, dim, and warm, away from the rest of the flock, keep handling to a minimum, and lock everyone else down so you’re not managing a second incident the same night.

Then get a professional on the phone. Call an avian or poultry vet promptly if you see bleeding that won’t stop with gentle pressure, deep punctures or torn skin, wounds near the vent, or signs of shock — a pale comb, labored breathing, or a bird that can’t stay on its feet.

When you can’t tell how serious a wound is, make the call anyway — describing it to someone trained beats guessing, and it beats losing the whole night to worry.

The Tick Myth Worth Retiring

You’ve almost certainly read that a single opossum hoovers up around 5,000 ticks a week and clears out up to 90 percent of the ticks in its territory — so you should welcome one near the coop as free Lyme-disease control. It’s a charming story, and it’s almost certainly wrong.

That number traces back to a 2009 study of captive opossums penned with loose ticks — an artificial setup that all but guaranteed the animals would eat some.

More recent work knocked it flat: a 2021 University of Illinois analysis examined the stomach contents of 32 wild opossums and found not a single tick, and a review of 23 separate diet studies turned up no evidence that ticks are a meaningful part of a wild opossum’s menu.

None of this makes possums villains. They still tidy up carrion, snails, and the odd rodent.

It just means you shouldn’t keep one around your flock as a pest-control strategy — the trade-off in risk to your eggs, your chicks, and (as you’ll see next) your other animals isn’t worth an ecological perk that mostly doesn’t exist.

The Health Risks Most Articles Skip

Even a possum that never lays a tooth on a bird can cause trouble, because the bigger danger often hides in its droppings.

This is the part most coop guides gloss over:

  • Horses: opossums are the main carrier of the parasite behind EPM (equine protozoal myeloencephalitis), a serious neurological disease. Horses pick it up from hay, grain, or water fouled by possum droppings — so keep possums out of feed rooms and hay storage.
  • Dogs: possums can spread leptospirosis, a bacterial infection that can turn severe. If you live rurally, ask your vet whether the lepto vaccine makes sense for your dogs.
  • People: their scat can carry salmonella and other bugs. Wear gloves for cleanup, keep kids’ hands out of the coop, and wash up with soap and water after handling birds, eggs, or anything in their environment — a habit the CDC recommends for every poultry keeper.
  • Rabies is possible but uncommon in possums; even so, never handle one with bare hands.

Frequently Asked Questions

  • I saw a possum in broad daylight — does that mean it’s rabid?

Almost certainly not. Possums are mainly nocturnal, but they’ll venture out by day when food is scarce — especially in winter or when a mother is feeding young.

Daytime activity on its own isn’t a reliable sign of rabies, which is uncommon in possums to begin with. Give it room, don’t corner it, and it’ll usually wander off on its own.

  • If a possum visited once, will it come back?

If the weakness that let it in is still there, count on it. Possums recheck reliable food sources, so the real fix is closing the gap and clearing the attractants — not just shooing away tonight’s visitor.

  • How do I know it was a possum and not a raccoon?

Look at the pattern. A possum usually kills one bird, eats part of it on the spot, and leaves handprint-like tracks.

Raccoons often hit several birds, reach through wire to pull off heads or feet, and are skilled at opening simple latches. When in doubt, a trail camera settles the argument overnight.

  • Are possums dangerous to my dog or my family?

Directly, not much — a possum would rather flee or “play dead” than fight, and it rarely bites unless it’s cornered or handled.

The real danger is indirect: it’s what their droppings can carry, not their teeth. Keep it simple — don’t corner one, never handle it bare-handed, and keep your dog from mouthing it or its scat.

  • Do ammonia, mothballs, or predator-urine granules actually keep possums away?

Not reliably. Scent repellents wash away, fade fast, and are easy for a hungry animal to ignore, and some — like mothballs — aren’t safe around livestock. Treat them as minor add-ons; a sealed coop and no free food do far more than any smell ever will.

The Bottom Line

So, do possums eat chickens? Yes — but they’re opportunists chasing an easy meal, not relentless hunters, and that single fact changes how you protect your flock.

Keep these in your back pocket:

  • Possums mostly want eggs, chicks, feed, and vulnerable birds — typically a single bird per visit, eaten on the spot.
  • The evidence they leave — one kill left behind, handprint tracks, scattered shell — usually tells you who’s responsible.
  • A tight coop, hardware cloth, a covered run, and a locked pop door solve the overwhelming majority of cases.
  • Skip the “possums eat all the ticks” reasoning, and stay mindful of the real disease risks in their droppings.

Here’s the encouraging part: the same weekend of upgrades that stops possums also foils raccoons, skunks, and hawks.

So grab a flashlight tonight, take a slow walk around your coop, and find the one gap you’ve been meaning to fix. Your flock — and your future self — will sleep easier for it.


source https://harvestsavvy.com/do-possums-eat-chickens/

Beekeeping for Beginners: How to Start Your First Hive

When a first colony dies, it’s rarely because the beekeeper got stung or bought the wrong hive. It usually dies over its first winter, from...