Wednesday, July 2, 2025

How to Grow a Thriving Backyard Orchard (Even in Small Spaces)

Picture this: You step outside your back door on a warm July morning, coffee in hand, and pluck a perfectly ripe peach from a tree that’s barely taller than you are.

A few steps away, your dwarf apple trees are heavy with fruit that won’t be ready until fall, while your cherry tree—harvested just last month—is already setting buds for next year. Welcome to the magic of backyard orchard culture.

I learned about this revolutionary approach to fruit growing three years ago when I was staring at my small suburban yard, desperately wanting fresh fruit but convinced I’d need acres of land to make it happen. Like most people, I imagined orchards as endless rows of towering trees requiring tractors and ladders.

The reality? You can grow more varieties of fresh, tree-ripe fruit in your backyard than most commercial orchards produce—and you can do it in a space smaller than many people’s driveways.

What Is Backyard Orchard Culture (And Why It Changes Everything)

Backyard orchard culture flips traditional orchard thinking on its head. Instead of growing a few massive trees that produce hundreds of pounds of fruit all at once, you plant many smaller trees close together, each producing manageable amounts of different fruits that ripen throughout the growing season.

The concept was pioneered by Dave Wilson Nursery in California, and it’s built on a simple but brilliant insight: home fruit growers have completely different needs than commercial farmers.

Dave Wilson Nursery
Credit: Dave Wilson Nursery

Commercial growers want maximum yield per tree for a single variety that can be machine-harvested all at once. Home growers want variety, manageable harvests, and fresh fruit from spring through fall.

Here’s what makes it revolutionary:

  • Space Efficiency: You can plant 4-6 trees in the space traditionally used for one, giving you multiple varieties instead of a single type of fruit.
  • Extended Harvest: By choosing early, mid-season, and late varieties, you extend your fresh fruit season from a few weeks to several months.
  • Manageable Scale: Smaller trees mean smaller harvests that a family can actually use, rather than being overwhelmed with 200 pounds of apples all ripening in the same week.
  • Easy Maintenance: Everything happens at ground level—no ladders needed for pruning, thinning, or harvesting.
  • Better Pollination: Having multiple varieties blooming at different times attracts more pollinators and often results in better fruit set across all your trees.

Understanding Rootstocks: The Foundation of Your Success

Before diving into planting, you need to understand one of the most important factors in fruit tree success: rootstock. Almost every fruit tree you buy is actually two plants grafted together—the top part (scion) that produces the fruit you want, and the bottom part (rootstock) that controls the tree’s size, hardiness, and adaptability.

Understanding Rootstocks

  • Dwarf Rootstocks keep trees 6-10 feet tall but may need permanent staking and more intensive care. They’re perfect for containers or very small spaces but can be shorter-lived.
  • Semi-Dwarf Rootstocks create trees 10-16 feet tall (which you’ll prune to 6-8 feet) and offer the best balance of manageable size, productivity, and longevity for most backyard situations.
  • Standard Rootstocks would normally create full-sized trees, but with aggressive pruning, they can be kept small while providing excellent disease resistance and longevity.

The key insight? Don’t rely solely on rootstock for size control—pruning is what really keeps your trees manageable. A semi-dwarf tree that’s summer-pruned annually will stay smaller and more productive than a dwarf tree that’s left unpruned.

Getting Started: Setting the Stage for Success

Choose Your Location Wisely

Your mini orchard needs full sun—at least 6-8 hours of direct sunlight daily. Fruit trees are essentially farming sunlight to create sugar, and insufficient light means poor fruit quality and reduced yields.

I learned this lesson the hard way when I planted my first fig tree in what I thought was a sunny spot. It got morning sun beautifully, but by 2 PM, my neighbor’s garage cast it into shade. The tree grew fine, but the figs never developed their characteristic sweetness. After relocating it to a truly sunny spot, the difference was remarkable.

Look for a south-facing area of your yard that doesn’t get shaded by buildings or large trees. If you’re unsure, spend a day tracking sun patterns during the summer solstice—the longest day of the year will show you the maximum sun exposure any spot can receive.

a south-facing area
Credit: Available_Nerve_3431 on reddit

The Drainage Test That Could Save Your Trees

Poor drainage kills more fruit trees than all pests and diseases combined. Most fruit trees hate “wet feet”—their roots need oxygen, and waterlogged soil essentially drowns them.

Here’s a simple test: dig a hole about 12 inches deep and 12 inches wide in your planned planting area. Fill it with water and let it drain completely. Fill it again and time how long it takes to drain the second time. If it takes more than 24 hours, you’ll need to improve drainage through raised beds or choose a different location.

The Drainage Test
Credit: ediblebackyard

If you discover drainage issues, don’t despair. You can create raised beds or mounded planting areas 8-12 inches high using quality topsoil. Even this modest elevation can make the difference between thriving trees and dead ones.

Soil Testing: Know What You’re Working With

While fruit trees are adaptable, understanding your soil gives you a significant advantage. A basic soil test will tell you your pH and major nutrient levels. Most fruit trees prefer slightly acidic to neutral soil (pH 6.0-7.0), though blueberries are notable exceptions, preferring very acidic conditions (pH 4.5-5.5).

Soil Testing
Credit: Carolina Fresh Farms

If your soil is too alkaline (common in areas with limestone bedrock), you can lower the pH with sulfur or organic matter. If it’s too acidic, lime can raise it. But here’s a secret: it’s often easier to choose varieties adapted to your existing conditions than to fight your soil chemistry.

Here’s How to Add Nitrogen to Soil: 18 Quick Fixes + Long-Term Solutions

Choosing Your Trees: The Art of Variety Selection

This is where backyard orchard culture gets really exciting. Instead of being limited to one or two types of fruit, you can create a diverse ecosystem that provides fresh options from late spring through fall.

Understanding Chill Hours (And Why They Matter)

One of the biggest mistakes new fruit growers make is choosing varieties that aren’t suited to their climate. Many fruit trees require a certain number of “chill hours”—hours between 32°F and 45°F during winter dormancy—to produce fruit properly.

If you live in southern California and plant a ‘Honeycrisp’ apple that needs 800+ chill hours, you’ll get a beautiful tree that never fruits. Conversely, if you’re in Minnesota and choose a low-chill variety bred for warm climates, your tree might not survive the winter.

Check with your local extension office or use online chill hour maps to determine your area’s average annual chill hours, then choose varieties accordingly. This one factor can mean the difference between success and frustration.

Pollination: The Secret to Abundant Harvests

Many fruit trees need cross-pollination to produce well, meaning they need pollen from a different variety of the same fruit type. This is actually a hidden advantage of backyard orchard culture—by planting multiple varieties, you’re naturally creating better pollination conditions.

Some fruits are self-fertile and will produce alone, while others absolutely require a pollinator partner. Here’s a quick guide:

  • Self-fertile: Most peaches, nectarines, apricots, sour cherries, figs
  • Need pollinators: Most apples, pears, sweet cherries, plums
  • Partially self-fertile: Some varieties will produce alone but do much better with a pollinator

When planning your orchard, ensure that varieties needing cross-pollination have compatible partners that bloom at the same time. Your local nursery or extension office can provide compatibility charts for your area.

Here’s How to Create a Pollinator-Friendly Garden: A Step-by-Step Guide

The Succession Planting Strategy

This is where backyard orchard culture really shines. Instead of planting one apple tree that gives you 100 pounds of fruit in September, plant three different varieties: an early summer apple, a late summer variety, and a fall storage apple. Same space, same amount of total fruit, but spread over three months instead of three weeks.

Here’s a sample progression for a temperate climate:

  • June: Sweet cherries, early summer apples, strawberries
  • July: Apricots, early plums, summer pears, raspberries
  • August: Peaches, nectarines, mid-season apples, blueberries
  • September: Late plums, fall pears, main apple harvest
  • October: Late apples, persimmons, late pears, cranberries

Disease Resistance: Your Insurance Policy

Nothing is more heartbreaking than losing years of growth to preventable diseases. When selecting varieties, prioritize disease resistance over famous names. An ‘Enterprise’ apple that resists scab, fire blight, and cedar apple rust will give you decades of reliable harvests with minimal intervention, while that ‘Red Delicious’ might require constant spraying to survive.

Modern breeding programs have developed remarkable disease-resistant varieties that often taste better than their famous ancestors. Don’t be afraid to try varieties you’ve never heard of—they might become your new favorites.

High-Density Planting Techniques: Maximizing Your Space

The Revolutionary “Multiple Trees in One Hole” Method

One of the most space-efficient techniques involves planting 2-4 compatible trees in a single large planting hole, spaced 18-24 inches apart. As they grow, they appear to be a single multi-trunked tree but actually produce multiple varieties with staggered harvest times.

The keys to success with this method:

  • Choose varieties with similar vigor and growth habits
  • Use compatible rootstocks (ideally the same type)
  • Prune regularly to maintain balance between trees
  • Plant at least 6 feet away from other tree groupings

Multiple Trees in One Hole

I was skeptical when I first tried this with three apple varieties in my small yard. But five years later, that single “hole” gives me apples from July through October, and the trees have grown into a beautiful, naturally balanced form.

Multiple Trees in One Hole For Gardens
Credit: Trees of Antiquity

Espalier: Living Fences That Bear Fruit

Espalier involves training trees to grow flat against a wall, fence, or trellis system. This ancient technique can fit fruit production into incredibly narrow spaces—even a 2-foot-wide strip along a fence can accommodate multiple espaliered trees.

Popular espalier forms include:

  • Horizontal cordon: Single trunk with horizontal branches
  • Fan shape: Branches radiating from a short trunk
  • Belgian fence: Diagonal branches creating a diamond pattern
Espalier trees
Credit: Lane Forest Products

Espalier trees require more initial training and annual pruning, but they’re incredibly productive for their footprint and create stunning living architecture in your landscape.

Container Growing: Portable Orchards

Don’t let limited space or rental housing stop you from growing fruit. Many trees thrive in large containers (20-30 gallons minimum), giving you the flexibility to move them for optimal sun, protect them from severe weather, or take them with you if you relocate.

Container-grown trees
Credit: Stark Bro’s

Container-grown trees require more attention to watering and fertilizing, but they also give you complete control over soil conditions. This is particularly valuable for plants with special requirements, like blueberries that need acidic soil.

Planting Your Mini Orchard: Getting Off to the Right Start

The Critical First Steps

Proper planting technique can determine whether your trees thrive for decades or struggle from day one. Here’s what matters most:

  • Hole Size: Dig holes only slightly larger than the root ball—huge, amended holes can actually hinder root development by creating a “bathtub effect” where roots circle within the improved soil rather than spreading into native soil.
  • Planting Depth: This is crucial. The graft union (the swollen area where the scion meets the rootstock) should be 2-3 inches above the final soil level. Planting too deep can kill the tree or negate the rootstock’s dwarfing effects.
  • Root Preparation: Gently tease apart circled roots, but don’t be too aggressive. Some trees, particularly those grown in containers, benefit from making shallow vertical cuts in the root ball to encourage outward growth.
  • Backfilling: Use the native soil you removed—don’t amend it heavily. You want roots to spread into the surrounding soil, not stay confined to a rich pocket that differs dramatically from the native ground.
  • Initial Watering: Water thoroughly after planting to eliminate air pockets, then maintain consistent moisture (not soggy) during the establishment period.
Planting Your Mini Orchard
Credit: Yard and Garden – Iowa State University

Spacing for Success

Spacing depends on your goals and maintenance willingness:

  • Ultra-intensive: 3-4 feet apart (requires dedicated pruning)
  • High-density: 4-6 feet apart (good balance of production and maintenance)
  • Moderate spacing: 6-8 feet apart (easier maintenance, room for growth)

I space my trees about 6 feet apart, which gives me room to walk between them with a wheelbarrow while keeping them close enough to create beneficial microclimates and efficient use of space.

The First-Year Priority: Establishment Over Production

This might be the hardest advice to follow, but it’s crucial: remove any flowers or fruit that develop in the first year after planting. Yes, it’s heartbreaking to pinch off those first little apples, but you’re making an investment in your tree’s future.

A tree that spends its first year developing a strong root system will reward you with decades of healthy production. One that exhausts itself trying to ripen fruit while establishing roots often struggles for years.

Mulching: Your Secret Weapon

Apply a 3-4 inch layer of organic mulch (wood chips, shredded leaves, or straw) in a 4-foot circle around each tree, keeping the mulch 6 inches away from the trunk. Mulch conserves moisture, suppresses weeds, moderates soil temperature, and slowly breaks down to feed soil organisms.

organic mulch
Credit: trees dot com

Good mulch can reduce your watering needs by 50% and virtually eliminate weeding around your trees. It’s one of the highest-impact, lowest-effort things you can do for your orchard.

The Art of Summer Pruning: Your Secret to Manageable Trees

Summer pruning is what makes backyard orchard culture possible, but it can seem intimidating at first. The good news? It’s more forgiving than you think, and the trees will guide you.

When to Summer Prune

The ideal timing is late June through early August in most climates—after the spring growth flush has finished but while the tree is still actively growing. You’ll notice new growth slowing down and beginning to “harden off” from green, flexible shoots to brown, woody stems.

In warmer climates, you might have multiple growth flushes, so you can prune after each one. The key is pruning during active growth, not during dormancy.

The Science Behind Summer Pruning

Summer pruning works because you’re removing leaves during peak photosynthesis season. Since leaves are the tree’s solar panels, removing them reduces the tree’s ability to manufacture and store energy for explosive spring growth.

The result? Smaller, more manageable trees that redirect energy into fruit bud formation rather than endless vegetative growth.

What to Remove

Focus on these priorities in order:

  1. Water sprouts: Vigorous vertical shoots growing from main branches—these rarely produce fruit and steal energy from productive wood
  2. Suckers: Growth from the base of the tree or below the graft union—these come from the rootstock and won’t produce your desired fruit
  3. Diseased or broken wood: Remove any time of year for tree health
  4. Crossing or rubbing branches: Branches that will damage each other as they grow
  5. Excessive interior growth: Open up the center for air circulation and light penetration
Summer Pruning
Credit: Redfin

The “Heading Back” Technique

For size control, cut new growth back by about half during summer pruning. Make cuts just above an outward-facing bud to encourage horizontal branching rather than vertical growth. This technique encourages the development of fruit buds rather than more vegetative growth.

The Heading Back Technique
Credit: notfarfromthetree

I remember being nervous about cutting back what seemed like healthy growth on my young pear trees. But the following spring, those pruned branches were loaded with flower clusters, while the unpruned sections produced mostly leaves.

Year-by-Year Pruning Guide

  • Year 1: Focus on structure, remove competing leaders, establish main branches
  • Year 2: Continue structural development, begin heading back vigorous growth
  • Year 3: Establish final height, focus on encouraging fruiting spurs
  • Year 4+: Maintenance pruning to control size and encourage continued fruit production

Fruit Thinning: The Counterintuitive Key to Better Harvests

Fruit thinning might seem wasteful, but it’s essential for several reasons: preventing branch breakage, ensuring good fruit size and quality, and avoiding the exhaustion that leads to biennial bearing (producing heavily one year, then little the next).

When to Thin

The best time is about 4-6 weeks after bloom, when fruits are nickel to quarter-sized. At this stage, the tree has naturally dropped some fruits, and you can see which ones are developing well.

How Much to Thin

General guidelines:

  • Apples and pears: Space fruits 6-8 inches apart, one per cluster
  • Stone fruits: Space 3-4 inches apart for larger fruits, 2-3 inches for smaller varieties
  • Cherries: Usually don’t require thinning
Fruit Thinning
Credit: Tallahassee Nurseries

It feels brutal the first time you do it, but proper thinning often results in more total pounds of fruit because the remaining fruits reach full size and quality.

Managing Your Mini Orchard Through the Seasons

Spring: The Season of Awakening and Vigilance

Spring is when your orchard comes alive, and it’s your busiest season. Trees are leafing out, flowering, and setting fruit. This is when you’ll complete any dormant season pruning (before bud break), apply organic fertilizers, and begin monitoring for pest and disease issues.

Watch the weather during bloom time—late frosts can devastate flower buds, especially on early-blooming trees like apricots and peaches. If frost threatens during bloom, you can protect small trees with row covers or even old sheets.

Summer: Growth, Maintenance, and Early Harvests

Summer brings your first harvests and is your main pruning season. Keep trees well-watered during hot spells—stressed trees are more susceptible to pests and diseases and may drop fruit prematurely.

This is also when you’ll start learning which varieties work best in your specific microclimate. Take notes on ripening times, flavor, storage quality, and tree health. These observations will guide future planting decisions.

Fall: Harvest Celebration and Winter Preparation

Fall is the climax of your orchard year, with many varieties reaching peak ripeness. It’s also preparation time for winter—apply compost around trees, plant new additions, and clean up fallen fruit and leaves that might harbor diseases.

This is the perfect time to evaluate your successes and plan improvements for next year. Which varieties exceeded expectations? Which underperformed? What would you plant differently?

Winter: Rest, Reflection, and Planning

Winter is when your trees rest and when you can do structural pruning on dormant trees. It’s also the perfect time to study catalogs, research new varieties, and plan expansions to your orchard.

Use this time to sharpen and maintain your tools, review your notes from the growing season, and dream about next year’s possibilities.

Advanced Techniques for Maximum Production

Integrated Pest Management: Working With Nature

The best pest management starts with healthy trees in a diverse environment. Stressed trees attract pests, while vigorous trees in biodiverse settings often experience fewer problems.

Create habitat for beneficial insects by planting flowers near your orchard. Native plants are particularly valuable—they support local predator populations that help control fruit pests. A simple border of native wildflowers can dramatically reduce pest pressure.

For specific problems, start with the least disruptive solutions:

  • Horticultural oil sprays during dormancy for overwintering pests
  • Kaolin clay (Surround) to deter insects through physical deterrence
  • Beneficial insect releases for targeted pest control
  • Pheromone traps to monitor and reduce pest populations

Soil Health: The Foundation of Everything

Healthy soil creates healthy trees that resist pests and diseases naturally. Focus on building organic matter through compost, mulch, and diverse plantings rather than relying on synthetic fertilizers.

Consider planting nitrogen-fixing ground covers like clover between tree rows. This reduces mowing while naturally fertilizing your trees. Some orchardists plant beneficial herbs like comfrey and nettle, which can be harvested for compost or liquid fertilizers.

clover between tree rows
Credit: Growing Fruit

Water Management: Efficiency and Conservation

Newly planted trees need consistent moisture for the first 1-2 years while they establish. After that, deep, infrequent watering encourages deep root development and drought tolerance.

Drip irrigation is ideal for orchards—it delivers water directly to root zones while keeping foliage dry (reducing disease issues). A simple timer can automate the system, ensuring consistent care even when you’re busy or away.

Troubleshooting Common Challenges

1. “My trees are getting too big despite pruning!”

This usually means you’re not summer pruning aggressively enough, or you’re over-fertilizing with nitrogen. Summer pruning should be your primary size-control method—don’t be afraid to cut back vigorous growth by half or more during the growing season.

2. “I’m getting flowers but no fruit.”

Check these common causes:

  • Poor pollination: Plant additional varieties or encourage pollinators with diverse flowers
  • Late frost damage: Flowers may look normal but be internally damaged
  • Insufficient chill hours: Your variety may not be suited to your climate
  • Over-fertilization: Too much nitrogen promotes leaves over flowers

3. “My fruit has worms or pest damage.”

This is often variety-specific. Some fruits (like cherries) are naturally less attractive to many pests, while others (like peaches) face heavy pressure in many areas. Research pest-resistant varieties for your area, and don’t be afraid to replace problem trees with better-adapted ones.

4. “The harvest is overwhelming!”

This is a good problem to have! Plan for preservation: dehydrating, freezing, canning, or sharing with neighbors. Many successful orchardists view surplus fruit as an opportunity to build community relationships and even generate income through farmers market sales.

Container Growing: Orchards Anywhere

Don’t let apartment living or poor soil stop you from growing fruit. Container cultivation opens possibilities for anyone with a sunny balcony, patio, or small yard.

  • Choosing Containers

Use containers at least 20-30 gallons for tree fruits, larger for vigorous varieties. Ensure excellent drainage—drill additional holes if necessary. Dark containers can overheat roots in summer, so consider light-colored pots or provide shade to the container while keeping the canopy in full sun.

  • Soil and Nutrition

Use high-quality potting mix, not garden soil, which compacts in containers. Container trees need more frequent fertilizing since nutrients wash out with watering. A slow-release organic fertilizer applied twice yearly usually provides adequate nutrition.

  • Watering Considerations

Container trees need more frequent watering, especially during hot weather. In summer, daily watering may be necessary. Mulch the soil surface to reduce water loss, and consider drip irrigation for consistent moisture.

  • Winter Protection

In cold climates, container trees need protection since their roots are more exposed to freezing. Move containers to protected areas, wrap them in insulation, or bury them in mulch for winter.

Setting Realistic Expectations: The Truth About Homegrown Fruit

Let’s be honest about what backyard orchard culture can and can’t do for you.

The Incredible Benefits:

You’ll have fresher, more flavorful fruit than anything you can buy. You’ll enjoy varieties that never make it to supermarkets because they don’t ship well but taste amazing fresh. You’ll harvest tree-ripe fruit at perfect sweetness. And you’ll have the deep satisfaction of growing your own food while creating habitat for wildlife.

The Reality Check:

You won’t have perfect, unblemished fruit like the grocery store (that’s achieved through intensive spraying and careful sorting). You’ll lose some fruit to weather, pests, and diseases—budget for 60-80% of a perfect harvest in most climates.

Some years will be better than others due to weather, and yes, you’ll occasionally deal with an overabundance that needs quick processing or sharing.

Timeline for Success

Understanding the timeline helps set appropriate expectations:

  • Year 1: Focus entirely on establishment—remove any fruit to help trees develop strong roots
  • Year 2: Allow light harvest to taste-test varieties while trees continue establishing
  • Year 3: Moderate harvest as trees begin hitting their stride
  • Years 4-5: Good harvests with trees reaching productive maturity
  • Years 6+: Full production from a well-established system

Frequently Asked Questions

  • Q: How much space do I really need for a backyard orchard?

A: You can create a productive mini orchard in as little as 200-300 square feet using high-density techniques. Even a 10×10 foot area can accommodate 4-6 dwarf trees. For reference, four trees planted in one hole need about the same space as a large garden shed.

  • Q: What’s the best rootstock for backyard growing?

A: Semi-dwarf rootstocks usually offer the best balance of manageable size, good productivity, and tree longevity. True dwarf rootstocks keep trees smaller but may require permanent staking and more intensive care.

  • Q: Can I really plant four trees in one hole?

A: Absolutely, but success depends on choosing varieties with similar vigor and compatible rootstocks. Plant them 18-24 inches apart in a large hole and prune regularly to maintain balance. This technique is particularly effective for apples and stone fruits.

  • Q: How do I deal with too much fruit at harvest time?

A: Plan ahead for preservation methods: dehydrating, freezing, canning, or making preserves. Build relationships with neighbors who appreciate fresh fruit. Some orchardists even sell surplus at farmers markets or use excess fruit for home brewing.

  • Q: What if I rent and can’t plant permanent trees?

A: Container growing is your answer. Use large pots (20+ gallons) and dwarf varieties. Many successful container orchards produce substantial harvests while remaining completely portable.

  • Q: How much maintenance does a backyard orchard really require?

A: After establishment, expect 10-20 hours per year for a small orchard: summer pruning (4-6 hours), harvest and cleanup (6-10 hours), and seasonal tasks like fertilizing and pest monitoring (4-8 hours). It’s roughly equivalent to maintaining a flower garden of the same size.

  • Q: What fruits are easiest for beginners?

A: Start with naturally disease-resistant fruits like figs, persimmons, or Asian pears. Among traditional fruits, disease-resistant apple varieties and most stone fruits (peaches, plums) are relatively forgiving. Avoid European plums and sweet cherries in areas with high disease pressure.

Your Orchard Journey Starts Now

Creating a backyard orchard using these principles isn’t just about growing fruit—it’s about fundamentally changing your relationship with your outdoor space and your food. There’s something deeply satisfying about stepping outside and harvesting breakfast from trees you planted and nurtured yourself.

The beauty of backyard orchard culture lies in its scalability. You can start with a single dwarf apple tree in a container and gradually expand as you gain experience and confidence. Each tree teaches you something new about your microclimate, your preferences, and the art of fruit growing.

Start small and build on success. Choose 2-3 varieties that excite you and are well-suited to your climate. Pay attention to what works in your specific conditions rather than trying to replicate someone else’s orchard. Every successful fruit grower I know started with more enthusiasm than knowledge and learned through experience.

Remember that some of the most productive and beautiful home orchards I’ve visited started with a single tree planted by someone who thought they “didn’t have enough space for fruit trees.” That person learned, experimented, adapted their techniques to their situation, and gradually created their own fruit paradise—one tree at a time.

Your backyard—no matter how small—has more potential than you realize. With the principles of backyard orchard culture, you’re not just planting trees. You’re cultivating abundance, building food security, creating wildlife habitat, and establishing a legacy that will feed your family for decades to come.

The best time to plant a fruit tree was 20 years ago. The second-best time is right now. What variety will you start with?


source https://harvestsavvy.com/backyard-orchard/

Tuesday, July 1, 2025

The Ultimate Companion Planting Guide: 422 Plant Combinations That Actually Work

Picture this: You’re standing in your garden, watching your tomatoes flourish next to a patch of aromatic basil, while nearby, your corn stalks support climbing beans that are quietly enriching the soil for everyone. It’s not garden magic—it’s companion planting, and it might just be the secret weapon your garden has been waiting for.

I’ll never forget the first time I truly “got” companion planting. After years of fighting aphids on my pepper plants with every organic spray I could find, a neighbor suggested I plant some chives nearby.

Skeptical but desperate, I tucked a few chive plants around my pepper bed. Within weeks, the aphid problem virtually disappeared. That was my “aha” moment—plants really can help each other in remarkable ways.

Companion planting isn’t just some trendy gardening buzzword. It’s an ancient practice that recognizes something profound: in nature, plants don’t grow in isolation.

They form complex relationships, supporting each other through challenges while sharing resources and protection. When we recreate these partnerships in our gardens, we’re working with nature instead of against it.

What Is Companion Planting, Really?

At its heart, companion planting is about growing different plants together strategically so they benefit each other. Think of it as creating plant communities where everyone has a role to play.

One plant might repel pests that bother its neighbor, while another fixes nitrogen in the soil for everyone to share. Some provide physical support, shade, or ground cover, while others attract beneficial insects that keep the whole system healthy.

But here’s what makes companion planting so appealing: it’s not just about the plants helping each other—it helps you too. When your garden plants work as a team, you’ll find yourself dealing with fewer pest problems, better soil health, more efficient use of space, and often bigger, more flavorful harvests. It’s gardening with a wingman.

The practice works through several key mechanisms. Plants can release chemical compounds that either repel harmful insects or attract beneficial ones. Some plants improve soil conditions for their neighbors by fixing nitrogen or accessing deep nutrients.

Others provide physical benefits like shade, wind protection, or structural support. Understanding these mechanisms helps you choose the right partnerships for your specific garden needs.

The Science Behind Plant Partnerships

While much companion planting wisdom comes from generations of gardener observations, modern research is backing up many of these traditional practices.

Scientists have discovered that plants communicate through chemical signals, both above and below ground. Some release compounds that repel harmful insects, while others produce substances that actually help neighboring plants grow stronger.

For example, when researchers studied basil and tomato combinations, they found that basil doesn’t just repel pests through its strong scent—it actually helps tomato plants produce compounds that boost their natural defense systems.

The volatile oils released by basil prime tomato plants’ immune responses, making them more resistant to pest attacks and diseases.

Similarly, marigolds don’t just smell bad to certain pests; they release chemicals called thiophenes into the soil that can kill harmful nematodes. French marigolds are particularly effective, with some studies showing up to 90% reduction in root-knot nematodes when grown as companions.

marigolds
Credit: reddit

The key insight from recent research? Plant diversity matters enormously. Gardens with a variety of plants consistently show fewer pest problems and healthier soil than monoculture plantings. When you mix things up, you create an environment where beneficial insects thrive and pest insects struggle to establish themselves.

The Big Benefits: Why Your Garden Will Thank You

Natural Pest Control That Actually Works

Let’s be honest—dealing with garden pests can be exhausting. Companion planting offers a refreshingly hands-off approach to pest management. Instead of constantly spraying and monitoring, you can plant strategic partners that do the work for you.

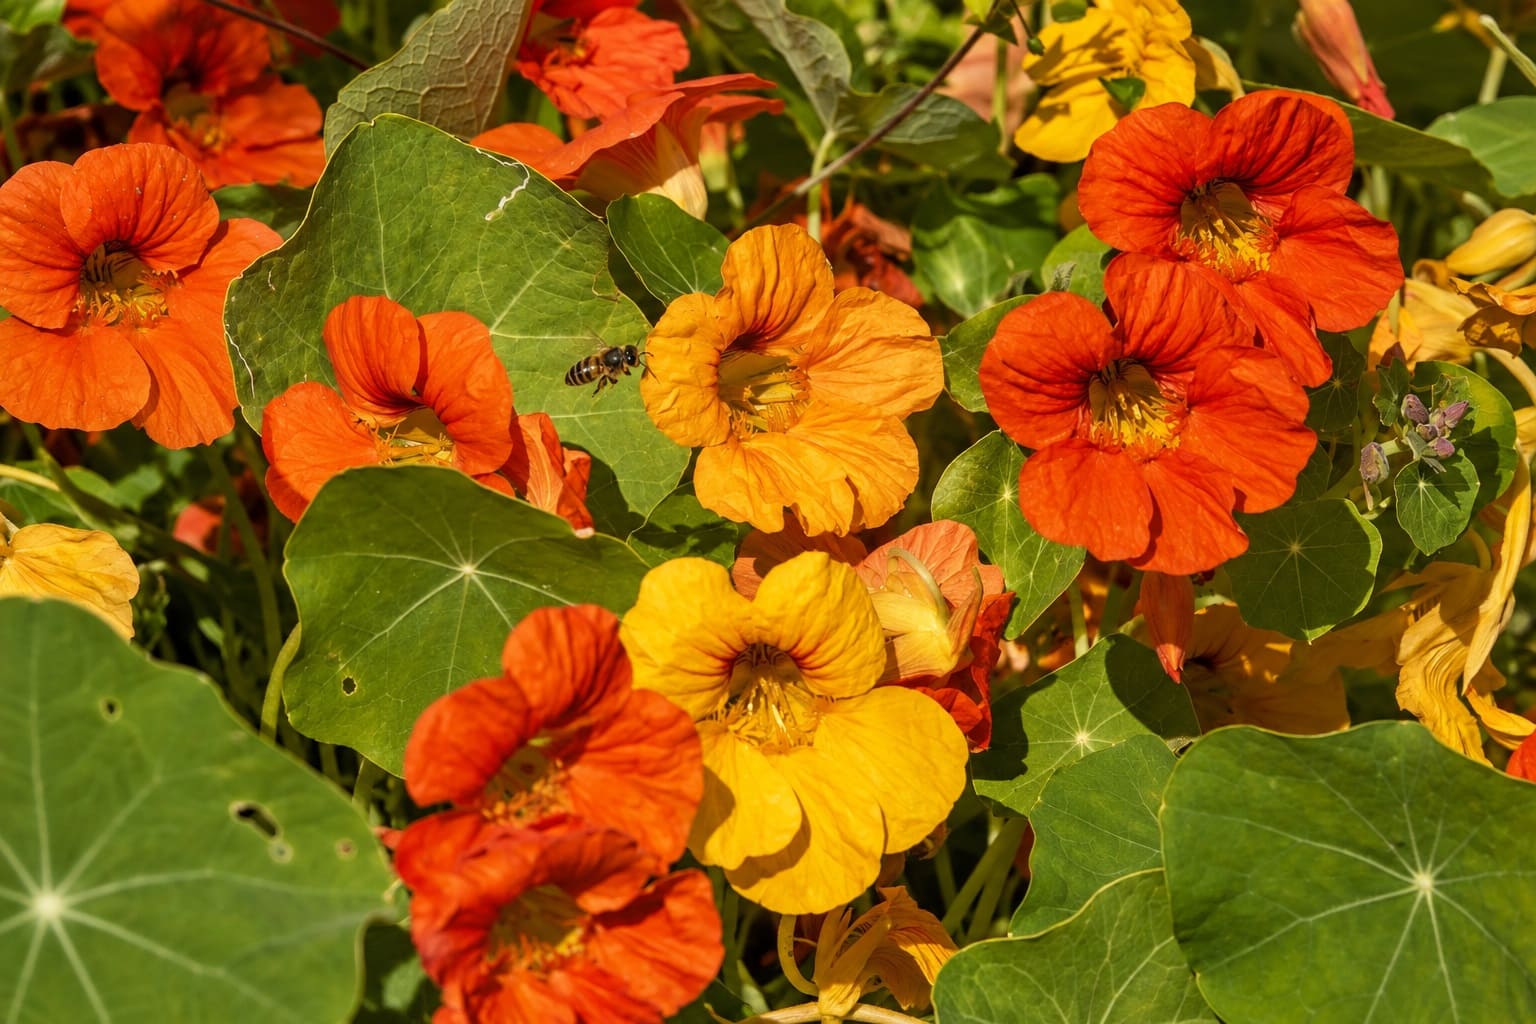
Some plants act as “trap crops,” essentially volunteering themselves as pest bait to protect their neighbors. Nasturtiums, for instance, are irresistible to aphids, cucumber beetles, and cabbage worms. Plant them near your vegetables, and watch the pests flock to the nasturtiums instead of your precious crops.

The key is monitoring your trap crops and removing them when they become heavily infested to prevent pest populations from exploding.

Other plants work as natural repellents. The strong scents of herbs like rosemary, sage, and mint confuse and deter many insects. These aromatic compounds work by masking the scent signals that pest insects use to locate their preferred host plants.

I’ve seen gardeners dramatically reduce cabbage moth problems by simply interplanting their brassicas with aromatic herbs.

Visual disruption also plays a role. Flying pests often locate their host plants by sight, looking for specific leaf shapes and colors. When you intermix different plants with varying heights, textures, and colors, you make it much harder for pest insects to find their targets.

Soil Health That Builds Over Time

One of companion planting’s most valuable benefits is how it improves your soil naturally. Legumes like beans, peas, and clover have a superpower: they can pull nitrogen from the air and convert it into a form other plants can use. This process, called nitrogen fixation, essentially fertilizes your garden for free.

But the soil benefits go deeper. Plants with different root structures work together beautifully underground. Deep-rooted plants like carrots and tomatoes pull nutrients from lower soil layers and bring them closer to the surface when their leaves decompose.

Shallow-rooted plants like lettuce make efficient use of nutrients near the surface. This means less competition and more efficient nutrient cycling throughout your garden.

Different root types also improve soil structure in unique ways. Taprooted plants like carrots and radishes help break up compacted soil, creating channels for water and air movement. Fibrous-rooted plants like grasses help bind soil particles together, reducing erosion.

Smart Space Solutions for Any Garden Size

Whether you’re working with a sprawling backyard or a compact balcony garden, companion planting helps you make the most of every square inch. The key is understanding how different plants use space both above and below ground.

Fast-growing crops like radishes and lettuce can be harvested from between slower-maturing plants like broccoli or corn before they need the space. This succession approach lets you get multiple harvests from the same area throughout the season.

Vertical partnerships work wonders too. Tall plants provide natural support for climbers—think corn supporting beans, or sunflowers acting as living trellises for cucumbers. This eliminates the need for additional structures while maximizing your growing space.

sunflowers as living trellises
Credit: pinterest

Meanwhile, ground-covering plants like squash spread below taller crops, suppressing weeds and maintaining soil moisture. The large leaves create a living mulch that reduces water needs and keeps soil temperatures stable.

Disease Prevention Through Plant Diversity

Monoculture plantings—growing large areas of the same crop—create ideal conditions for diseases to spread rapidly. When you diversify your plantings through companion strategies, you create natural barriers that slow disease transmission.

Some companion plants actively help prevent diseases. For instance, chives planted near roses can help prevent black spot and aphid infestations. The sulfur compounds in alliums have natural antifungal properties that protect nearby plants.

Mixed plantings also support beneficial soil microorganisms that compete with harmful pathogens. A diverse root zone environment encourages a healthy soil microbiome that helps plants resist diseases naturally.

Attracting the Good Guys: Building Beneficial Insect Habitat

A thriving garden ecosystem needs beneficial insects—pollinators, predators, and parasites that keep everything in balance. Companion planting creates habitat and food sources that draw these helpful creatures to your garden.

Different beneficial insects have different needs throughout their life cycles. Many need nectar for adult energy but hunt pest insects to feed their larvae. By providing a continuous succession of flowers throughout the growing season, you can support beneficial insect populations year-round.

Some of the most valuable beneficial insects are tiny and often overlooked. Parasitic wasps, for example, are smaller than gnats but incredibly effective at controlling pest insects. They lay their eggs inside aphids, caterpillars, and other pests, providing long-term natural pest control.

Parasitic wasp
Credit: By Seney Natural History Association

Read The Essential Wasp Identification Guide: 28 Common Types of Wasps In Your Garden

The All-Stars: Proven Companion Plant Combinations

The Three Sisters: Ancient Wisdom That Still Works

No discussion of companion planting would be complete without honoring the Three Sisters—corn, beans, and squash. This combination, developed by indigenous peoples thousands of years ago, remains one of the most elegant examples of plant partnership.

Here’s how the magic works: Corn provides a natural trellis for pole beans to climb. The beans, in return, fix nitrogen in the soil that feeds the corn and squash.

The squash spreads across the ground, its large leaves shading the soil to retain moisture and suppress weeds. Some squash varieties even have slightly prickly stems that deter small animals from munching on the corn.

Starting Your Three Sisters Garden
Credit: mother earth news

For success with the Three Sisters, timing is crucial. Plant your corn first and let it reach 6-8 inches tall before adding the beans. This gives the corn a head start so it can support the beans’ weight. Plant 4-6 corn seeds in a circle about 18 inches across, then plant 4-6 bean seeds around the corn when it’s established.

Finally, plant 2-3 squash seeds about 3 feet away from the corn circle so they have room to spread.

Tomatoes and Basil: The Classic Kitchen Garden Duo

This pairing works beautifully both in the garden and on your dinner plate. Basil planted near tomatoes has been shown to improve tomato flavor and reduce pest problems. The basil’s strong scent masks the tomato’s aroma from harmful insects like hornworms and aphids.

Tomatoes and Basil
Credit: homesteadandchill

Research suggests that basil actually helps tomato plants produce more of their natural pest-deterrent compounds. The volatile oils from basil seem to “prime” the tomato plants’ defense systems, making them more resistant to insect damage.

For best results, plant basil about 12-18 inches from your tomato plants—close enough to provide protection but far enough to avoid root competition. You’ll need several basil plants per tomato to get the full pest-deterrent effect. A good ratio is 3-4 basil plants for every tomato plant.

Carrots and Onions: The Mutual Protection Society

This is one of my favorite combinations because it’s so elegantly simple. Carrot flies are repelled by the scent of onions, while onion flies are deterred by carrots. Plant them together, and both crops benefit from natural pest protection.

The different root depths work perfectly together too—carrots go deep (6-8 inches) while onions stay shallow (2-4 inches), so they’re not competing for the same soil space or nutrients. This makes efficient use of your garden’s three-dimensional space.

Carrots and Onions
Credit: Kellogg Garden Products

For optimal results, alternate rows of carrots and onions, or plant onions around the perimeter of carrot patches. You can also interplant onion sets directly in carrot rows, spacing them so they don’t interfere with carrot development.

Marigolds: The Garden’s Multi-Purpose Bodyguards

If there’s one flower every vegetable gardener should grow, it’s marigolds. These cheerful annuals are like security guards for your garden, providing multiple types of protection.

Companion Plants for Marigolds
Credit: Meadowlark Journal

French marigolds (Tagetes patula) release compounds that repel whiteflies, aphids, and certain beetles. Even better, their roots secrete substances that kill harmful soil nematodes. Studies have shown that growing French marigolds can reduce root-knot nematode populations by up to 90%.

Mexican marigolds (Tagetes erecta) have similar properties and may also help repel rabbits and other small mammals. Both types attract beneficial insects like hoverflies and parasitic wasps.

Plant marigolds throughout your vegetable beds, especially near tomatoes, peppers, and eggplants. Space them about 18-24 inches apart for effective coverage. The flowers also add bright color and attract pollinators to your garden.

Complete Companion Planting Reference Chart

While the combinations above represent some of the most proven and popular partnerships, the world of companion planting offers hundreds of beneficial plant relationships.

The comprehensive chart below serves as your complete reference guide for planning any garden layout, troubleshooting plant problems, or discovering new combinations to try.

This research-backed chart includes every companion relationship from traditional gardening wisdom and modern scientific studies. Bookmark this section—you’ll find yourself returning to it throughout your gardening seasons.

How to Use This Chart

This comprehensive chart includes companion plant relationships gathered from multiple research sources. Use it alongside the main companion planting guide to plan your garden layouts and plant partnerships.

Chart Key:

  • Companions = Plants that benefit each other when grown together
  • Avoid = Plants that should not be grown near each other
  • Benefits = Primary reasons why the partnership works

Vegetables

Asparagus

  • Companions: Basil, calendula, coriander, dill, marigolds, oregano, parsley, petunias, tomatoes
  • Avoid: Garlic, onions, potatoes
  • Benefits: Marigold and petunias deter asparagus beetles; tomatoes repel asparagus beetles while asparagus repels nematodes

Beans (Bush)

  • Companions: Beets, broccoli, Brussels sprouts, cabbage, carrots, catnip, cauliflower, celery, corn, cucumber, eggplant, kale, marigolds, nasturtiums, peas, potatoes, radishes, rosemary, squash, strawberries, summer savory, tomatoes
  • Avoid: Chives, garlic, gladiolus, onions, shallots
  • Benefits: Catnip repels flea beetles; marigolds deter Mexican bean beetles; summer savory improves growth and flavor

Beans (Pole/Climbing)

  • Companions: Broccoli, cabbage, carrots, catnip, cauliflower, celery, corn, cucumber, eggplant, marigolds, nasturtiums, peas, potatoes, radishes, rosemary, squash, strawberries, sunflowers, tomatoes
  • Avoid: Beets, chives, garlic, onions, shallots
  • Benefits: Corn provides natural trellis; beans fix nitrogen for soil

Beets

  • Companions: Broccoli, Brussels sprouts, bush beans, cabbage, cauliflower, garlic, kohlrabi, leeks, lettuce, onions
  • Avoid: Pole beans, spinach, chard (same family – Beta vulgaris)
  • Benefits: Garlic improves growth and flavor; add magnesium to soil when composted

Broccoli

  • Companions: Alyssum, basil, beets, celery, chamomile, Chinese cabbage, cucumber, dill, garlic, lettuce, marigolds, mint, nasturtiums, onions, oregano, potato, radishes, rosemary, sage, spinach, thyme
  • Avoid: Asparagus, pole beans, corn, melons, mustard, peppers, pumpkins, squash, strawberries, tomatoes
  • Benefits: Dill attracts beneficial wasps; rosemary repels cabbage fly; sage reduces diamondback moth

Brussels Sprouts

  • Companions: Basil, beans, beets, carrots, garlic, mint, nasturtiums, onions, peas, sage, thyme
  • Avoid: Pole beans, strawberries, tomatoes
  • Benefits: Aromatic herbs repel cabbage pests; mint deters flea beetles

Cabbage

  • Companions: Beans (bush), beets, celery, chamomile, dill, garlic, mint, nasturtiums, onions, oregano, rosemary, sage, tansy, thyme
  • Avoid: Grapes, pole beans, mustard, strawberries, tomatoes
  • Benefits: Chamomile deters pests; tansy and thyme disrupt egg-laying behavior of cabbage worms

Carrots

  • Companions: Beans, chives, leeks, lettuce, onions, peas, peppers, radishes, rosemary, sage, tomatoes
  • Avoid: Dill, parsnips, potatoes
  • Benefits: Chives improve growth and flavor; rosemary and sage deter carrot fly; onions mask scent from carrot fly

Cauliflower

  • Companions: Beans, beets, broccoli, Brussels sprouts, celery, corn, onions, radishes, spinach
  • Avoid: Dill, parsnips, radishes, strawberries
  • Benefits: Similar benefits to other brassicas; onions provide pest protection

Celery

  • Companions: Beans, cabbage family, leeks, onions, tomatoes
  • Avoid: Carrots, parsnips, potatoes
  • Benefits: Chives and garlic deter aphids; nasturtiums repel various pests

Corn (Sweet)

  • Companions: Beans, cucumbers, dill, geraniums, melons, parsley, peas, potatoes, pumpkins, squash, sunflowers
  • Avoid: Celery, tomatoes
  • Benefits: Provides support for climbing plants; geraniums attract and paralyze Japanese beetles

Cucumbers

  • Companions: Beans, borage, cabbage family, corn, dill, lettuce, marigolds, nasturtiums, oregano, peas, radishes, sunflowers, tansy
  • Avoid: Aromatic herbs (except dill), potatoes, sage
  • Benefits: Dill repels aphids and mites; nasturtiums trap cucumber beetles; radishes repel cucumber beetles

Eggplant

  • Companions: Beans, catnip, marigolds, peas, peppers
  • Avoid: Fennel, potatoes, tomatoes (nightshade family – disease spread)
  • Benefits: Catnip repels flea beetles; marigolds deter nematodes

Garlic

  • Companions: Beets, broccoli, cabbage, carrots, cauliflower, dill, eggplant, kohlrabi, peppers, potatoes, spinach, tomatoes
  • Avoid: Asparagus, beans, parsley, peas, sage
  • Benefits: Repels wide range of pests including aphids, beetles, and root maggots

Kale

  • Companions: Beets, beans, celery, cucumber, dill, garlic, lettuce, mint, onions, peas, peppers, potatoes, rosemary, sage, spinach
  • Avoid: Other brassicas (disease prevention), peppers
  • Benefits: Similar pest protection as other brassicas; aromatic herbs provide protection

Kohlrabi

  • Companions: Beets, onions
  • Avoid: Beans, peppers, strawberries, tomatoes
  • Benefits: Compact growth works well with root crops

Leeks

  • Companions: Beets, carrots, celery, onions, spinach, strawberries
  • Avoid: Beans, peas, parsley
  • Benefits: Repel carrot rust fly and other flying pests

Lettuce

  • Companions: Asparagus, basil, beans, beets, broccoli, Brussels sprouts, carrots, chives, corn, cucumbers, eggplant, garlic, mint, onions, peas, radishes, spinach, strawberries, tomatoes
  • Avoid: Cabbage, celery, parsley
  • Benefits: Chives and garlic deter aphids; mint repels slugs and cabbage moths

Melons

  • Companions: Corn, pumpkins, radishes, squash
  • Avoid: Potatoes
  • Benefits: Corn provides structure; radishes improve soil and deter pests

Onions

  • Companions: Beets, broccoli, Brussels sprouts, cabbage, carrots, chamomile, lettuce, peppers, strawberries, tomatoes
  • Avoid: Asparagus, beans, peas, sage
  • Benefits: Chamomile and summer savory improve flavor; repel many pest insects

Parsnips

  • Companions: Garlic, sweet corn
  • Avoid: Carrots, celery, lettuce, potatoes
  • Benefits: Deep roots don’t compete with shallow-rooted companions

Peas

  • Companions: Alyssum, beans, carrots, celery, chives, corn, cucumbers, eggplant, lettuce, mint, potatoes, radishes, spinach, tomatoes, turnips
  • Avoid: Chives, garlic, onions, shallots
  • Benefits: Fix nitrogen; alyssum attracts beneficial insects; mint improves health and flavor

Peppers

  • Companions: Basil, beans, beets, carrots, chives, coriander, cucumbers, dill, eggplant, garlic, lettuce, marjoram, onions, oregano, spinach, tomatoes
  • Avoid: Brassicas (broccoli, Brussels sprouts, cabbage, cauliflower), fennel
  • Benefits: Basil improves flavor and deters pests; herbs provide natural insect protection

Potatoes

  • Companions: Basil, beans, cabbage, chamomile, cilantro, corn, garlic, horseradish, lettuce, marigolds, parsley, peas, radishes, spinach, thyme
  • Avoid: Asparagus, carrots, cucumbers, eggplant, fennel, onions, pumpkins, raspberries, squash, sunflowers, tomatoes, turnips
  • Benefits: Horseradish increases disease resistance; herbs enhance flavor

Pumpkins

  • Companions: Beans (pole), buckwheat, calendula, corn, lovage, marigolds, nasturtiums, oregano
  • Avoid: Potatoes
  • Benefits: Pole beans provide nitrogen; marigolds deter beetles; nasturtiums repel squash bugs

Radishes

  • Companions: Beans, beets, carrots, chervil, cucumbers, lettuce, melons, nasturtiums, peas, spinach, squash
  • Avoid: Brassicas (broccoli, Brussels sprouts, cabbage, cauliflower), hyssop
  • Benefits: Break up soil; act as trap crop for flea beetles; chervil improves growth

Spinach

  • Companions: Beans, beets, celery, cilantro, eggplant, lettuce, oregano, peas, rosemary, strawberries
  • Avoid: Potatoes
  • Benefits: Benefits from nitrogen-fixing companions; herbs provide pest protection

Squash (Summer & Winter)

  • Companions: Beans, borage, buckwheat, calendula, corn, dill, marigolds, nasturtiums, oregano, peas, radishes, sunflowers, zinnia
  • Avoid: Potatoes
  • Benefits: Buckwheat brings predators; nasturtiums repel squash bugs; borage improves pollination

Swiss Chard

  • Companions: Beans, beets, cabbage family, onions
  • Avoid: None specifically noted
  • Benefits: Similar to beets in soil mineral contribution

Tomatoes

  • Companions: Asparagus, basil, borage, calendula, carrots, celery, chives, cucumber, garlic, lettuce, marigolds, mint, nasturtiums, onions, parsley, peppers
  • Avoid: Brassicas, corn, dill, fennel, kohlrabi, potatoes
  • Benefits: Basil improves growth and flavor; marigolds repel whiteflies; asparagus repels nematodes

Turnips

  • Companions: Peas
  • Avoid: Potatoes
  • Benefits: Root crops work well with nitrogen-fixing peas

Herbs & Flowers

Alyssum (Sweet)

  • Companions: Lettuce, peas, potatoes
  • Benefits: Attracts hoverflies and lacewings that eat aphids; provides ground cover

Basil

  • Companions: Asparagus, beets, borage, carrots, chamomile, chives, marigolds, oregano, peppers, radishes, tomatoes, turnips
  • Avoid: Cucumber, fennel, rue, sage, thyme
  • Benefits: Repels flies, mosquitoes, aphids, and tomato hornworms; improves tomato yields

Borage

  • Companions: Squash, strawberries, tomatoes
  • Avoid: None specifically noted
  • Benefits: Attracts pollinators; repels tomato hornworms; improves strawberry yield

Calendula

  • Companions: Asparagus, mint, sage, tomatoes, potatoes, pumpkins
  • Benefits: Repels beetles and nematodes; attracts beneficial insects

Chamomile

  • Companions: Cabbage, onions
  • Benefits: Deters flies and mosquitoes; strengthens neighboring plants

Chives

  • Companions: Apples, carrots, cucumbers, lettuce, peas, roses, tomatoes
  • Avoid: Beans, peas
  • Benefits: Prevents apple scab; deters aphids and carrot rust fly

Cilantro/Coriander

  • Companions: Asparagus, peppers, potatoes
  • Avoid: Dill (cross-pollination)
  • Benefits: Repels aphids, potato beetles, and spider mites

Cosmos

  • Companions: General garden companion
  • Benefits: Attracts beneficial insects including parasitic wasps and hoverflies

Dill

  • Companions: Broccoli, Brussels sprouts, cabbage, corn, cucumbers, lettuce, onions
  • Avoid: Carrots, cilantro, tomatoes
  • Benefits: Attracts ladybugs and beneficial wasps; repels aphids and cabbage loopers

Lavender

  • Companions: Lettuce, onions, tomatoes, oregano, sage, rosemary, basil
  • Benefits: Repels various pests; attracts pollinators

Marigolds (French)

  • Companions: Most vegetables, especially tomatoes, peppers, eggplants
  • Avoid: Beans
  • Benefits: Kill root-knot nematodes; repel whiteflies and aphids

Mint

  • Companions: Beets, broccoli, Brussels sprouts, cabbage, cauliflower, eggplant, kale, lettuce, peas, squash, tomatoes
  • Avoid: Chamomile, parsley
  • Benefits: Repels ants, aphids, flea beetles, and cabbage moths

Nasturtiums

  • Companions: Beans, brassicas, cucumbers, fruit trees, radishes, tomatoes, zucchini
  • Avoid: None specifically noted
  • Benefits: Trap crop for aphids and cucumber beetles; repels various pests

Oregano

  • Companions: Asparagus, basil, peppers, pumpkins, grapes
  • Benefits: Natural insecticide properties; attracts beneficial insects

Parsley

  • Companions: Asparagus, corn, sweet corn, tomatoes
  • Avoid: Lettuce, mint
  • Benefits: Attracts beneficial insects; deters asparagus beetles

Rosemary

  • Companions: Beans, brassicas, carrots, cauliflower, kale
  • Avoid: Pumpkins, squash
  • Benefits: Repels bean beetles, cabbage moths, and carrot rust fly

Sage

  • Companions: Brassicas, carrots, rosemary
  • Avoid: Cucumbers
  • Benefits: Repels cabbage white butterfly and carrot flies

Sunflowers

  • Companions: Beans, corn, cucumbers, squash
  • Avoid: Pole beans, potatoes
  • Benefits: Provide natural support; attract beneficial insects and pollinators

Tansy

  • Companions: Potatoes, pumpkins
  • Benefits: Repels ants, beetles, and Colorado potato beetles

Thyme

  • Companions: Brassicas, potatoes, strawberries, Brussels sprouts
  • Benefits: Deters cabbage worms and weevils; enhances strawberry flavor

Yarrow

  • Companions: Most aromatic herbs
  • Benefits: Enhances essential oil production in nearby herbs; attracts beneficial insects

Zinnia

  • Companions: General garden companion, especially summer squash
  • Benefits: Attracts ladybugs and other beneficial insects; provides continuous blooms

Specialty Combinations

Three Sisters Traditional

  • Plants: Corn, pole beans, winter squash
  • Benefits: Corn supports beans; beans fix nitrogen; squash suppresses weeds and provides ground cover

Pollinator Support Mix

Natural Pest Control Border

  • Plants: Marigolds, nasturtiums, chives, mint (contained), tansy
  • Benefits: Creates protective barrier around main crops

Soil Building Combination

  • Plants: Clover, beans, peas, comfrey
  • Benefits: Nitrogen fixation and deep nutrient mining improve soil health

Quick Reference Notes

Best Universal Companions:

  • Marigolds (pest control, soil health)
  • Nasturtiums (trap crops, pest deterrent)
  • Basil (pest control, flavor enhancement)
  • Beans (nitrogen fixation)
  • Herbs in general (pest control, beneficial insects)

Plants to Keep Separate:

  • Fennel (inhibits most vegetables)
  • Black walnut trees (toxic to many plants)
  • Beans and alliums (onion family)
  • Tomatoes and brassicas (different pH needs)

Container-Friendly Combinations:

  • Tomatoes + basil + marigolds
  • Peppers + chives + nasturtiums
  • Lettuce + radishes + sweet alyssum
  • Herbs together (basil, oregano, thyme)

Season Extenders:

  • Tall plants providing shade for cool-season crops
  • Ground covers maintaining soil temperature
  • Wind barriers protecting tender plants

This chart compiles companion planting relationships from multiple research sources. Results may vary based on local conditions, climate, and specific varieties. Always consider your garden’s unique environment when planning companion combinations.

Strategic Timing: When to Plant What

Early Season Partnerships

Start your companion planting season with cool-weather partnerships. Plant peas and spinach together in early spring—the peas fix nitrogen that the spinach can use, while both crops prefer cool conditions.

Radishes make excellent early companions for slower-germinating crops like carrots and parsnips. The radishes break up the soil as they grow and are ready to harvest just as the root crops need more space.

Mid-Season Transitions

As your cool-season crops finish, transition to warm-season partnerships. This is when you’ll plant your tomato-basil combinations, corn-bean partnerships, and summer squash with their protective nasturtium companions.

Time your plantings so that nitrogen-fixing plants like beans have a chance to establish before planting heavy feeders like corn or squash nearby.

Late Season Planning

Late summer is perfect for planting cover crop companions that will improve your soil for next year. Crimson clover, winter rye, and other cover crops can be planted between finishing summer crops to prevent soil erosion and add organic matter.

cover crops
Credit: By Ethanstuckey

Understanding Plant Spacing and Proportions

Getting companion plant spacing right is crucial for success. Too close, and plants compete for resources. Too far apart, and you lose the companion benefits.

For pest control companions like basil with tomatoes, plant within 18-24 inches for maximum effectiveness. For soil-building companions like nitrogen-fixing plants, the benefits can extend 3-4 feet in all directions.

When using trap crops, plant them slightly closer to your main crops than you would normally space plants. You want the pests to find the trap crop first, but not so close that problems can easily spread to your main vegetables.

using trap crops
Credit: SA Garden and Home

Consider mature plant sizes when planning spacing. A small basil seedling will eventually bush out to 12-18 inches wide, so plan accordingly.

Working with Different Growing Conditions

Soil pH Considerations

Different plants prefer different soil pH levels, and this affects companion plant success. Tomatoes, peppers, and eggplants prefer slightly acidic soil (pH 6.0-6.8), while brassicas like cabbage and broccoli prefer neutral to slightly alkaline soil (pH 6.5-7.5).

When planning companions, group plants with similar pH preferences together. If you must grow plants with different pH needs near each other, consider using raised beds or containers to create distinct growing environments.

Water Needs and Irrigation Planning

Successful companion planting requires matching plants with similar water needs. Mediterranean herbs like rosemary and oregano prefer drier conditions, while leafy greens need consistent moisture.

Group plants with similar water requirements together to make irrigation more efficient. If you’re using drip irrigation, design your system to accommodate different watering zones.

using drip irrigation
Credit: DripWorks

Deep-rooted and shallow-rooted companions can sometimes share water resources effectively, with the deep-rooted plants accessing water from lower soil layers while shallow-rooted plants use surface moisture.

Sun and Shade Partnerships

Use natural shade relationships to your advantage. Tall plants like corn, sunflowers, or trellised tomatoes can provide afternoon shade for heat-sensitive crops like lettuce and spinach.

This is especially valuable in hot climates where cool-season crops can bolt quickly in full sun. Strategic shading can extend your harvest season for these crops.

Consider the seasonal changes in sun angles when planning shade relationships. A location that receives morning shade in summer might be in full sun during spring and fall.

Advanced Companion Strategies

Succession Planting for Continuous Benefits

Plan your companions in waves throughout the season. Start with cool-season partners, transition to warm-season combinations, and finish with cover crops that prepare the soil for next year.

Fast-growing companions like radishes and lettuce can be replanted every 2-3 weeks to provide continuous benefits and harvests throughout the season.

Creating Pollinator Corridors

Design your companion plantings to create corridors of flowering plants that bloom in succession throughout the growing season. This provides continuous habitat for beneficial insects and pollinators.

Include native flowering plants in your companion strategies—they’re often more attractive to local beneficial insects than non-native varieties.

The Polyculture Approach

Advanced companion planters often grow three or more compatible plants together in polyculture systems. A successful polyculture might include tomatoes for the main crop, basil for pest control, nasturtiums for trap cropping, and marigolds for soil health.

marigolds around tomatoes
Credit: teh_m on reddit

These complex plantings require more planning but can create incredibly resilient and productive growing systems.

Troubleshooting Common Challenges

When Companions Don’t Work as Expected

Not every companion combination works in every garden. Regional climate differences, local pest populations, and specific growing conditions can all affect plant relationships.

If a recommended combination isn’t working for you, try adjusting the spacing, timing, or varieties. Sometimes the issue isn’t the plant pairing but other factors like soil nutrition or water stress.

Keep detailed garden records to track which combinations work best in your specific conditions. Your garden’s unique environment will determine which partnerships are most successful.

Managing Aggressive Companions

Some beneficial companion plants can become overly enthusiastic. Mint, for example, is excellent for pest control but can quickly take over a garden bed if not managed properly.

Mint
Credit: Stellar-naut on reddit

Solutions for aggressive companions include:

  • Growing them in containers placed near your main crops
  • Using them as living mulch that you harvest regularly
  • Creating physical barriers in the soil to limit root spread
  • Choosing less aggressive varieties or species

Balancing Harvest Timing

When companion plants mature at different rates, plan your harvests carefully. Quick-growing crops like radishes might be ready while their slower companions are just getting established.

Use succession planting to stagger harvests and maintain continuous companion benefits. As you harvest fast-growing companions, you can replant the same area or transition to different seasonal companions.

Find out When and How to Harvest Vegetables for Peak Flavor: Timing and Tips for Every Crop

Regional Considerations and Climate Adaptation

Hot Climate Strategies

In hot, dry climates, focus on companions that provide shade and conserve moisture. Heat-tolerant herbs like oregano and thyme can protect more sensitive vegetables from intense sun.

Use ground-covering companions like squash or sweet potatoes to shade soil and reduce water evaporation. These living mulches can significantly reduce irrigation needs.

Cold Climate Approaches

In northern gardens with short growing seasons, choose companions that mature quickly or provide season extension benefits. Row covers and cold frames work well with companion plantings to extend the growing season.

Wooden Cold Frames
Credit: eartheasy

Focus on companions that help plants establish quickly in spring, such as nitrogen-fixing plants that give nearby crops a growth boost early in the season.

Humid Climate Considerations

In humid climates where fungal diseases are common, choose companions that improve air circulation and have natural antifungal properties.

Avoid overcrowding companion plantings in humid conditions—good air circulation is crucial for preventing disease problems.

Essential Companion Plants for Every Garden

The Must-Have Pest Controllers

  • Marigolds top the list for their nematode control and general pest deterrent properties. Plant them throughout your garden for broad-spectrum protection.
  • Nasturtiums work as excellent trap crops and add edible flowers to your garden. They’re particularly valuable near cucumbers, squash, and brassicas.
  • Chives and other alliums provide excellent pest control for a wide range of crops. Their compact size makes them easy to tuck into small spaces throughout your garden.

The Soil Builders

  • Bush beans are perfect for adding nitrogen while taking up minimal space. They’re compatible with most vegetables and provide a bonus food crop.
  • Clover can be used as a living mulch or cover crop. White clover is particularly good for pathways or between beds where you want low-growing ground cover.
  • Comfrey has deep roots that bring up nutrients from subsoil layers. Its leaves make excellent compost material or liquid fertilizer.

The Beneficial Insect Attractors

  • Sweet alyssum blooms continuously and attracts tiny beneficial wasps that control aphids. It works well as an edging plant or ground cover.
  • Cosmos are easy to grow and extremely attractive to beneficial insects. They bloom until frost and self-seed readily.
  • Dill and cilantro provide nectar when allowed to flower and are useful culinary herbs. Let some plants go to seed for continuous beneficial insect habitat.

Container and Small Space Companion Planting

Maximizing Limited Space

Container companion planting requires careful attention to spacing and root zone management. Choose compact varieties and focus on compatible growth habits.

Vertical combinations work especially well in containers. Try cherry tomatoes with basil, or use a trellis to grow beans with lettuce planted around the base.

Succession Container Planting

In containers, you can easily implement succession planting by replacing finished crops with seasonal companions. Start with cool-season partnerships, then transition to warm-season combinations as the weather warms.

Window boxes and small containers are perfect for herb-vegetable companions like basil with cherry tomatoes or chives with lettuce.

Seasonal Maintenance and Care

Spring Setup

Begin your companion planting season by preparing soil and planning layouts. Test soil pH and amend as needed for your chosen companion combinations.

Start cool-season companions early, focusing on nitrogen-fixing plants that will benefit later warm-season crops.

Summer Management

Monitor pest levels and adjust companion strategies as needed. Remove trap crops when they become heavily infested, and replant quick-growing companions for continuous protection.

Maintain adequate spacing as plants grow, and thin or harvest components as needed to prevent overcrowding.

Read about Chop and Drop Gardening: Build Healthy Soil the Easy Way

Fall Transition

As summer crops finish, plant cover crop companions to improve soil for next year. Crimson clover, winter rye, and radishes can all provide soil benefits through winter.

Save seeds from successful companion plants for next year’s garden, and take notes on which combinations worked best in your specific conditions.

Frequently Asked Questions

  • Q: How close should companion plants be to each other?

A: For pest control effects, companions usually need to be within 18-36 inches of the plants they’re protecting. For soil benefits like nitrogen fixation, the effects can extend 3-4 feet. Always respect each plant’s mature size requirements—overcrowding eliminates companion benefits.

  • Q: Can I use companion planting in containers?

A: Absolutely! Container companion planting can be very effective, especially for herb-vegetable combinations. Try basil with cherry tomatoes, marigolds with peppers, or lettuce with taller plants that provide afternoon shade. Ensure your container is large enough—at least 5 gallons for most vegetable combinations.

  • Q: What if I don’t have space for all these different plants?

A: Start with multi-purpose companions that serve several functions. Herbs like basil provide pest control, culinary value, and pollinator habitat. Marigolds offer pest control and beautiful flowers. Even a few strategically placed companion plants can make a significant difference.

  • Q: Do companion plants really work, or is it just garden folklore?

A: While not every traditional pairing has scientific backing, many do. Research has confirmed benefits for combinations like marigolds reducing nematodes, diverse plantings reducing pest pressure, and legumes improving soil nitrogen. The key is understanding that companion planting works through multiple mechanisms, not magic.

  • Q: How do I know if companion planting is working in my garden?

A: Look for reduced pest damage, healthier plant growth, improved soil conditions, and increased beneficial insect activity. Keep garden records comparing areas with and without companion plants. Success may be subtle—fewer pest problems rather than dramatic changes.

  • Q: Can I practice companion planting organically?

A: Companion planting is inherently organic—it relies on natural plant relationships rather than synthetic inputs. It actually enhances organic gardening by providing natural pest control, soil improvement, and ecosystem support without chemicals.

  • Q: What’s the biggest mistake beginners make with companion planting?

A: Overcrowding is the most common mistake. Cramming too many plants together eliminates the benefits and creates competition for resources. Give each plant adequate space to thrive, and remember that companion benefits come from strategic placement, not cramming plants together.

Cramming too many plants together
Credit: msn

Conclusion: Growing a Garden Community

Companion planting transforms gardening from a series of individual plant struggles into a collaborative community effort. When you start thinking of your garden as an ecosystem where every plant has a role to play, something magical happens.

Plants grow stronger, pests become manageable, soil health improves naturally, and you develop a deeper understanding of how nature works.

The beauty of companion planting is that it grows with you. Each season teaches you something new about plant relationships, and every garden challenge becomes an opportunity to find creative partnerships.

You’ll find yourself noticing which plants attract which insects, how different combinations affect plant health, and how your garden’s unique conditions influence these relationships.

My garden today looks very different from when I started—it’s more diverse, more resilient, and frankly, more interesting. There’s always something flowering for the beneficial insects, something growing to build the soil, and plants helping each other in ways I’m still discovering.

The pest problems that once frustrated me have become manageable through natural partnerships, and my harvests have improved as plants support each other’s growth.

Your Next Steps:

Start with one simple combination that appeals to you and fits your current garden setup. Maybe it’s the classic tomato and basil pairing, or perhaps you’re intrigued by the Three Sisters method. Choose companions that match your climate, space, and growing conditions.

Begin small and build success. Plant with intention, observe with curiosity, and keep notes on what works in your specific garden. Remember that every garden is unique, and your best companion combinations might be different from the textbook recommendations.

Focus on creating diversity rather than perfection. Even simple changes like adding marigolds throughout your vegetable beds or interplanting herbs with your vegetables can create significant improvements in plant health and pest management.

The best companion planting advice I can give you? Trust the process, enjoy the learning, and remember that nature has been practicing these partnerships for millions of years. We’re just smart enough to pay attention and join the collaboration.

Your plants are ready to be part of a community—are you ready to help them find their perfect neighbors? Start this season, start small, and start building the diverse, resilient garden ecosystem that will reward you for years to come.


source https://harvestsavvy.com/companion-planting/

Can You Eat Nasturtiums? Edible Parts and How to Use Them

Yes, you can eat nasturtiums, and nearly the whole plant above the ground: flowers, buds, leaves, stems and green seed pods. Garden nasturt...