Thursday, June 26, 2025

How To Grow More in Less Space With Polyculture Gardening

Why growing just one thing at a time is like trying to dance alone – and how mixing it up creates garden magic

I’ll never forget the summer my grandmother caught me meticulously organizing her vegetable garden into perfect, separated rows. “Child,” she said with a gentle laugh, “you’re making my garden look like a parking lot. Plants don’t live alone in nature – why should they in our garden?”

That moment sparked a journey that completely transformed how I think about growing food. What started as a quest for tidier rows became a discovery of nature’s incredible wisdom – and how we can harness it to create gardens that are more productive, resilient, and beautiful than anything I could have imagined.

Today, I want to share with you the beautiful, productive world of polyculture gardening – an approach that works with nature instead of against it, creating gardens that practically take care of themselves while producing more food than you ever thought possible.

What Is Polyculture Gardening?

Polyculture is the practice of growing multiple plant species together in the same space, mimicking how plants naturally coexist in wild ecosystems.

Think of a thriving forest where hundreds of different plants grow together – each occupying its own niche, supporting neighbors, and contributing to a resilient, self-sustaining community. This approach stands in sharp contrast to monoculture – the modern agricultural practice of growing single crops in isolation.

While monoculture might look neat and organized, it’s like forcing an entire orchestra to play just one note. You miss out on nature’s symphony of beneficial relationships, natural pest control, and soil building that happens when diverse plants work together.

In my own garden, I’ve watched this principle transform everything. Where I once battled persistent pest problems in my orderly tomato rows, I now have thriving communities of tomatoes, basil, marigolds, and companion plants that protect and nourish each other.

The difference isn’t just in plant health – it’s in the vibrant ecosystem of beneficial insects, improved soil life, and dramatically reduced maintenance that naturally emerges.

Polyculture Garden
Credit: Garden Therapy

The Science Behind Nature’s Design

Understanding why polyculture works so brilliantly helps you make better decisions in your own garden. In nature, plants have evolved intricate relationships over millions of years.

Some plants excel at mining deep nutrients and sharing them through root networks. Others specialize in pest deterrence through chemical compounds they release. Still others focus on attracting beneficial insects or improving soil structure.

When we honor these relationships in our gardens, we tap into sophisticated biological systems that require no external inputs – no pesticides, minimal fertilizers, and often less water. The plants essentially manage themselves through these evolved partnerships.

The Remarkable Benefits You’ll Experience

Nature’s Sophisticated Pest Management

One of the most striking changes you’ll notice is how polyculture creates a natural pest control system that works around the clock. Many garden pests locate their preferred plants through scent trails.

When you intermix different plants with varying aromatics, you essentially scramble these scent signals, making it much harder for pests to find and devastate entire crops.

Last season, I witnessed this firsthand when I planted nasturtiums throughout my cucumber bed. Not only did they repel cucumber beetles with their peppery scent, but when aphids did arrive, they made a beeline for the nasturtiums instead of my vegetables.

The nasturtiums became a “trap crop” – deliberately attracting pests away from my harvest while their bright flowers attracted ladybugs and other beneficial predators to handle the aphid problem naturally.

Some of the most effective pest-deterring combinations I’ve discovered include onions and garlic near brassicas (they repel cabbage moths), marigolds around tomatoes (they deter nematodes and many flying insects), and catnip scattered throughout beds (it repels ants, flea beetles, and surprisingly, mosquitoes).

marigolds around tomatoes
Credit: teh_m on reddit

Revolutionary Soil Health

Different plants contribute to soil health in unique ways, creating a underground network of mutual support. Deep-rooted plants like carrots and daikon radishes break up compacted soil layers, allowing water and nutrients to penetrate more effectively.

Meanwhile, shallow-rooted crops like lettuce and herbs utilize nutrients near the surface that deep-rooted plants can’t access.

Nitrogen-fixing legumes deserve special mention here. Plants like beans, peas, and clovers have specialized root nodules that host bacteria capable of converting atmospheric nitrogen into plant-usable forms.

While it’s a common myth that they actively “share” this nitrogen with neighboring plants during their growing season, they do leave behind nitrogen-rich root material when they die back, feeding future plantings naturally.

I learned this soil lesson dramatically during my first year of gardening when I dedicated an entire bed to tomatoes. By mid-season, the plants looked stressed and yields dropped significantly – the soil was simply depleted.

Now I pair heavy feeders like tomatoes and corn with soil-builders like beans and nitrogen-accumulating plants like comfrey, creating a balanced nutrient cycle that actually improves my soil year after year.

Maximizing Every Square Inch

Polyculture allows you to think three-dimensionally and temporally about your growing space. Tall plants provide natural trellises for climbers, quick-growing crops can be harvested before slower plants need their space, and different root depths mean plants aren’t competing for the same soil nutrients.

One of my most successful space-maximizing experiments involves what I call “succession polyculture.” I plant fast-growing radishes and lettuce around slower-developing tomato seedlings. By the time the tomatoes need full space, I’ve already harvested multiple crops of greens from the same area.

Later in the season, I undersow the mature tomatoes with fall spinach, which thrives in the partial shade and cooler microclimate the tomato plants create.

Find out Why You Should Plant Tomatoes Sideways: Expert Growing Guide

Building Unshakeable Garden Resilience

Perhaps the most valuable benefit is the stability that diversity provides. When you grow many different plants together, you’re essentially creating an insurance policy against the unpredictable challenges every gardener faces. If one crop fails due to weather, pests, or disease, others will continue thriving.

This principle saved my harvest during an unusual late frost last spring. While the tender tomato and pepper plants got damaged, the cold-hardy lettuce, peas, kale, and herbs in the same beds kept producing abundantly. Instead of losing everything, we actually had some of our best early-season harvests ever.

Getting Started: Your Polyculture Foundation

The “Three Plants Per Bed” Strategy

If the idea of completely redesigning your garden feels overwhelming, start with this simple but powerful principle: instead of planting one type of vegetable per bed, choose three complementary species that work well together.

For your first polyculture experiment, try these proven combinations:

Root, Leaf, and Aromatic Trio:

  • Carrots (deep-rooted, slow-growing)
  • Lettuce (shallow-rooted, quick harvest)
  • Chives (pest-deterrent, perennial)

Heavy Feeder Support System:

  • Tomatoes (main crop, heavy nitrogen needs)
  • Bush beans (nitrogen-fixing support)
  • Basil (pest protection, culinary companion)

Cool Season Community:

  • Broccoli (main crop, brassica family)
  • Spinach (quick harvest, shade-tolerant)
  • Dill (attracts beneficial insects, pest deterrent)

This simple change immediately provides polyculture benefits while keeping management straightforward and allowing you to build confidence with the approach.

Integrating Functional Flowers

Flowers in a polyculture system aren’t decorative afterthoughts – they’re hardworking team members with specific jobs. Understanding their functions helps you place them strategically for maximum benefit.

  • Pest Control Flowers:

Marigolds release compounds through their roots that deter soil nematodes and their scent repels many flying insects. Nasturtiums act as trap crops for aphids, cucumber beetles, and squash bugs while their peppery oils naturally repel ants and other crawling pests.

  • Beneficial Insect Attractors:

Plants with small, clustered flowers like sweet alyssum, dill, and coriander provide nectar for beneficial insects whose larvae prey on garden pests. I’ve learned to always have something flowering throughout the growing season to maintain populations of these helpful predators.

  • Pollinator Support:

Sunflowers, zinnias, and cosmos attract bees and other pollinators essential for fruit and seed production. In my garden, I’ve noticed that beds with diverse flowers consistently have better fruit set on tomatoes, peppers, and squash.

Here’s How to Create a Pollinator-Friendly Garden: A Step-by-Step Guide

The Power of Aromatic Herbs

Strong-scented herbs function as your garden’s natural security system, working continuously to deter pests while providing fresh flavors for your kitchen. The key is understanding which herbs work best for specific pest problems and placing them strategically.

  • Allium Family Champions:

Onions, garlic, chives, and leeks release sulfur compounds that repel many common garden pests. I plant them throughout my beds rather than grouping them together – their pest-deterrent effects work best when distributed among vulnerable crops.

  • Mediterranean Herb Powerhouses:

Oregano, thyme, rosemary, and sage contain natural compounds that confuse pest insects and attract beneficial predators. These perennial herbs also provide year-round structure to polyculture beds while offering continuous harvest opportunities.

  • Annual Herb Workhorses:

Basil planted near tomatoes and peppers improves their growth and deters aphids and hornworms. Cilantro and dill attract beneficial wasps and predatory insects while providing fresh herbs and eventually seeds for cooking.

Explore the Best Herbs for Cut Flower Gardens: 12 Essential Varieties to Grow

Mastering Vertical Growing

Thoughtful vertical arrangement prevents shading problems while maximizing growing space. The fundamental rule is placing taller plants on the north side of beds (south side in the southern hemisphere) so they don’t shade shorter plants during peak growing hours.

  • Natural Support Systems:

Corn stalks make excellent living trellises for climbing beans – a partnership that benefits both plants. Sunflowers can support lightweight vines like cucumbers or small squash varieties. Even sturdy herb plants like rosemary can support pea or bean vines early in the season.

  • Creating Beneficial Microclimates:

Taller plants don’t just avoid shading problems – they can create beneficial growing conditions for other crops. In hot climates, strategically placed tall plants provide valuable afternoon shade for lettuce and other cool-season crops, extending their productive season significantly.

Advanced Polyculture Mastery

Once you’ve experienced success with basic polyculture principles, you can explore more sophisticated approaches that unlock even greater productivity and ecosystem benefits.

The Eight-Layer Forest Garden

The most advanced polyculture systems mimic forest ecosystems by incorporating plants that occupy different vertical and temporal niches. This creates incredibly productive and self-sustaining growing systems.

Ground Level Layers:

  • Root layer: Carrots, beets, potatoes, garlic, and other underground crops
  • Ground cover: Creeping thyme, strawberries, winter squash, and other spreading plants
  • Herbaceous layer: Annual vegetables, salad greens, and soft-stemmed plants

Vertical Layers:

  • Shrub layer: Blueberries, currants, perennial herbs like rosemary and sage
  • Understory trees: Dwarf fruit trees, elderberry, hazelnuts
  • Canopy trees: Standard fruit and nut trees for mature systems
  • Vine layer: Grapes, hardy kiwi, climbing beans and squash

Specialized Niches:

  • Water plants: If you have ponds, water features, or bog areas

This layered approach maximizes photosynthesis efficiency while creating habitat for beneficial insects and providing diverse harvest opportunities throughout the growing season.

Succession Planting in Polyculture

Planning for continuous harvest requires thinking about both space and time. Different plants mature at different rates, and smart polyculture design takes advantage of these timing differences to keep beds productive all season long.

  • Fast and Slow Combinations:

Plant quick-maturing radishes, spinach, or lettuce alongside slower-developing tomatoes, peppers, or winter squash. By the time the slow crops need full space, you’ve already harvested multiple fast crops from the same area.

  • Seasonal Transitions:

In spring, I start cool-season crops like peas and lettuce in spaces where heat-loving tomatoes and peppers will eventually grow. As temperatures warm and cool crops finish, warm-season plants seamlessly take over the space.

  • Vertical Succession:

Climbing beans planted early in the season can support themselves on temporary trellises. Later, as corn grows tall enough, the beans can transition to using corn stalks for support, freeing up trellis materials for other crops.

Climbing beans on temporary trellises
Credit: garden eco

Creating Powerful Plant Guilds

Some plant combinations create particularly synergistic relationships that go beyond simple companion planting. These guilds function as mini-ecosystems with each plant contributing specific benefits to the group.

  • The Classic Three Sisters Guild:

Corn provides support for climbing beans, beans fix nitrogen that feeds all three plants, and squash creates living mulch while its spiny stems deter raccoons and other pests. For best results, plant corn first, add beans when corn is 6 inches tall, and plant squash 2-3 weeks later.

What is the Three Sisters Planting Method?
Credit: US Fish and Wildlife Service

Here’s How to Grow a Three Sisters Garden: Corn, Beans, Squash Together

  • Mediterranean Tomato Guild:

Tomatoes, basil, oregano, and marigolds create a powerful combination. Basil improves tomato flavor and deters pests, oregano attracts beneficial insects, and marigolds provide broad-spectrum pest deterrence. Add parsley around the edges to attract predatory wasps.

  • Brassica Protection Guild:

Cabbage family plants, dill, nasturtiums, and onions work together beautifully. Dill and nasturtiums attract beneficial insects that control cabbage worms, while onions repel cabbage moths and root flies.

Seasonal Management and Maintenance

Successful polyculture requires understanding how to manage these diverse systems throughout the growing season. The maintenance approach differs significantly from traditional single-crop gardening.

Spring: Foundation and Planning

Early season preparation sets the stage for success. Start by preparing beds with plenty of compost and organic matter – diverse plant communities require rich, biologically active soil to support all their varied needs.

  • Succession Seeding Strategy:

Rather than planting everything at once, stagger plantings every 2-3 weeks for continuous harvest. This also helps prevent overwhelming pest populations and ensures you’re not harvesting everything simultaneously.

  • Climate Considerations:

In cold climates, use season extenders like row covers or cold frames to get cool-season polycultures established before transitioning to warm-season combinations. In hot climates, focus on heat-tolerant polycultures and provide afternoon shade for sensitive crops.

Learn about Desert Gardening for Beginners: Growing Food & Plants in Extreme Heat

Summer: Peak Management

During peak growing season, polyculture beds require different maintenance than monoculture systems. Instead of cultivating between neat rows, you’ll be managing a diverse community of plants with varying needs.

  • Selective Harvesting:

Learn to harvest strategically, removing plants or plant parts that have finished producing to make room for others still growing. This might mean cutting back spent lettuce plants to allow tomatoes more space, or harvesting outer leaves from chard to keep plants productive longer.

Find out Should You Let Garlic Flower? Pros & Cons Explained

  • Water Management:

Polyculture systems generally require less water than monocultures because diverse root systems use water more efficiently and plant diversity creates cooling microclimates. However, ensure deep watering reaches all root zones, not just surface-rooted plants.

Fall: Transition and Renewal

As growing seasons change, polyculture beds can transition smoothly from summer to fall crops without losing productivity.

  • Succession Integration:

As summer crops finish, immediately plant fall varieties in their place. Spinach, lettuce, and radishes can be grown in the partial shade of still-producing tomatoes and peppers, taking advantage of the warming microclimate these plants create.

Here’s How to Plant Garlic in the Fall: Planting, Care & Harvest Guide

  • Season-End Management:

Rather than clearing everything at once, practice “chop and drop” – cutting finished plants at soil level and leaving their roots and tops to decompose in place. This feeds soil organisms and provides natural mulch for next season’s plantings.

Problem-Solving Your Polyculture Garden

Every gardener encounters challenges, and polyculture systems have their own unique troubleshooting considerations. Understanding how to address common issues will help you maintain productive, healthy plant communities.

When Plants Don’t Play Well Together

Not all plant combinations work harmoniously. Some plants release chemicals that inhibit their neighbors’ growth (allelopathy), while others may compete too aggressively for resources.

Problematic Pairings to Avoid:

  • Black walnut trees inhibit many vegetables and should be avoided near food crops
  • Fennel can stunt the growth of many vegetables and is best grown separately
  • Beans and alliums (onions, garlic) don’t thrive together – alliums can inhibit the nitrogen-fixing bacteria beans depend on
  • Plants in the same family often share pests and diseases, so avoid clustering too many brassicas or nightshades together

Signs of Incompatibility: Watch for stunted growth, yellowing leaves, or poor fruit production in plants that should be thriving. If certain combinations consistently underperform in your garden, don’t hesitate to separate them.

Find out Why Are My Cucumber Leaves Turning Yellow? Top Causes & Solutions

Managing the “Where Is Everything?” Challenge

The biggest fear many gardeners have about polyculture is losing track of what’s planted where. This challenge is real but entirely manageable with good organization strategies.

Visual Organization Techniques:

  • Use brightly colored flowers like marigolds or nasturtiums as natural markers between different crop sections
  • Plant in recognizable patterns – perhaps alternating vegetables with herbs, or creating distinct groupings within larger beds
  • Keep pathways clear and well-defined to maintain easy access to all areas

Record-Keeping Solutions: Maintain a simple garden journal with basic sketches of bed layouts and planting dates. Digital photos taken throughout the season also help track what grows where and how well different combinations perform.

garden journal

Timing and Harvest Coordination

Different maturation times can feel chaotic initially, but this actually becomes one of polyculture’s greatest advantages once you adjust your mindset from “big harvest days” to “continuous abundance.”

  • Embrace the Continuous Harvest:

Instead of having overwhelming amounts of one crop ready simultaneously, polyculture provides steady, manageable harvests of diverse foods throughout the season. This means fresher food on your table and less pressure to preserve large quantities at once.

  • Strategic Succession Planning:

Plan plantings so that as one crop finishes, another is ready to take its place. This requires some advance planning but creates incredibly productive use of garden space.

Discover When and How to Harvest Vegetables for Peak Flavor: Timing and Tips for Every Crop

Economic and Environmental Benefits

Polyculture gardening provides significant economic advantages that become more apparent over time. Reduced need for external inputs, higher productivity per square foot, and improved soil health all translate to cost savings and better environmental stewardship.

  • Input Reduction: Well-designed polyculture systems require fewer pesticides (often none), less fertilizer, and frequently less water than monoculture gardens. The plants provide these services for each other naturally.
  • Improved Yields: While individual plants may be slightly smaller in polyculture systems, total productivity per square foot typically increases significantly due to better space utilization and beneficial plant interactions.
  • Soil Investment: Unlike annual inputs that must be purchased every season, the soil improvement that comes from diverse polyculture systems compounds year after year, creating long-term value and reduced ongoing costs.

Tools and Techniques for Success

Certain tools and approaches make polyculture management much easier and more enjoyable. These don’t need to be expensive or complicated – often the simplest solutions work best.

Essential Tools for Polyculture Management

  • Precision Harvesting Tools: Sharp, clean pruning shears and harvest knives allow you to selectively harvest from dense plantings without damaging neighboring plants. A good pair of pointed scissors is invaluable for harvesting herbs and greens in tight spaces.
  • Soil Building Tools: A broad fork for loosening soil without disturbing plant roots, and a good compost thermometer for monitoring your soil amendment efforts. A soil pH test kit helps ensure your diverse plant community has appropriate growing conditions.
  • Organization Tools: Plant markers that last (metal or stone), a waterproof garden journal, and a simple measuring tape for planning spacing help keep polyculture beds organized and trackable.
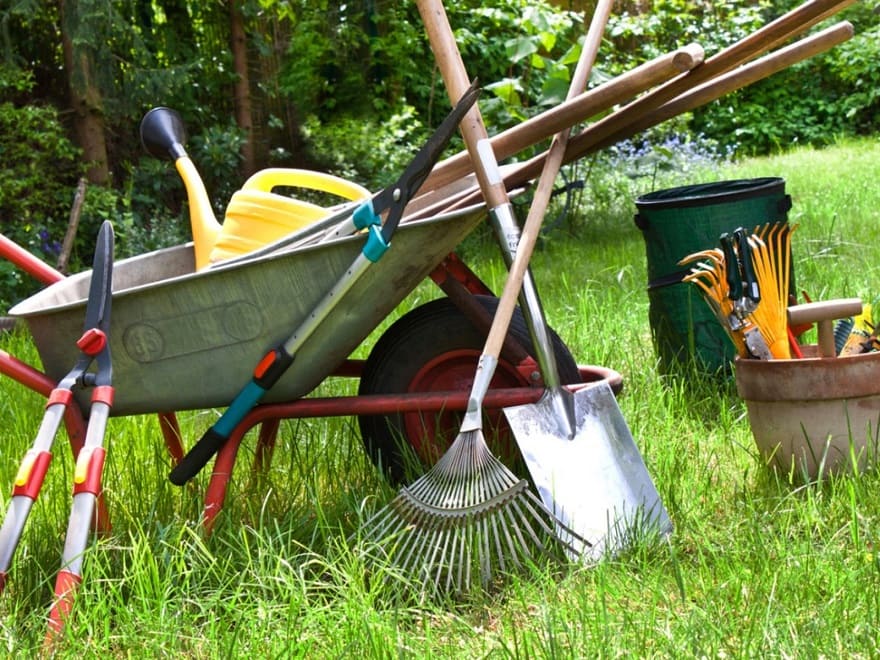
Unveiling The Must-Have Gardening Tools: Essential Picks for Every Gardener

Seed Management and Propagation

Advanced polyculture gardeners often benefit from understanding seed saving and propagation techniques, which allow for better customization of plant varieties and timing.

  • Succession Seeding: Keep small amounts of quick-maturing crop seeds available for continuous planting as spaces open up in beds. Radishes, lettuce, and spinach are perfect for filling temporary gaps.
  • Self-Seeding Management: Many polyculture plants will self-seed if allowed. Learning to recognize and manage these volunteers can provide continuous crops with minimal effort. Dill, cilantro, lettuce, and many herbs excel at this.
  • Propagation Opportunities: Understanding basic cutting and division techniques allows you to multiply beneficial perennial herbs and flowers throughout your polyculture systems without additional cost.

Here’s How to Propagate Plants in Water: Easy Step-by-Step Method

Your Polyculture Action Plan

Starting your polyculture journey doesn’t require completely overhauling your existing garden. The most successful approach involves gradual transition, building skills and confidence while maintaining productive growing space.

This Season: Easy First Steps

  • Choose One Experimental Bed: Select a small area where you can try basic polyculture principles without risking your entire harvest. Start with the “three plants per bed” approach using proven combinations.
  • Add Beneficial Flowers: Even if you’re not ready to change your vegetable planting entirely, adding marigolds, nasturtiums, or sweet alyssum throughout existing beds provides immediate pest control and pollinator benefits.
  • Try Vertical Partnerships: Plant climbing beans or peas near existing tomato or pepper plants to begin experimenting with beneficial plant relationships and space efficiency.

Next Season: Building Complexity

  • Expand Successful Combinations: Take note of which polyculture experiments work well in your specific garden conditions and expand these proven combinations to larger areas.
  • Incorporate Perennial Elements: Add perennial herbs, small fruit bushes, or dwarf fruit trees to create permanent polyculture structure that builds value over time.
  • Experiment with Advanced Techniques: Try succession planting, undersowing, or more complex plant guilds as your comfort level and observation skills develop.

Long-Term Vision: Ecosystem Development

  • Soil Development Focus: As your polyculture beds mature, focus on building soil health through diverse plant root systems, natural mulching, and reduced tillage.
  • Beneficial Habitat Creation: Develop areas that support beneficial insects, birds, and other garden allies through diverse flowering plants and structural complexity.
  • Community Connection: Share seeds, plants, and knowledge with other gardeners interested in polyculture approaches. These systems work even better when gardeners collaborate and share experiences.

Unlocking the Secrets of Ecosystem-Based Garden Design for a Sustainable Future

Frequently Asked Questions

  • Q: Will polyculture actually produce less food than traditional row gardening?

A: While individual plants may be slightly smaller due to sharing space, total productivity per square foot typically increases significantly in well-designed polyculture systems.

You’re utilizing vertical space, different soil depths, and temporal succession that single-crop systems can’t access. Most gardeners find they harvest more diverse, continuous food from polyculture beds.

  • Q: How do I know which plants will actually grow well together in my specific climate and soil?

A: Start with proven combinations like tomatoes with basil and marigolds, or carrots with lettuce and chives, then observe carefully how plants respond in your unique conditions. Keep simple notes about what thrives and what struggles. Every garden is different, so local experimentation and observation matter more than following rigid rules.

  • Q: Is polyculture significantly more work than traditional gardening methods?

A: Initially, polyculture requires more planning and observation as you learn how different plants interact. However, established polyculture systems often require less maintenance due to natural pest control, improved soil health, and reduced need for external inputs. The work shifts from fighting problems to managing abundance.

  • Q: Can I practice effective polyculture in containers or small spaces?

A: Absolutely! Container polyculture works wonderfully and may actually be easier to manage than ground-based systems. Try combining herbs with vegetables in large pots, growing lettuce around the base of tomato plants, or creating vertical polycultures with climbing and trailing plants in the same container.

  • Q: What should I do if some plants in my polyculture aren’t performing well?

A: Poor performance is valuable information rather than failure. Note which combinations struggle in your conditions and adjust accordingly. Some plants may need more space, different nutrients, or alternative companions.

Don’t hesitate to remove underperforming plants to give others more room – this selective management is part of polyculture success.

  • Q: How do I prevent polyculture beds from becoming an unmanageable mess?

A: Organization and planning prevent chaos. Use flowers or distinctive plants as visual markers between sections, maintain clear pathways, and keep a simple garden map. Start with fewer plants and add complexity gradually as you develop management skills. Remember that some apparent “messiness” is actually beneficial ecosystem complexity.

Embracing the Polyculture Journey

Polyculture gardening represents more than just a growing technique – it’s a fundamental shift toward working with natural systems rather than against them. This approach honors the sophisticated relationships plants have developed over millions of years and invites us to become partners in these incredible biological communities.

The transformation in my own garden has been profound. What began as an experiment in mixing a few plants together has evolved into a thriving ecosystem that requires less work, produces more food, and brings endless fascination as I observe the intricate relationships between plants, insects, and soil life.

Your polyculture journey will be unique to your climate, soil, space, and family needs. Trust the process, embrace experimentation, and don’t be discouraged by initial challenges. Every season brings new discoveries and opportunities to refine your approach.

Start small this season with just one experimental bed or even a single container. Choose proven plant combinations, observe carefully, and keep simple notes about what works. Build complexity gradually as your skills and confidence develop.

The reward isn’t just more productive gardens – though you’ll certainly experience that. The deeper gift is reconnecting with natural systems and discovering the profound satisfaction that comes from working as a partner with nature rather than trying to control it.

Whether you’re dreaming of a small herb and vegetable container on your balcony or envisioning an entire food forest in your backyard, polyculture principles can transform your growing experience. The plants are ready to teach you – all you need to do is start listening.

What polyculture experiment calls to you for this season? Share your plans, questions, or success stories in the comments below. Your experiences inspire and help other gardeners on their own polyculture journeys!


source https://harvestsavvy.com/polyculture-gardening/

Wednesday, June 25, 2025

13 Fiddle Leaf Fig Problems and How to Solve Them With Easy Fixes

Let me start with a confession: my first fiddle leaf fig lasted exactly three months. Three months of beautiful Instagram-worthy photos followed by a dramatic descent into brown-spotted, leaf-dropping chaos that left me questioning my entire identity as a plant parent. Sound familiar?

If you’re reading this with a struggling fiddle leaf fig nearby, frantically googling “why is my plant dying,” take a deep breath. You’re in excellent company.

Fiddle leaf figs have earned their reputation as the drama queens of the houseplant world, but here’s what I’ve learned after years of trial, error, and finally achieving success: they’re not actually trying to be difficult. They’re just very honest about their needs.

Think of your fiddle leaf fig as that friend who tells you exactly what they think—once you understand their language, the relationship becomes so much easier (and more rewarding).

Emergency Triage: Is Your Plant in Crisis?

Before we dive deep, let’s address the panic mode. If you’re here because your plant looks like it’s on death’s door, here’s your emergency checklist:

Immediate Action Required:

  • Massive leaf drop (5+ leaves in a few days): Stop watering immediately, check for root rot
  • Black or dark brown mushy spots: Remove from pot, inspect roots, trim any black/mushy parts
  • All leaves drooping suddenly: Check soil moisture—either severely under or overwatered
  • Visible pests: Isolate plant immediately, identify pest type, begin treatment

Can Wait a Few Days:

  • Brown leaf tips: Usually humidity or watering schedule issue
  • Small brown spots: Likely minor pest issue or bacterial infection
  • One or two yellow leaves: Often normal aging, monitor for spread
  • Slow growth: Environmental adjustment needed, not urgent

Now, let’s solve these problems step by step.

Part 1: The “Oh No!” Moments – Emergency Signals Decoded

The Great Leaf Drop Disaster

Nothing strikes fear into a plant parent’s heart quite like finding multiple leaves scattered around your fiddle leaf fig like fallen soldiers. I still remember discovering seven leaves on the floor one morning—I genuinely considered calling in sick to work for a “plant emergency.”

  • What’s Really Happening: Your fiddle leaf fig is basically having a meltdown about something in its environment. Here’s how to decode the message:
  • Gradual leaf drop (1-2 leaves over weeks): Usually normal aging of older, lower leaves. No panic needed.
  • Sudden mass leaf drop: Environmental shock or watering extremes. This is your plant’s way of conserving energy when stressed.
fiddle leaf fig leaves dropping
Credit: Justascruffygirl on reddit

The Detective Work:

  • Recent changes: Did you move, repot, or change its location?
  • Seasonal shifts: Moving from warm to cool weather often triggers drop
  • Watering extremes: Been extra generous or forgotten to water for weeks?
  • Root investigation: If other causes don’t fit, check for root rot

The Recovery Plan:

  1. Stabilize immediately: Keep temperature, light, and location consistent
  2. Check soil moisture: Water only when top 2 inches feel dry
  3. Be patient: Recovery can take 4-6 weeks
  4. New growth is the goal: Focus on creating conditions for healthy new leaves

Recovery Timeline: With proper care, new growth typically appears in 4-8 weeks. Don’t expect dropped leaves to return—your focus should be on preventing further loss and encouraging new growth.

Find out Why You Should Leave Fall Leaves on Your Lawn and Garden

Brown and Black Spots: Reading Your Plant’s Medical Chart

Brown spots are like your plant’s way of showing you exactly what’s wrong. The location, size, and appearance tell the whole story.

Brown spots on a fiddle leaf fig's leaves
Credit: shinjikari01 on reddit

Small, Scattered Brown Spots = Pest Investigation Time

When I first discovered tiny brown spots on my fiddle leaf fig, I honestly thought it was just “character.” Wrong. Those little spots were actually spider mite damage, and they were having a feast on my plant’s sap.

Pest Identification Guide:

  • Spider mites: Tiny brown spots with fine webbing between leaves and stems
  • Scale insects: Brown bumps that look like they’re part of the plant (they’re not!)
  • Thrips: Small brown spots that eventually become holes

Treatment Protocol:

  1. Isolate immediately (trust me, pests spread faster than gossip)
  2. Identify the culprit using a magnifying glass
  3. Choose your weapon: Insecticidal soap for general treatment, neem oil for prevention
  4. Treat weekly until no signs remain for two consecutive weeks
  5. Monitor closely for reinfection

Large, Irregular Brown Patches = Bacterial Leaf Spot

These look different from pest damage—larger, often with yellow halos, and they spread irregularly across the leaf surface. I learned this the hard way when I brought home a “bargain” plant from a nursery that turned out to be infected.

Treatment Approach:

  • Remove affected leaves immediately with sterilized scissors
  • Improve air circulation around the plant
  • Reduce humidity slightly if it’s very high
  • Consider copper-based fungicide for severe cases
  • Monitor new growth for 4-6 weeks

Dark Brown to Black Spots = Root Rot Emergency

This is the big one. When spots are dark brown to black and appear mushy or wet, your plant’s roots are drowning. Time for emergency surgery.

Root Rot Rescue Mission:

  1. Remove from pot immediately
  2. Rinse roots gently to inspect damage
  3. Trim all black, mushy roots with sterilized tools
  4. Repot in fresh, well-draining soil
  5. Reduce watering dramatically until recovery signs appear

Recovery Timeline: Root rot recovery is slow—expect 6-12 weeks before seeing significant improvement. During this time, the plant may continue to drop leaves as it redirects energy to root recovery.

Here’s How to Identify and Fix Brown Spots on Your Snake Plant

Sunburn: When Your Plant Gets a Bad Tan

Those white or tan patches that appear suddenly? Your fiddle leaf fig got sunburned. It happened to mine when I enthusiastically moved it to a “brighter spot” without acclimating it first.

What Sunburn Looks Like:

  • Bleached, white, or tan patches on leaves
  • Usually affects leaves closest to the light source
  • Patches feel papery or crispy to touch
  • Often accompanied by leaf curling
fiddle leaf fig got sunburned
Credit: ssoe2020 on reddit

Prevention and Treatment:

  • Move gradually: When changing light conditions, do it over 1-2 weeks
  • Use sheer curtains: Filter harsh direct sunlight
  • Remove damaged leaves: They won’t recover and may become infection sites
  • Monitor new growth: Should be normal once proper light levels are established

Find out Why Are My Cucumber Leaves Turning Yellow? Top Causes & Solutions

Part 2: The Subtle SOS Signals

Brown Leaf Tips: Your Plant’s Cry for Humidity

I learned about this one during my first winter with a fiddle leaf fig. As soon as the heating system kicked on, my beautiful plant started developing crispy brown edges like someone had taken a lighter to each leaf tip.

fiddle leaf fig brown leaf
Credit: SpeakAndSpin on reddit

What’s Really Happening: Your plant is literally drying out from the edges inward. This happens when:

  • Indoor humidity drops below 40% (common in heated homes)
  • Consistent underwatering
  • Proximity to heating vents or drafty areas
  • Using water with high mineral content

The Humidity Solution:

  • Humidifier: Most effective long-term solution (aim for 50-60% humidity)
  • Pebble trays: Fill shallow trays with water and pebbles, place under pot
  • Plant grouping: Cluster plants together to create humid microclimates
  • Avoid misting: Can lead to fungal issues; focus on ambient humidity instead

Watering Adjustments:

  • Check soil moisture more frequently during dry seasons
  • Water quality matters—use filtered water if your tap water is very hard
  • Ensure thorough watering when soil is dry to prevent salt buildup

Drooping and Curling: Your Plant Can’t Hold Itself Up

Drooping leaves are your fiddle leaf fig’s way of saying “I can’t maintain my structure anymore.” But here’s where it gets tricky—both overwatering and underwatering cause drooping, just for different reasons.

Underwatered Drooping:

  • Soil feels dry throughout
  • Leaves are limp but still green
  • Plant perks up quickly after watering
  • Often accompanied by brown leaf edges

Overwatered Drooping:

  • Soil feels wet or soggy
  • Leaves may be yellowing
  • Plant doesn’t improve after watering
  • May have musty smell from soil
Drooping leaves on fiddle leaf fig
Credit: Muncheeese on reddit

Leaf Curling Specifics: Curling is often your plant’s attempt to reduce surface area and conserve moisture. This can happen from:

  • High light levels: Leaves curl to protect themselves
  • Low humidity: Conserving internal moisture
  • Inconsistent watering: Stress response to unpredictable conditions

Recovery Strategy:

  1. Assess soil moisture first (finger test 2 inches deep)
  2. Adjust watering accordingly
  3. Check environmental conditions (light, humidity, temperature)
  4. Be patient: Drooping can take 1-2 weeks to resolve even with proper care

Small New Growth: Your Plant is Energy-Starved

When your fiddle leaf fig produces tiny, pale leaves instead of those gorgeous large ones you see in magazines, it’s essentially saying “I’m doing my best with what you’ve given me, but I need more resources.”

fiddle leaf fig produces tiny, pale leaves
Credit: iforgotthatiforgot on reddit

Common Causes:

  • Insufficient light: Most common reason for small leaves
  • Nutrient deficiency: Plant hasn’t been fertilized in months
  • Root bound conditions: Not enough space for proper root development
  • Seasonal dormancy: Normal in fall and winter

The Enhancement Plan:

  • Light assessment: Move to brighter location gradually
  • Fertilizer schedule: Monthly feeding during growing season (spring/summer)
  • Root check: Look for roots growing from drainage holes
  • Patience: New large leaves take 2-3 months to develop with improved conditions

Here’s How to Grow and Care for Pot Mums: A Comprehensive Guide

Red Spots: Your Plant’s Stress Response

Those tiny red dots that sometimes appear on new leaves? I call them your plant’s stress rash. The technical term is edema, and it happens when your plant absorbs more water than it can process, causing cells to burst.

fiddle leaf fig red spots
Credit: justsheerdumbluck on reddit

Why Edema Occurs:

  • Inconsistent watering: Alternating between too dry and too wet
  • High humidity with poor air circulation
  • Temperature fluctuations
  • Overwatering during cooler periods

Prevention and Management:

  • Consistent watering schedule: Avoid extreme wet/dry cycles
  • Improve air circulation: Use a small fan nearby
  • Monitor seasonal changes: Adjust watering as growth slows in winter
  • Don’t panic: Existing spots won’t disappear, but new growth should be normal

Part 3: The Uninvited Guests – Comprehensive Pest Management

Most Common Fiddle Leaf Fig Pests

1. Spider Mites: The Invisible Menace

These microscopic troublemakers love dry conditions and announce themselves with fine webbing and stippled yellow spots on leaves. I discovered my first infestation when I noticed what looked like tiny spider webs in the morning light.

Spider Mites on Fiddle Leaf Fig
Credit: leonandgeorge

Detection and Treatment:

  • Early signs: Fine webbing, stippled leaves, tiny moving dots
  • Treatment: Spray with water to remove, follow with insecticidal soap
  • Prevention: Maintain humidity above 40%

2. Mealybugs: The Cotton Ball Invaders

Look like white cotton balls clustered in leaf joints and stem crevices. They’re plant vampires, literally sucking the life out of your fiddle leaf fig.

mealy bugs on Fiddle Leaf Fig
Credit: RollinGnome on reddit

Combat Strategy:

  • Spot treatment: Dab with rubbing alcohol on cotton swabs
  • Systemic treatment: Insecticidal soap spray for large infestations
  • Follow-up: Weekly inspections for 4-6 weeks

3. Scale Insects: Masters of Disguise

These brown, dome-shaped insects attach to stems and leaves, looking so much like part of the plant that they’re often missed until the infestation is severe.

Scale insects on Fiddle Leaf Fig
Credit: Professional_Big6743 on reddit

Identification and Removal:

  • Physical removal: Scrape off with fingernail or soft brush
  • Chemical treatment: Systemic insecticide for heavy infestations
  • Monitoring: Check weekly for several months

Integrated Pest Management Strategy

Prevention First:

  • Quarantine new plants for 2-3 weeks before introducing to your collection
  • Regular inspection during weekly care routine
  • Maintain proper humidity (pests love dry conditions)
  • Avoid overcrowding plants (improves air circulation)

Treatment Protocol:

  1. Isolate immediately upon detection
  2. Identify pest type accurately
  3. Remove manually when possible
  4. Apply appropriate treatment
  5. Monitor and repeat treatments as needed
  6. Gradual reintroduction to plant collection after 2 pest-free weeks

Learn To Master Natural Pest Control With Top Organic Solutions

Part 4: Environmental Mastery

Light: Finding the Goldilocks Zone

Fiddle leaf figs want bright, indirect light—bright enough to read a book comfortably, but not bright enough to get a suntan. Getting this right is often the difference between a thriving plant and a struggling one.

Ideal Light Conditions:

  • East-facing windows: Perfect morning light without harsh afternoon sun
  • South/west windows with protection: Sheer curtains or positioned 3-4 feet back
  • North windows: Usually insufficient unless very large
  • Artificial lighting: Full-spectrum grow lights 12-16 inches away
Fiddle leaf figs want bright, indirect light
Credit: smidtce on reddit

Troubleshooting Light Issues:

Too Much Light Signs:

  • White or tan patches (sunburn)
  • Leaves curling upward
  • Rapid soil drying
  • New leaves smaller than expected

Too Little Light Signs:

  • Leggy growth with long spaces between leaves
  • Small, pale new leaves
  • Gradual leaf drop
  • Leaning heavily toward light source

Light Optimization Tips:

  • Rotate weekly: Quarter turn to ensure even growth
  • Seasonal adjustments: May need to move closer to windows in winter
  • Acclimate gradually: When increasing light, do it over 1-2 weeks
  • Monitor new growth: Best indicator of proper light levels

Explore the Best Air-Purifying Indoor Plants That Thrive Without Direct Sunlight

Watering: The Make-or-Break Skill

This is where most fiddle leaf fig relationships go wrong. I used to water mine every Sunday religiously, regardless of what the plant actually needed. Terrible mistake.

The Golden Rules:

  1. Water by soil condition, not calendar
  2. Thorough watering when needed
  3. Excellent drainage is non-negotiable
  4. Seasonal adjustments are essential

Proper Watering Technique:

  1. Check soil moisture: Finger test 2 inches deep
  2. Water thoroughly: Until water runs out drainage holes
  3. Empty excess water: Remove from saucer after 30 minutes
  4. Wait for next cycle: Until top 2 inches dry again

Seasonal Watering Adjustments:

  • Spring/Summer: More frequent watering as growth increases
  • Fall/Winter: Reduce frequency as growth slows
  • Heating season: May need more frequent watering due to dry air
  • Dormant period: Water much less frequently but don’t let completely dry

Water Quality Considerations:

  • Filtered water preferred: Especially if tap water is very hard
  • Room temperature water: Avoid shocking roots with cold water
  • Chlorine concerns: Let tap water sit 24 hours before using

Soil and Potting: The Foundation of Health

The right soil mix can prevent 80% of fiddle leaf fig problems. Your plant needs soil that drains well but retains some moisture—think “moist sponge, not swimming pool.”

Ideal Soil Composition:

  • Base: High-quality potting mix (not garden soil)
  • Drainage amendments: Perlite, coarse sand, or orchid bark
  • Moisture retention: Small amount of peat moss or coconut coir
  • pH level: Slightly acidic to neutral (6.0-7.0)

DIY Soil Mix Recipe:

  • 60% quality potting soil
  • 25% perlite or pumice
  • 10% orchid bark
  • 5% worm castings or compost

Potting Best Practices:

  • Drainage holes mandatory: Multiple holes in bottom of pot
  • Size matters: Pot diameter 2 inches larger than root ball
  • Repotting schedule: Every 2-3 years or when rootbound
  • Timing: Spring is ideal for repotting

Temperature and Humidity: Creating Paradise

Remember, fiddle leaf figs are from tropical West Africa. They’re happiest when you can replicate those warm, humid conditions.

Optimal Ranges:

  • Temperature: 65-80°F (18-27°C)
  • Humidity: 50-60% (most homes are 30-40%)
  • Air circulation: Gentle movement, not drafts

Temperature Shock Prevention:

  • Avoid cold drafts: Keep away from doors, windows in winter
  • Heat source caution: Don’t place near radiators, heat vents
  • Seasonal transitions: Gradual adjustment to changing conditions
  • Travel considerations: Protect during transport in extreme weather

Humidity Enhancement Methods:

Most Effective:

  • Room humidifier: Best long-term solution
  • Pebble trays: Immediate area humidity boost
  • Plant grouping: Creates humid microclimate

Less Effective but Helpful:

  • Bathroom placement: If it gets enough light
  • Kitchen location: Natural humidity from cooking

Avoid:

  • Leaf misting: Can promote fungal issues
  • Wet soil for humidity: Leads to root rot

Fertilizing: Feeding for Success

Proper nutrition transforms a surviving plant into a thriving one. But fiddle leaf figs are sensitive to overfertilizing, so less is often more.

Fertilizing Schedule:

  • Growing season (spring/summer): Monthly feeding
  • Dormant season (fall/winter): No fertilizing
  • Newly repotted plants: Wait 6-8 weeks before fertilizing

Fertilizer Selection:

  • Balanced liquid fertilizer: 10-10-10 or 20-20-20 NPK
  • Dilution: Half-strength to prevent burn
  • Organic options: Fish emulsion, worm casting tea
  • Slow-release granules: Applied once per season

Signs of Fertilizer Problems:

Overfertilizing:

  • Brown leaf edges despite proper watering
  • White salt crust on soil surface
  • Rapid growth followed by sudden decline

Underfertilizing:

  • Pale, small new leaves
  • Very slow growth during growing season
  • Yellowing of older leaves

Part 5: Seasonal Care and Long-Term Success

Spring: The Wake-Up Call

As temperatures warm and days lengthen, your fiddle leaf fig starts preparing for its active growing season.

Spring Care Checklist:

  • Gradually increase watering as soil dries faster
  • Begin monthly fertilizing when new growth appears
  • Repot if needed (every 2-3 years)
  • Increase light gradually if moving to brighter location
  • Inspect for winter damage and prune if necessary

Summer: Peak Growing Season

This is when your fiddle leaf fig should be putting on its best show with large, glossy new leaves.

Summer Priorities:

  • Consistent watering schedule as plant actively grows
  • Monitor for pests (they’re more active in warm weather)
  • Maintain humidity despite air conditioning
  • Regular fertilizing continues monthly
  • Rotate weekly for even growth

Fall: Preparation Mode

As temperatures drop and light decreases, your plant starts preparing for its rest period.

Fall Adjustments:

  • Reduce fertilizing and stop by November
  • Decrease watering frequency as growth slows
  • Increase humidity as heating systems start up
  • Monitor for temperature stress from heating system
  • Final pest inspection before dormant season

Here’s How to Turn Fall Leaves into Soil Enriching Mulch For a Nutrient-Rich Garden

Winter: Rest and Recovery

This is your plant’s dormant season. Growth slows dramatically, and care requirements change.

Winter Care Strategy:

  • Minimal watering: Only when soil is quite dry
  • No fertilizing: Plant isn’t actively growing
  • Humidity focus: Combat dry indoor air
  • Light optimization: May need to move closer to windows
  • Temperature stability: Protect from cold drafts

Maintenance and Cleaning

Regular maintenance keeps your fiddle leaf fig looking its best and helps prevent problems.

Weekly Tasks:

  • Soil moisture check: Finger test for watering needs
  • Leaf inspection: Check for pests, damage, or problems
  • Rotation: Quarter turn for even growth
  • Dust removal: Quick wipe with damp cloth

Monthly Tasks:

  • Deep cleaning: Thorough leaf wiping with damp cloth
  • Fertilizing (during growing season)
  • Detailed pest inspection: Check stems, undersides of leaves
  • Growth assessment: Measure progress and adjust care
Cleaning fiddle leaf fig
Credit: Patch Plants

Seasonal Tasks:

  • Repotting (spring, every 2-3 years)
  • Pruning (late winter/early spring)
  • Deep soil inspection for root health
  • Care routine adjustments for seasonal changes

Part 6: Recovery, Propagation, and Advanced Care

Recovery Timelines: Managing Expectations

Understanding how long recovery takes helps you stay patient and avoid overcorrecting.

Typical Recovery Periods:

  • Pest treatment: 2-4 weeks for complete elimination
  • Root rot recovery: 6-12 weeks for new growth
  • Environmental stress: 4-8 weeks for stability
  • Nutritional deficiency: 6-10 weeks for improvement
  • Light adjustment: 8-12 weeks for full adaptation

Recovery Signs to Watch For:

  • New growth appearing: Best sign of successful treatment
  • Existing leaves looking healthier: Color improvement, firmness
  • Stable conditions: No further leaf drop or problem progression
  • Root development: New white roots visible during repotting

Propagation: Growing Your Collection

Once you’ve mastered fiddle leaf fig care, propagation lets you expand your collection or share with friends.

Best Propagation Methods:

Stem Cuttings:

  1. Select healthy growth: 6-8 inches with 2-3 leaves
  2. Make clean cut: Just below a node with sterilized tools
  3. Rooting hormone optional: Can speed development
  4. Water propagation: Place in clean water, change weekly
  5. Soil transition: Plant when roots are 2-3 inches long

Air Layering:

  • For larger branches: When you want to maintain parent plant
  • Slower process: 6-12 months for full development
  • Higher success rate: Roots develop while attached to parent

Propagation Timeline:

  • Water roots: 4-8 weeks to develop
  • Soil planting: When roots are 2-3 inches
  • Establishment: 8-12 weeks in soil
  • Normal care: Treat as mature plant after 6 months

Here’s How to Make Willow Water: The Best Natural Rooting Hormone

When to Seek Help or Give Up

Sometimes, despite our best efforts, a plant is beyond saving. Here’s how to know when you’ve reached that point.

Signs of Hope:

  • Firm, green stems: Even if no leaves remain
  • White sap when scratched: Indicates living tissue
  • New growth buds: Small bumps along stems
  • Healthy root system: Even if top is damaged

Signs It’s Time to Let Go:

  • Completely black, mushy stems: No living tissue remaining
  • No response after 3 months: Of proper care and treatment
  • Extensive root rot: More than 75% of roots are black/mushy
  • Repeated pest infestations: Despite proper treatment

Making the Decision:

  • Propagation attempt: Take any healthy cuttings first
  • Compost responsibility: Don’t spread diseases to other plants
  • Learn from experience: What went wrong and how to prevent it
  • Start fresh: Apply lessons learned to new plant

Emergency Quick Reference Guide

Immediate Problems and Solutions

Plant is dropping many leaves:

  1. Check soil moisture immediately
  2. If soggy: Stop watering, check for root rot
  3. If dry: Water thoroughly, establish consistent schedule
  4. Stabilize environment (temperature, light, location)

Brown/black spots appearing:

  1. Isolate plant from others
  2. Small spots: Check for pests with magnifying glass
  3. Large patches: Remove affected leaves, improve air circulation
  4. Black spots: Check roots immediately for rot

All leaves drooping suddenly:

  1. Check soil moisture first
  2. Assess recent environmental changes
  3. Look for pest damage
  4. If overwatered: Allow to dry, check roots
  5. If underwatered: Water thoroughly, monitor humidity

Visible pests:

  1. Isolate immediately
  2. Identify pest type
  3. Begin appropriate treatment (soap, neem oil, alcohol)
  4. Monitor daily and repeat treatment weekly
  5. Quarantine for 2 weeks after last pest sighting

Your Path to Fiddle Leaf Fig Success

Here’s what I want you to remember: every experienced plant parent has killed a fiddle leaf fig. It’s practically a rite of passage in the houseplant community. The difference between long-term success and repeated failure isn’t perfection—it’s learning to read your plant’s signals and responding appropriately.

My current fiddle leaf fig (I call her Fiona) has been with me for four years now. She’s tall, bushy, and absolutely gorgeous, but more importantly, I finally understand what she needs. When she drops a leaf, I investigate rather than panic.

When her leaves start looking dull, I check the humidity levels. When new growth comes in small, I assess the light situation and make gradual adjustments.

The relationship between you and your fiddle leaf fig is exactly that—a relationship. It requires time, attention, and mutual understanding. There will be setbacks, learning moments, and small victories along the way.

But when you finally get it right, when you walk into a room and see your thriving, glossy-leaved beauty reaching confidently toward the ceiling, you’ll understand why plant parents everywhere are willing to put up with the drama.

Your fiddle leaf fig isn’t trying to be difficult. It’s just waiting for you to learn its language. Once you understand what it’s telling you through its leaves, stems, and growth patterns, you’ll wonder why you ever found it challenging in the first place.

Be patient with yourself and your plant. Every brown spot is valuable information, every dropped leaf is a learning opportunity, and every new leaf is a small celebration. With the knowledge in this guide and consistent care, your fiddle leaf fig will transform from a source of stress into a source of pride and joy.

Remember: Consistency beats perfection every time. Your plant will forgive mistakes much more easily than neglect. Happy growing!


source https://harvestsavvy.com/fiddle-leaf-fig-problems/

Monday, June 23, 2025

Can Chickens Swim? The Surprising Truth About Chickens and Water

Picture this: It’s a blazing 95°F afternoon, and you’re watching your chickens panting under the shade of their coop, wings spread wide and beaks open, clearly struggling with the heat.

Your crystal-clear swimming pool sparkles invitingly just a few yards away. You’ve seen those adorable YouTube videos of chickens floating like feathered pool toys, and suddenly you’re wondering – could a quick dip actually help your overheated flock?

I faced this exact dilemma three summers ago when my Rhode Island Red, Henrietta, looked like she was about to keel over from heat exhaustion.

My neighbor’s ducks were happily paddling in their pond while my chickens suffered in the shade. That day sparked my deep dive into understanding the complex relationship between chickens and water – and what I discovered might surprise you.

The Truth About Chickens and Swimming

Here’s what most people don’t expect to hear: chickens can indeed swim. But before you start shopping for tiny life jackets, understand that chicken swimming is like watching someone try to swim while wearing a heavy winter coat – technically possible, but definitely not their strong suit.

The reality is that chickens possess basic survival swimming abilities, but they’re about as comfortable in water as most cats. Swimming, for chickens, is an emergency skill rather than a leisure activity.

The Tale of Two Birds: Why Ducks Rule the Water While Chickens Rule the Land

To truly understand why your chickens eye water with suspicion, let’s examine the fundamental differences between chickens and their aquatic cousins.

Chicken vs Duck
Credit: Raising Happy Chickens

Ducks: Nature’s Swimming Champions

Ducks came equipped with premium water gear from the factory. Their webbed feet function like built-in swim fins, propelling them through water with remarkable efficiency.

More importantly, ducks possess a supercharged preen gland near their tail that produces copious amounts of waterproofing oil. Every time you see a duck methodically running its bill through its feathers, it’s essentially applying nature’s most effective waterproof coating.

This oil creates an impenetrable barrier that causes water to bead up and roll right off – you’ve literally seen water roll off a duck’s back. Their feathers also have specialized microscopic hooks called barbules that lock together, creating air pockets that provide exceptional buoyancy.

Read about Mixing Birds in Your Backyard: Can Chickens and Ducks Live Together?

Chickens: The Land-Based Specialists

Chickens evolved in forested environments where their talents lay in scratching through leaf litter, not navigating waterways. Their feet feature separate, clawed toes designed for digging and gripping – perfect for finding bugs and maintaining balance on uneven ground, but offering minimal propulsion in water.

While chickens do have preen glands, they’re considerably smaller and produce only about 10% of the oil that ducks generate. Their feathers lack the sophisticated interlocking system that makes waterfowl so buoyant.

Think of chicken feathers as water-resistant rather than waterproof – they’ll handle light rain just fine, but prolonged water exposure will eventually soak through.

What Actually Happens When Chickens Enter Water

Understanding the swimming process helps explain why it’s generally not recommended for chickens.

The Initial Float Phase

When a chicken first enters water, you might be impressed by their apparent competence. Most chickens will instinctively level their bodies, hold their heads high, and begin paddling with a motion surprisingly similar to ducks. Their feathers initially trap enough air to keep them buoyant, and many chickens can float quite peacefully for the first few minutes.

The Initial Float Phase
Credit: pinterest

The Critical Waterlog Timeline

Here’s where things get serious. Unlike ducks, whose feathers actively repel water, chicken feathers gradually absorb moisture. The timeline varies depending on several factors:

  • Water temperature plays a crucial role – cold water accelerates the soaking process and increases the risk of hypothermia. Warm water (around 85°F) is much safer if you absolutely must let a chicken swim.
  • The chicken’s temperament dramatically affects survival time. A calm, relaxed chicken might float comfortably for 10-15 minutes. However, a panicked bird thrashing around can become waterlogged and sink in under 60 seconds.
  • Feather condition matters too. Chickens with tight, well-maintained feathers resist water longer than those with loose or damaged plumage.
The Critical Waterlog Timeline
Credit: imgur

When Panic Sets In

Most chickens experience some level of stress when placed in deep water. This isn’t surprising – imagine being dropped into an environment where you can’t touch bottom and everything feels foreign. Stressed chickens often:

  • Flap frantically, which accelerates water absorption
  • Struggle to keep their heads up, risking water inhalation
  • Exhaust themselves quickly through inefficient movements
  • Lose their natural buoyancy through aggressive splashing
When Panic Sets In
Credit: pinterest

The Baby Chick Exception: A Non-Negotiable Safety Rule

If you take away just one piece of information from this article, let it be this: baby chicks and water simply don’t mix. This isn’t a recommendation – it’s a critical safety rule that can mean the difference between life and death for young birds.

Baby chicks don’t have proper feathers; they’re covered in fluffy down that acts like a natural sponge. The moment this down contacts water, it absorbs liquid instantly, pulling the chick underwater with surprising speed.

Even more dangerous, wet chicks lose body heat rapidly and can die from hypothermia within minutes, even in seemingly warm conditions.

I’ve heard tragic stories from well-meaning chicken keepers who thought a shallow dish of water would help their chicks cool off on a hot day, only to find drowned babies later. Until your chicks develop their first set of real juvenile feathers (usually around 6-8 weeks), keep them away from any water deeper than what they need for drinking.

Read the Ultimate Guide to Welcoming Baby Chicks: Setup, Care, and Tips for First-Timers

Debunking Common Swimming Pool Myths

Those viral videos of chickens peacefully floating in swimming pools have created some dangerous misconceptions. Let’s address the reality behind these seemingly harmless scenes.

The Chemical Cocktail Problem

Swimming pools aren’t just water – they’re complex chemical environments designed to kill bacteria, prevent algae growth, and maintain water clarity. The typical pool contains chlorine, stabilizers, pH adjusters, algaecides, and clarifiers. While these chemicals are generally safe for humans in small doses, we have no research on their effects on chickens.

Chickens will inevitably drink pool water while swimming, and their smaller body size means they’re more susceptible to chemical toxicity. Additionally, these chemicals can strip away the natural oils that provide what little water resistance chicken feathers possess.

The Escape Route Reality

Standard swimming pools present a death trap for chickens due to their smooth, vertical walls. Unlike ponds or streams with gradually sloping banks, pools offer no natural exit points. A tired chicken has no way to climb out, turning what might start as a pleasant float into a drowning situation.

pool Escape Route
Credit: pinterest

The Hygiene Factor

Let’s address the elephant in the room – chickens aren’t housetrained. They’ll defecate in pools, potentially introducing harmful bacteria like salmonella into water where humans swim. This creates health risks for both your family and the chickens themselves.

Heat Stress: Understanding Why Water Seems Appealing

Since overheating often triggers thoughts of chicken swimming, it’s important to recognize heat stress symptoms and understand better cooling alternatives.

Recognizing Heat Exhaustion in Chickens

Chickens begin showing heat stress when temperatures climb above 85°F, especially with high humidity. Watch for these warning signs:

  • Panting with open beaks and extended necks
  • Wings held away from their bodies
  • Lethargy or reluctance to move
  • Pale combs and wattles
  • Reduced egg production
  • Seeking the coolest available spots
Heat Exhaustion in Chickens
Credit: Poultry Extension

Why Chickens Choose Dust Over Water

Understanding chicken biology helps explain their bathing preferences. In nature, chickens take elaborate dust baths by digging shallow depressions in dry earth and vigorously fluffing dirt through their feathers. This behavior serves multiple purposes:

  • Parasite control ranks as the primary benefit. The fine particles irritate and suffocate external parasites like mites and lice, while the physical action helps dislodge them.
  • Temperature regulation happens as the dust absorbs excess oils and moisture, helping chickens maintain optimal body temperature.
  • Social bonding occurs when chickens dust bathe together, reinforcing flock relationships.
  • Stress relief appears to be another benefit, as chickens often seem more relaxed after thorough dust bath sessions.

This natural behavior explains why chickens prefer dusty, dry environments over water for their personal hygiene needs.

Chickens Choose Dust
Credit: Talking Hens

Safe Cooling Alternatives That Actually Work

Rather than risking water-based cooling, try these proven methods for keeping chickens comfortable during hot weather.

The Shallow Wading Solution

A children’s kiddie pool filled with just 2-3 inches of fresh, cool water can provide relief without swimming risks. The key is keeping water shallow enough that chickens can comfortably stand with their heads well above water level. Place some flat stones or bricks in the pool to give chickens stable footing and easy exit points.

Many chickens enjoy standing in cool, shallow water to lower their body temperature through their feet, which are excellent heat exchangers. This gives them control over their cooling without the dangers of deep water swimming.

The Shallow Wading Solution
Credit: Grubbly Farms

Strategic Shade and Airflow

Proper ventilation often matters more than water access. Ensure your coop has adequate airflow without creating drafts that could harm chickens in winter. Consider installing fans for the hottest days, positioning them to create gentle air movement rather than direct blasts.

Proper ventilation
Credit: Meyer Hatchery Blog

Shade management makes an enormous difference. Natural shade from trees is ideal, but shade cloth, tarps, or temporary structures can provide relief. Remember that shade needs change throughout the day as the sun moves.

Learn more about Winter Care for Chickens: Tips to Keep Your Flock Healthy and Happy

Frozen Treat Solutions

Chickens love frozen treats that provide both cooling and entertainment. Try freezing fruits like watermelon, berries, or chopped vegetables in ice blocks. Hanging frozen corn on the cob gives chickens something cool to peck while encouraging natural foraging behaviors.

Creating “chicken popsicles” by freezing treats in muffin tins or ice cube trays provides portion-controlled cooling that won’t upset their digestive systems.

Chickens love frozen treats
Credit: Farmers’ Almanac

Misting and Sprinkler Systems

Gentle misting systems allow chickens to choose their level of water contact. Many birds enjoy walking through light sprinkler spray on extremely hot days, getting just damp enough to cool down without becoming soaked.

The key is providing options rather than forcing water contact. Some chickens will embrace the mist while others prefer to stay dry and find cooling through other methods.

Emergency Response: When Things Go Wrong

Despite your best efforts, accidents happen. Knowing how to respond can save your chicken’s life.

Immediate Rescue Protocol

If you find a chicken in distress in water, act quickly but calmly. Scoop the bird up gently, supporting its body to avoid injury. Chickens in water emergencies are often panicked and may struggle, so be prepared for some resistance.

Move to a warm, quiet location away from other chickens and potential stressors. Time is critical – every second counts when dealing with hypothermia risks.

The Drying Process

Start with gentle towel drying, pressing rather than rubbing to avoid damaging wet feathers. Pay special attention to areas where water tends to collect, like under the wings and around the vent area.

Use a blow dryer on the lowest heat setting, keeping it 6-12 inches away from the chicken. Move the dryer constantly to avoid overheating any area. The goal is gentle warming, not rapid drying that could shock the bird’s system.

Drying Wet Chickens
Credit: omlet

Monitoring for Complications

Watch for signs of respiratory distress, which can occur if the chicken inhaled water. Symptoms include:

  • Labored breathing or wheezing
  • Discharge from the nostrils or beak
  • Unusual head positioning
  • Continued lethargy after warming

If you notice any of these signs, contact an avian veterinarian immediately. Chickens can develop pneumonia from water inhalation, which requires professional treatment.

Recovery Expectations

A healthy chicken should return to normal behavior within an hour of proper drying and warming. Expect some temporary lethargy as their system recovers from the stress. Provide easily digestible food like scrambled eggs or wet mash to help restore their energy.

Some chickens may be more cautious around water following a traumatic experience, which is actually a positive adaptive response.

Breed-Specific Swimming Considerations

Not all chickens face equal risks in water. Understanding your specific breeds can help you make informed decisions about water safety.

Natural Swimmers (Relatively Speaking)

Lighter breeds with tight feathering tend to fare better in water emergencies. Rhode Island Reds, Leghorns, and other production breeds often have the body structure and temperament that makes them more likely to survive accidental water exposure.

Game breeds, despite their sometimes aggressive nature, often possess the calm confidence that serves them well in unusual situations, including unexpected water encounters.

High-Risk Breeds

Heavy breeds like Brahmas, Cochins, and Orpingtons face greater drowning risks due to their substantial body weight and slower movements. Their bulk works against them in water, making it harder to stay afloat once their feathers become saturated.

Silkies deserve special mention as perhaps the most water-vulnerable breed. Their unique, down-like feathers provide no water resistance whatsoever. A Silkie in water has literally seconds before sinking, making water safety absolutely critical for owners of this breed.

Breeds with excessive feathering, including those with feathered feet, face additional challenges as their plumage becomes waterlogged more quickly than streamlined breeds.

Explore Top Egg-Laying Chicken Breeds for Your Backyard Flock

Seasonal Water Safety Considerations

Water risks change with the seasons, requiring different precautions throughout the year.

Summer Vigilance

Hot weather increases both the temptation to use water for cooling and the risks associated with it. Chickens suffering from heat stress may make poor decisions about entering water sources they’d normally avoid.

Monitor temporary water sources created by summer storms, as chickens might seek these out for cooling without understanding the drowning risks.

Winter Hazards

Icy conditions create slip hazards that can send chickens tumbling into water unexpectedly. Even normally safe, shallow water sources become dangerous when ice formations create unstable edges.

Frozen water containers that partially thaw can create unexpected deep spots that catch chickens off guard.

Spring and Fall Transitions

Seasonal rains create temporary pools and puddles that may seem harmless but can pose risks, especially for smaller or younger birds. These temporary water sources often lack the natural exit points that established ponds or streams provide.

Making Water-Smart Decisions for Your Flock

The key to chicken water safety lies in understanding that your birds don’t need swimming opportunities to live happy, healthy lives. Focus on providing what they actually need: fresh drinking water, appropriate cooling options during hot weather, and safety from water-related accidents.

Consider your individual chickens’ personalities when making decisions about water access. That bold, adventurous hen who leads the flock might handle shallow wading better than her nervous, flighty companions. However, even confident chickens benefit from careful supervision around any water deeper than their legs.

Remember that chickens have survived and thrived for thousands of years without swimming pools or extensive water access. Their natural behaviors – dust bathing, foraging, and social interactions – provide everything they need for physical and mental well-being.

The Bottom Line: Respecting Chicken Nature

After examining the evidence from multiple angles, the conclusion is clear: while chickens possess basic swimming capabilities, water activities carry significant risks that generally outweigh any potential benefits.

Your chickens are perfectly designed for the lives they’re meant to live – scratching for treats, taking luxurious dust baths, and maintaining their position in the pecking order. They don’t need swimming lessons or pool time to be fulfilled.

The best chicken care comes from understanding and supporting their natural behaviors rather than imposing activities that make us feel good but may not serve their best interests. Keep your chickens safe, dry, and happy doing what chickens do best – being wonderfully, authentically chicken.

When summer heat threatens your flock’s comfort, focus on proven cooling methods like shade, ventilation, and appropriate water sources for drinking and wading. Your chickens will thank you for keeping their feet firmly planted on the solid ground where they belong, while still ensuring they stay cool and comfortable through even the hottest weather.

Trust in their natural instincts, provide appropriate environmental management, and enjoy watching your flock thrive in the safe, secure environment you’ve created for them.


source https://harvestsavvy.com/can-chickens-swim/

Can You Eat Nasturtiums? Edible Parts and How to Use Them

Yes, you can eat nasturtiums, and nearly the whole plant above the ground: flowers, buds, leaves, stems and green seed pods. Garden nasturt...